Automating workflows in n8n with the SurveySparrow node
Harris
May 18, 2026
n8n is an open-source workflow automation platform that lets you connect apps, services, and APIs to build automated workflows — without needing to write complex code. With the SurveySparrow node for n8n, you can weave survey data and delivery directly into your automation workflows, whether you're reacting to new responses or programmatically sending surveys and managing contacts.
The SurveySparrow node works as a trigger and an action. As a trigger, it fires your n8n workflow the moment a new survey response arrives. As an action, it lets you send surveys via email, SMS, or WhatsApp, and create contacts in SurveySparrow — all as steps within a larger automated workflow.
Some example workflows include:
When a new SurveySparrow response comes in, automatically log it as a row in Google Sheets or create a task in your project management tool.
After a support ticket is resolved in your helpdesk, use n8n to trigger SurveySparrow to send a CSAT survey to the customer via email or WhatsApp.
When a new user signs up in your CRM, automatically create a corresponding contact in SurveySparrow and enroll them in an onboarding survey sequence.
Route detractor responses (low NPS scores) to a Slack alert or a follow-up email campaign, enabling your team to act on negative feedback in real time.
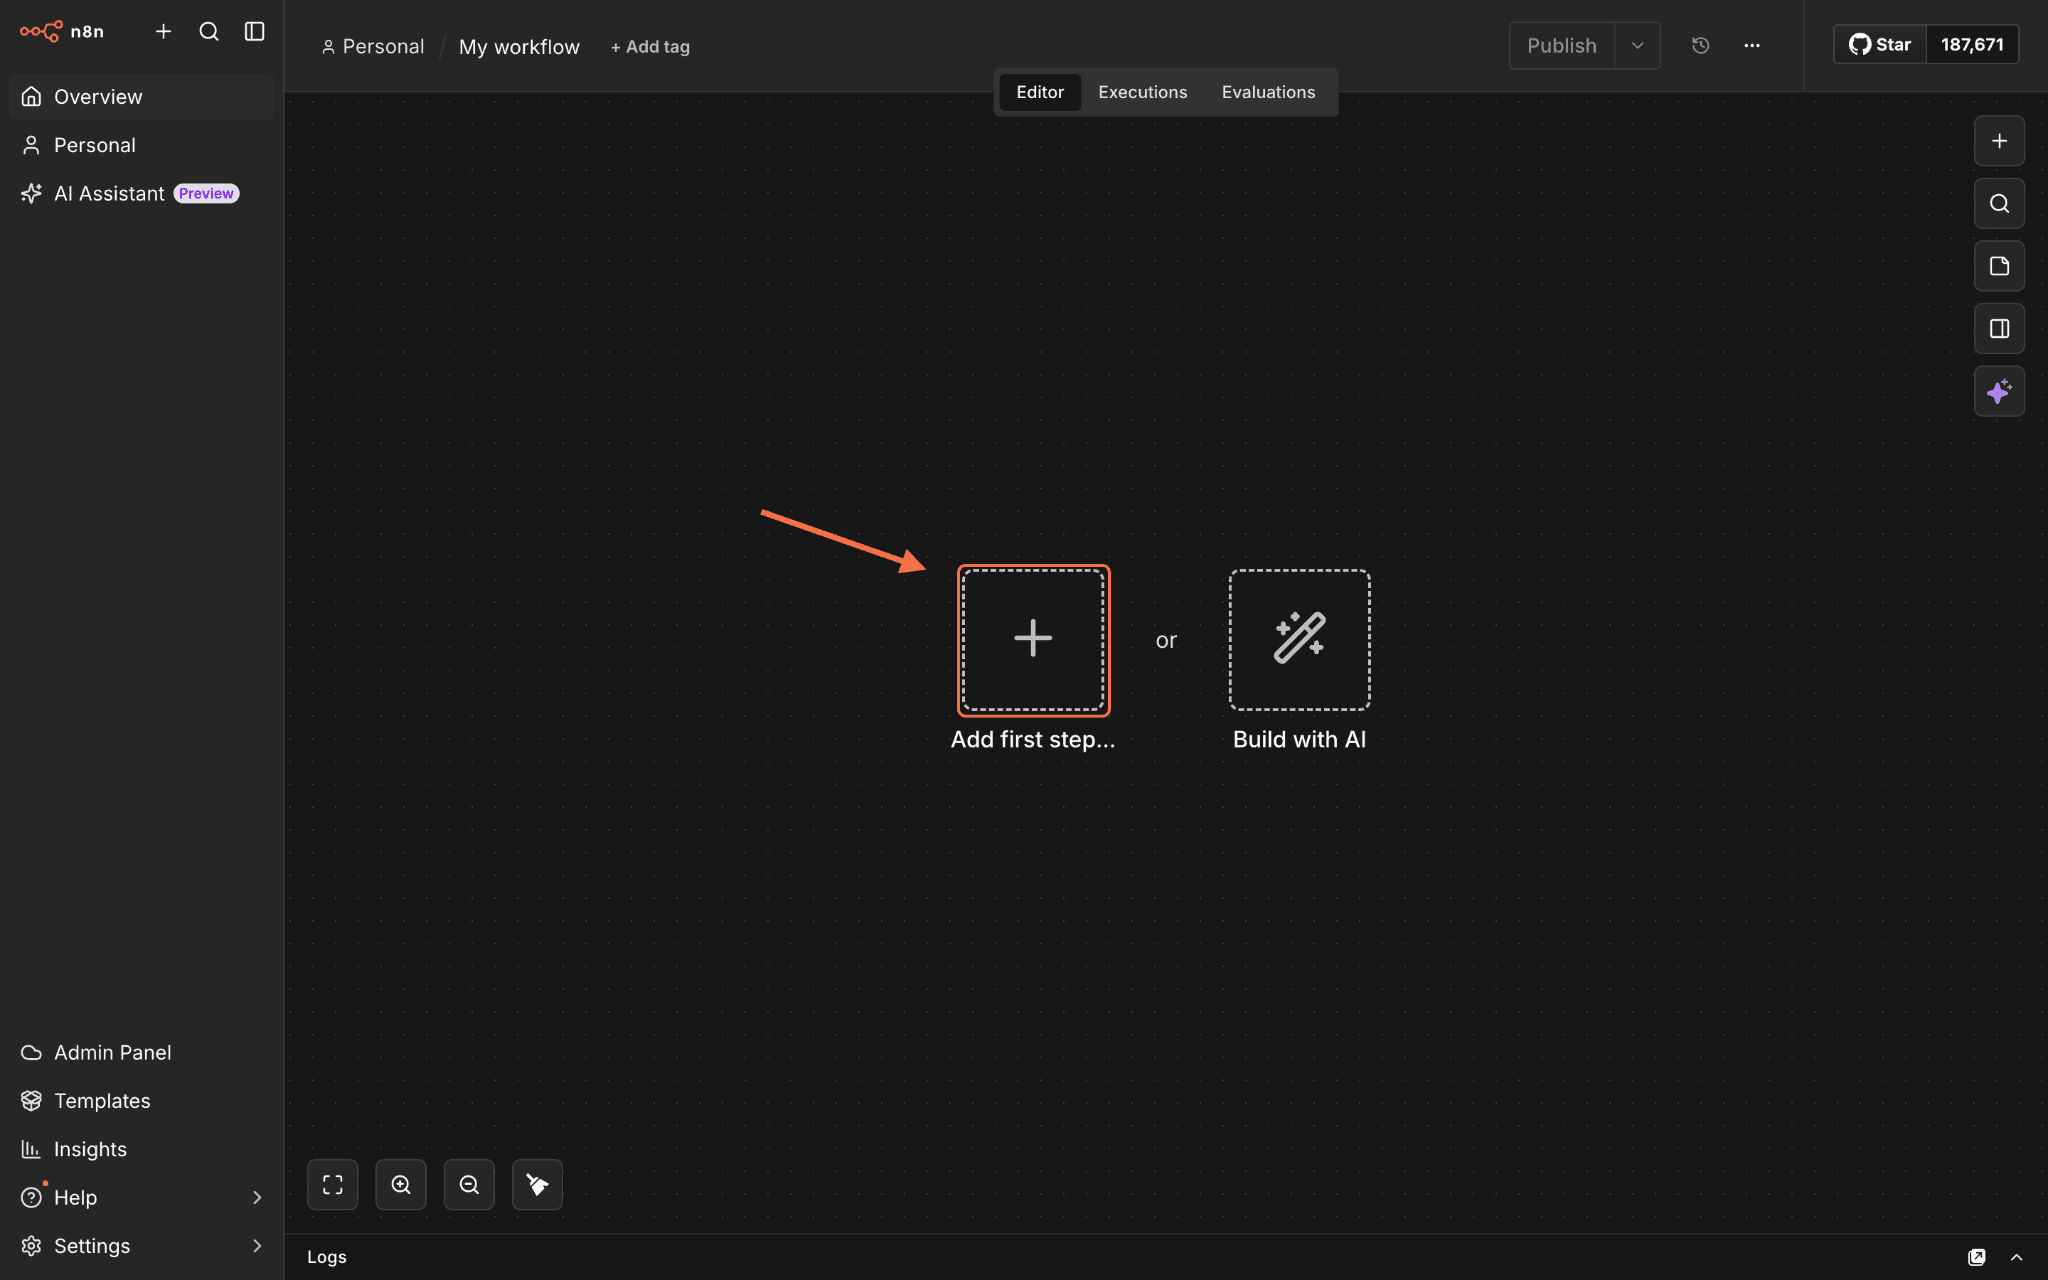
1. Create a new workflow inside n8n, then click on Add first step to open the node menu. Note: You can also open the menu by pressing N.
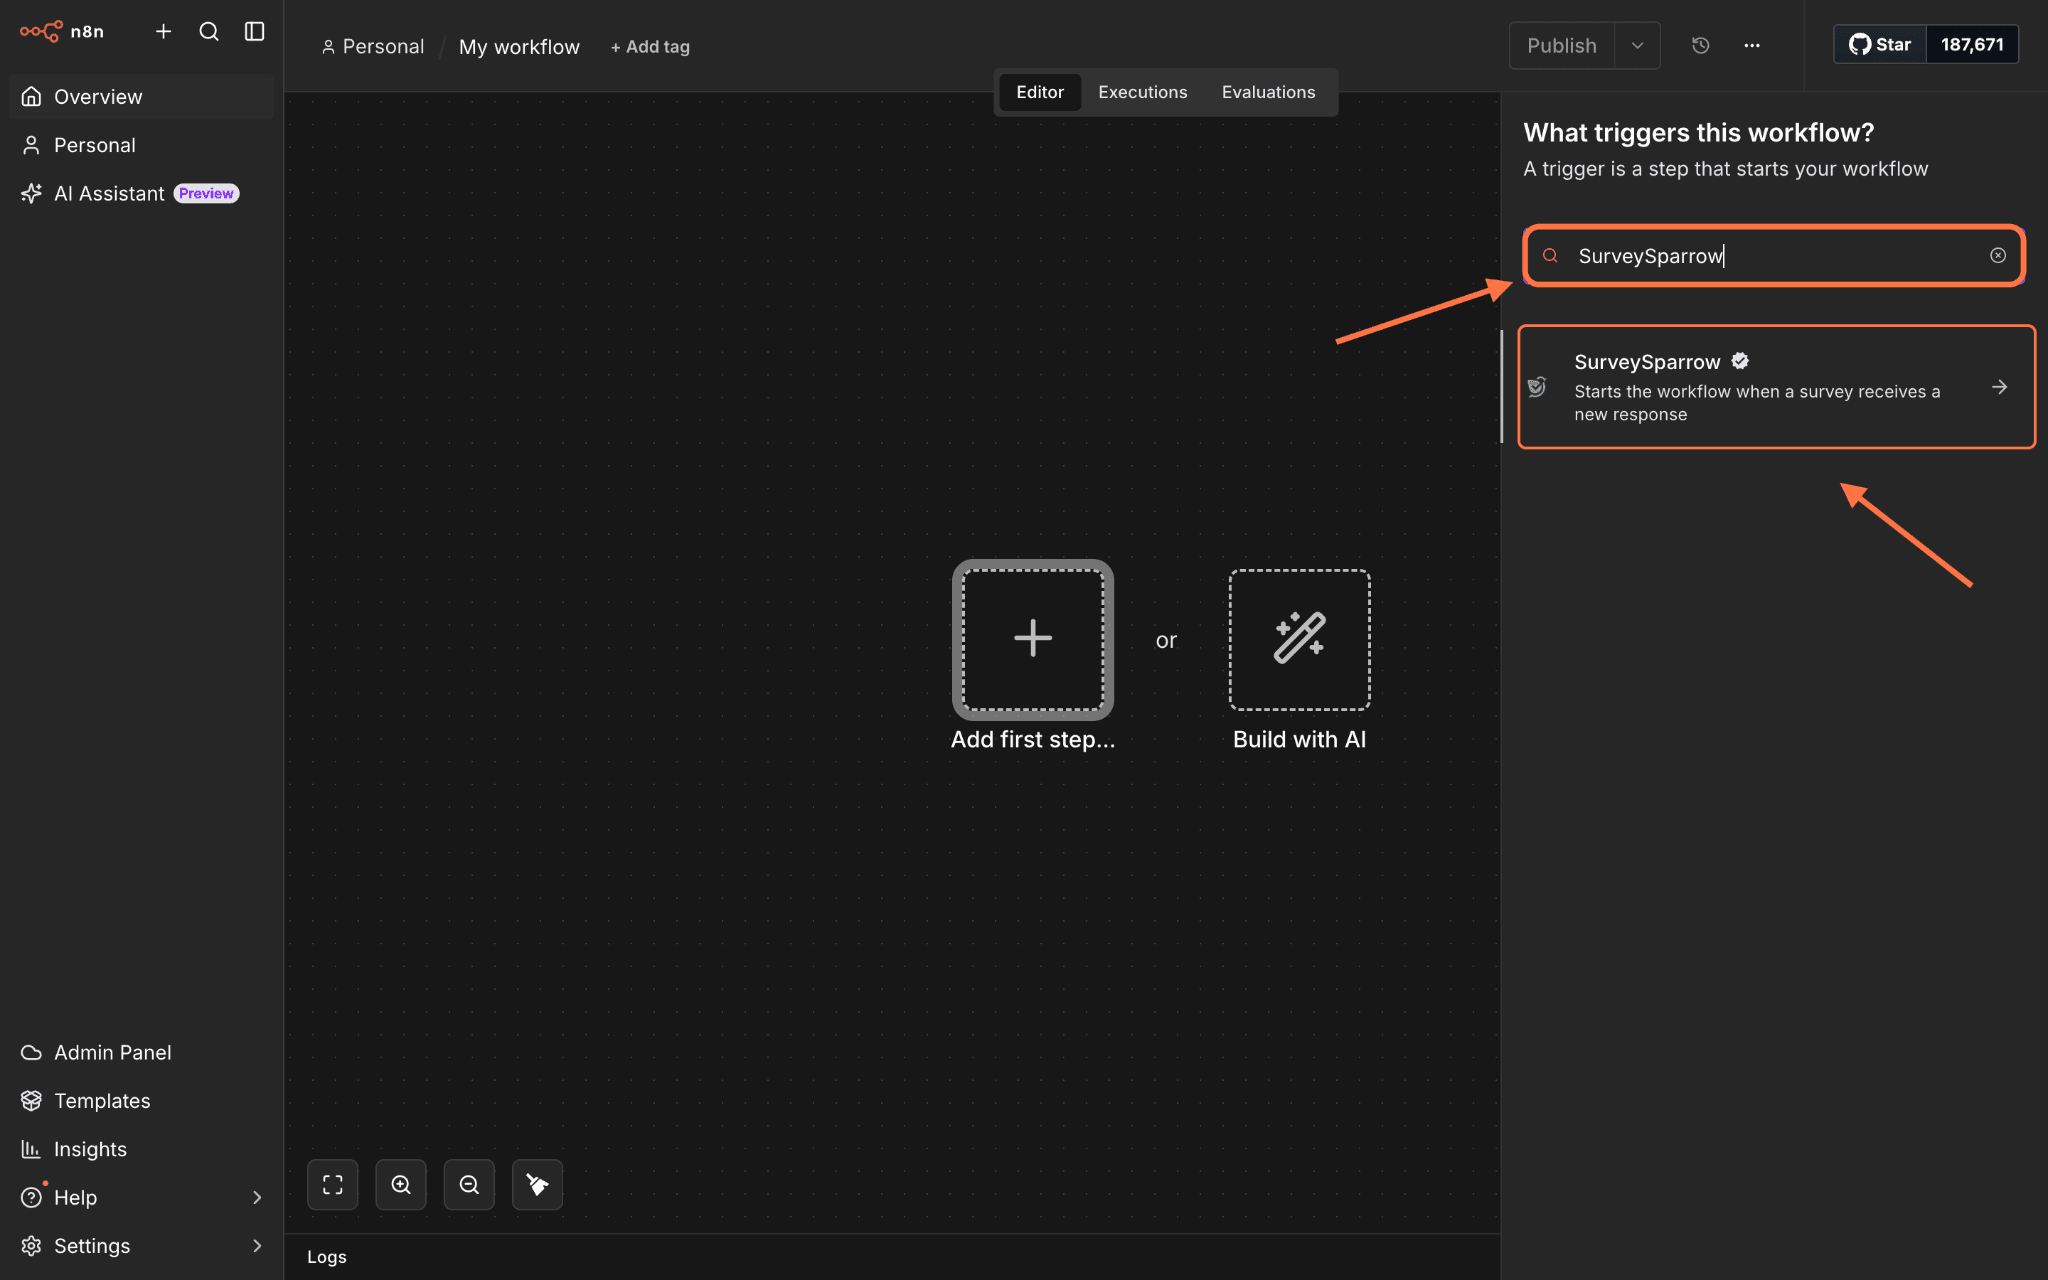
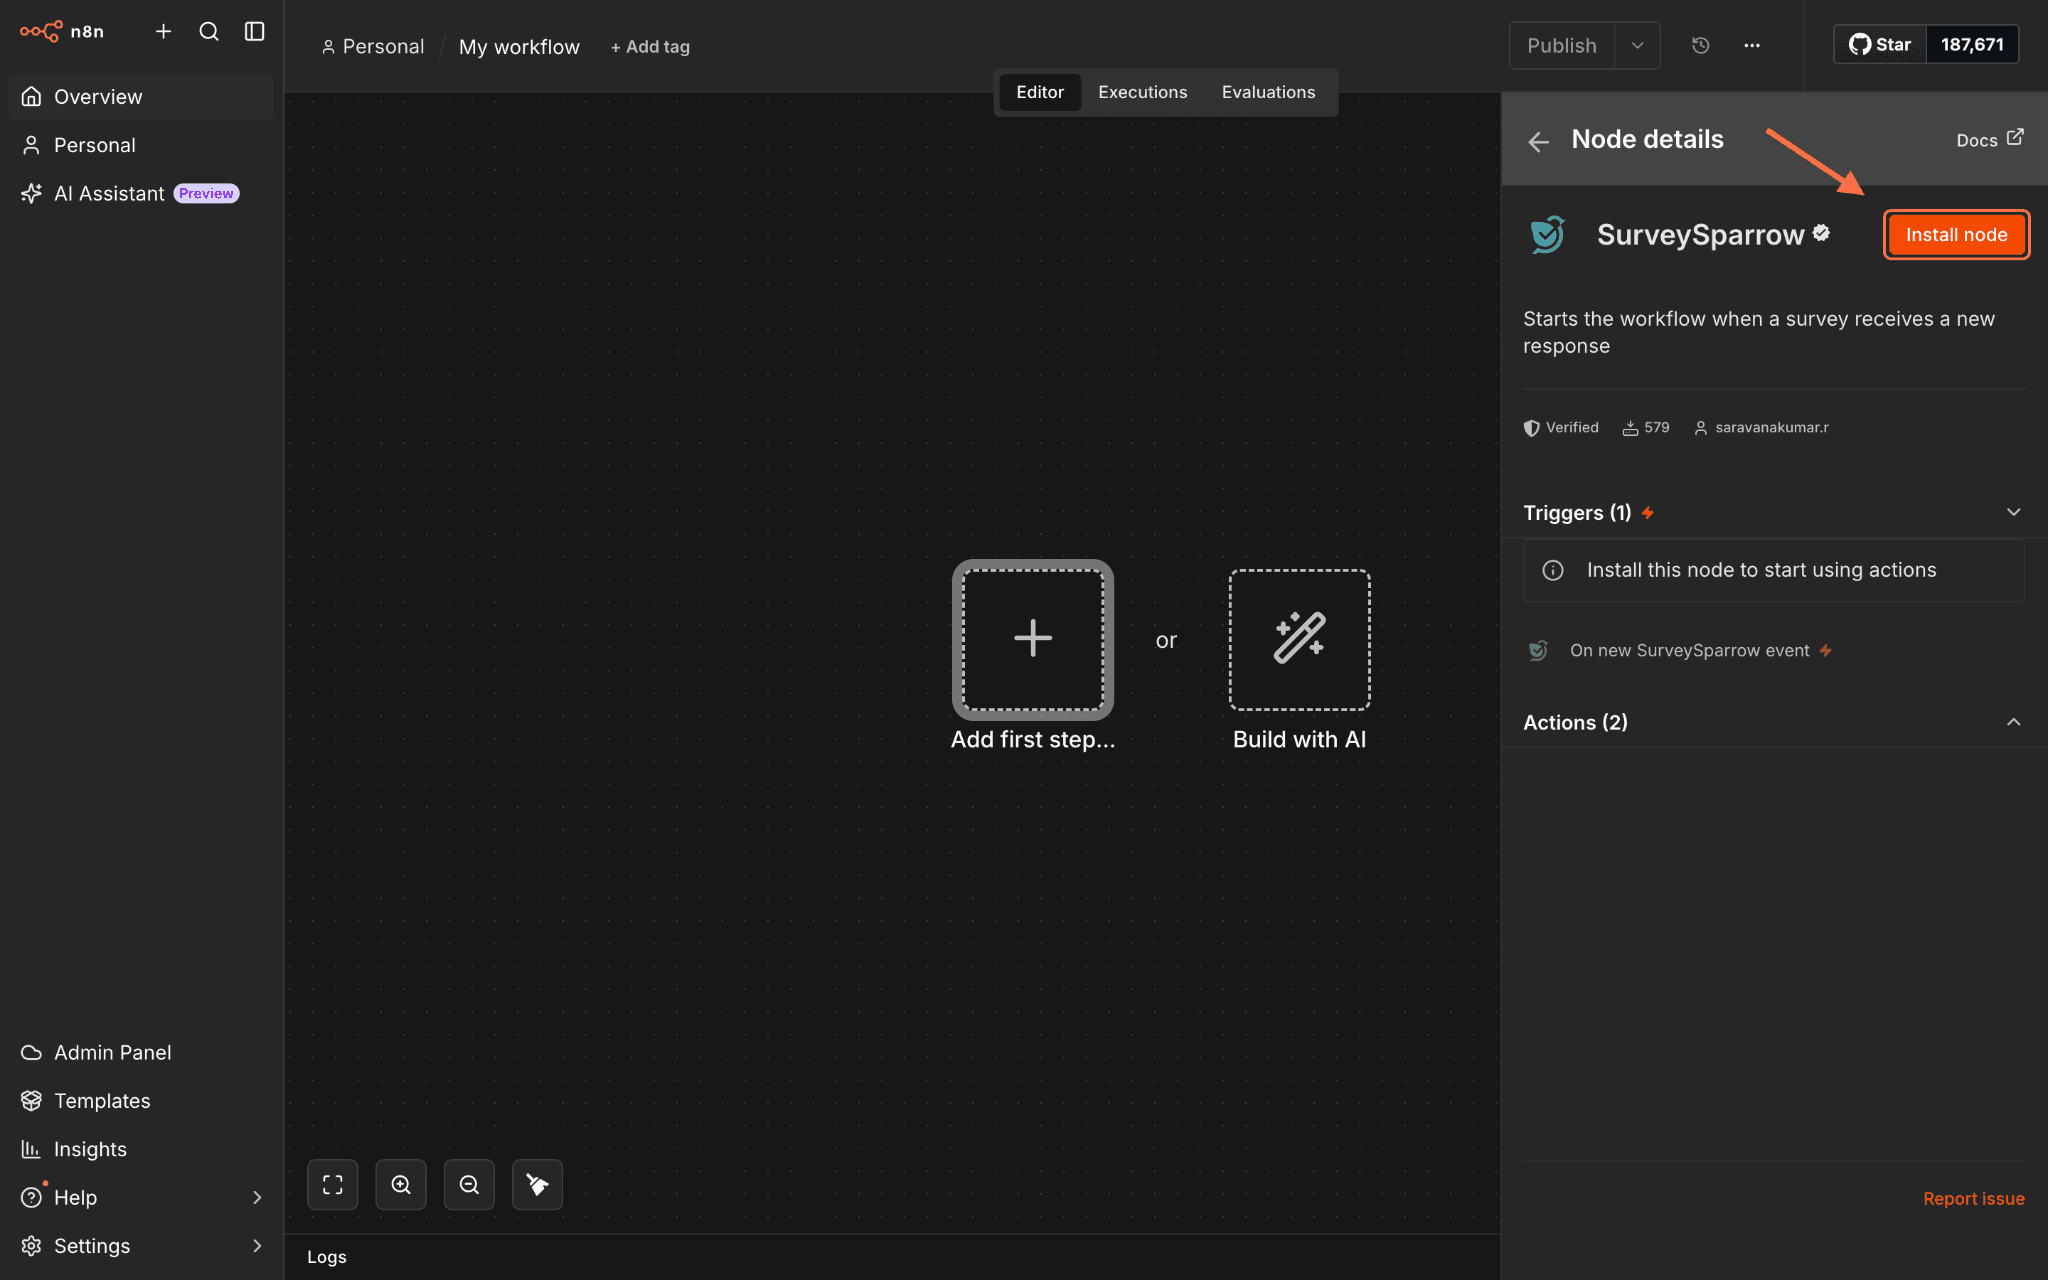
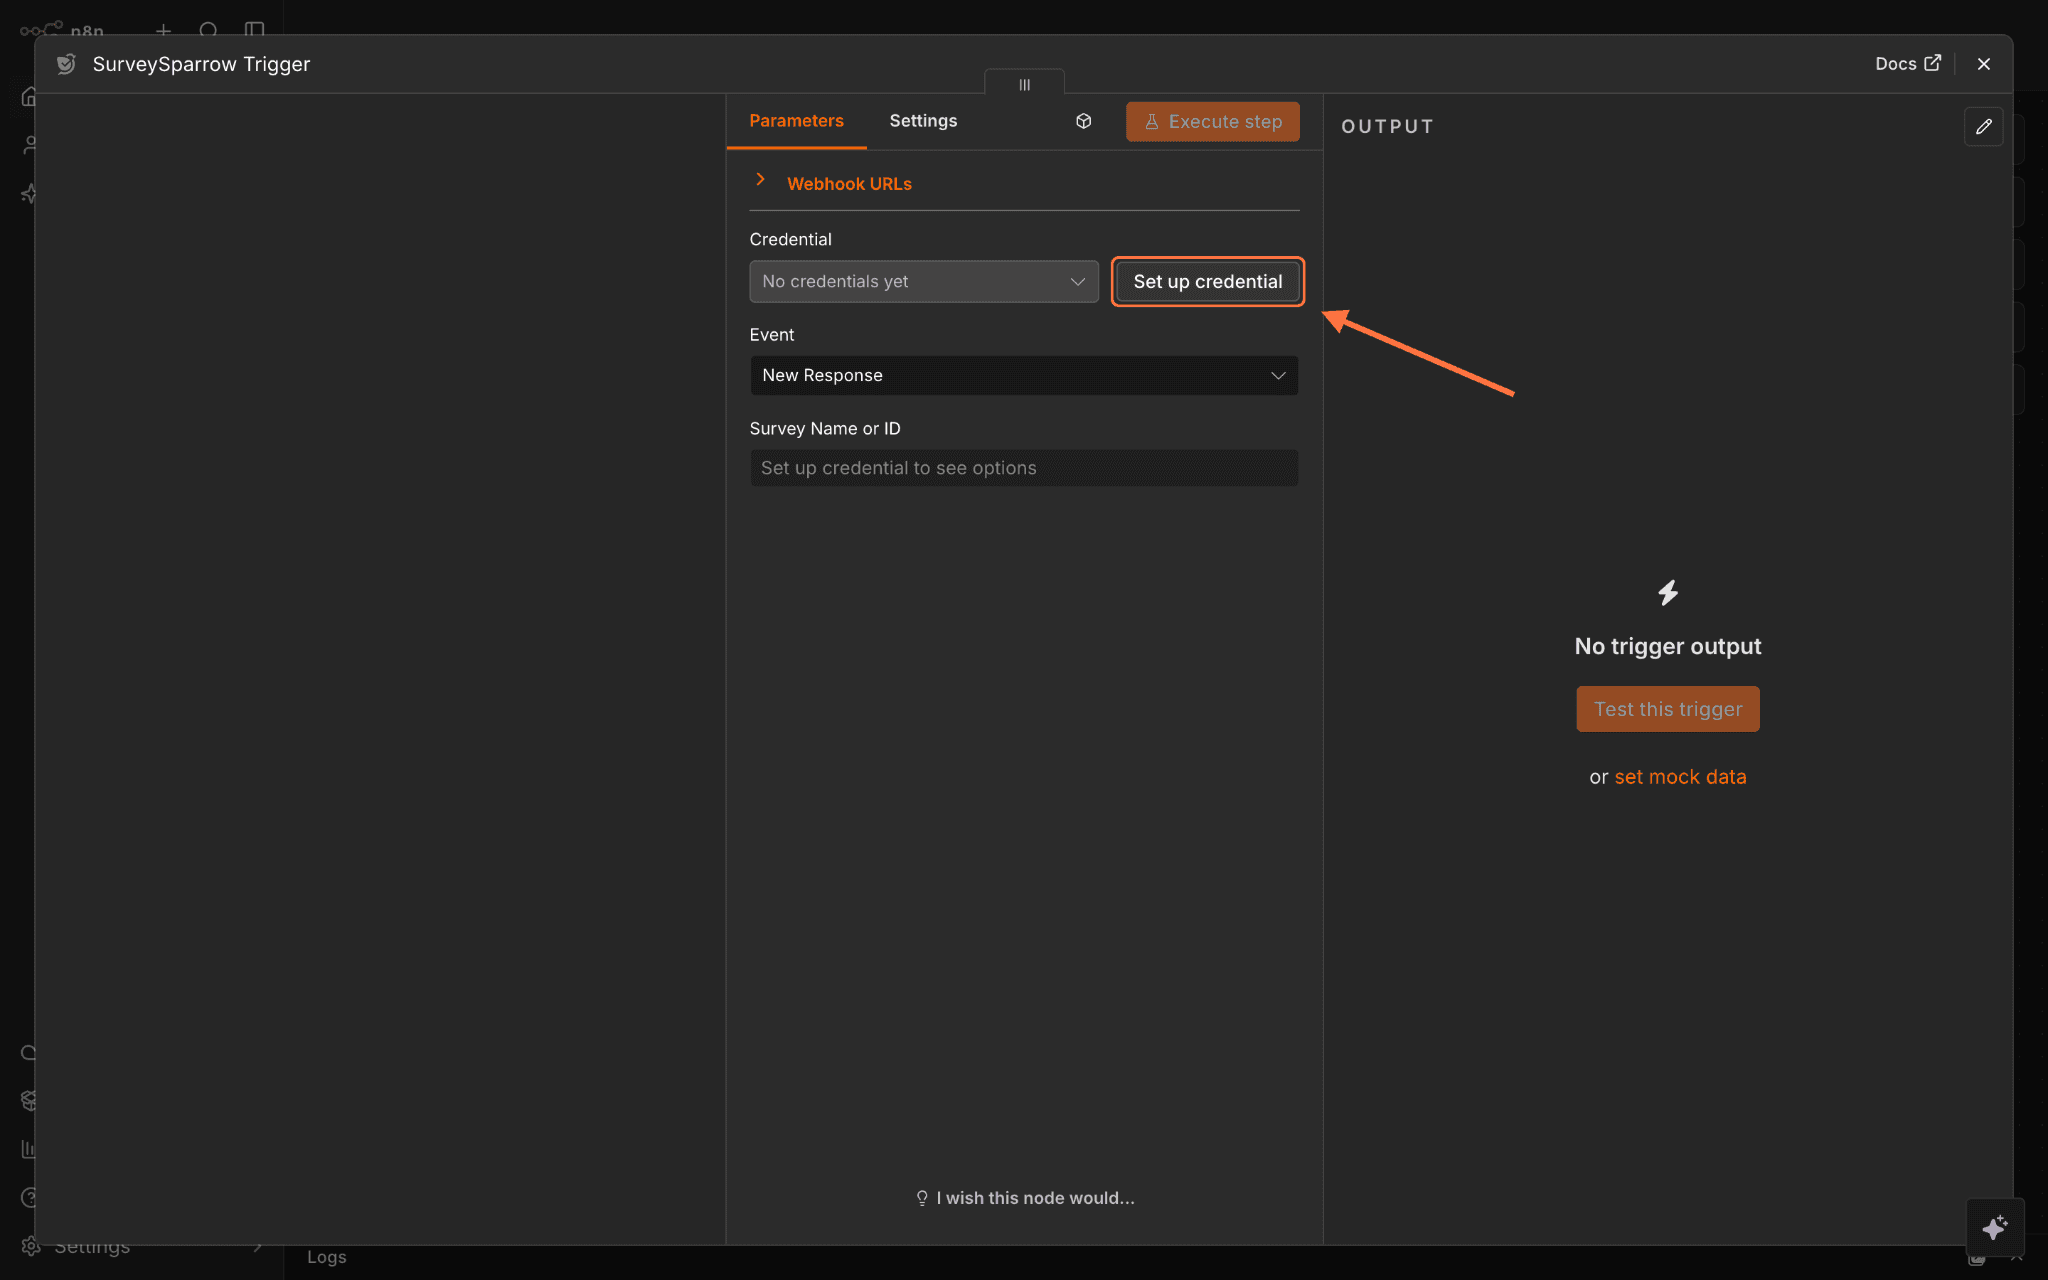
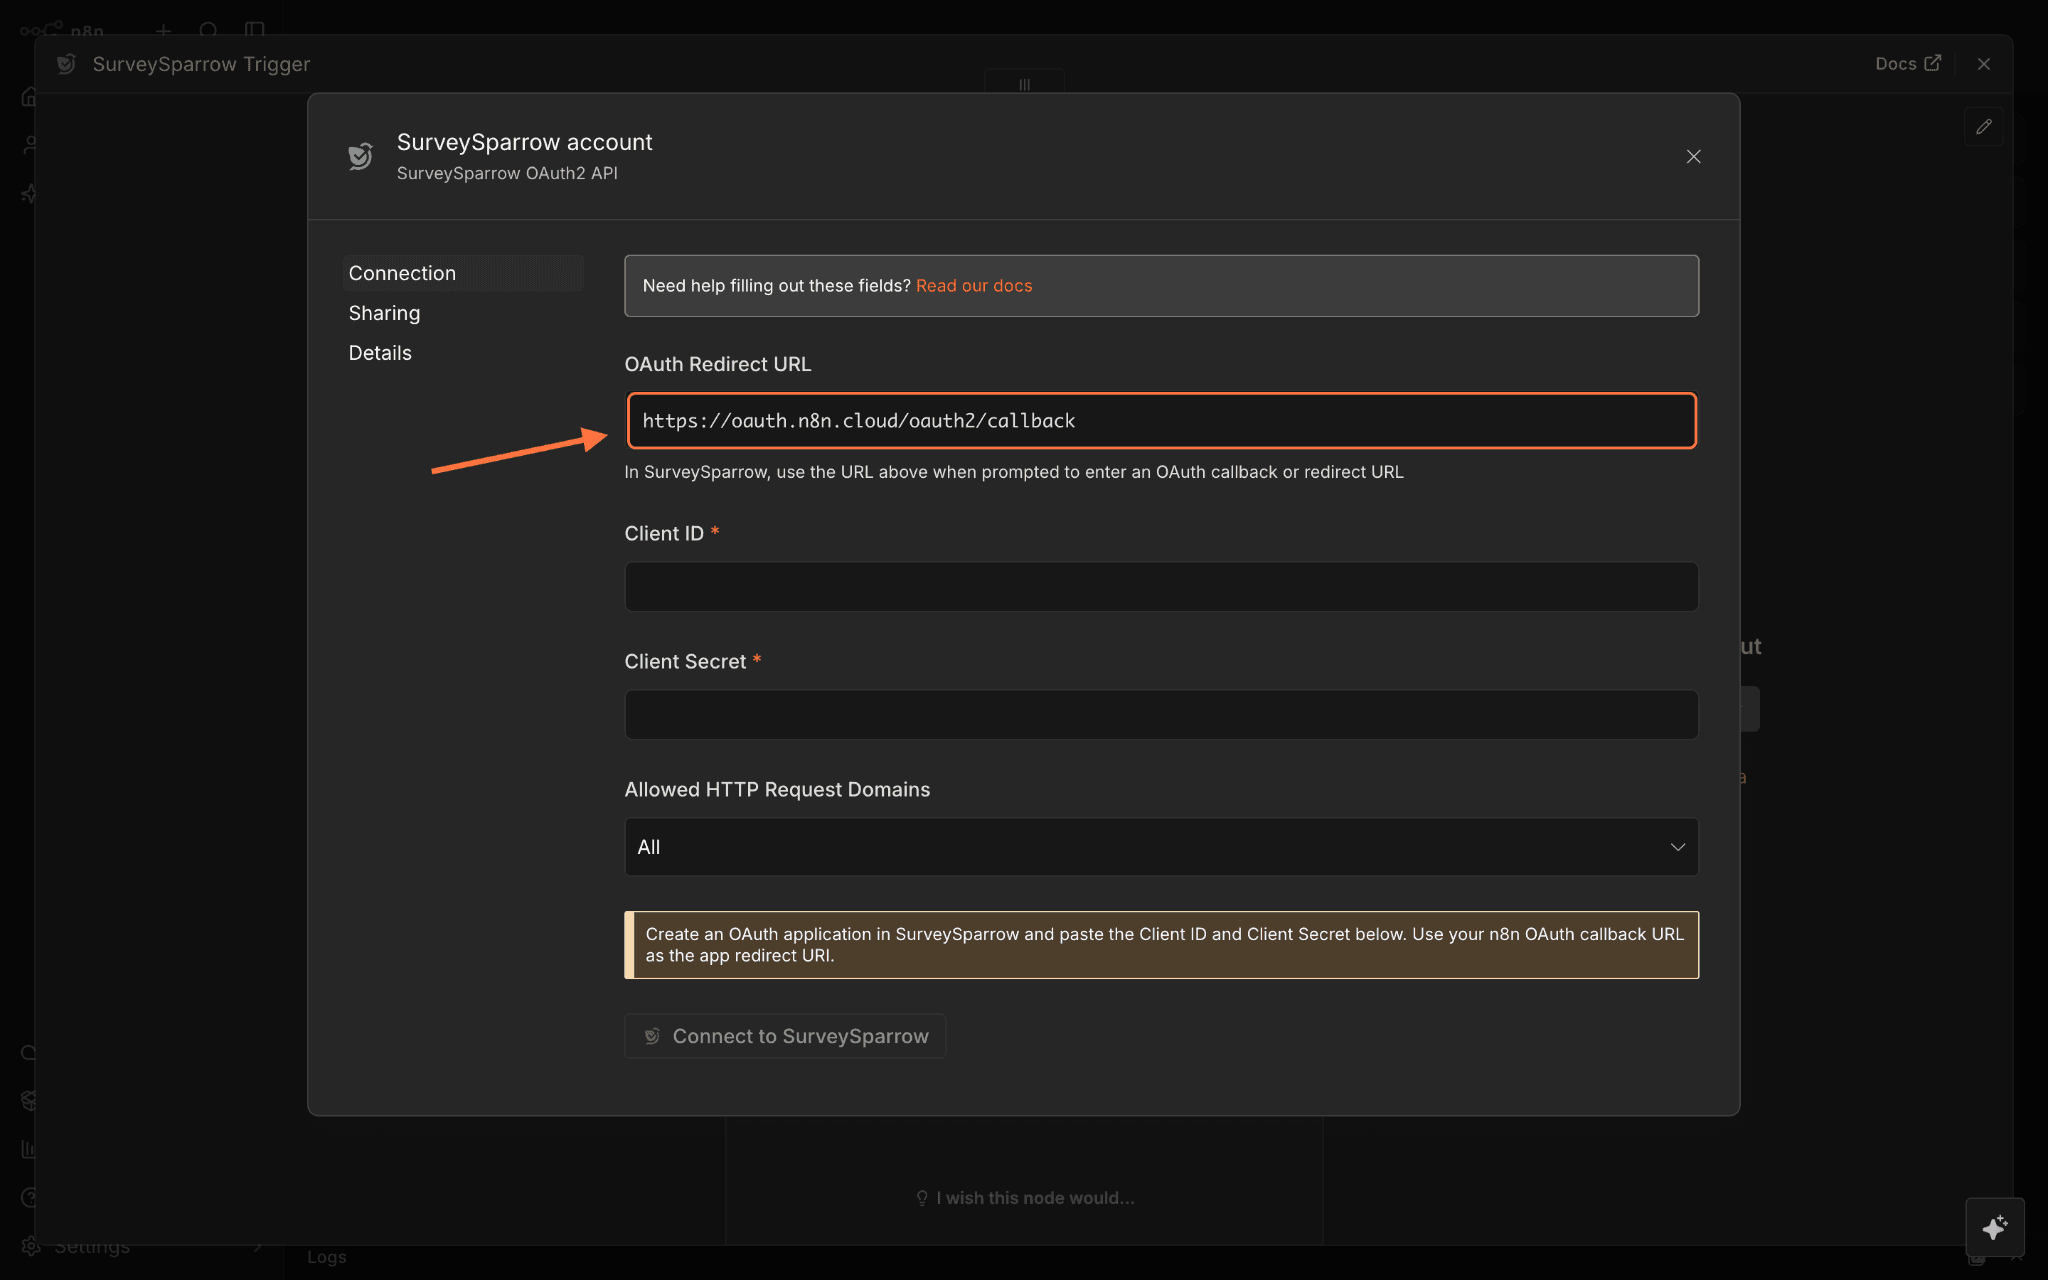
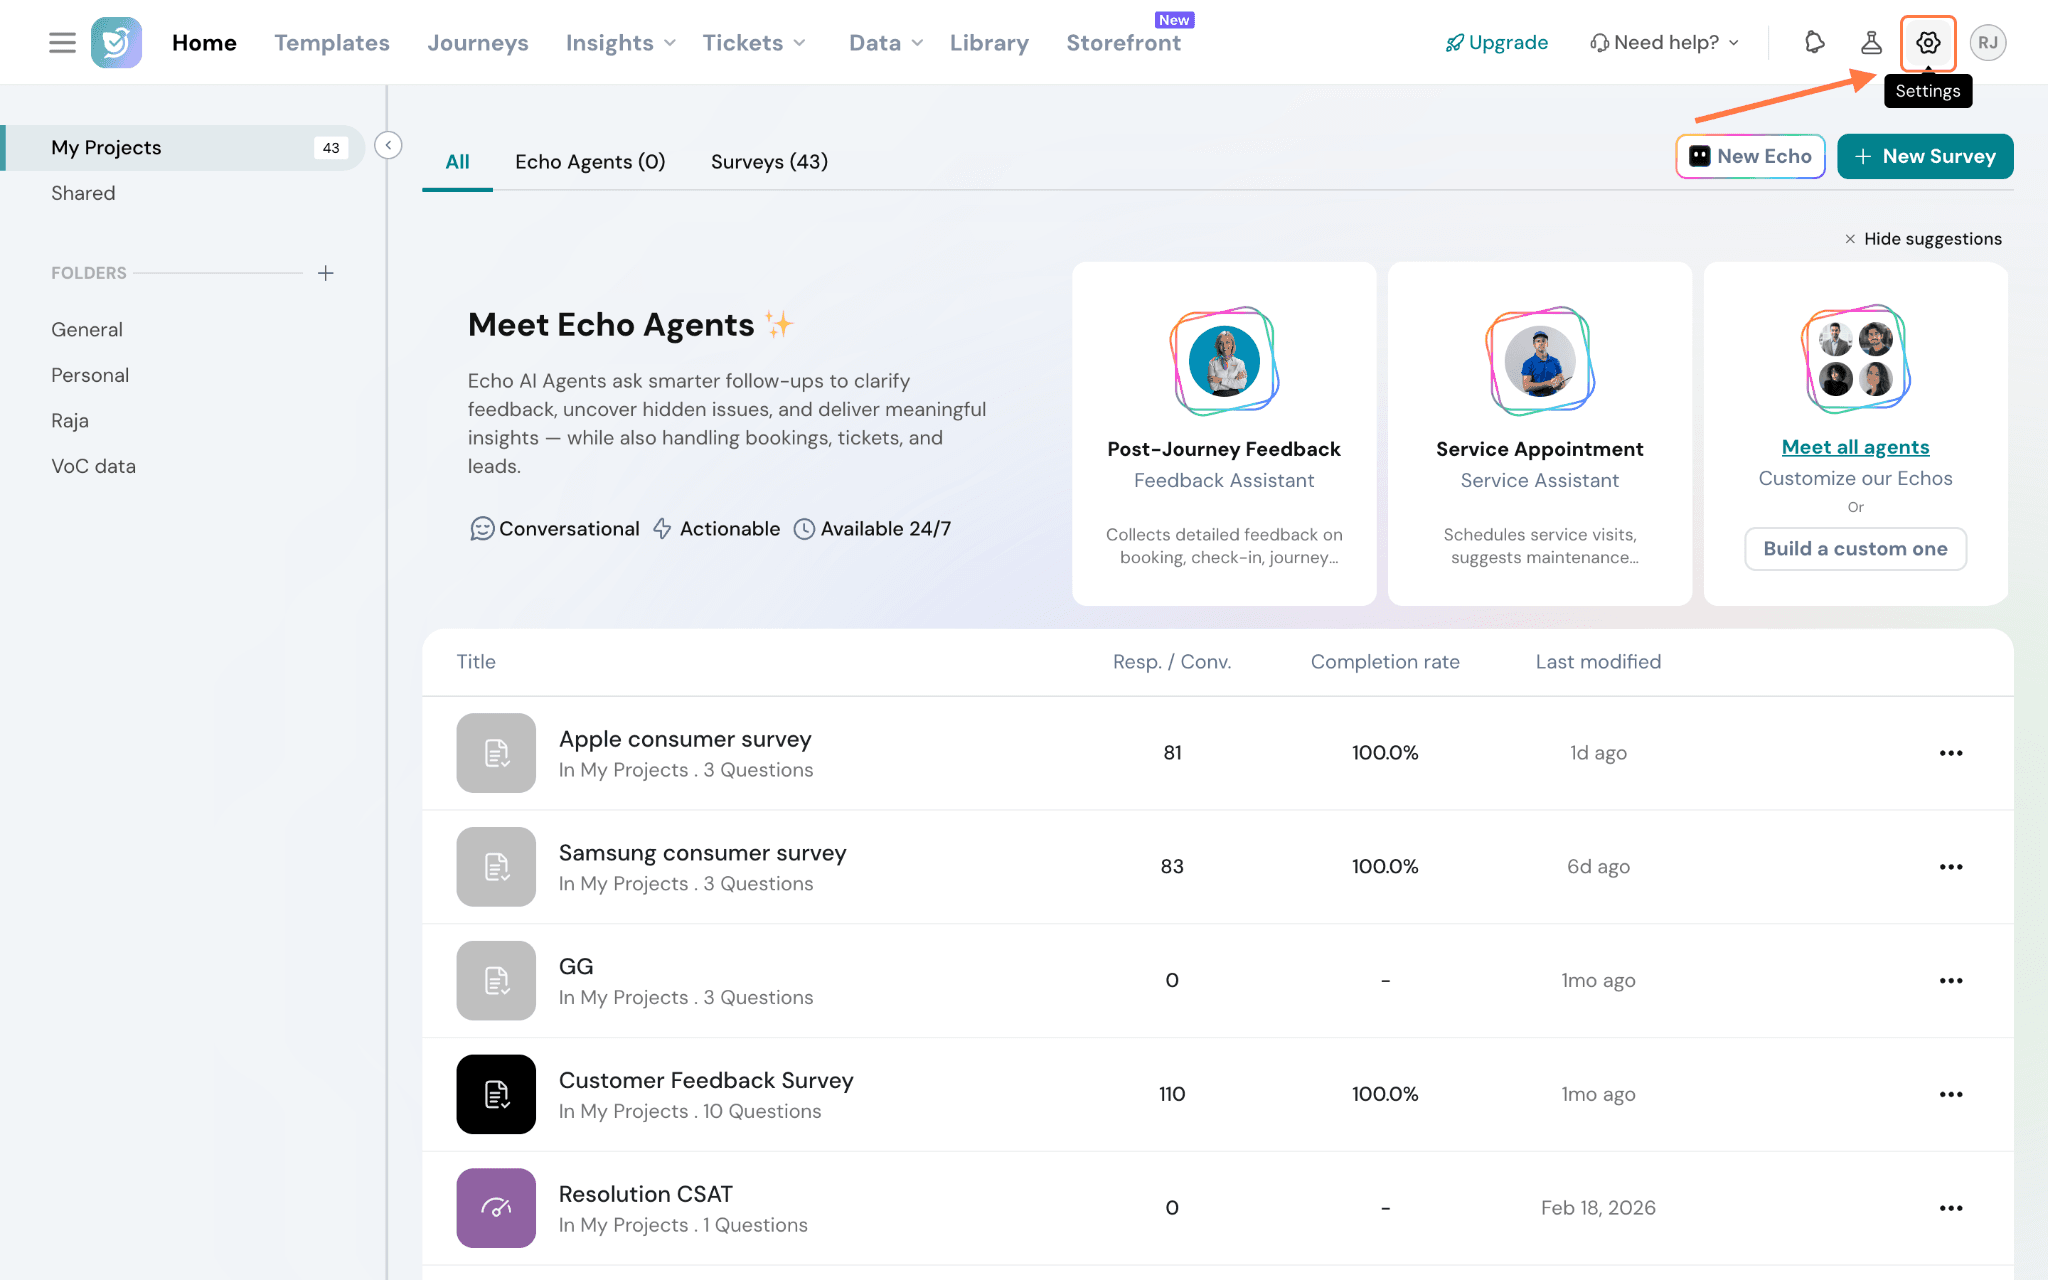
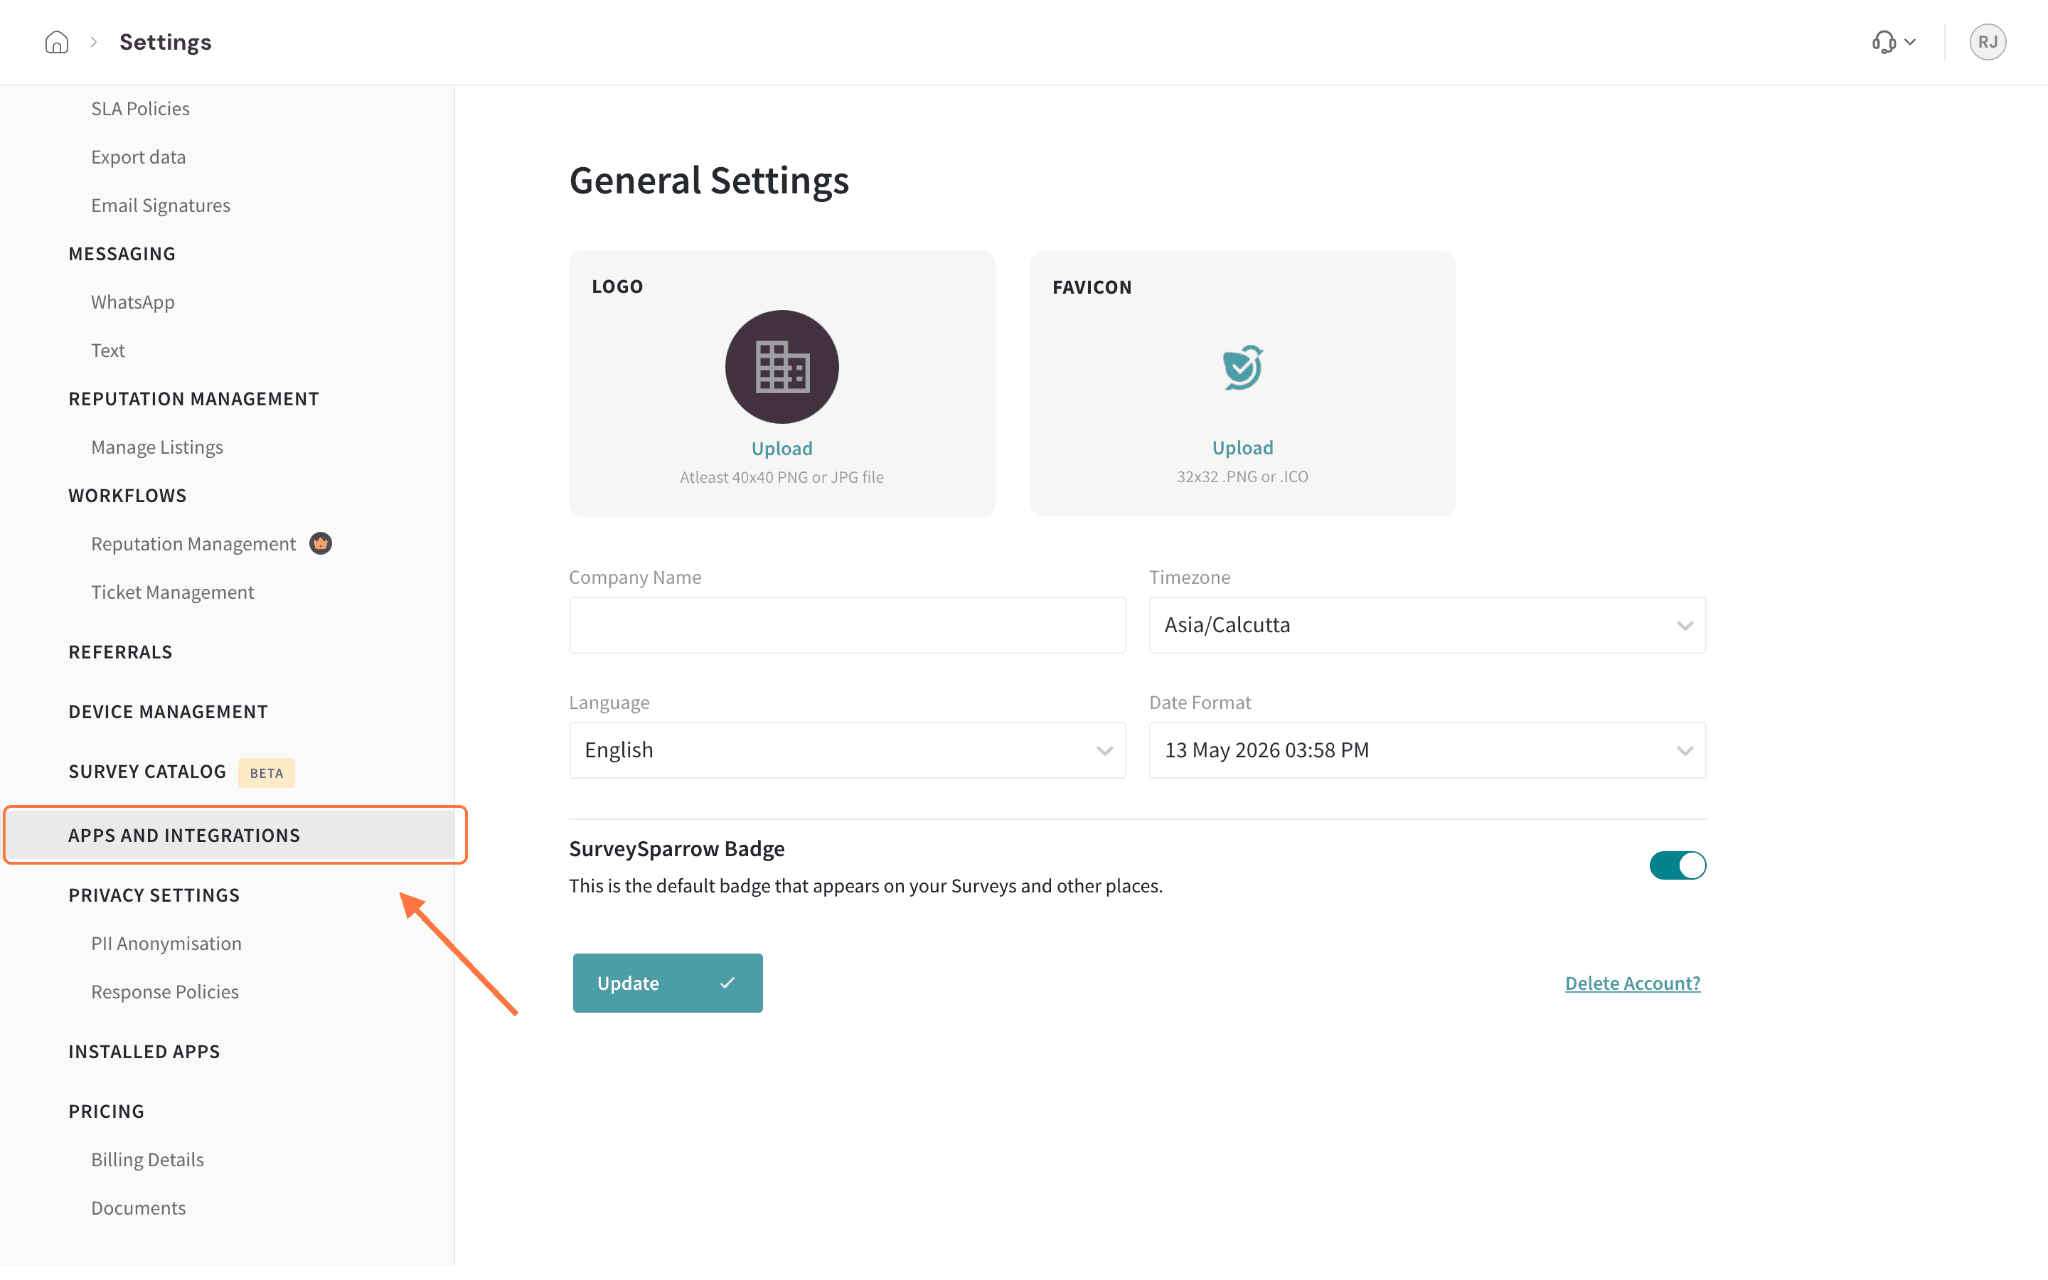
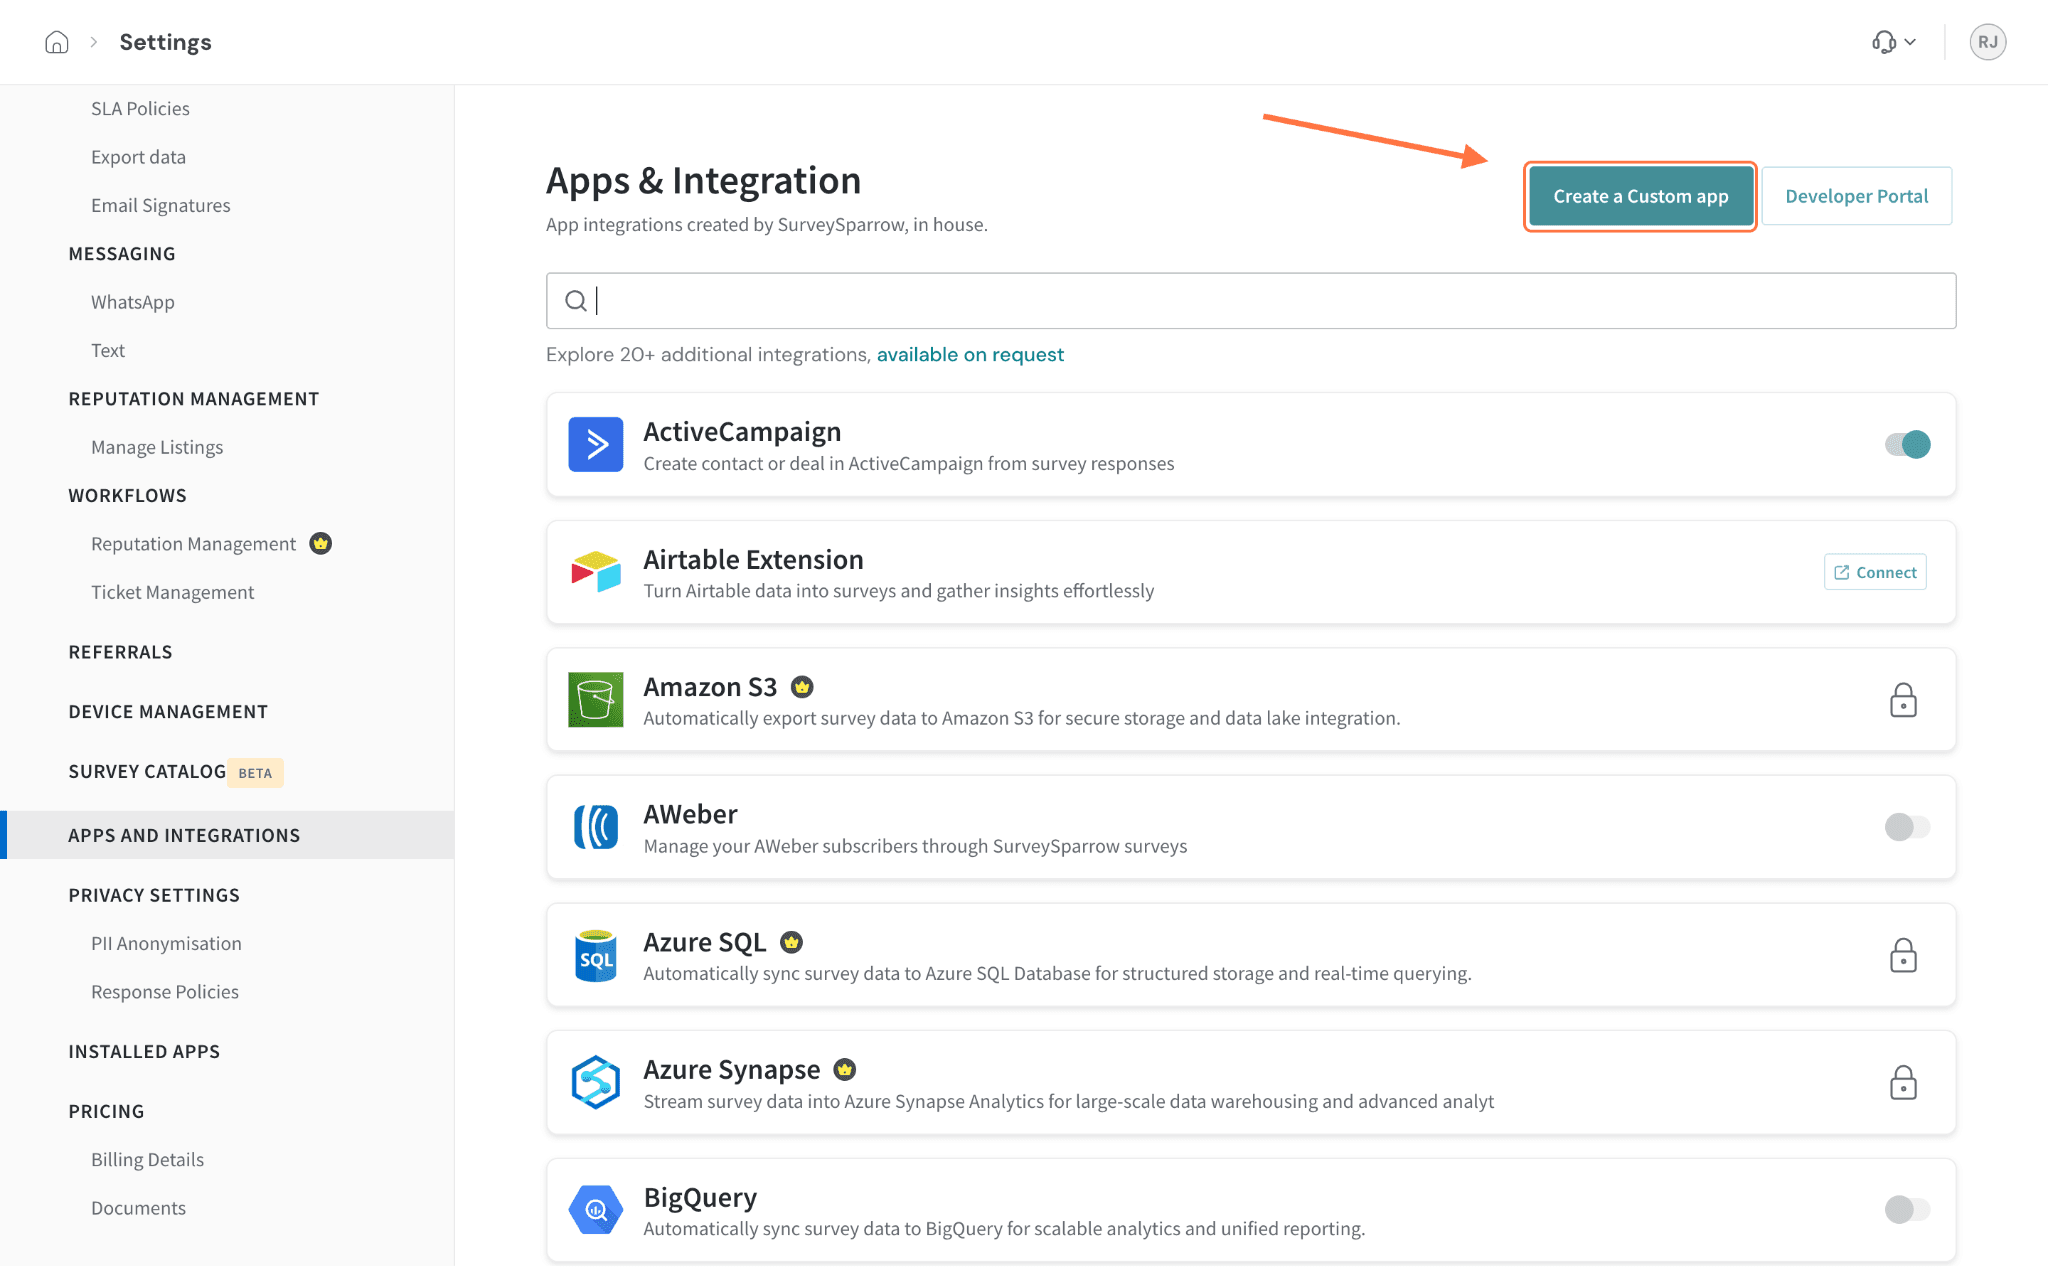
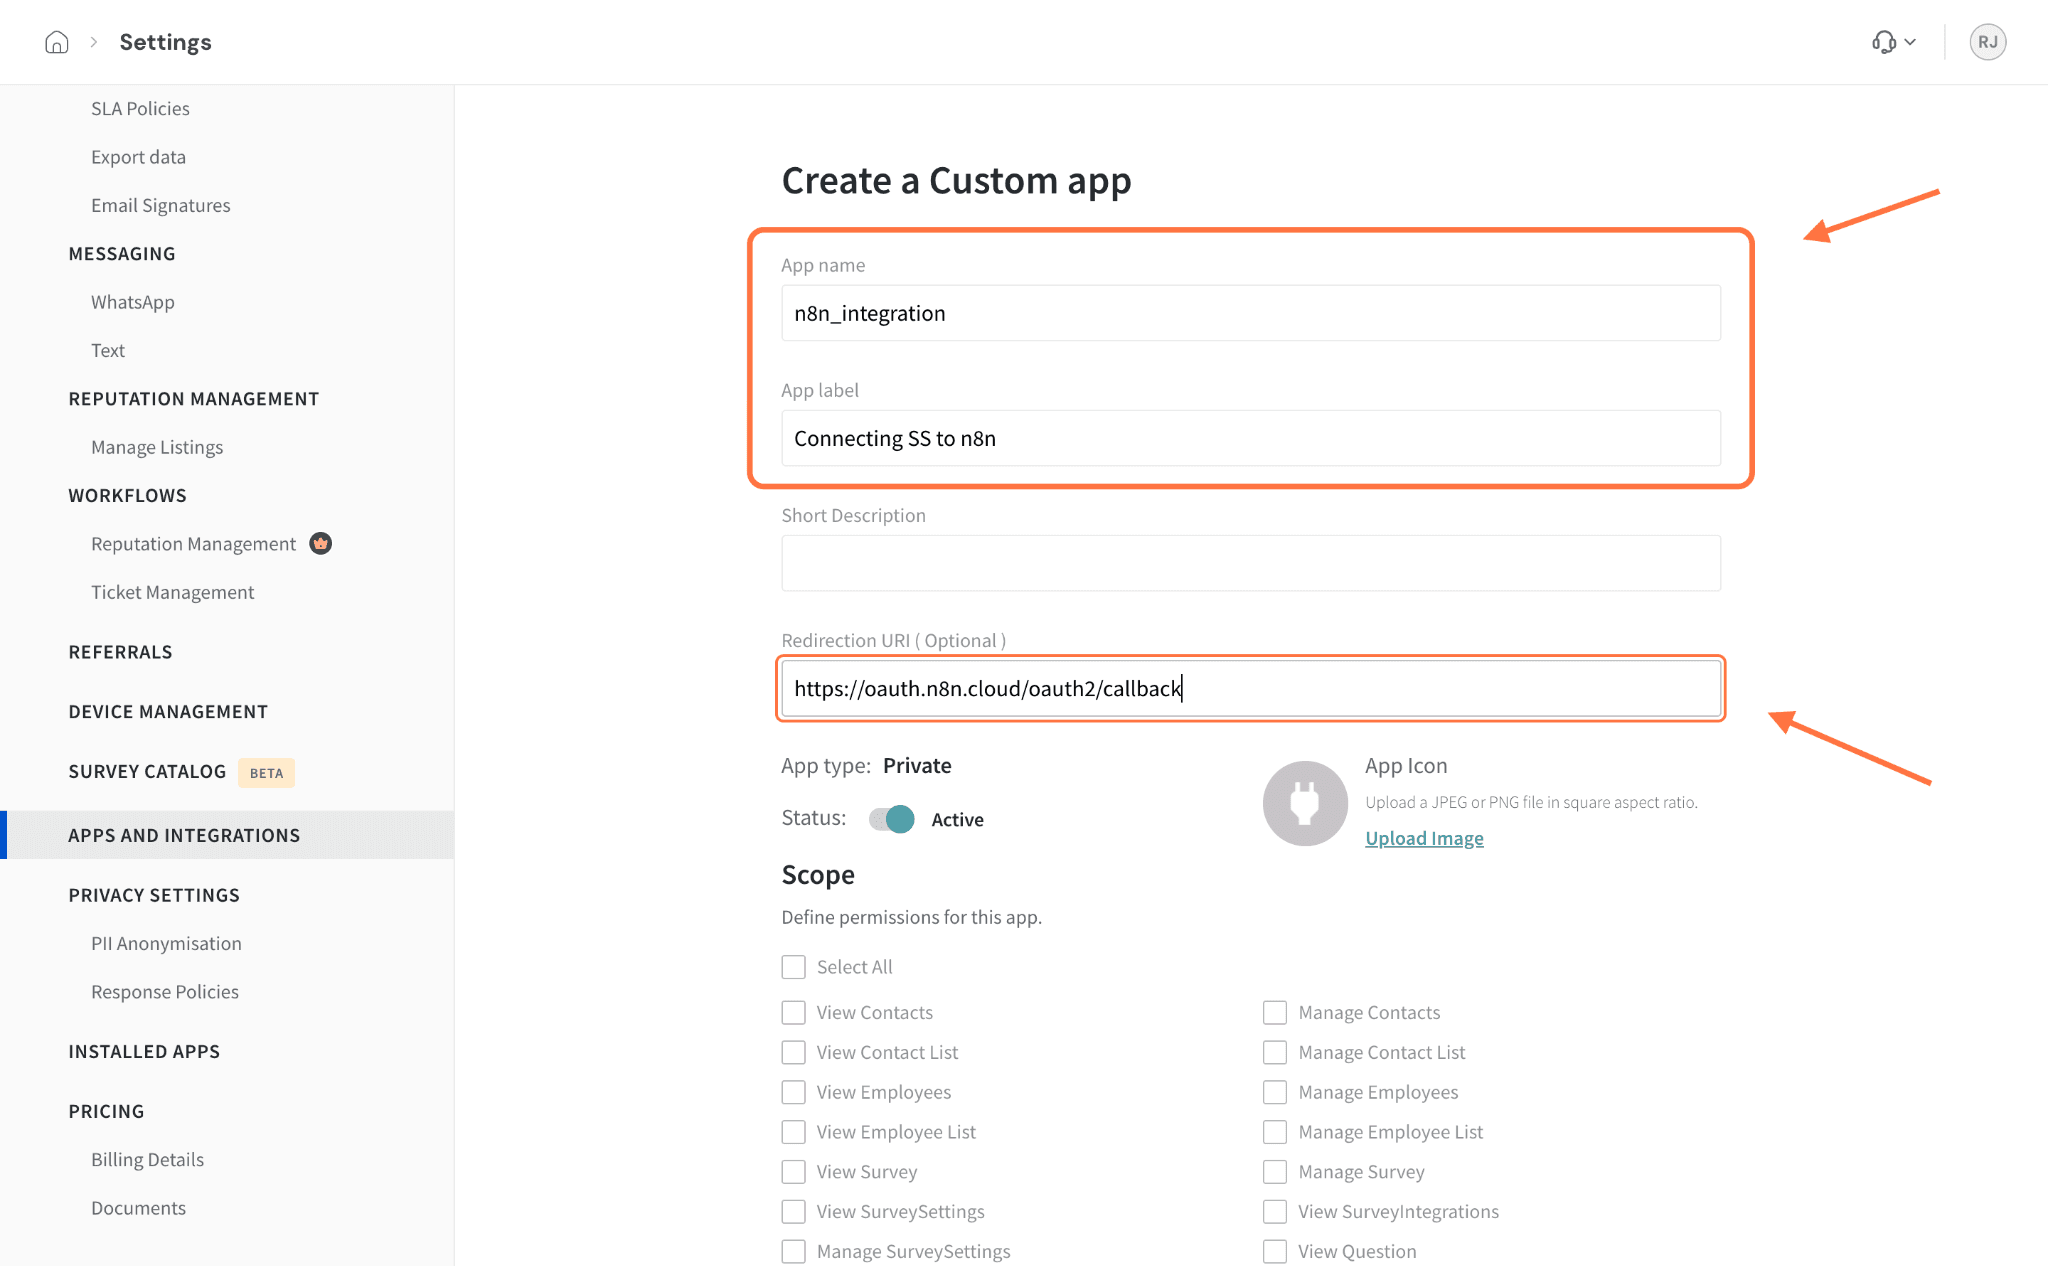
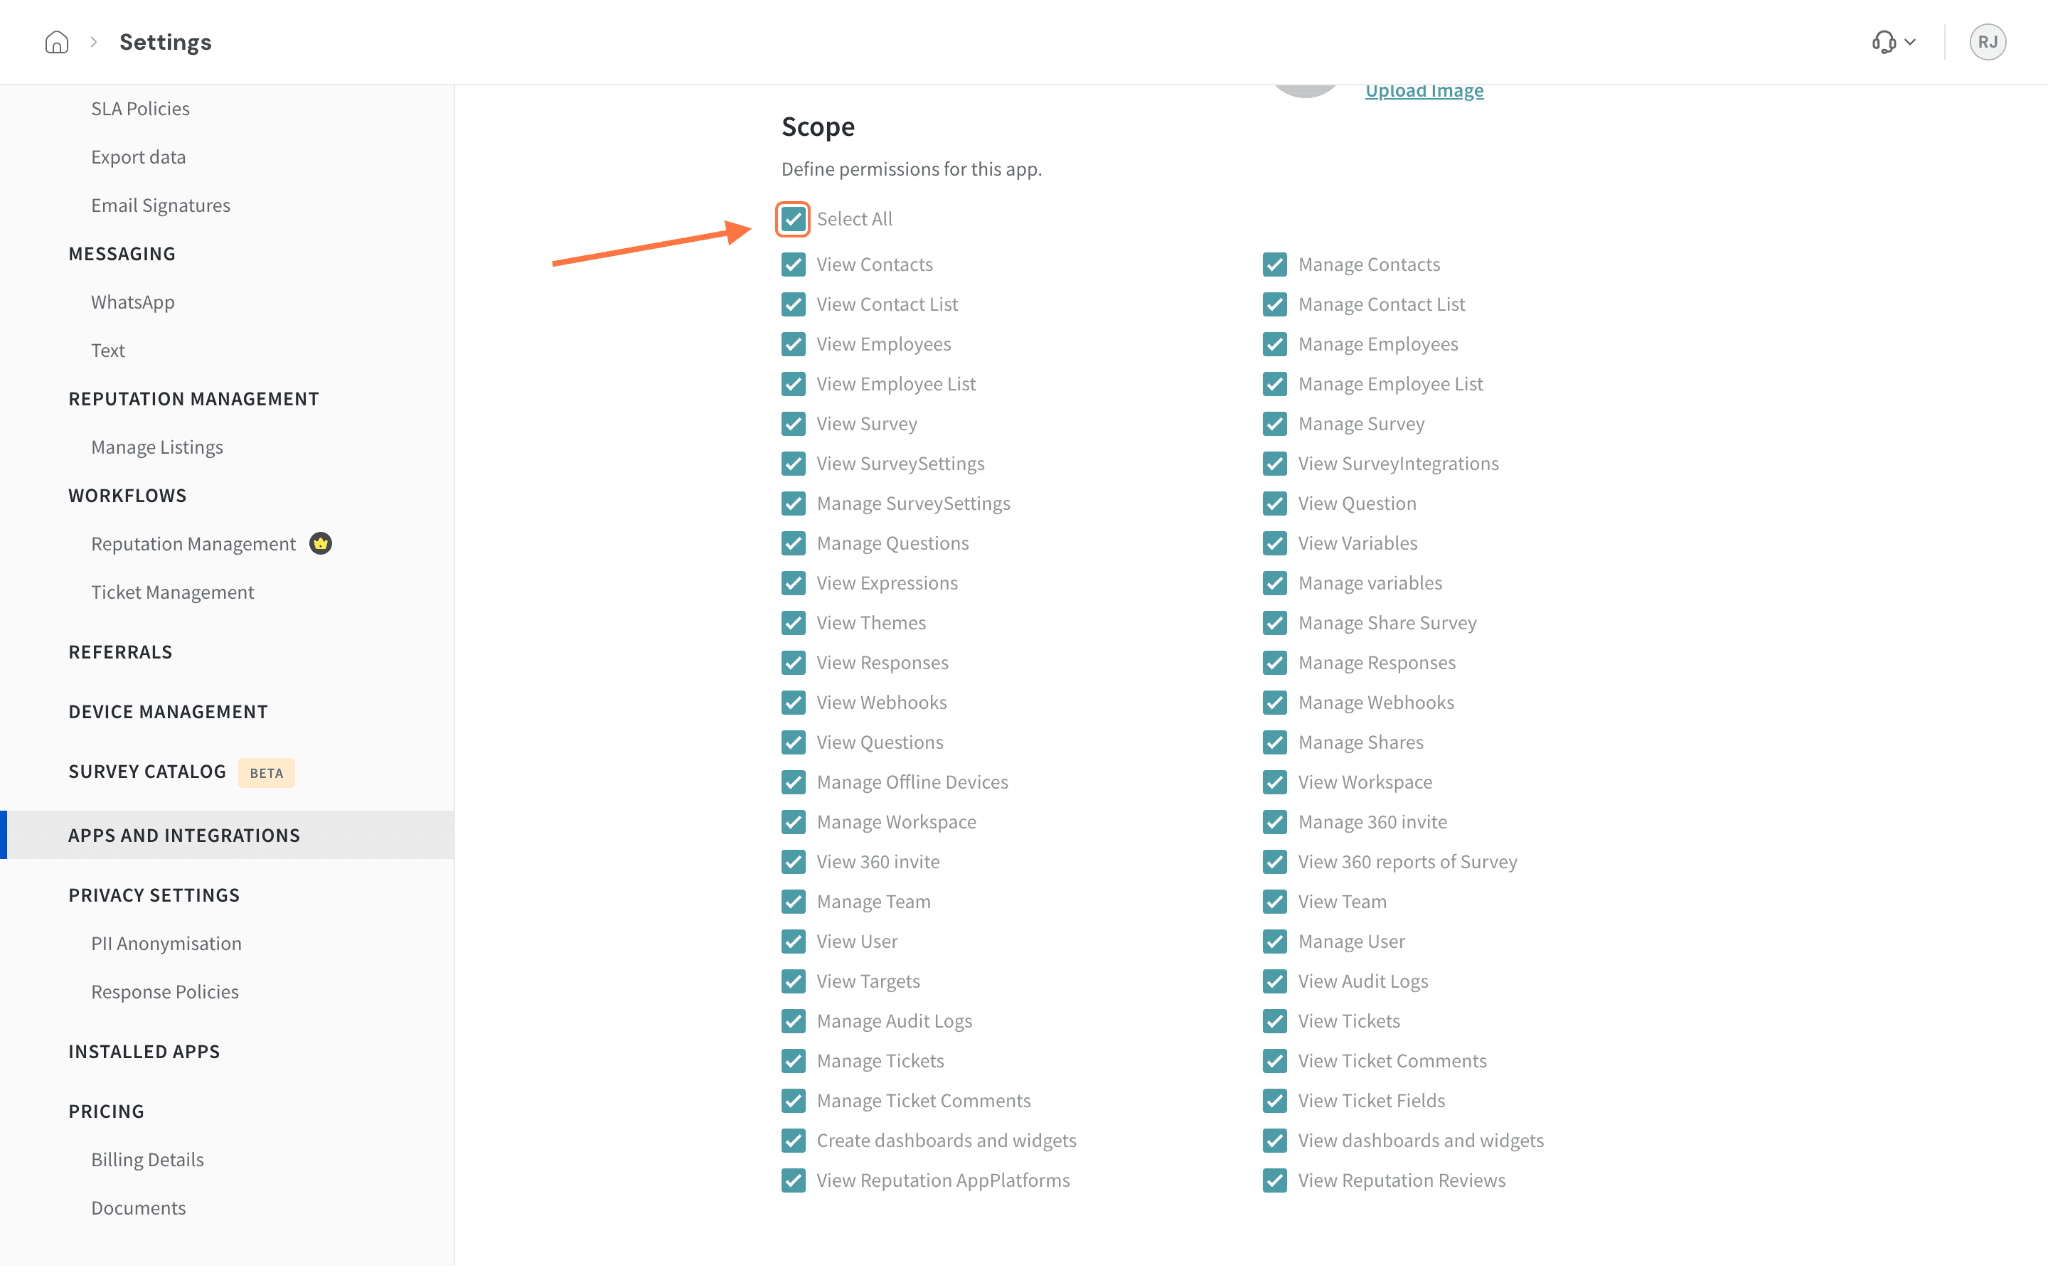
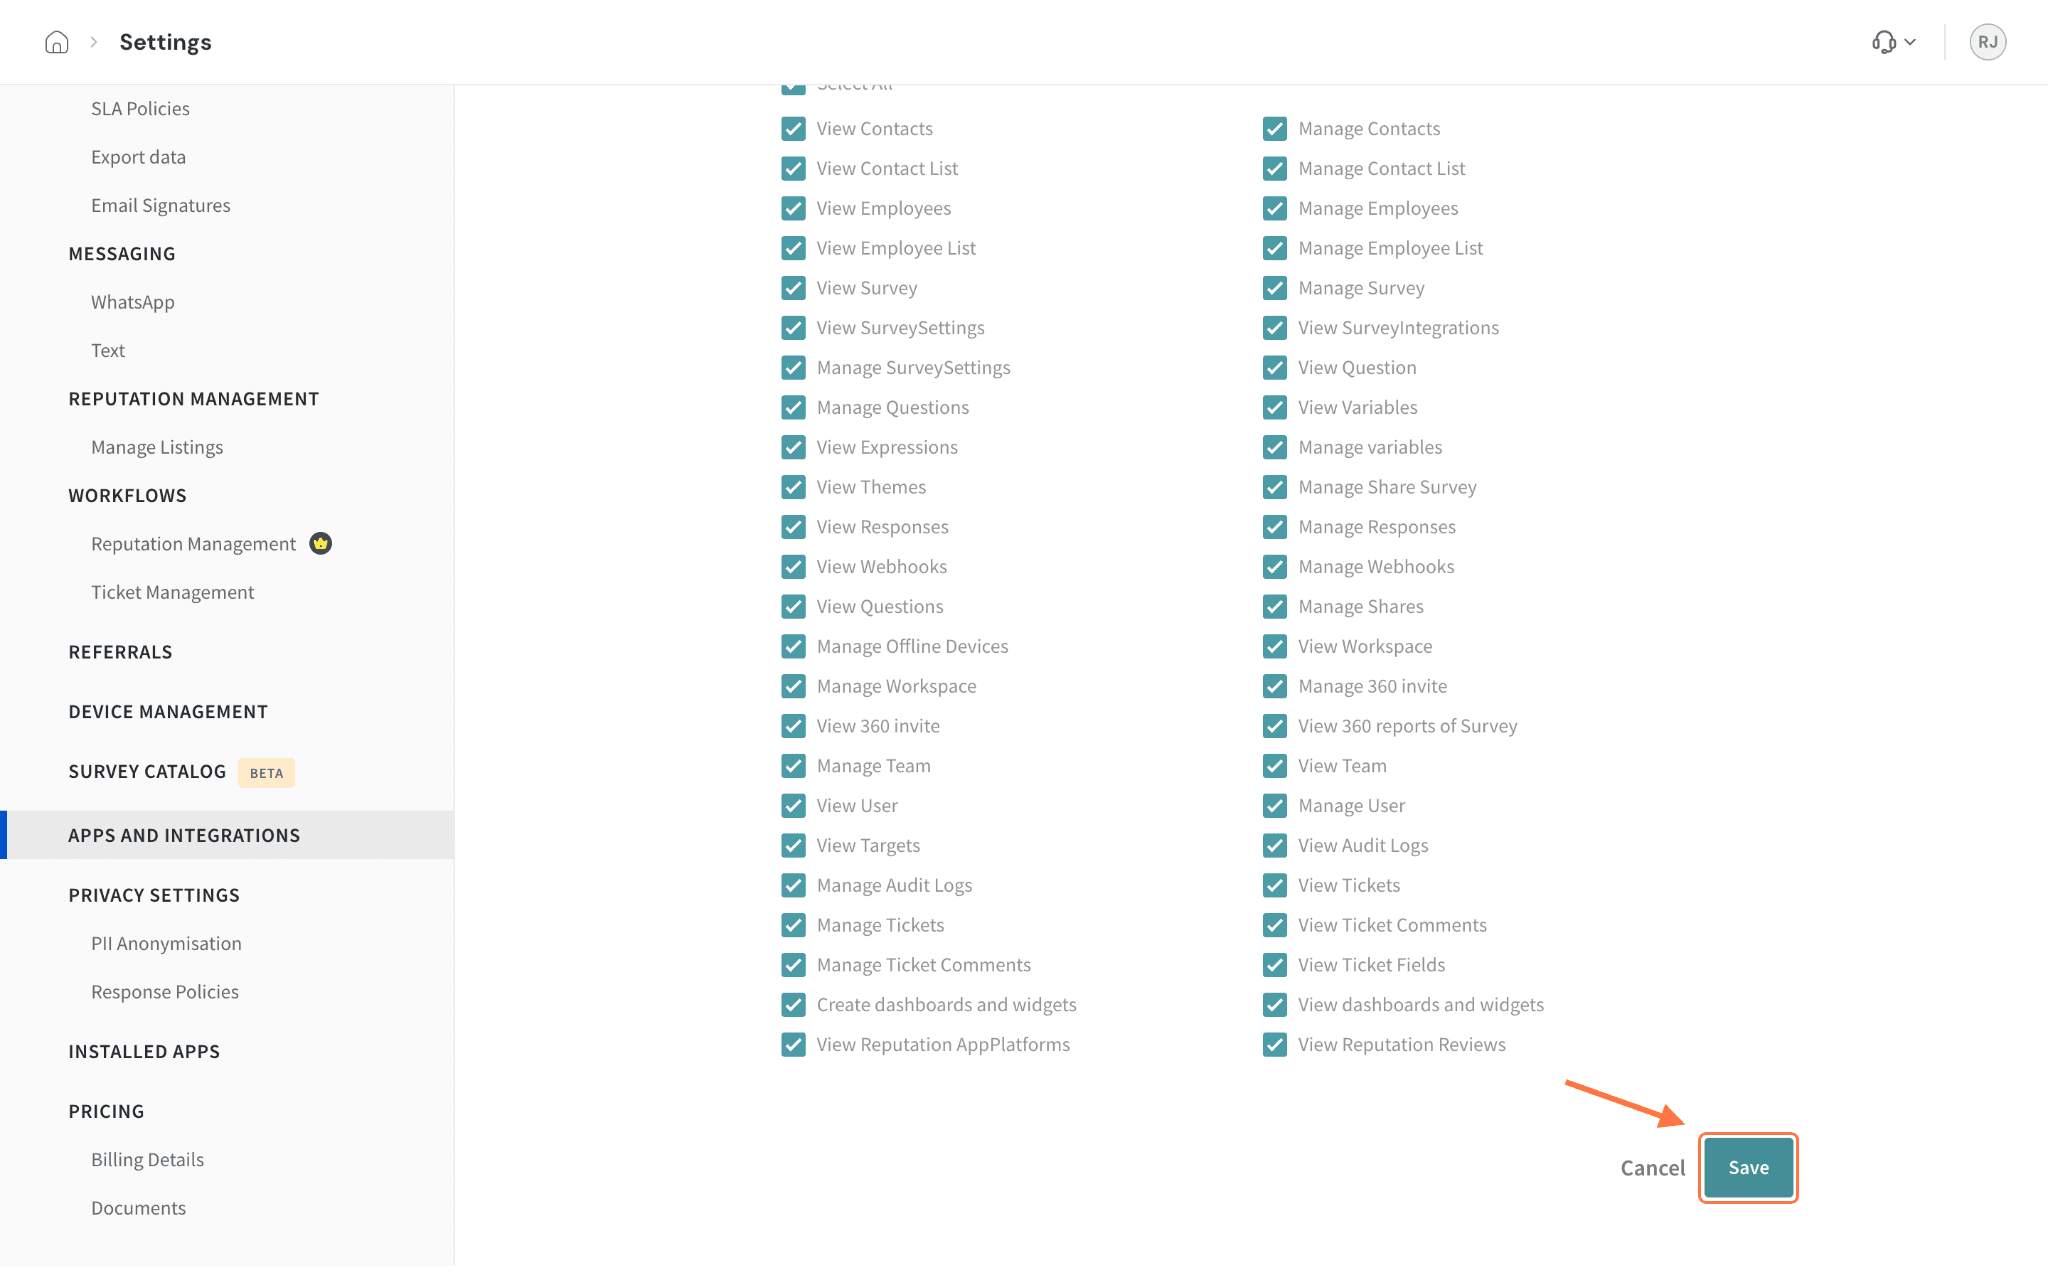
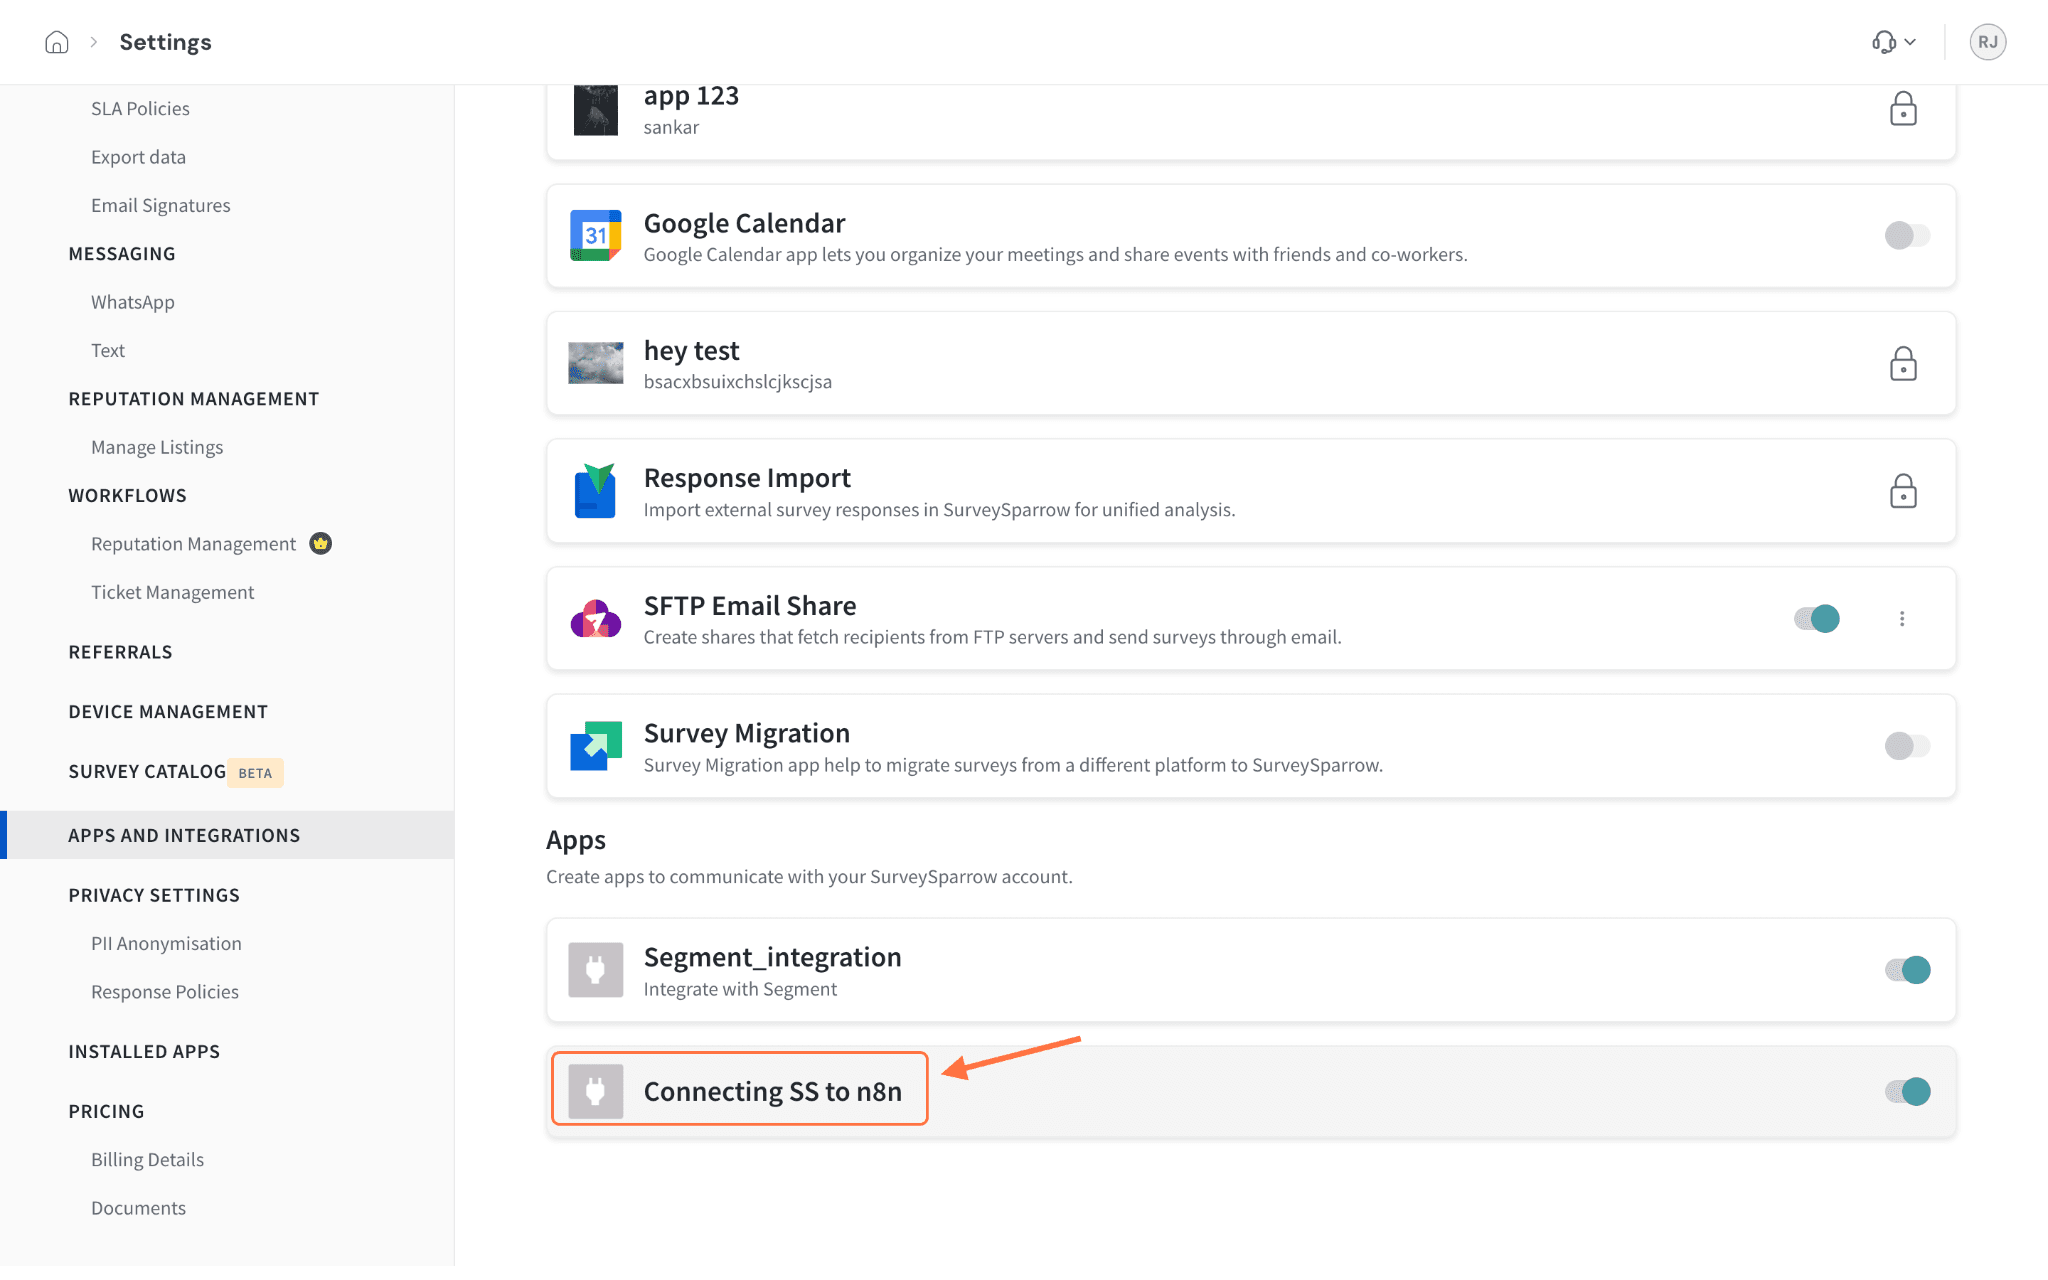
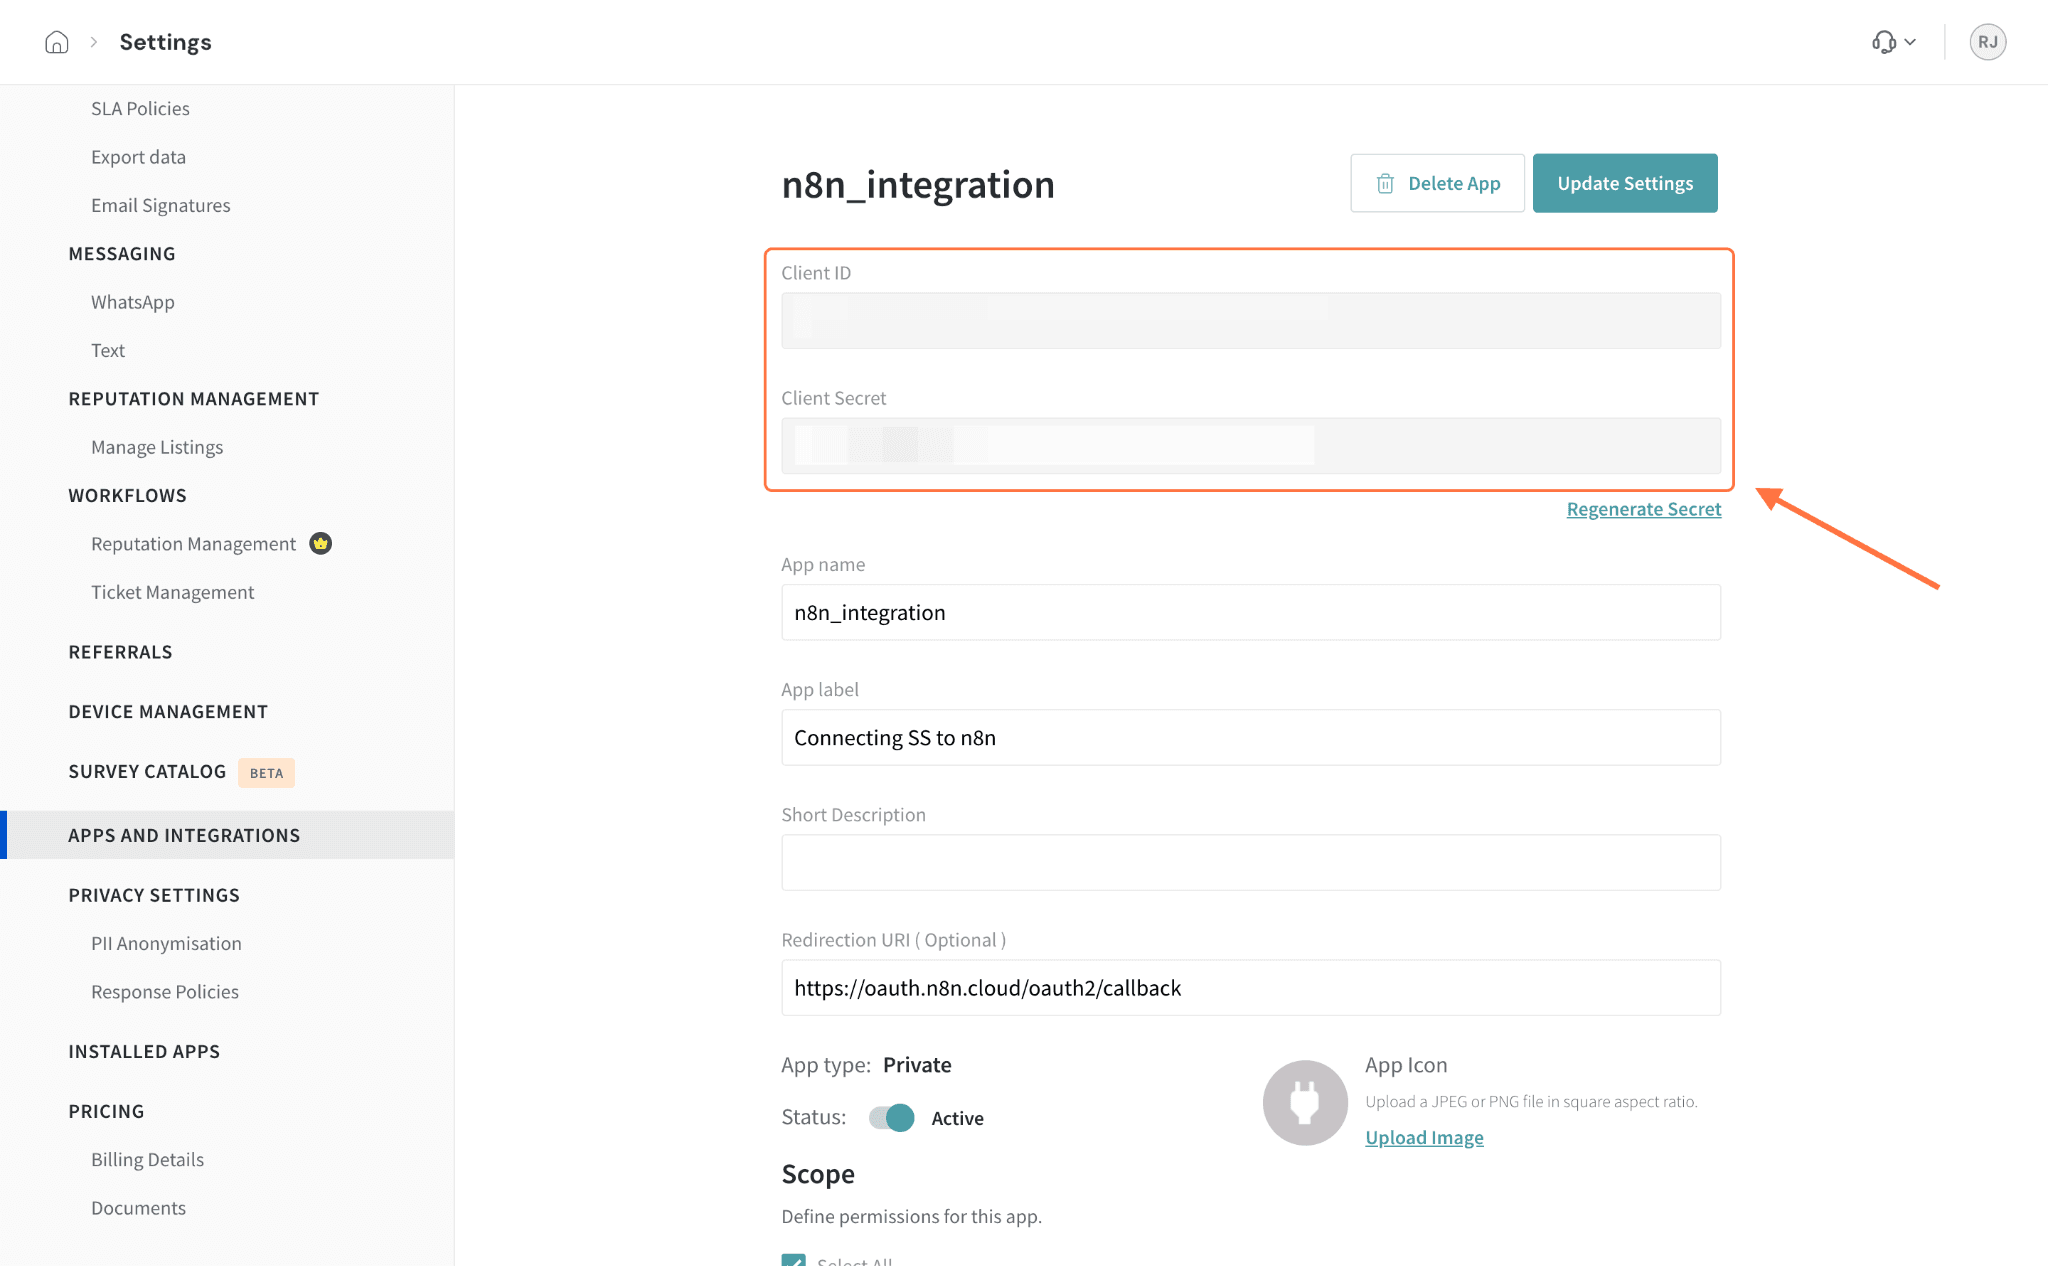
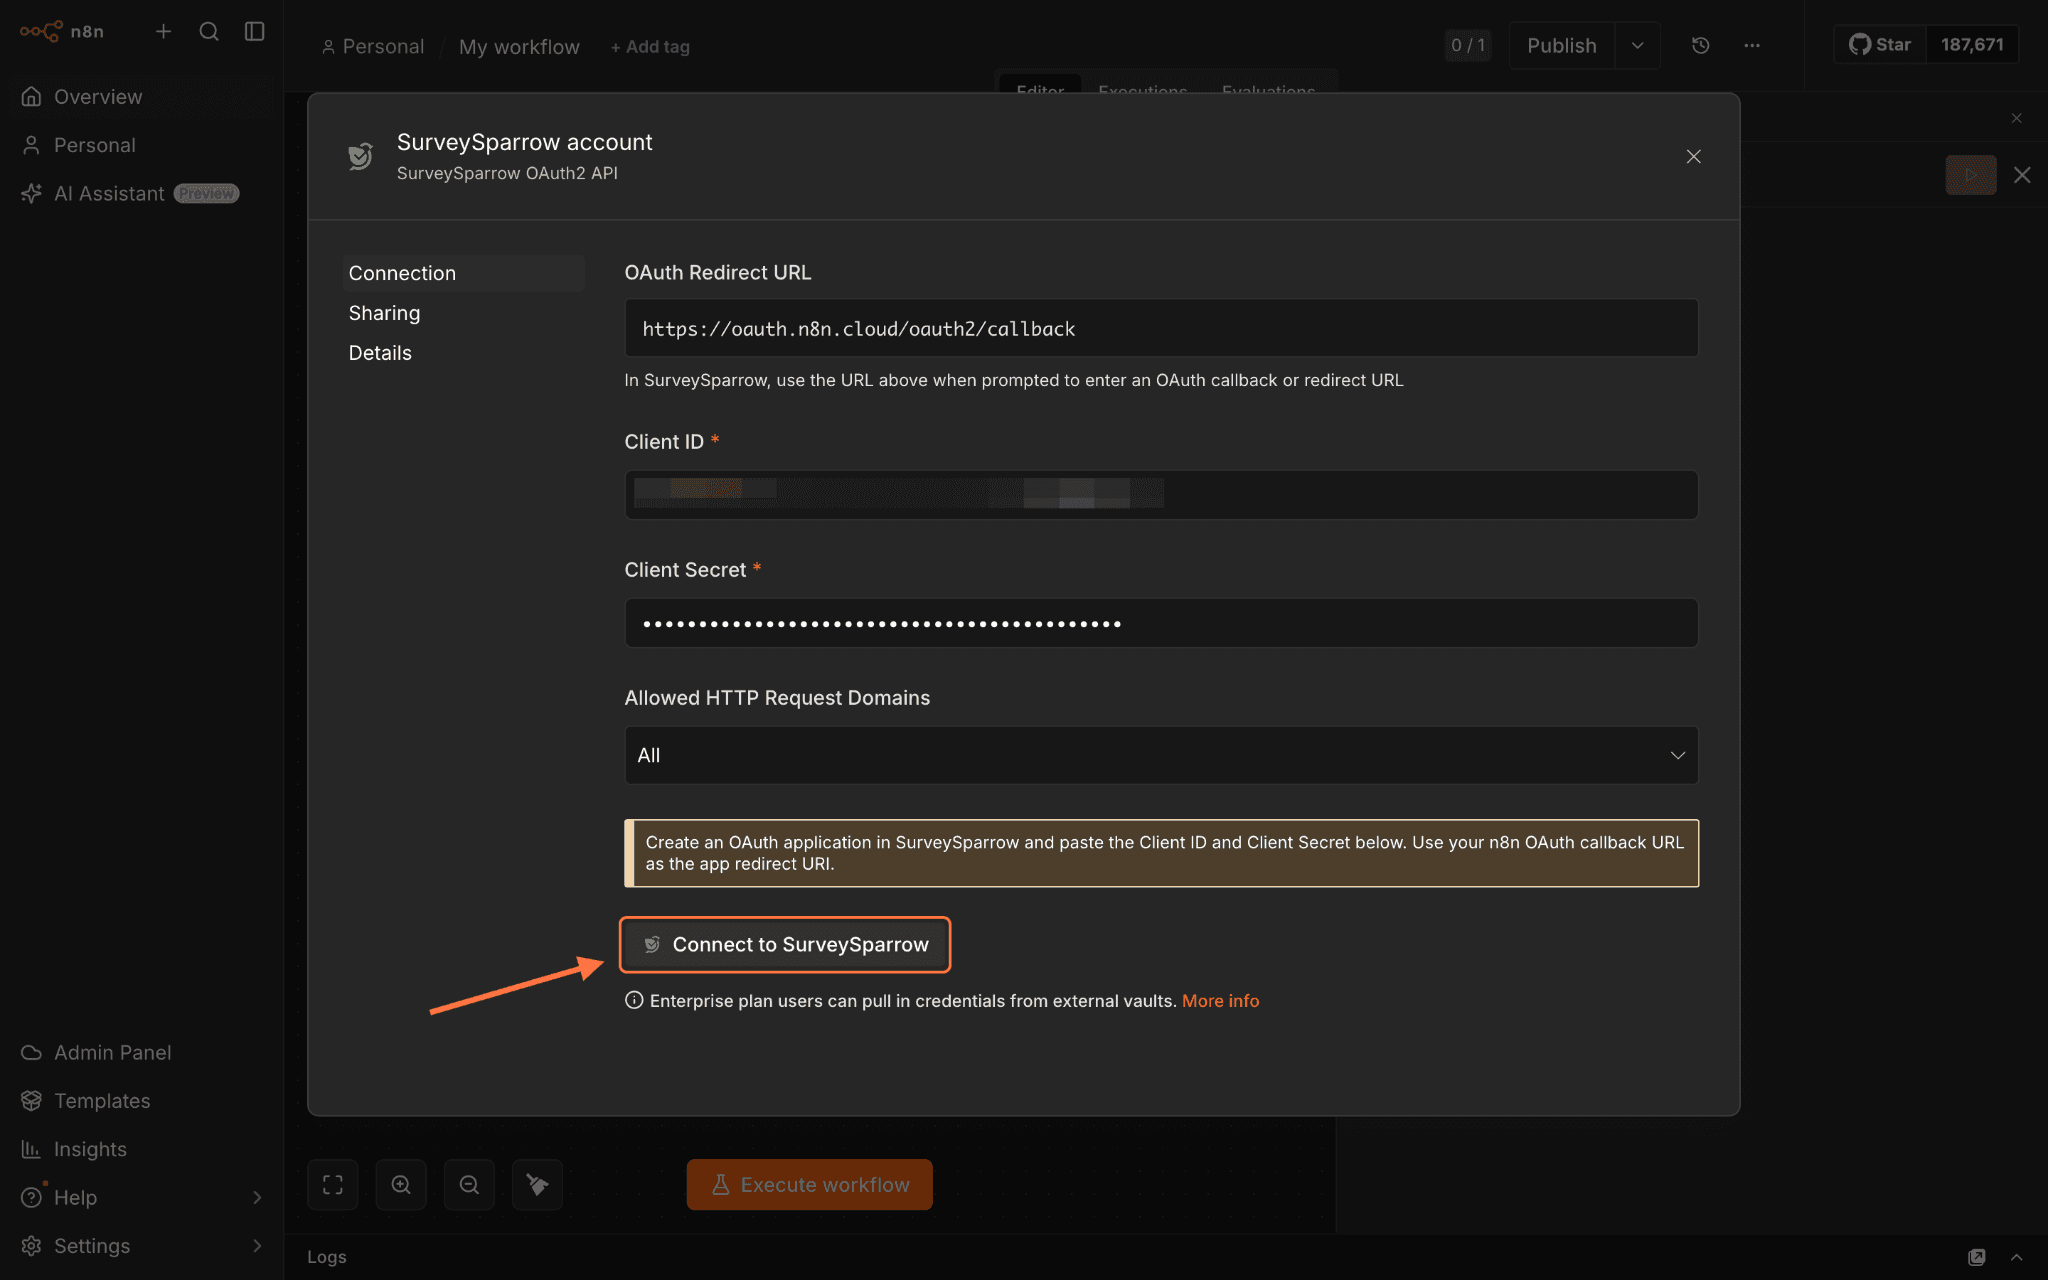
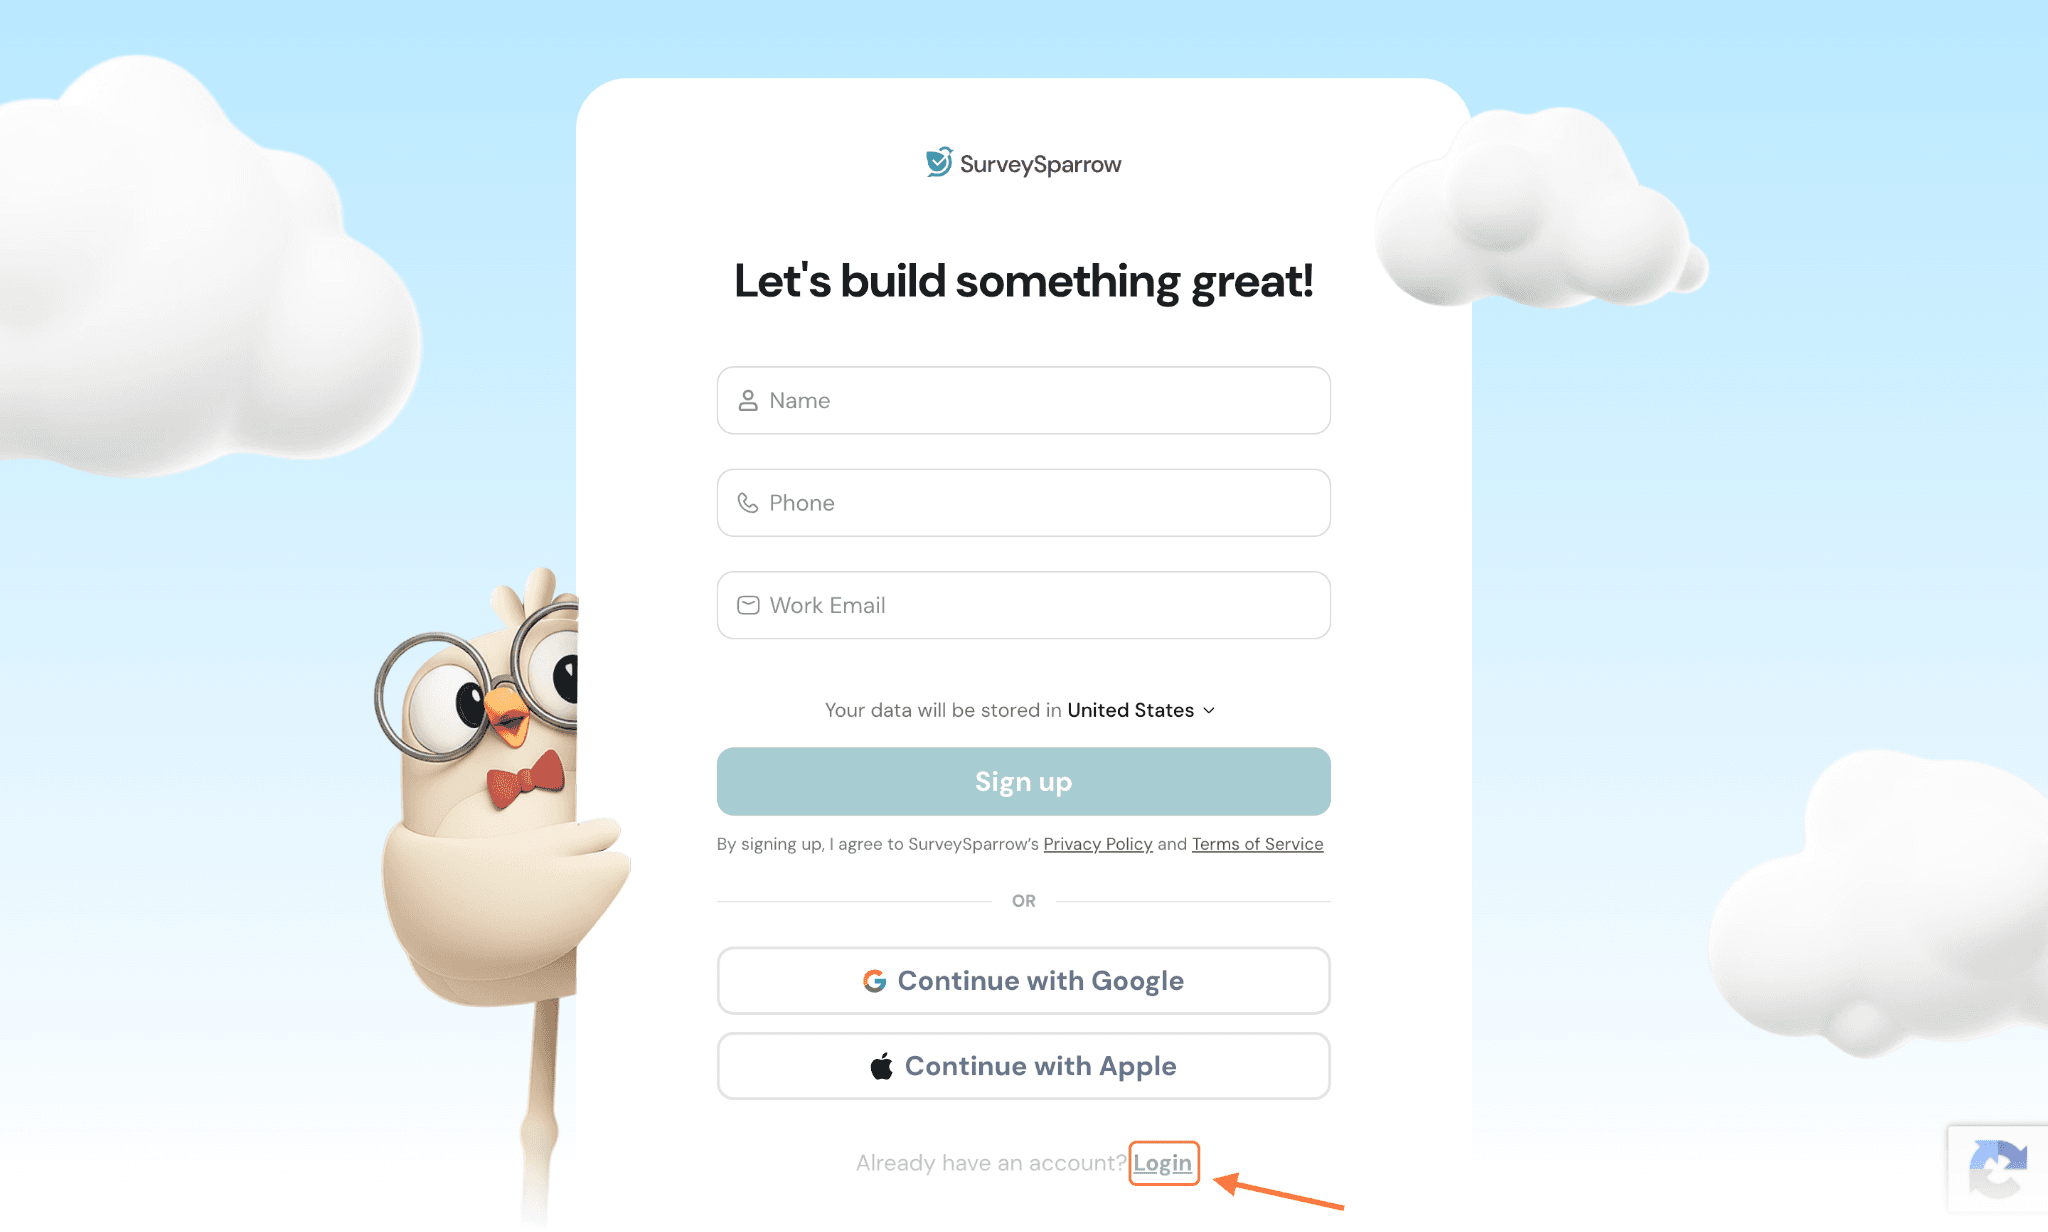
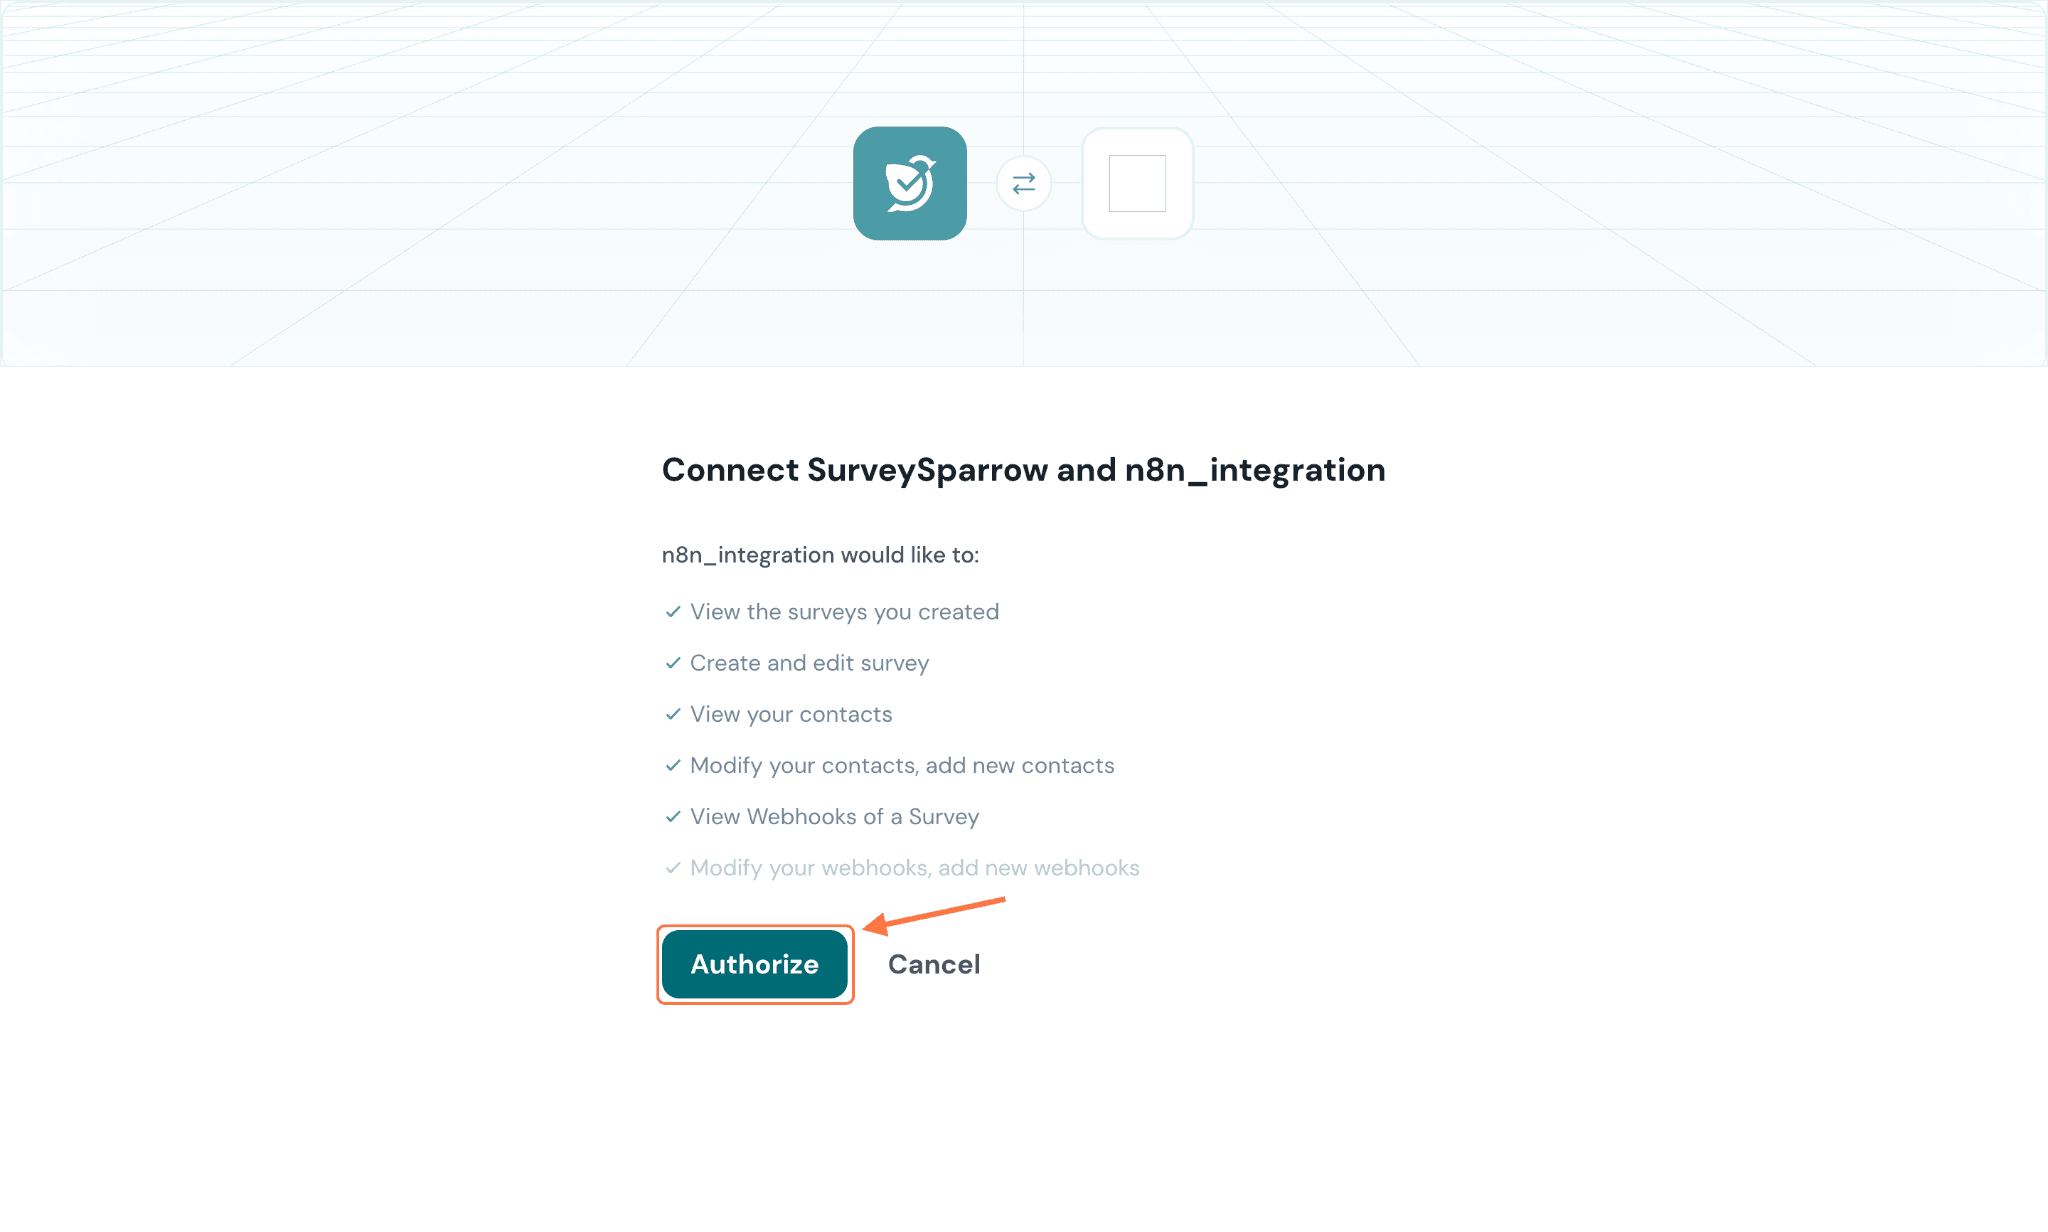
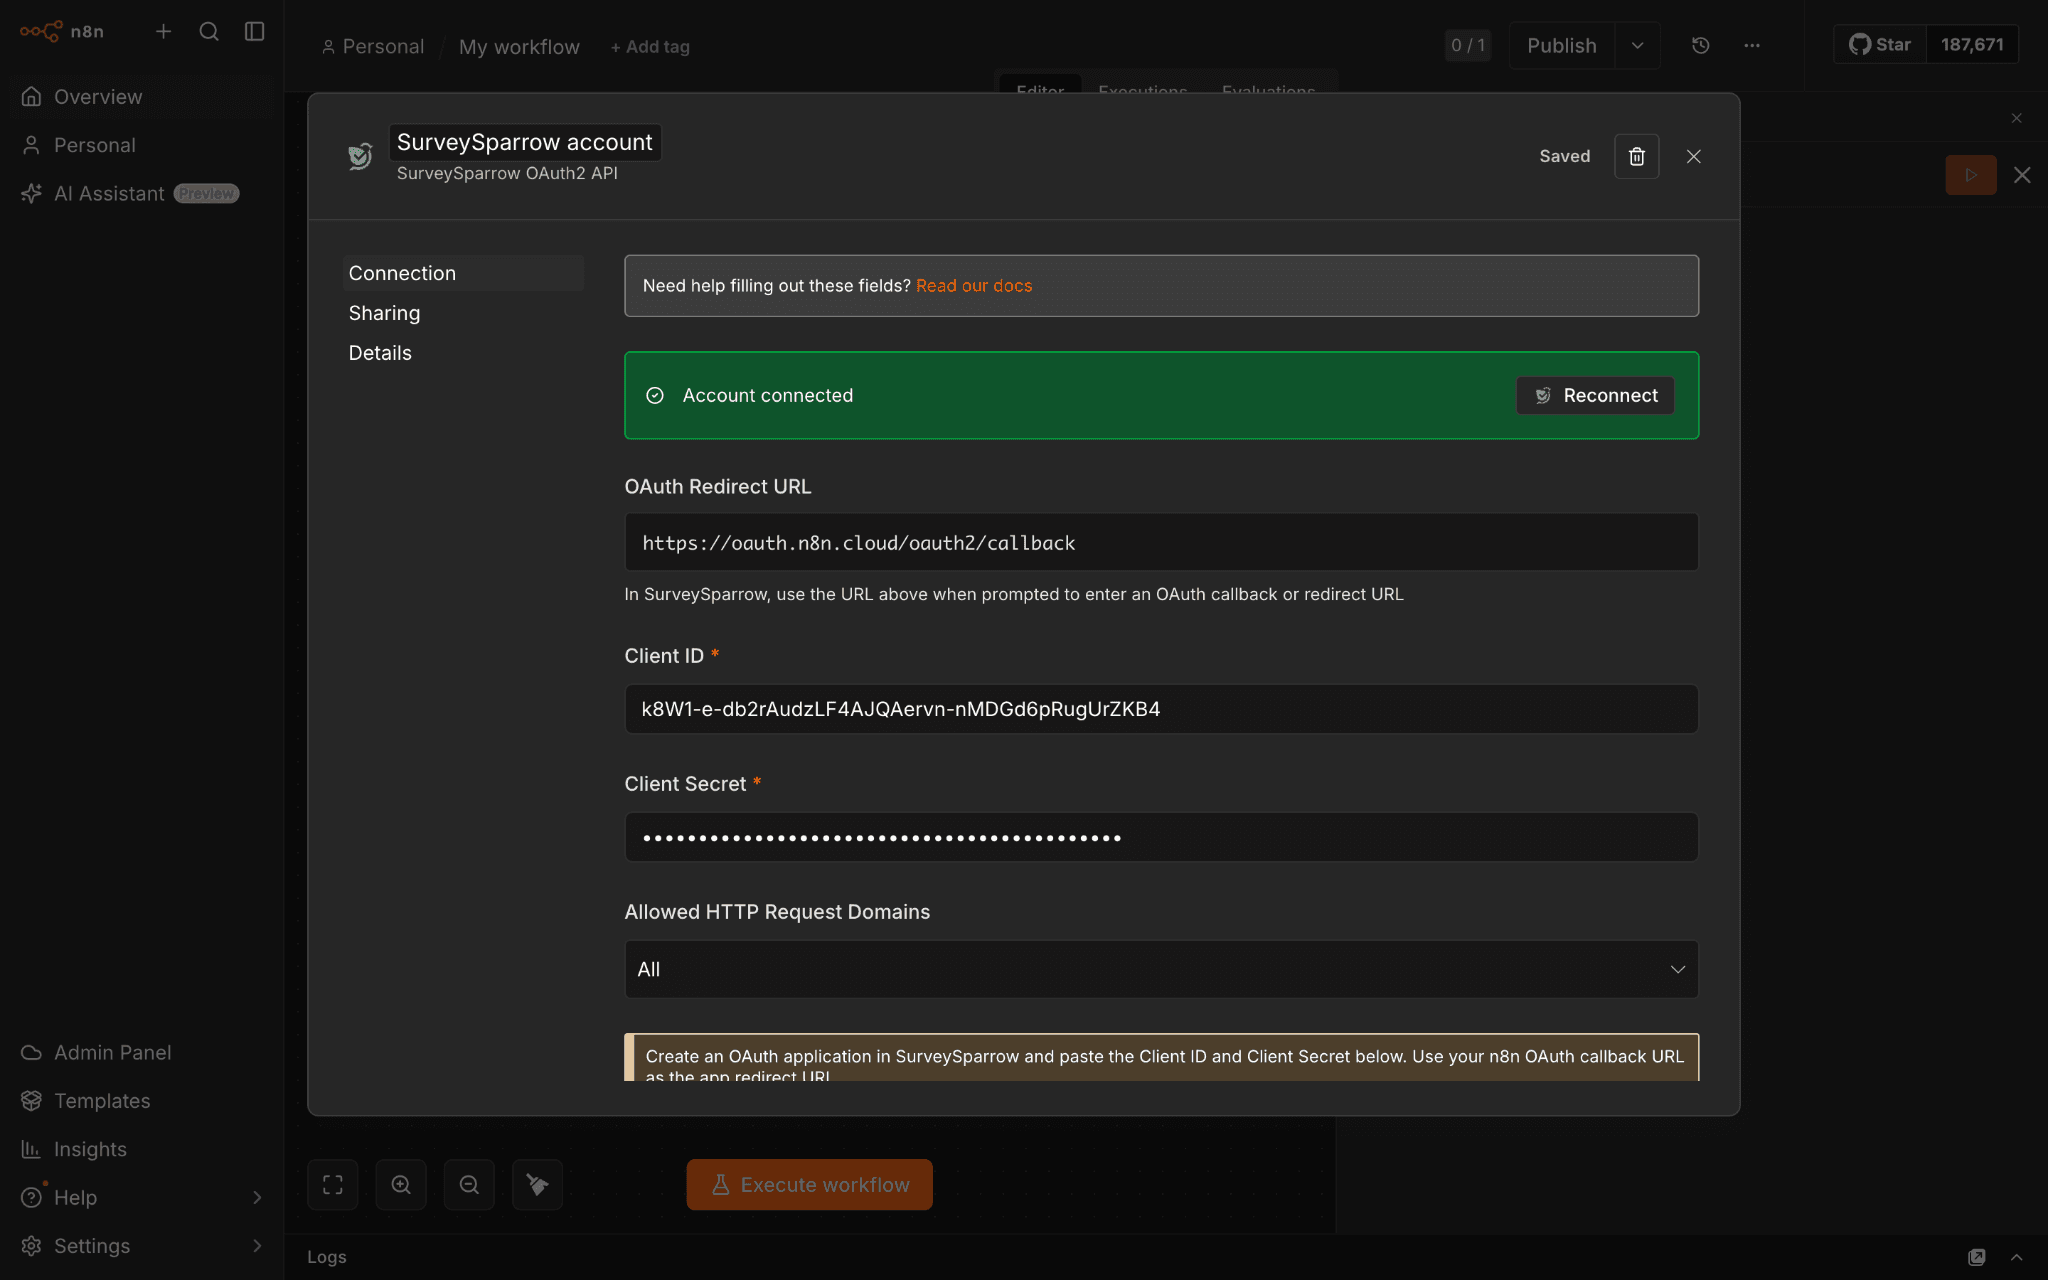
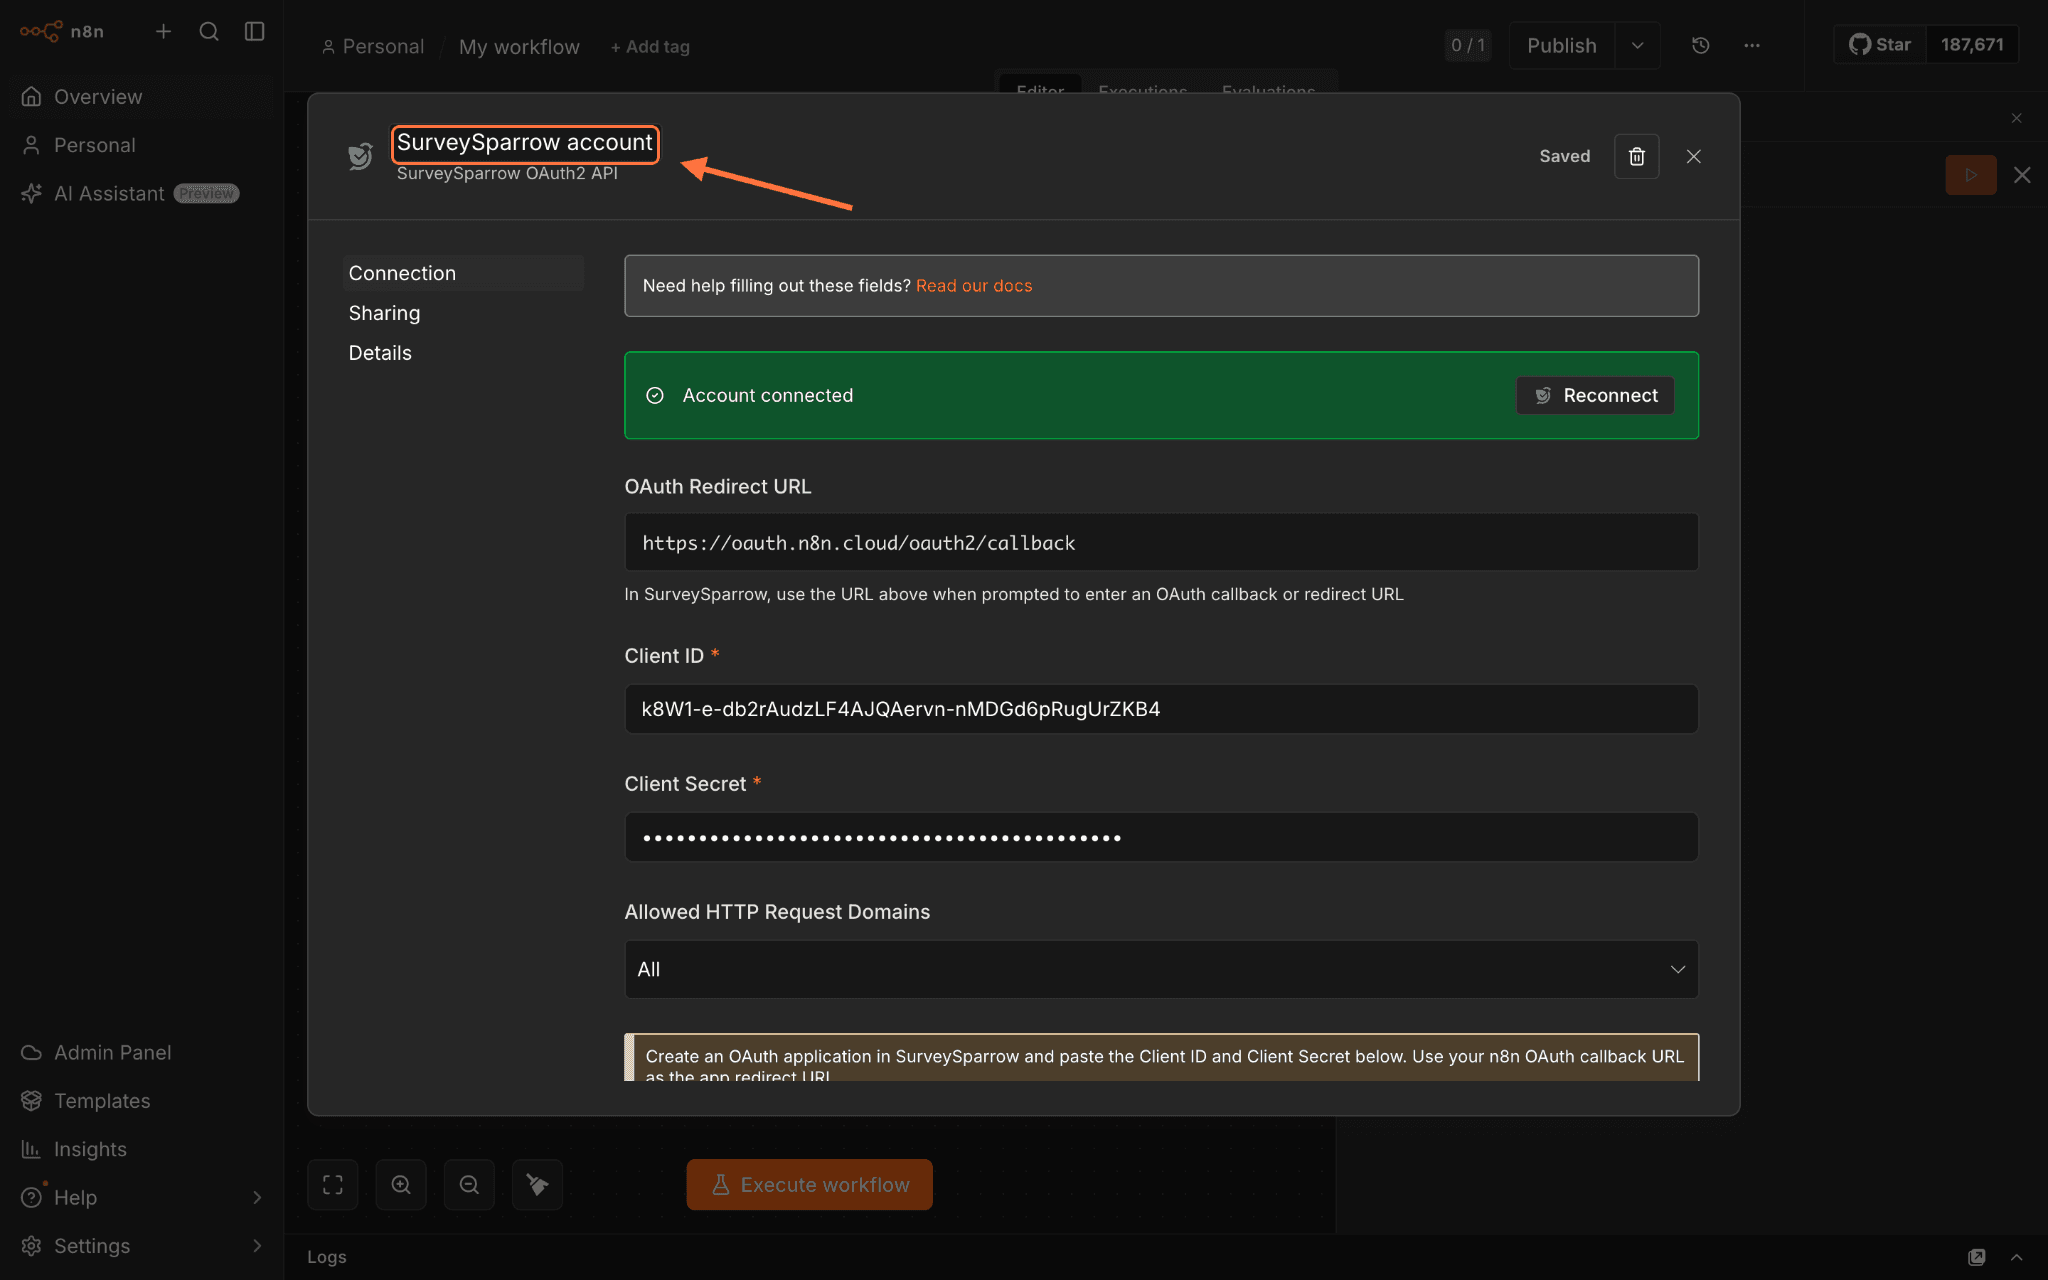
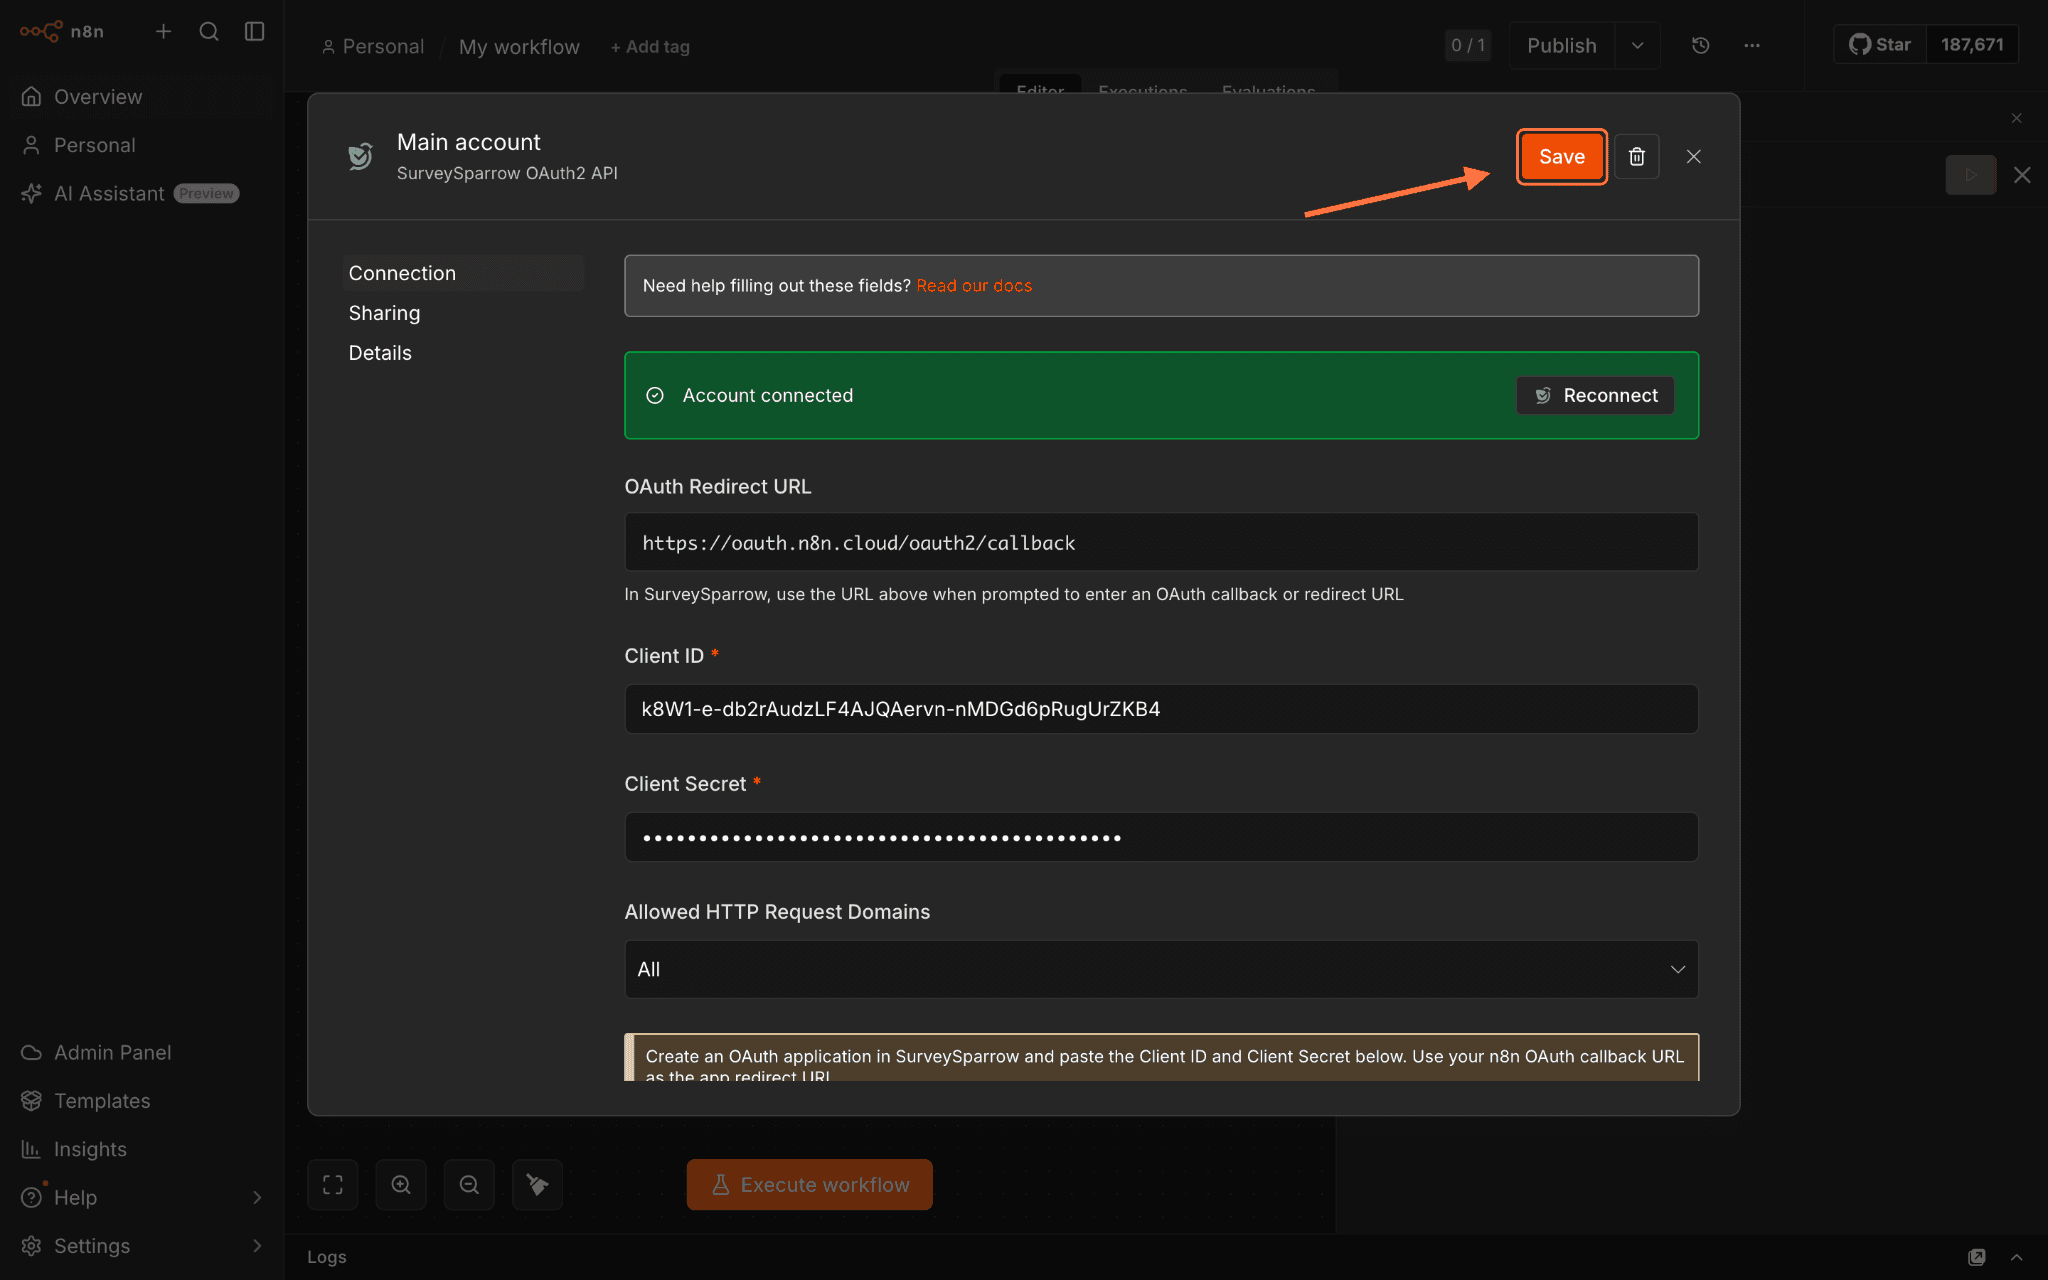
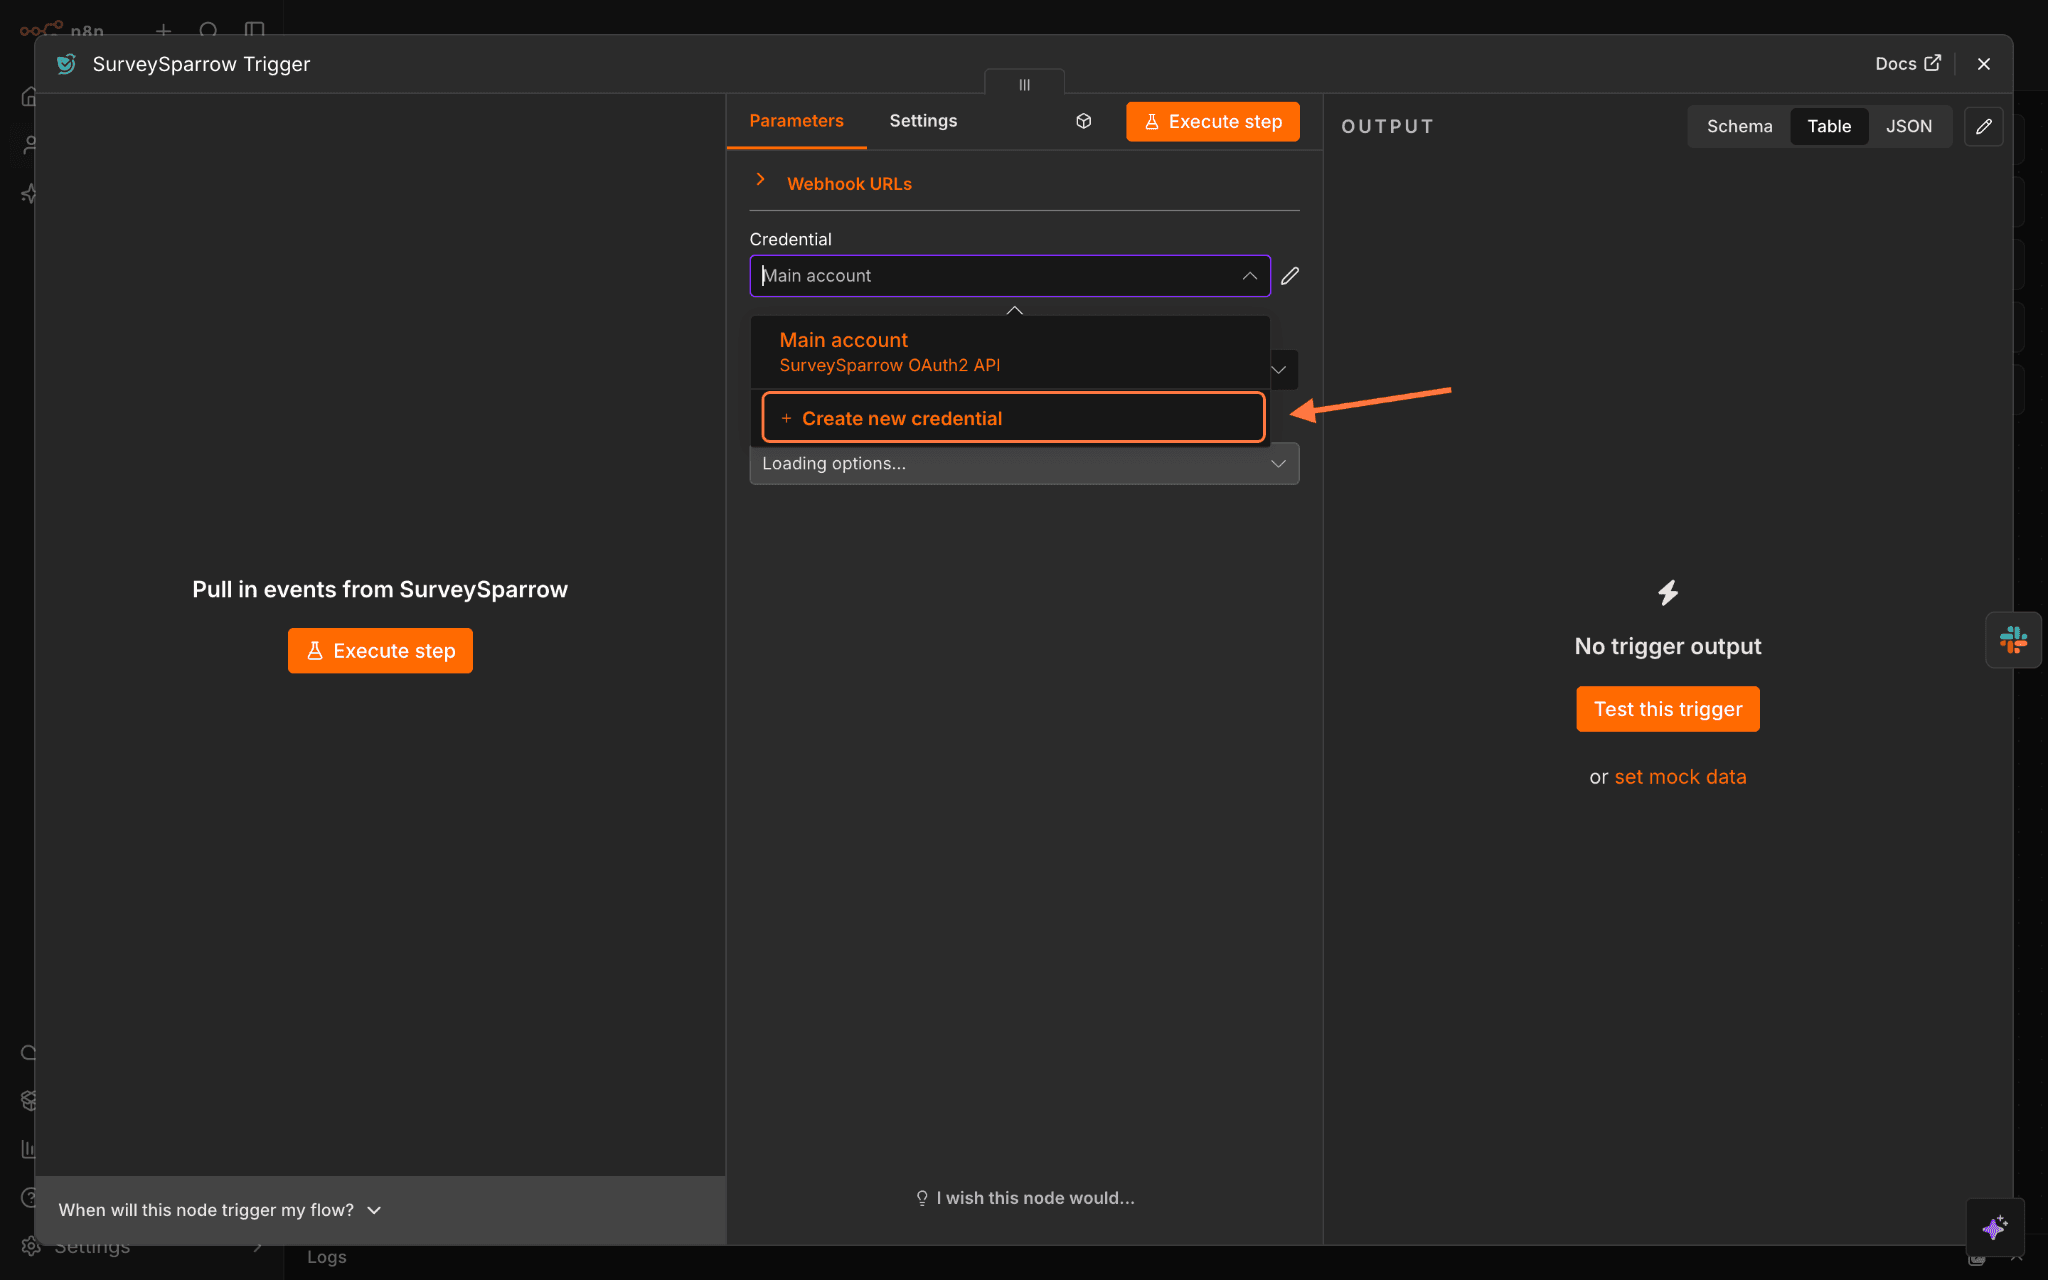
2. Use the search bar to find the SurveySparrow node, then click on it when it appears.3. Inside the node details section, click on Install node.4. Now the node is available in n8n, but you need to connect it to your SurveySparrow account. Start by selecting the trigger or any action.5. Inside the configuration section, click on Set up credential.6. A credential is a set of authentication details for the platform that you are trying to connect with. To get these authentication details, you will need to create a custom app inside SurveySparrow. Before proceeding to do that, copy the OAuth Redirect URL so that you can paste it inside your custom app.7. Now, open your SurveySparrow account in another tab and click on the Settings icon.8. Scroll down to the left panel till you see the Apps and Integrations option, then click on it.9. Now, click on Create a Custom App.10. Create an app name and label by filling out the respective fields. Then paste the OAuth redirection URL that you copied from n8n.11. Click on the Select All checkbox to provide all possible permissions for the app.12. Click on Save to create the app.13. Now open the app (inside the Apps section at the bottom of the page) and copy the Client ID and Client Secret from there.14. Head back to n8n and paste the authentication details, then click on Connect to SurveySparrow.15. A sign-up screen appears in another window. Click on Login and complete the login process.16. A final authorization screen appears; click on Authorize.17. You’ll be returned to the n8n window, and a success message will appear.Note: To rename the credential, click the name in the top left corner and enter the new one. Then click Save.Note: If you want to use another SurveySparrow account, you will need to add it as a separate credential. To that, within the same trigger/action configuration panel, click on the Credential drop-down menu. Then click on Create new credential.
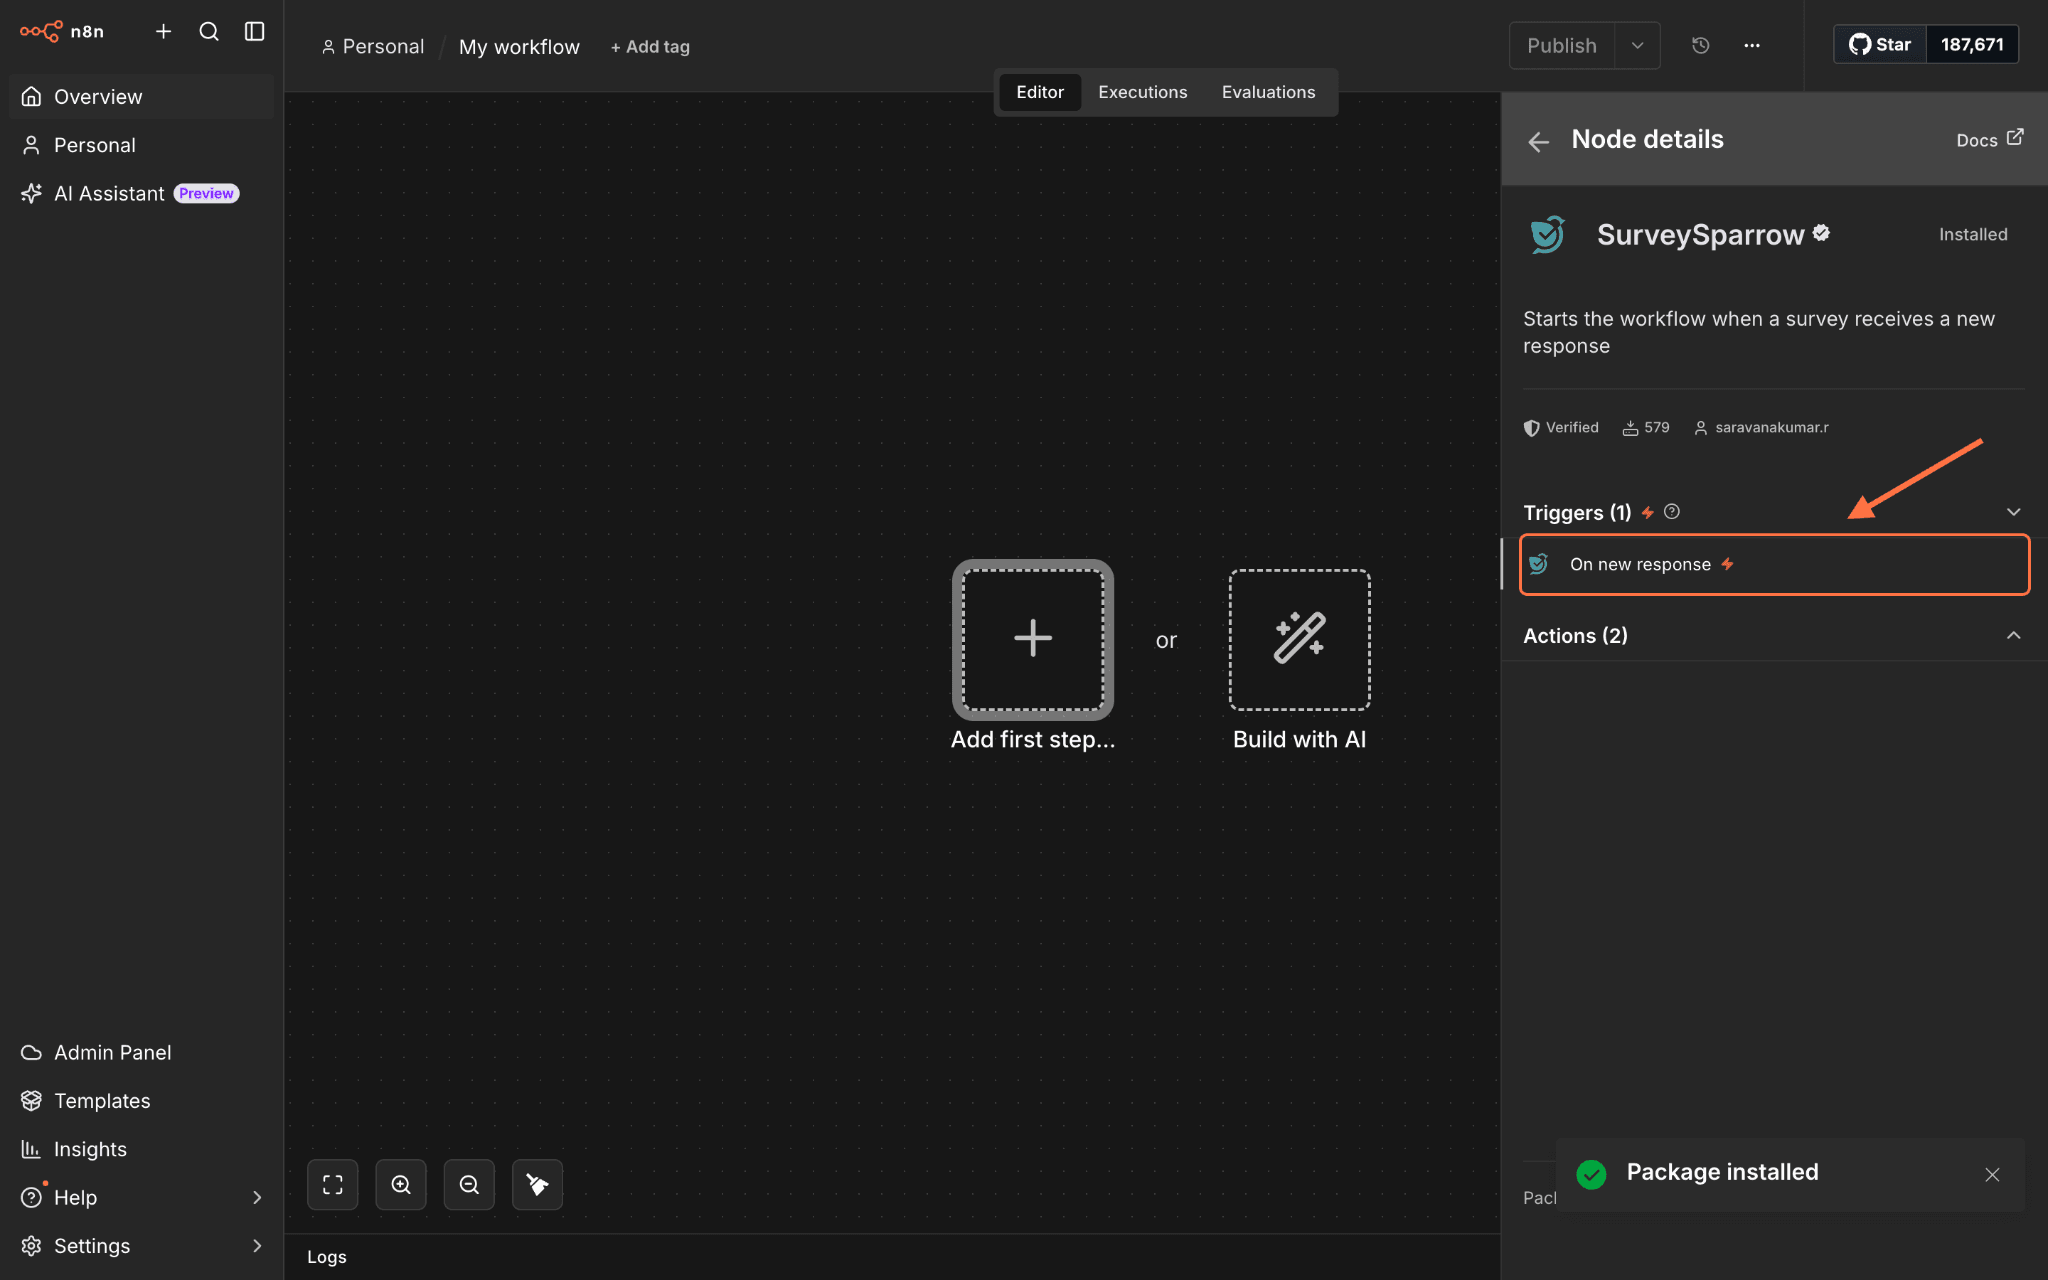
Creating triggers using the SurveySparrow node
A trigger is the first component of a workflow that sets off the rest of it and is centered around an event. An application can have multiple triggers for different events. The SurveySparrow n8n node offers a single trigger for when a survey receives a new response. We’ll go through the steps for using it here.
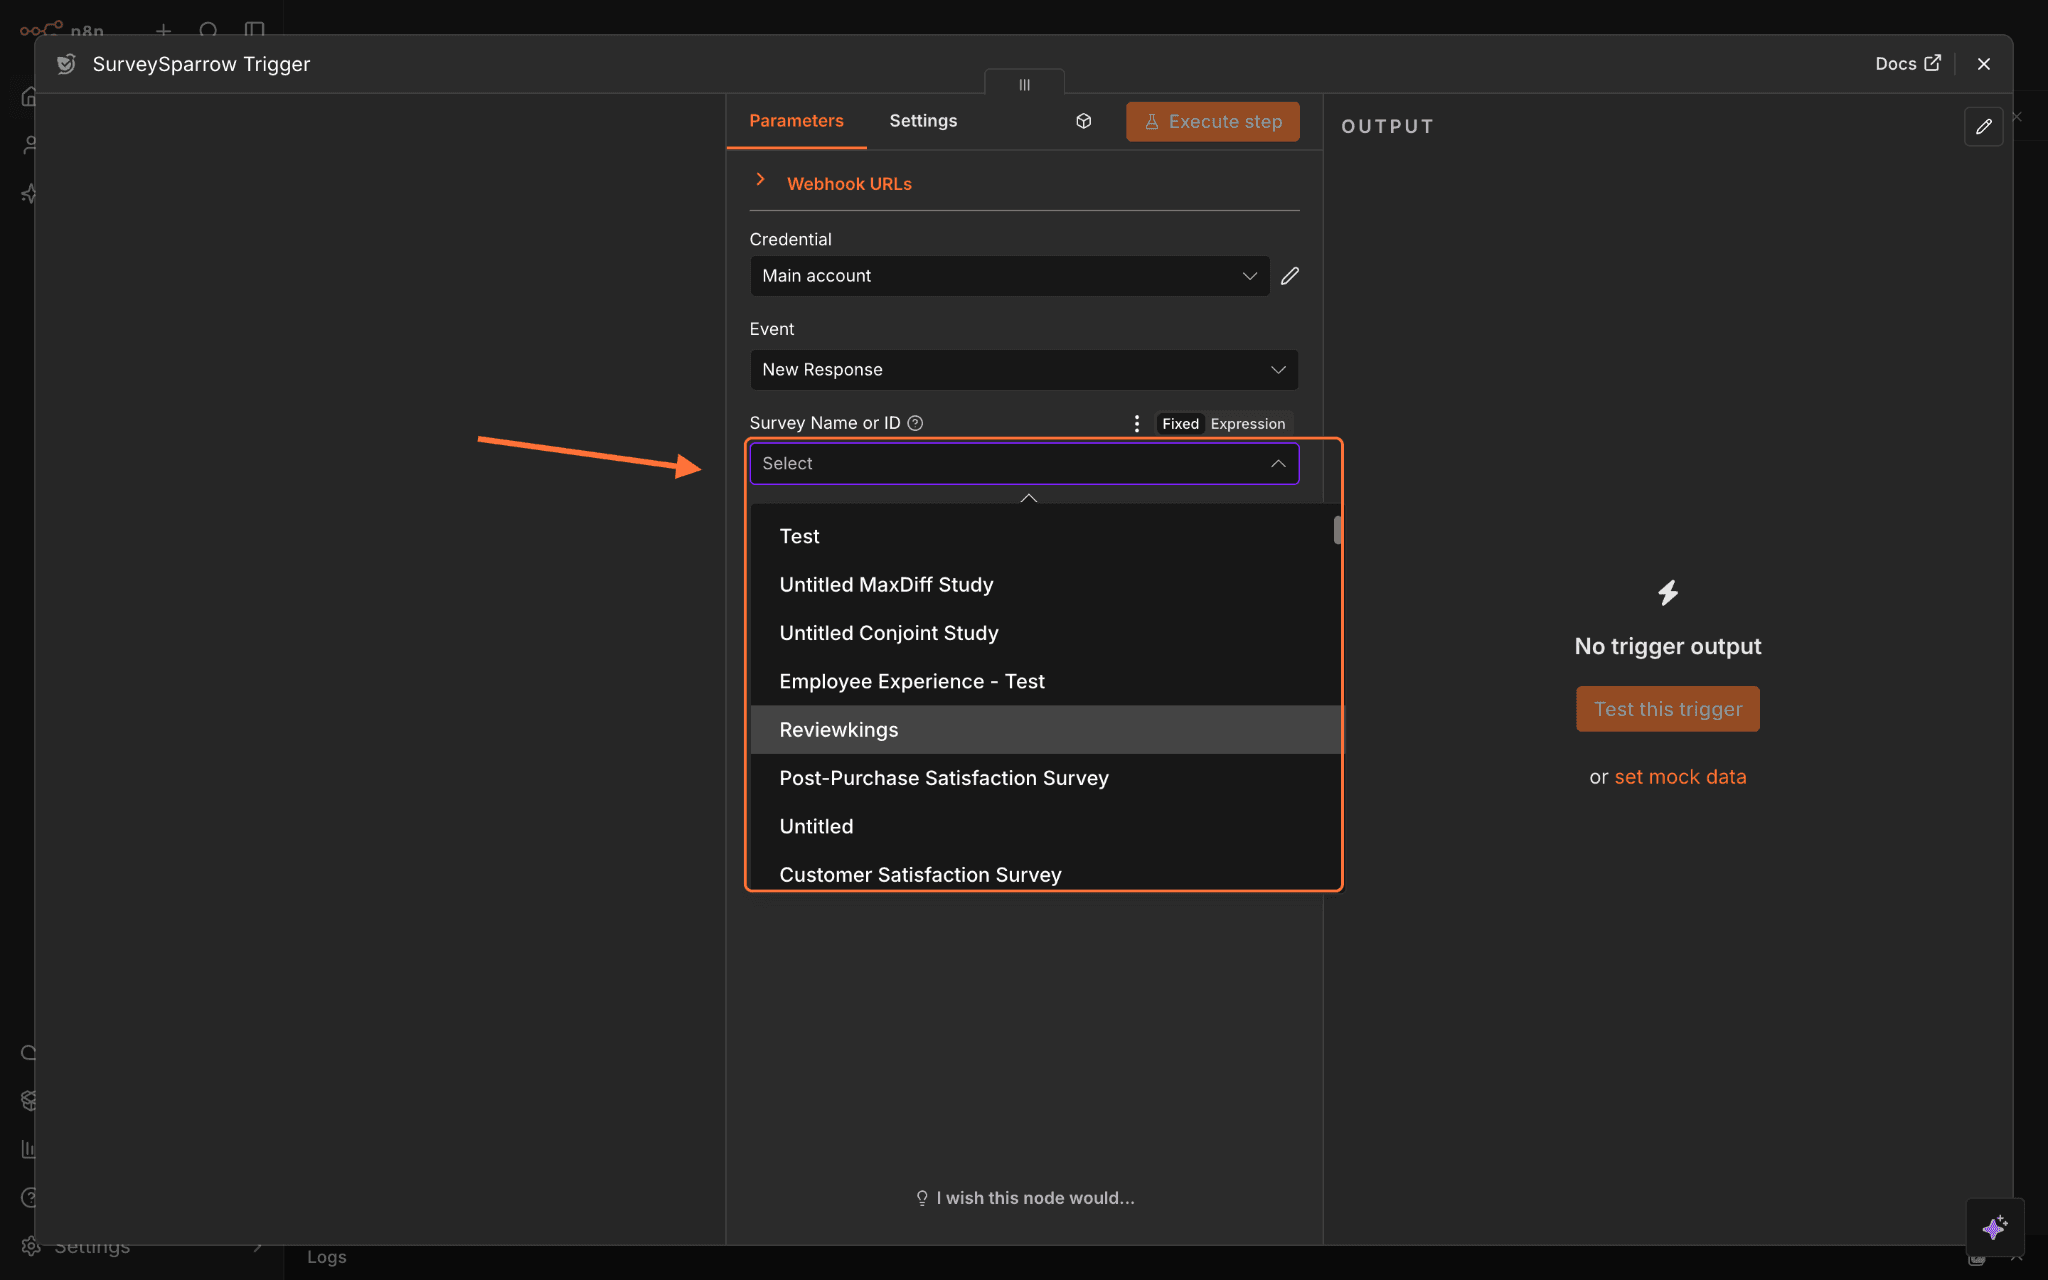
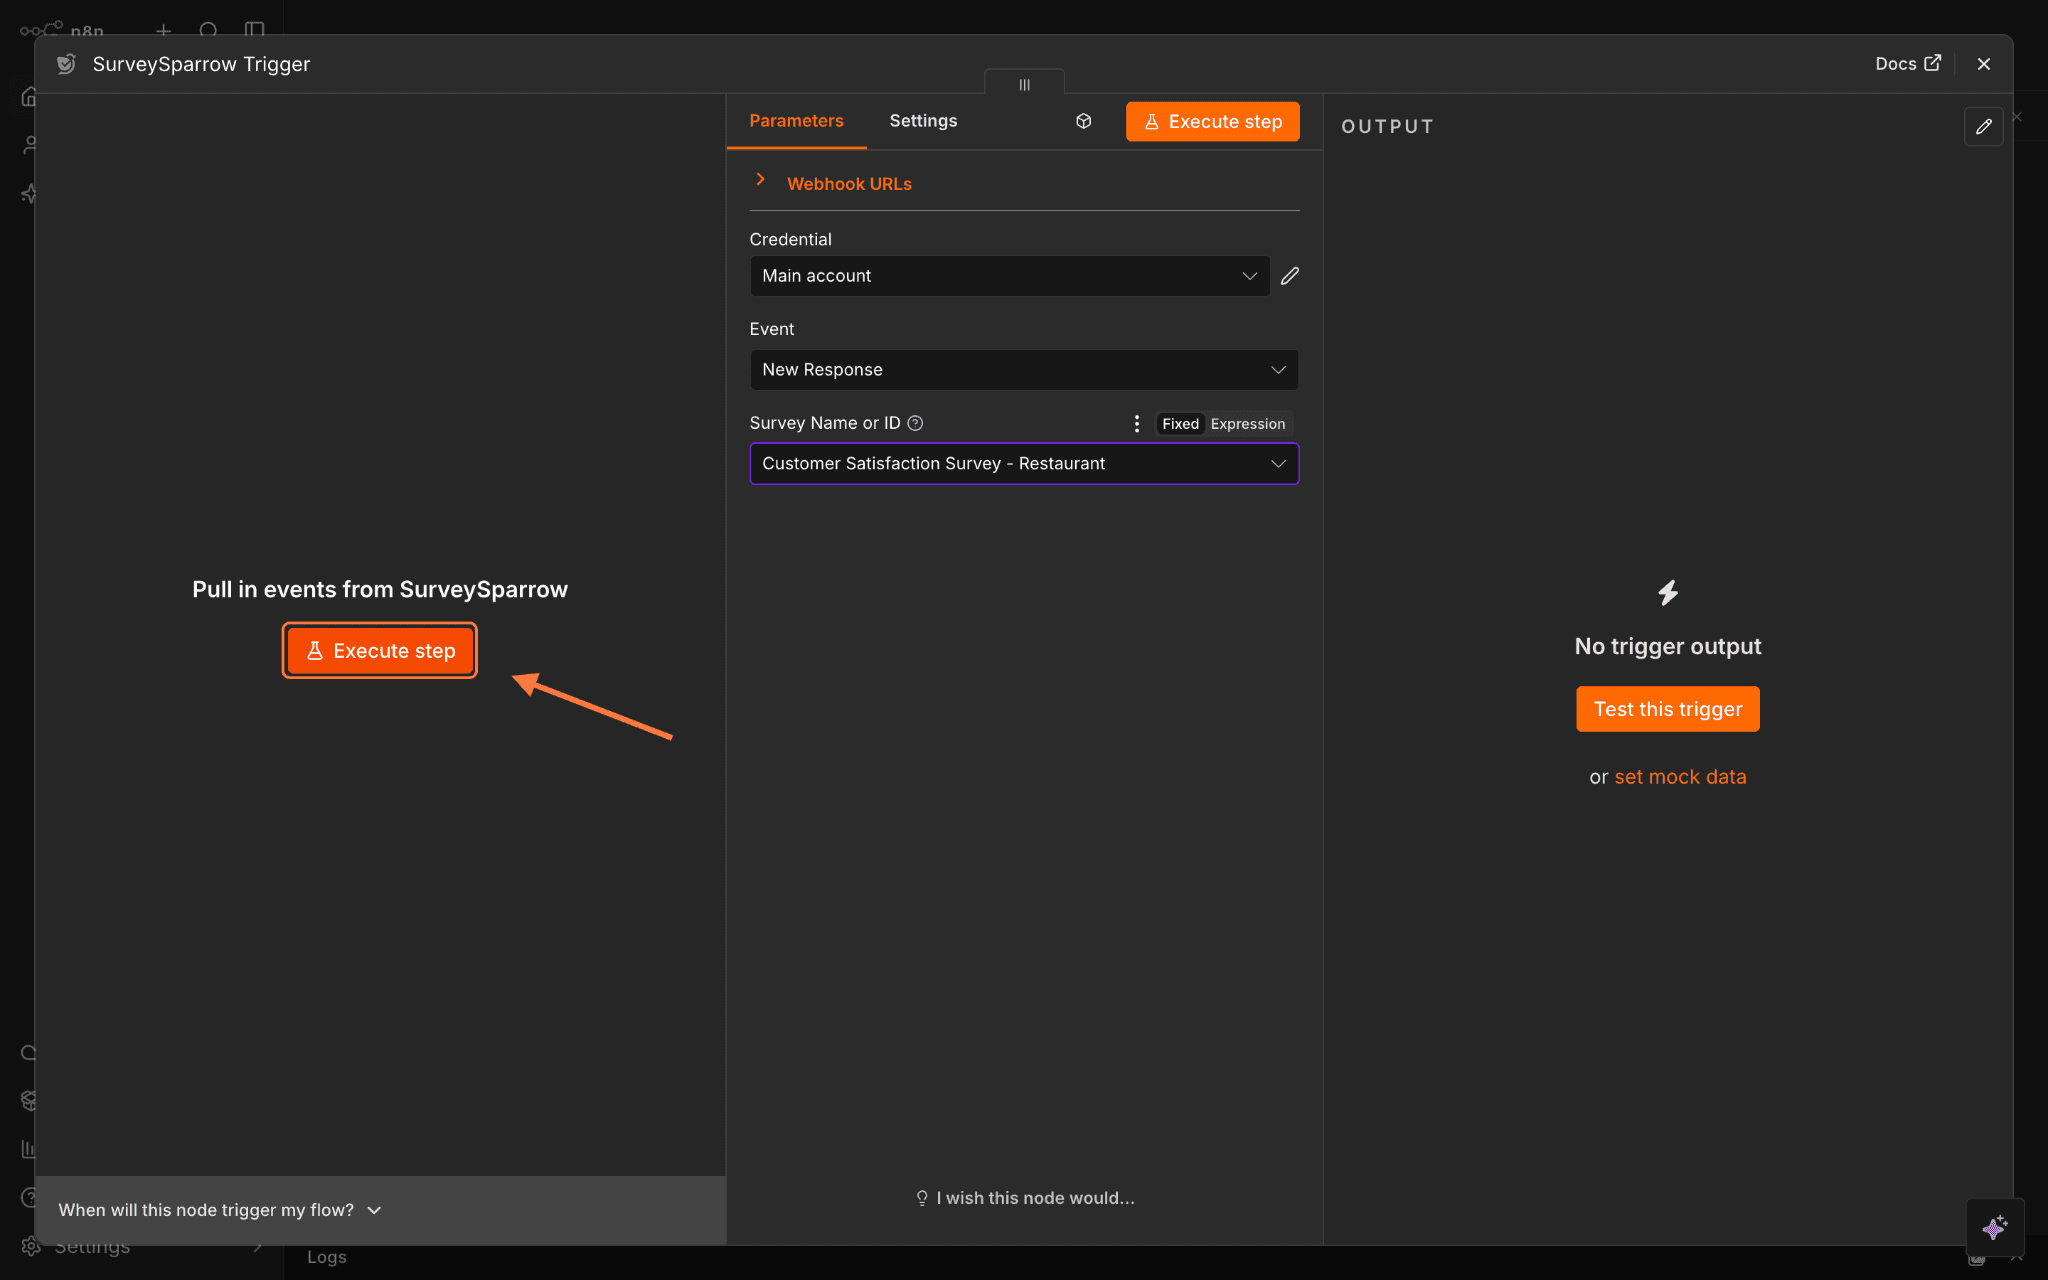
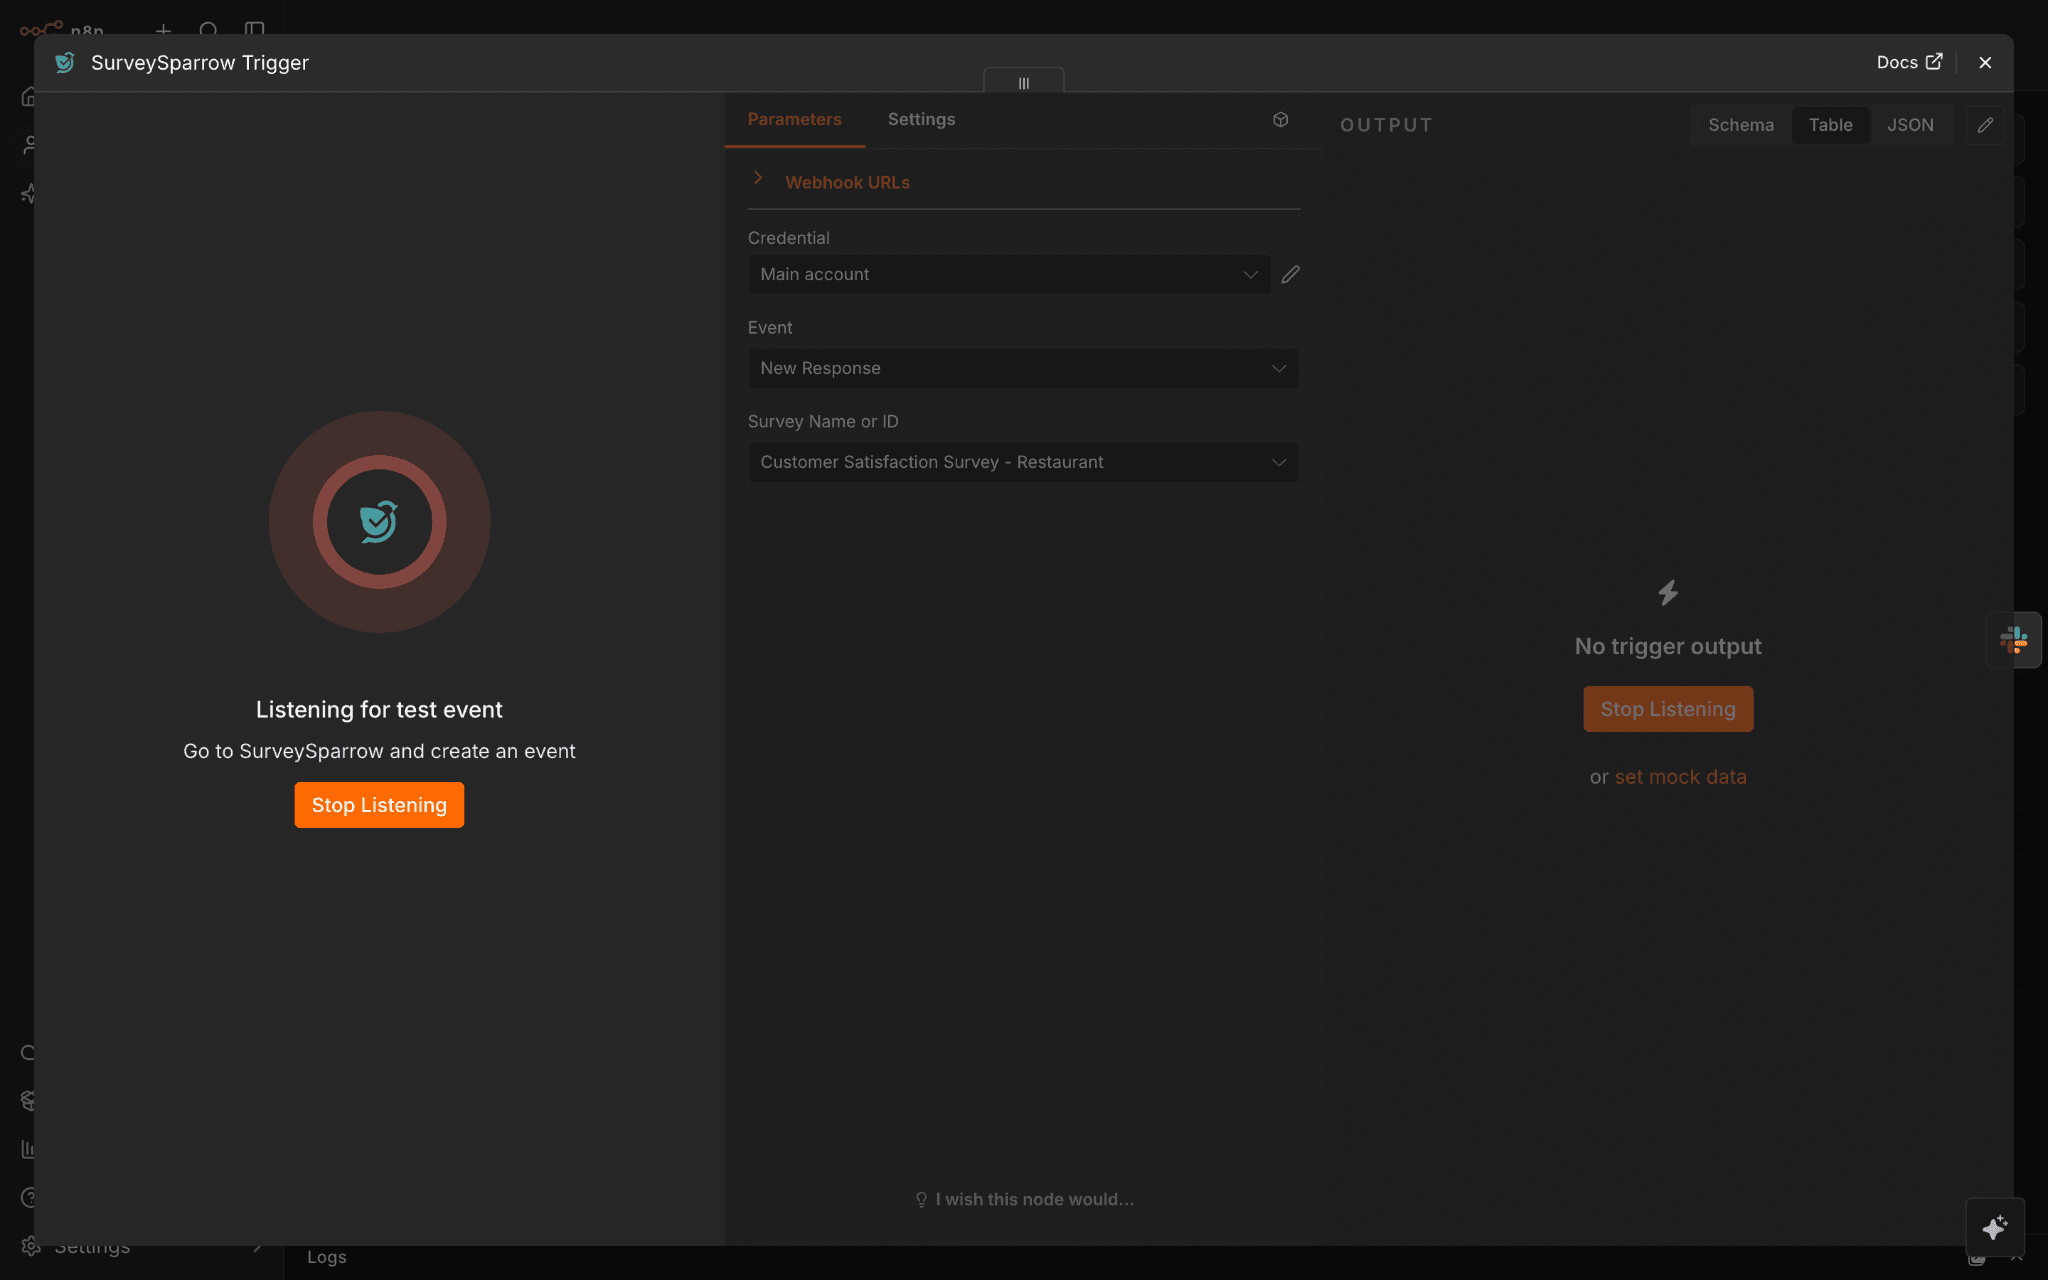
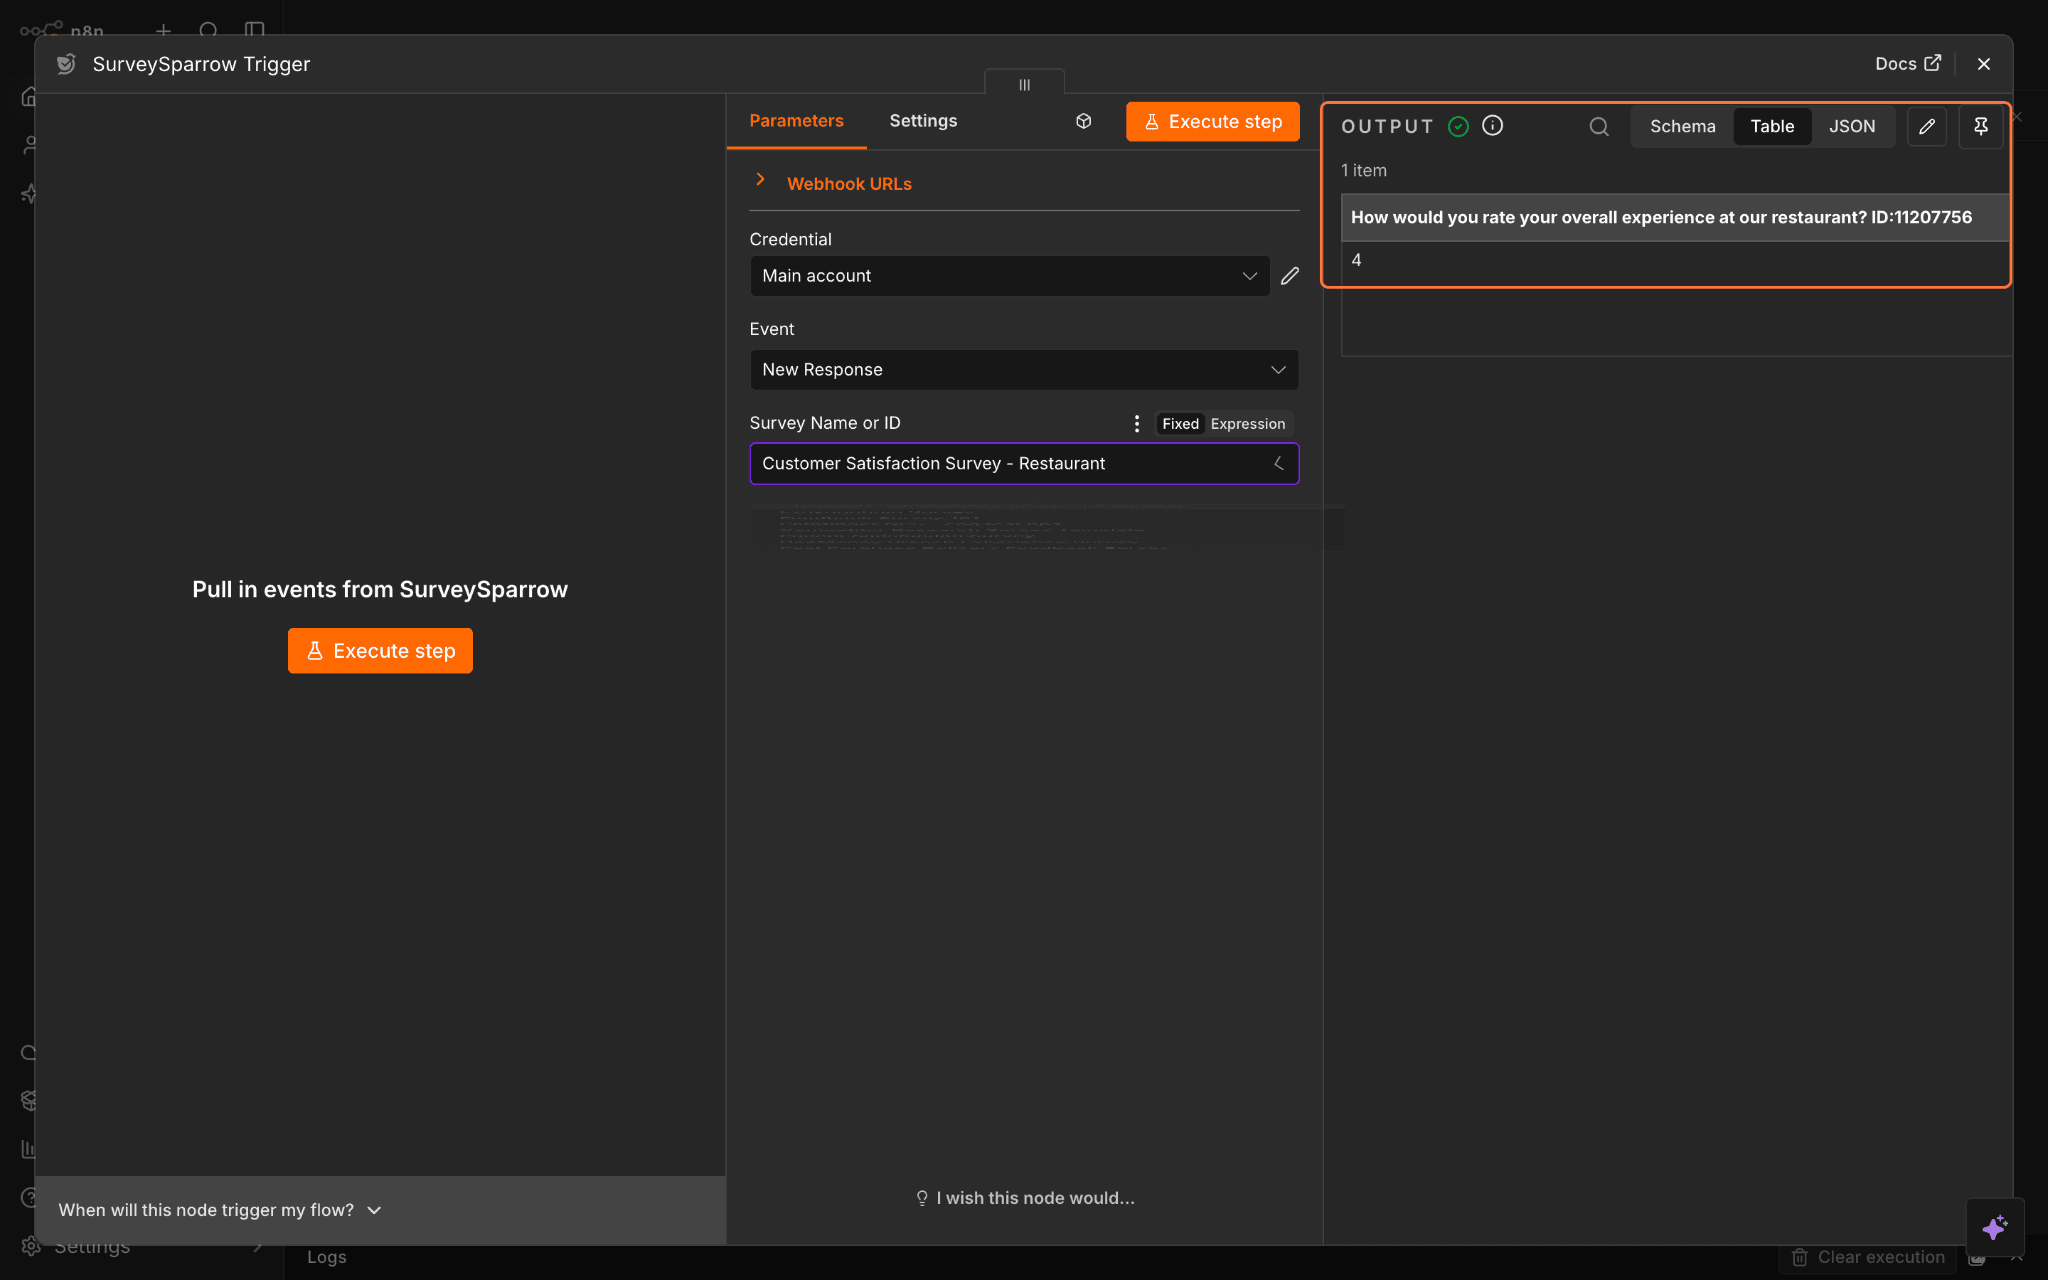
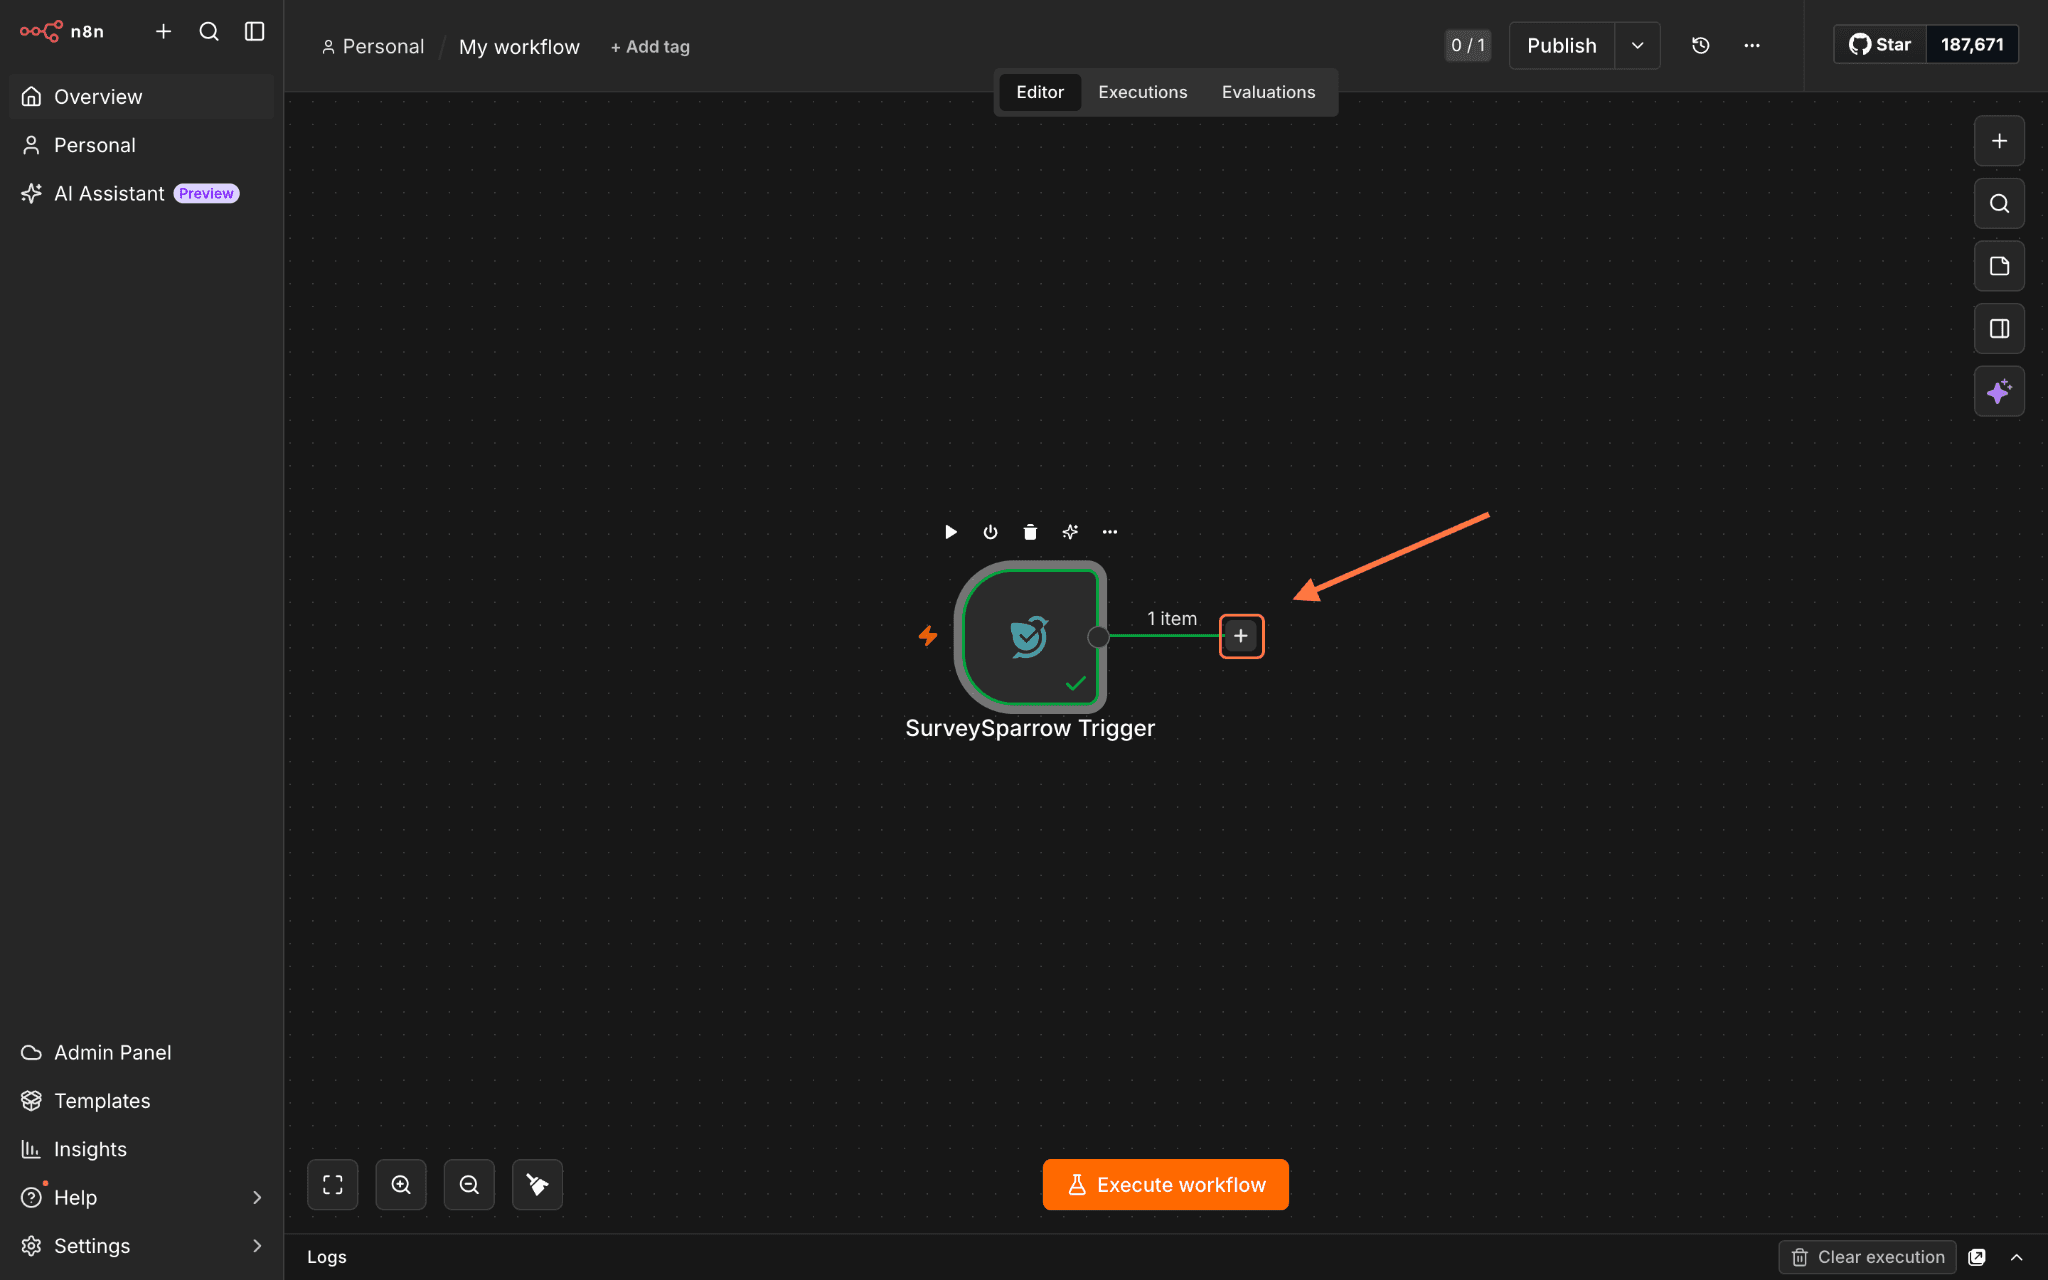
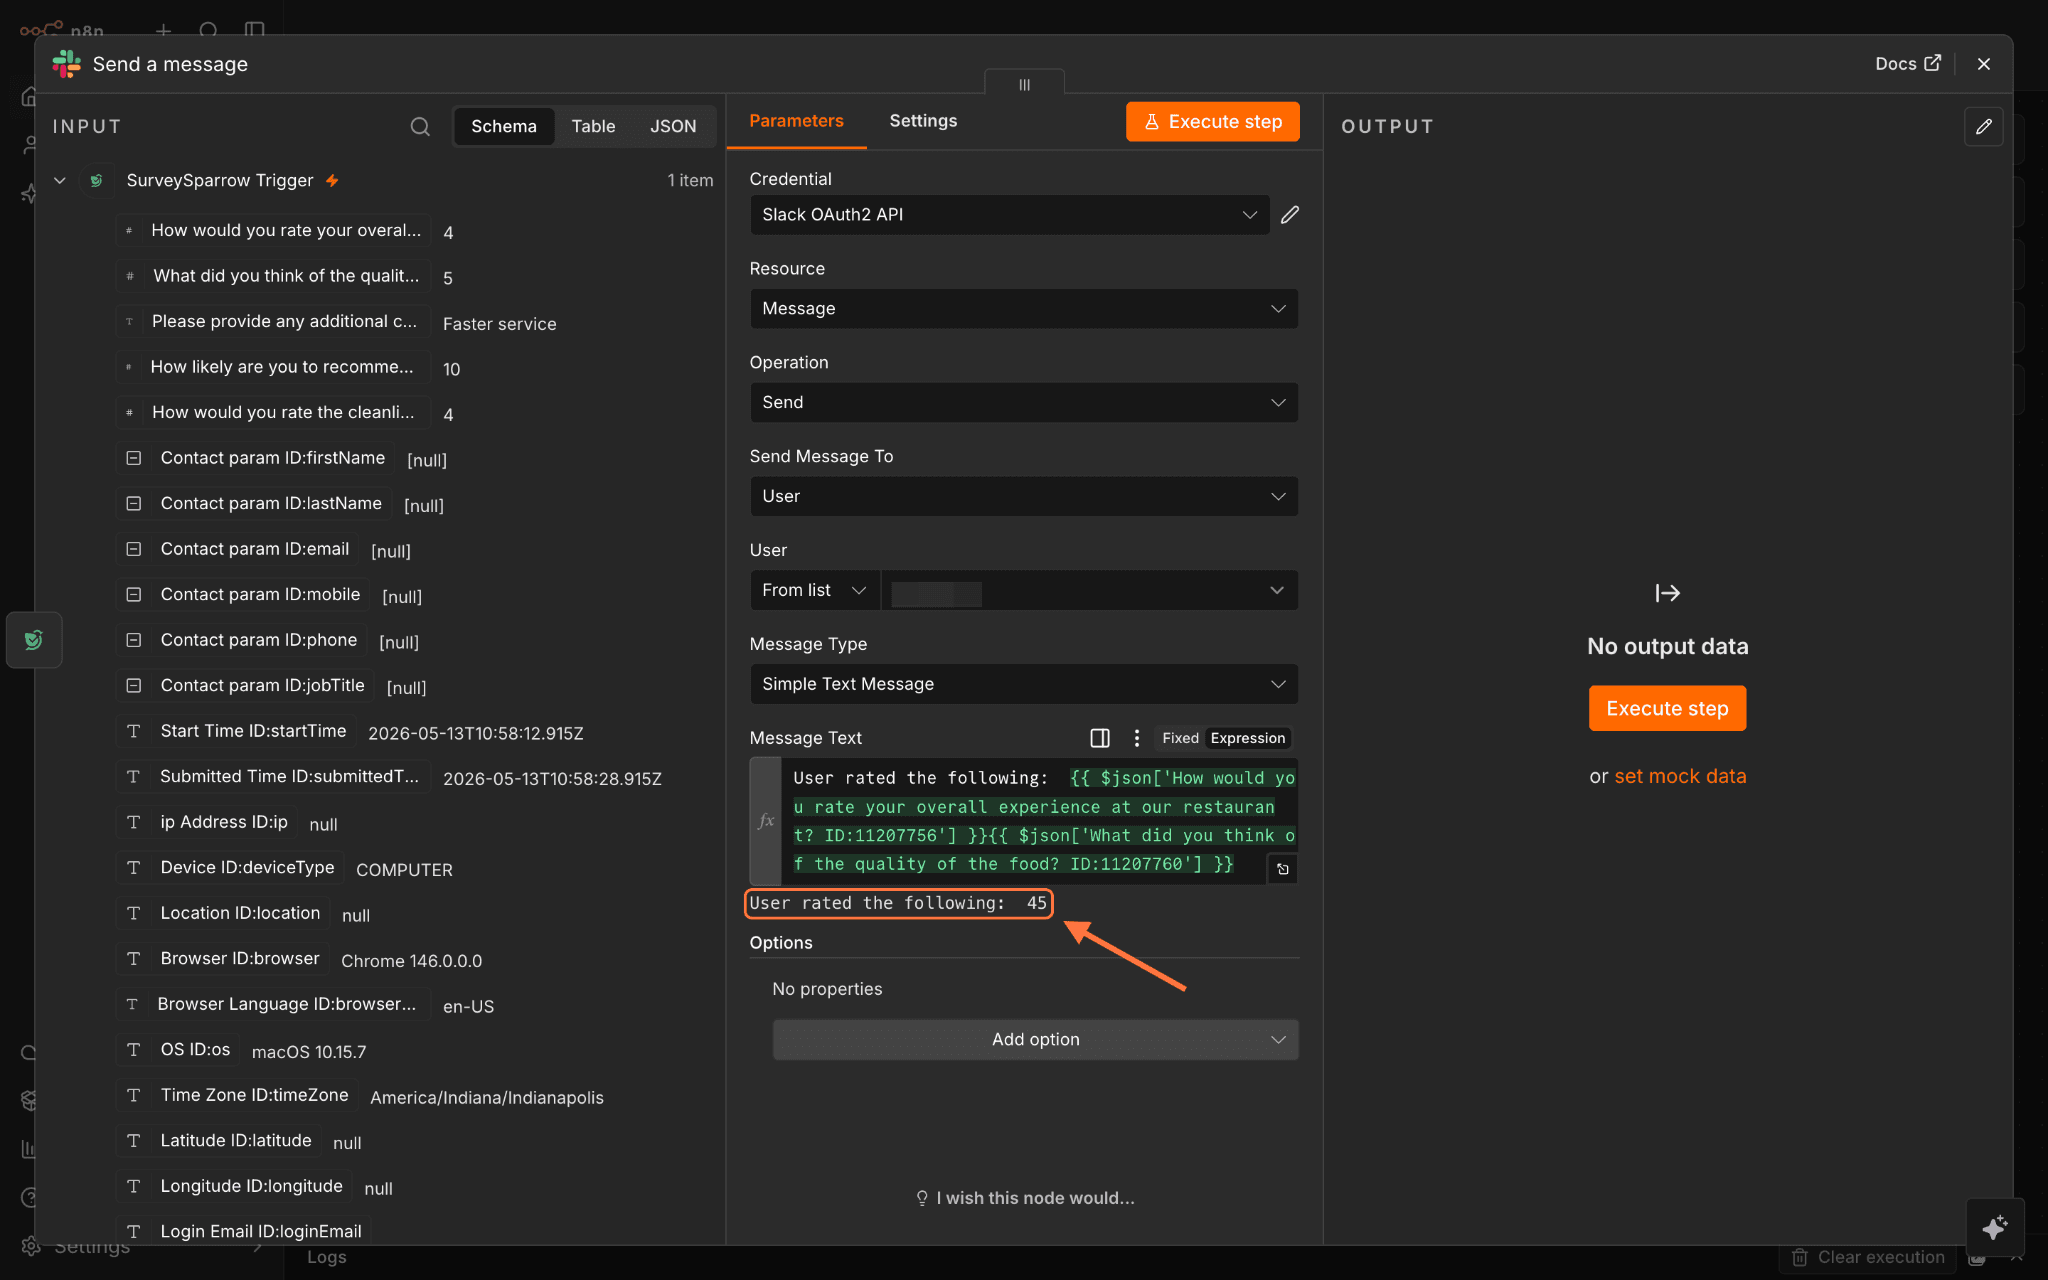
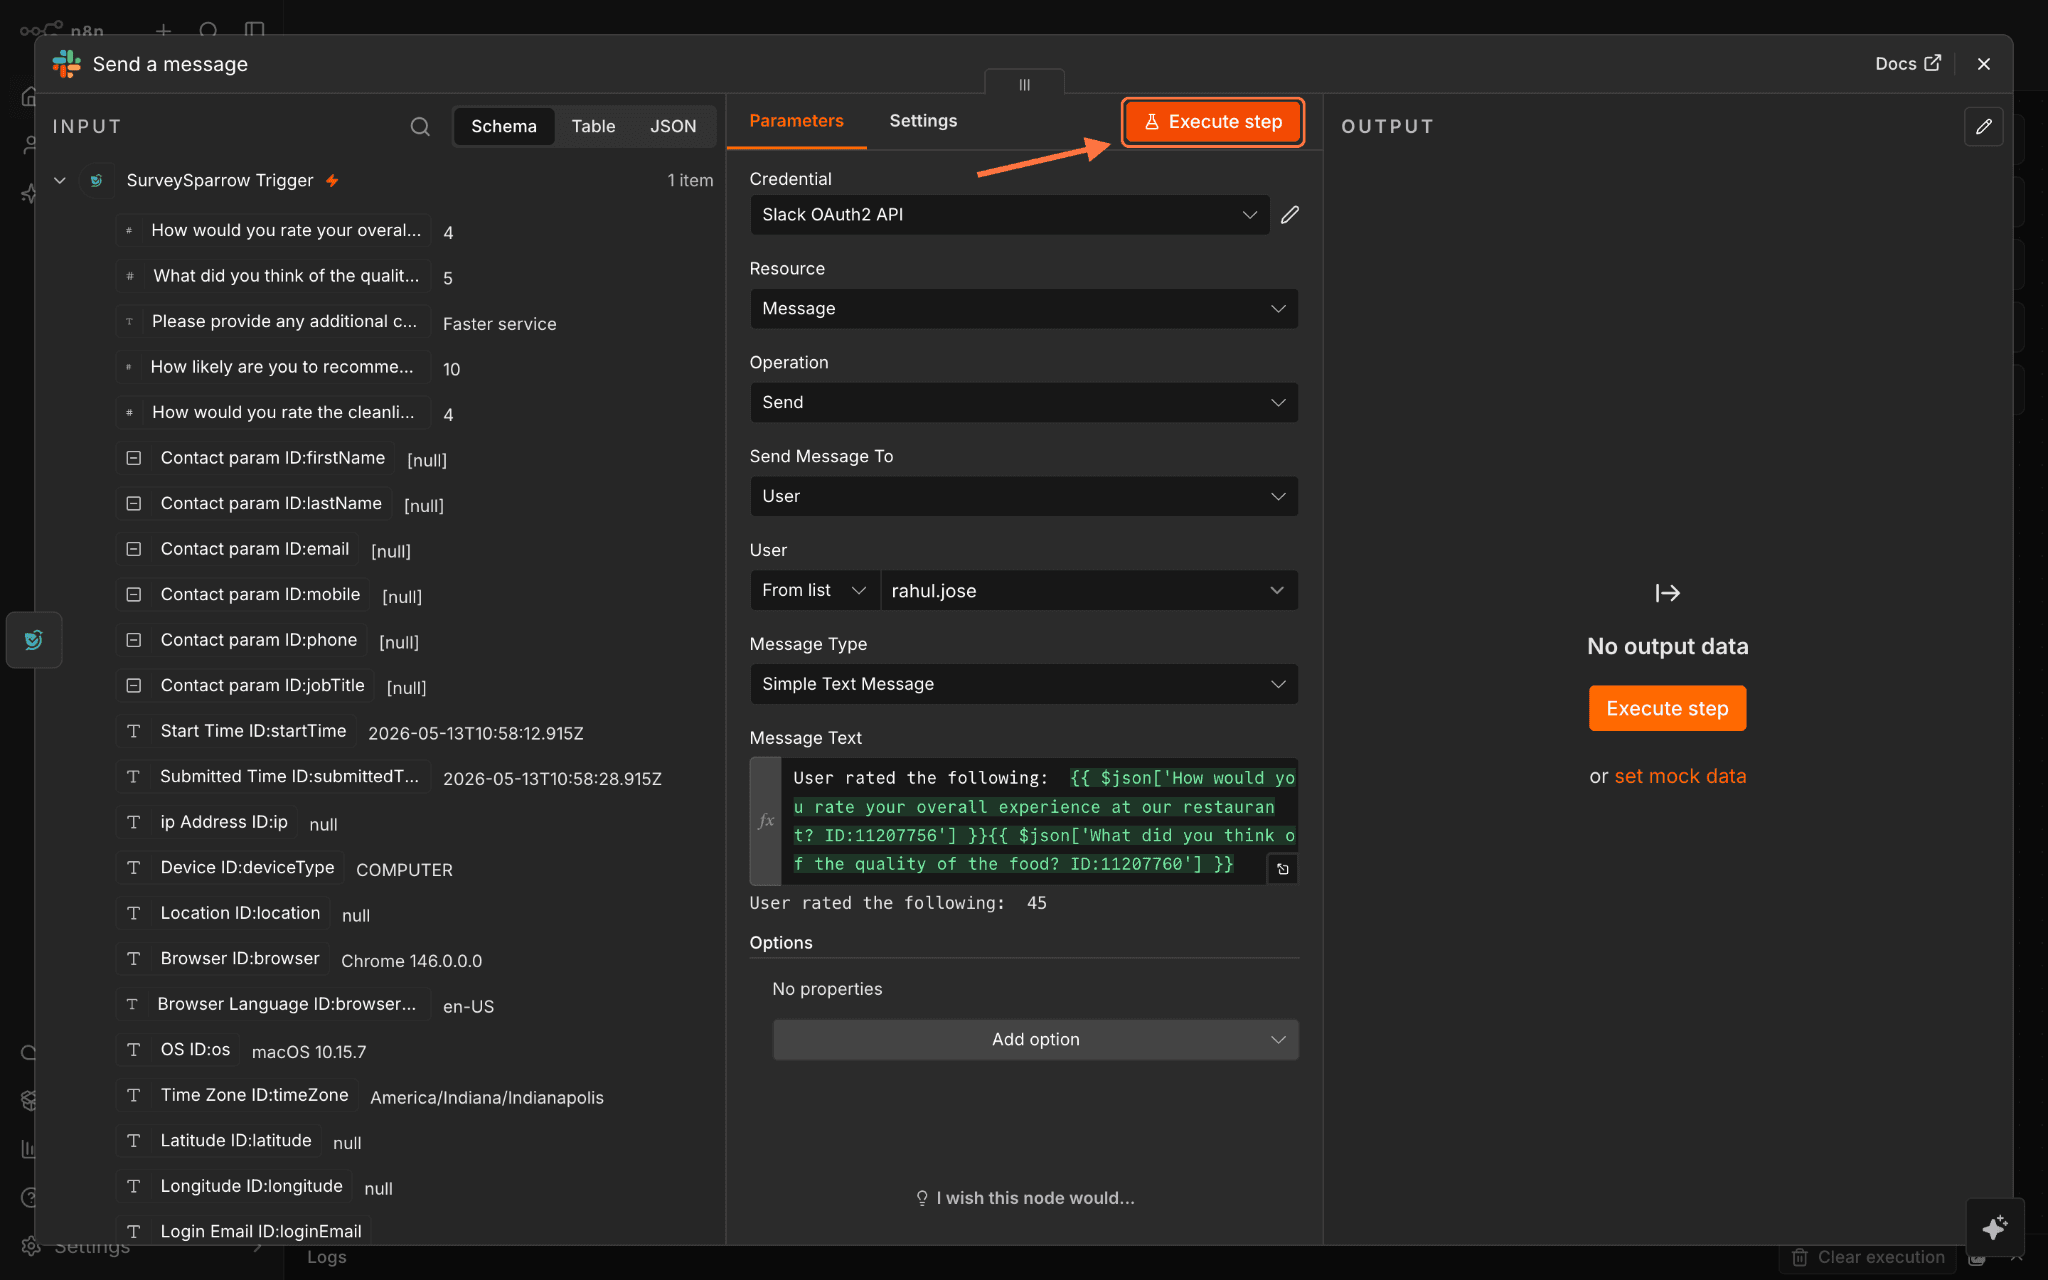
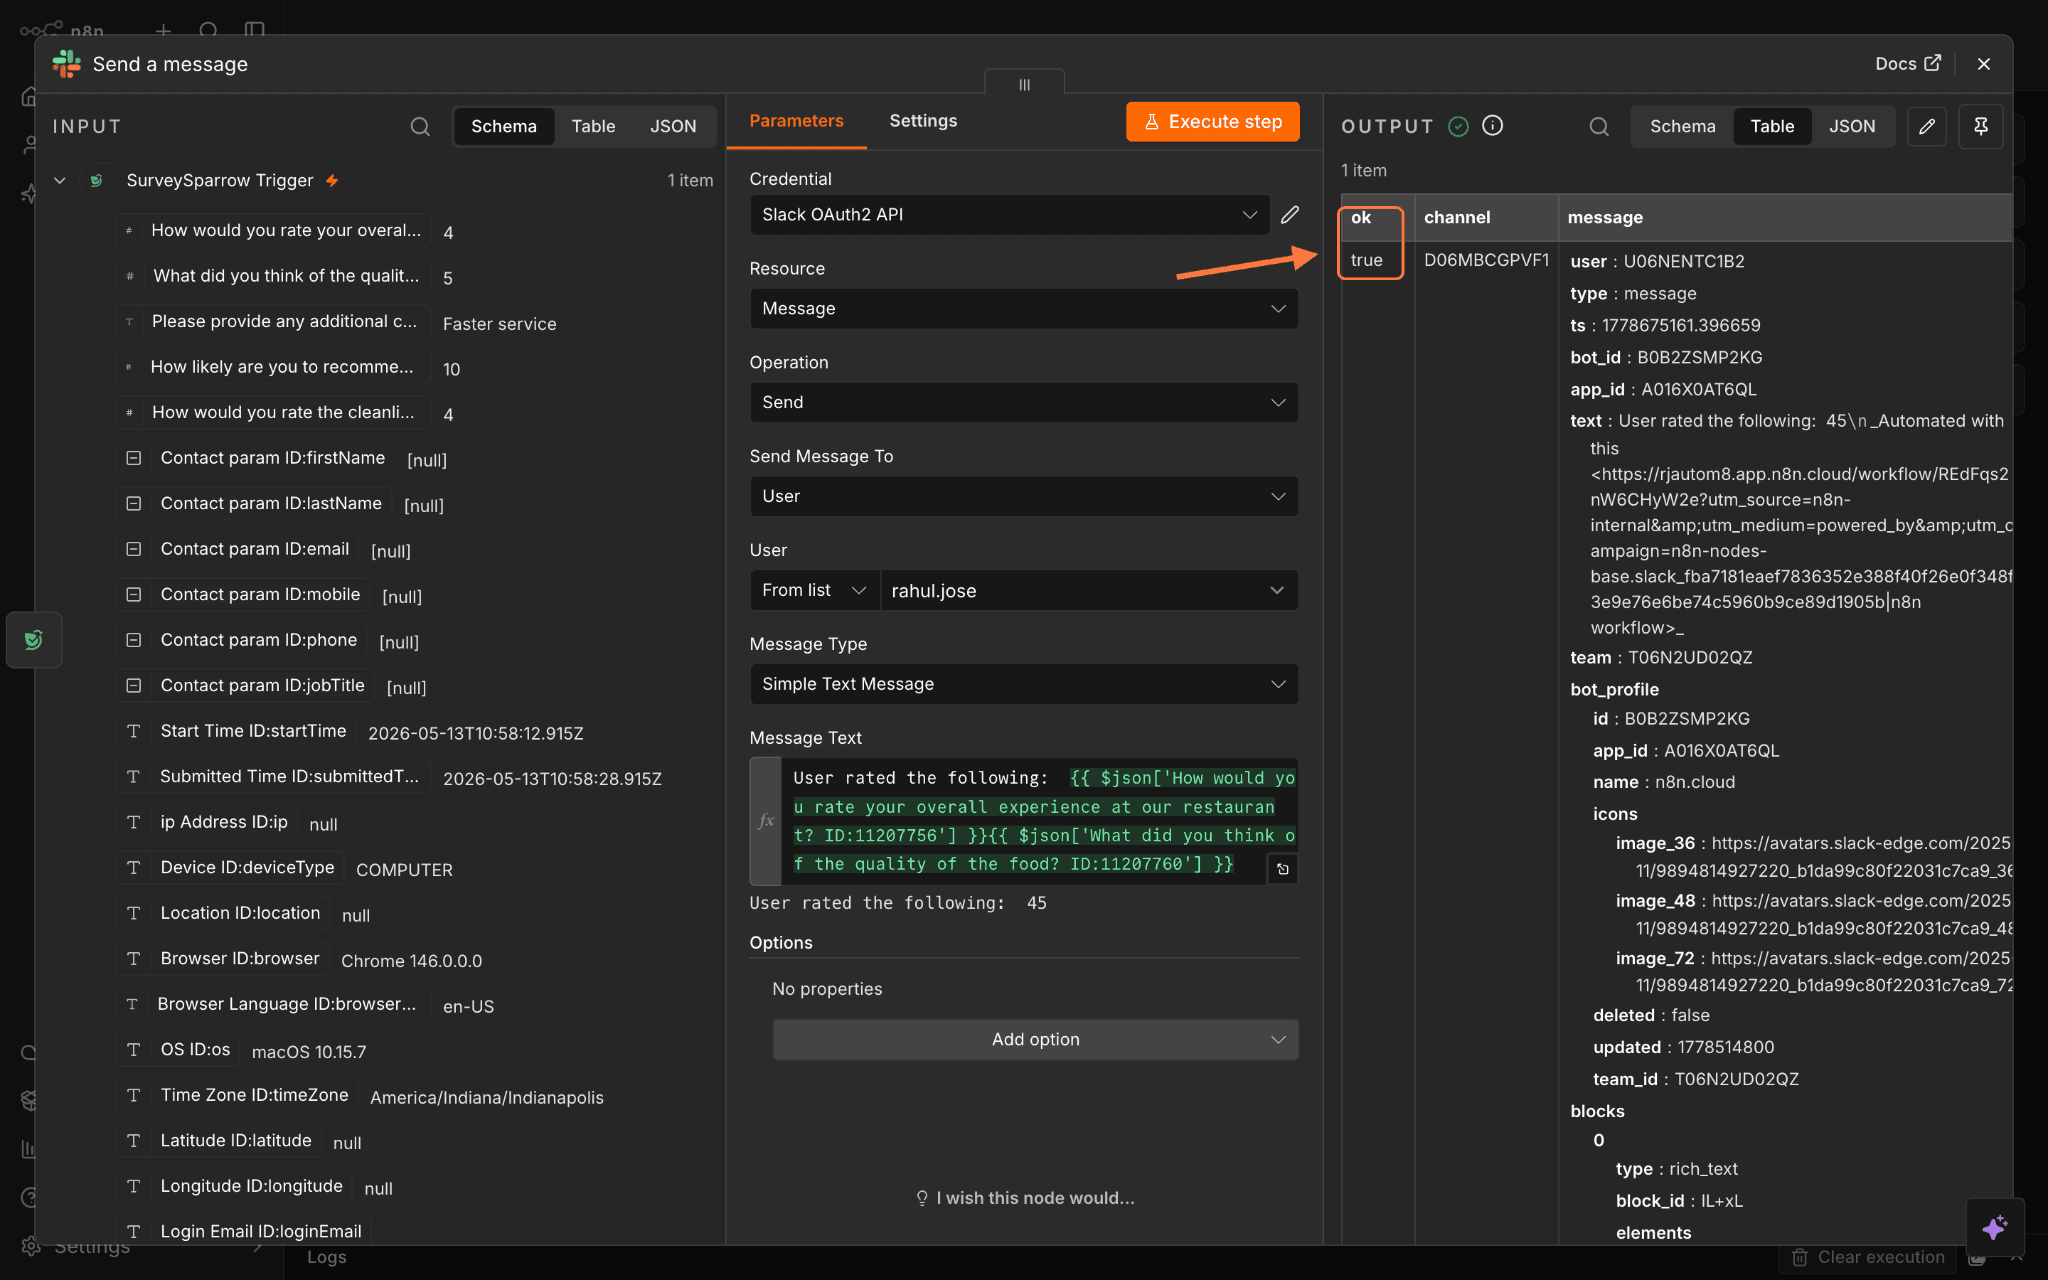
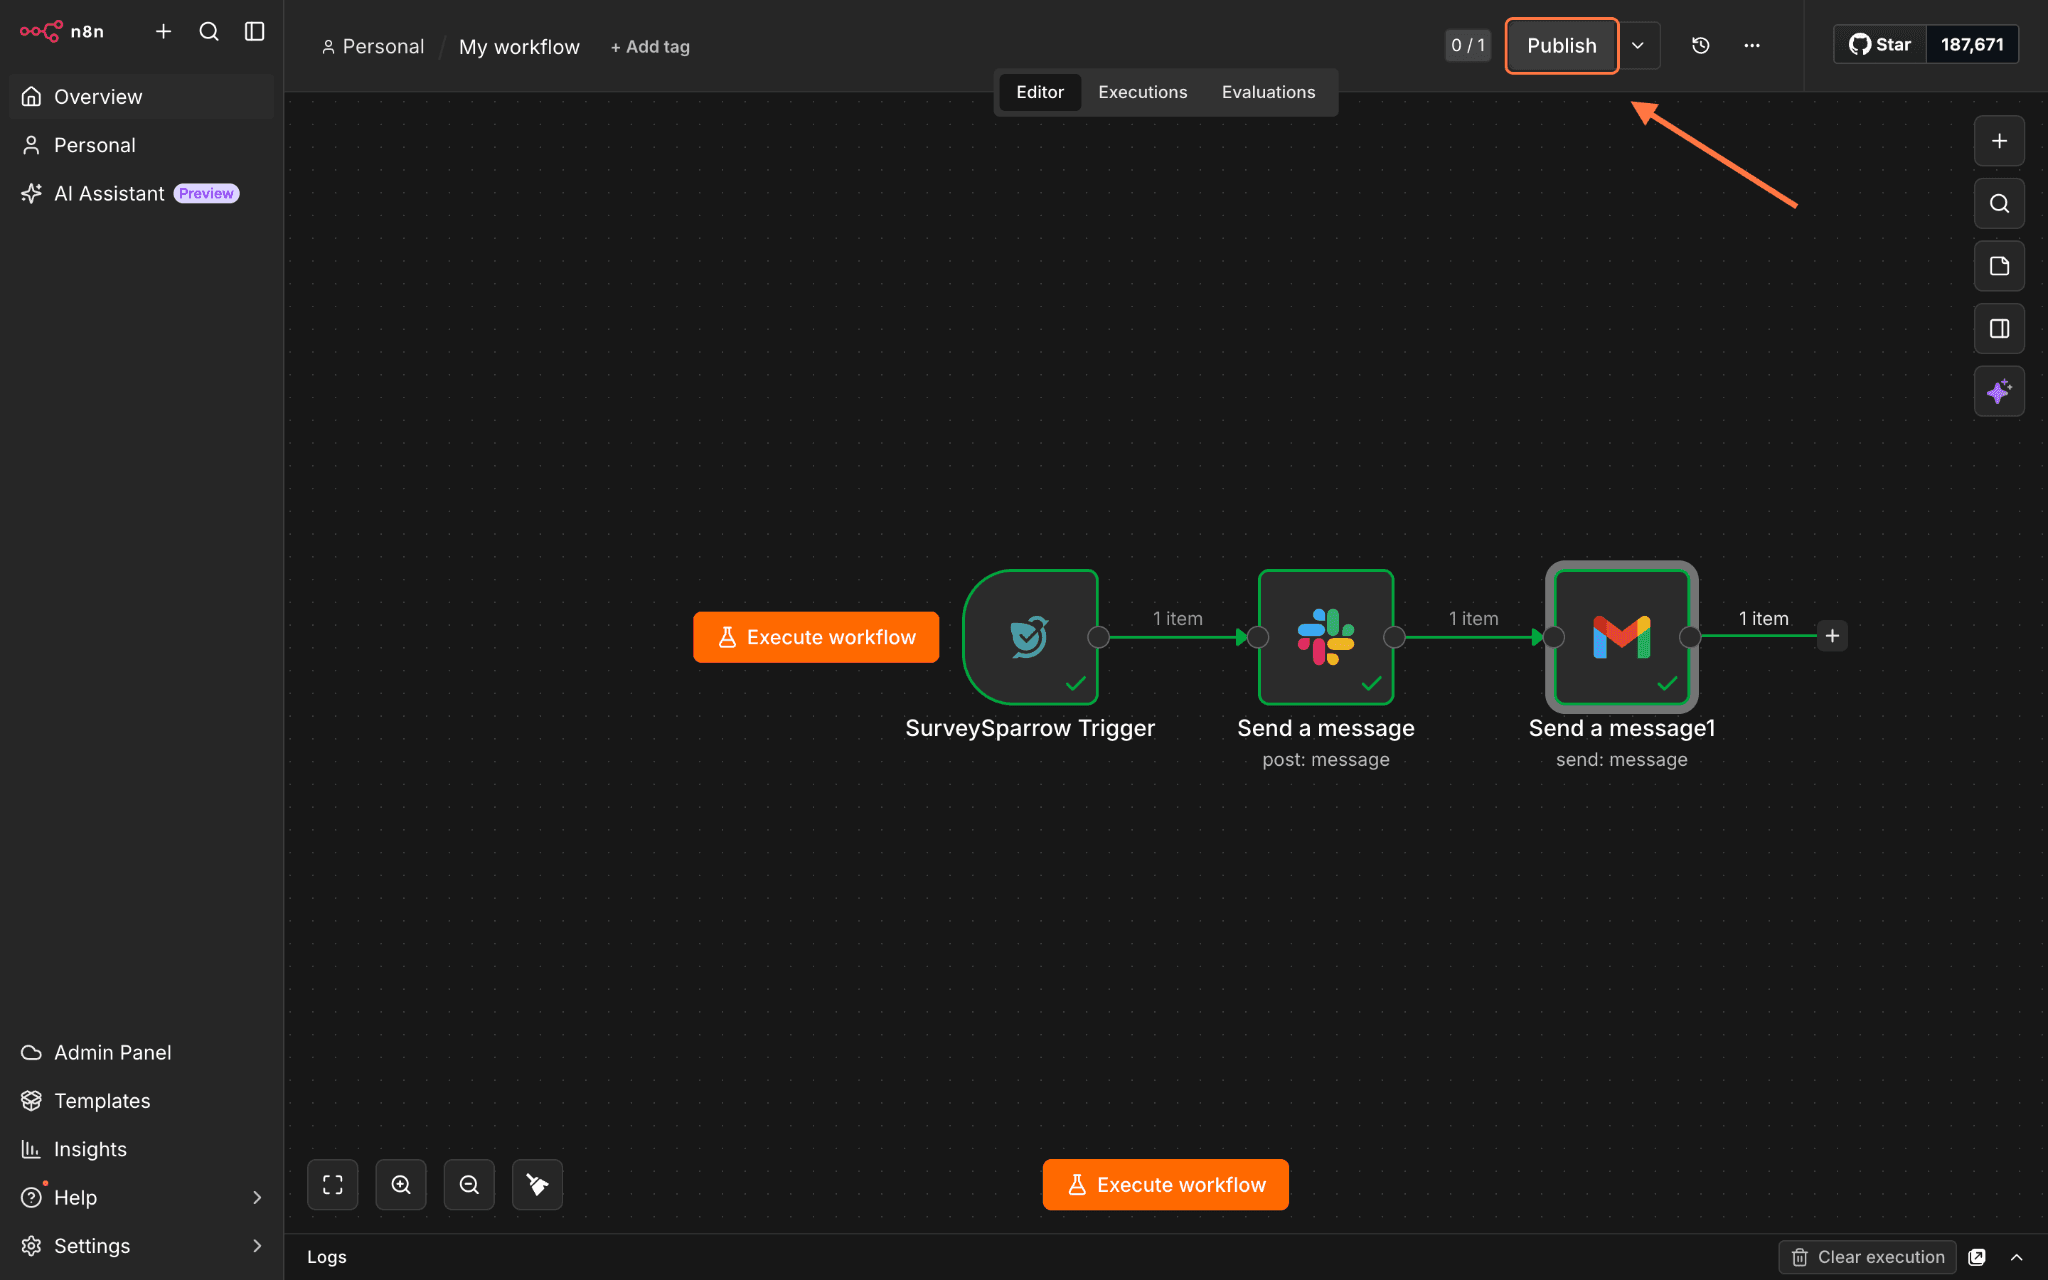
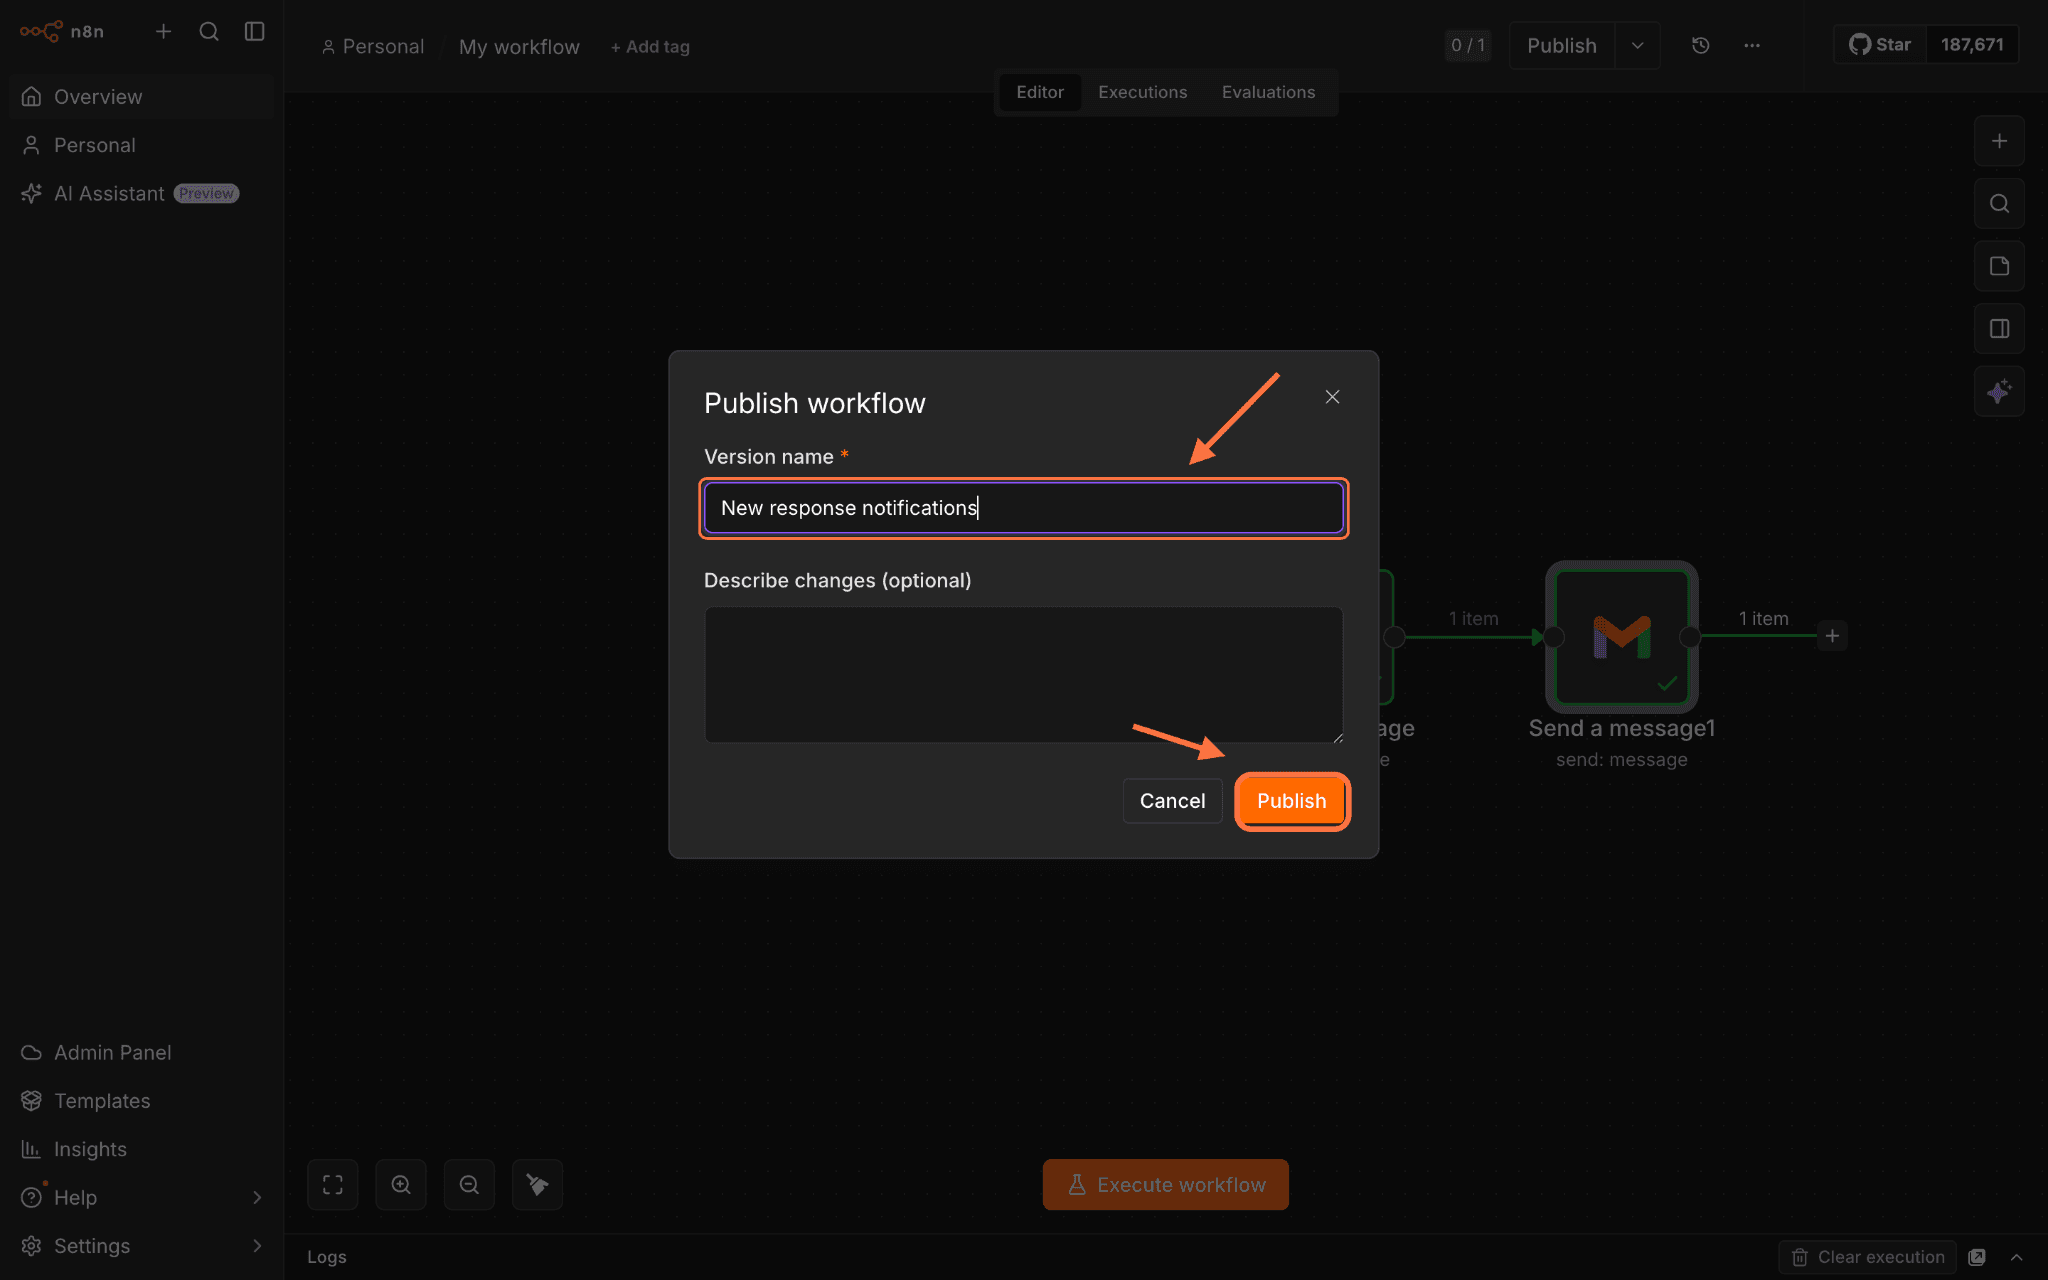
1. Inside your n8n workflow builder, open the SurveySparrow node and click On new response under the Triggers section.2. Your credential and event are already defined. Click on the drop-down menu under Survey Name or ID, and select the survey you want to trigger.3. If you want to verify that the node is working as intended, you can set it to identify an event (a new response submission) from SurveySparrow. Click on Execute Step.4. The node will ‘listen’/monitor the survey for a new response. Open the survey and fill it out to create a test event.5. When the node detects the response, you will see an output on the side. This means that the node is working as expected.6. Exit the node. When you’re back in the workflow builder, click on the plus icon to add other nodes that will perform actions.7. You can also pass response data from the response to the actions performed by other nodes. For example, we’ve added a Slack node to send a message whenever a new response is received. We want to include some of the answers in the message as well. So on the left side of the configuration screen, there’s an Input menu with data properties and data from the test event (response). We will drag and drop some of the response fields into the Message Text field.When you add response fields, you will also have a preview of the actual workflow output right below the text field.8. Click on Execute Step to ensure that the node is performing as expected. Keep in mind that only the test event data will be used by the second node. After execution, you will see a table inside the Output section. If the value under the ok column is true, the node runs successfully.9. Add as many nodes as needed, then hit Publish. Provide a version name and hit Publish once again.
Creating actions using the SurveySparrow node
In addition to a trigger, the SurveySparrow node also supports two actions: sending a survey or creating a contact inside SurveySparrow. We’ll explore the steps and set up for both.
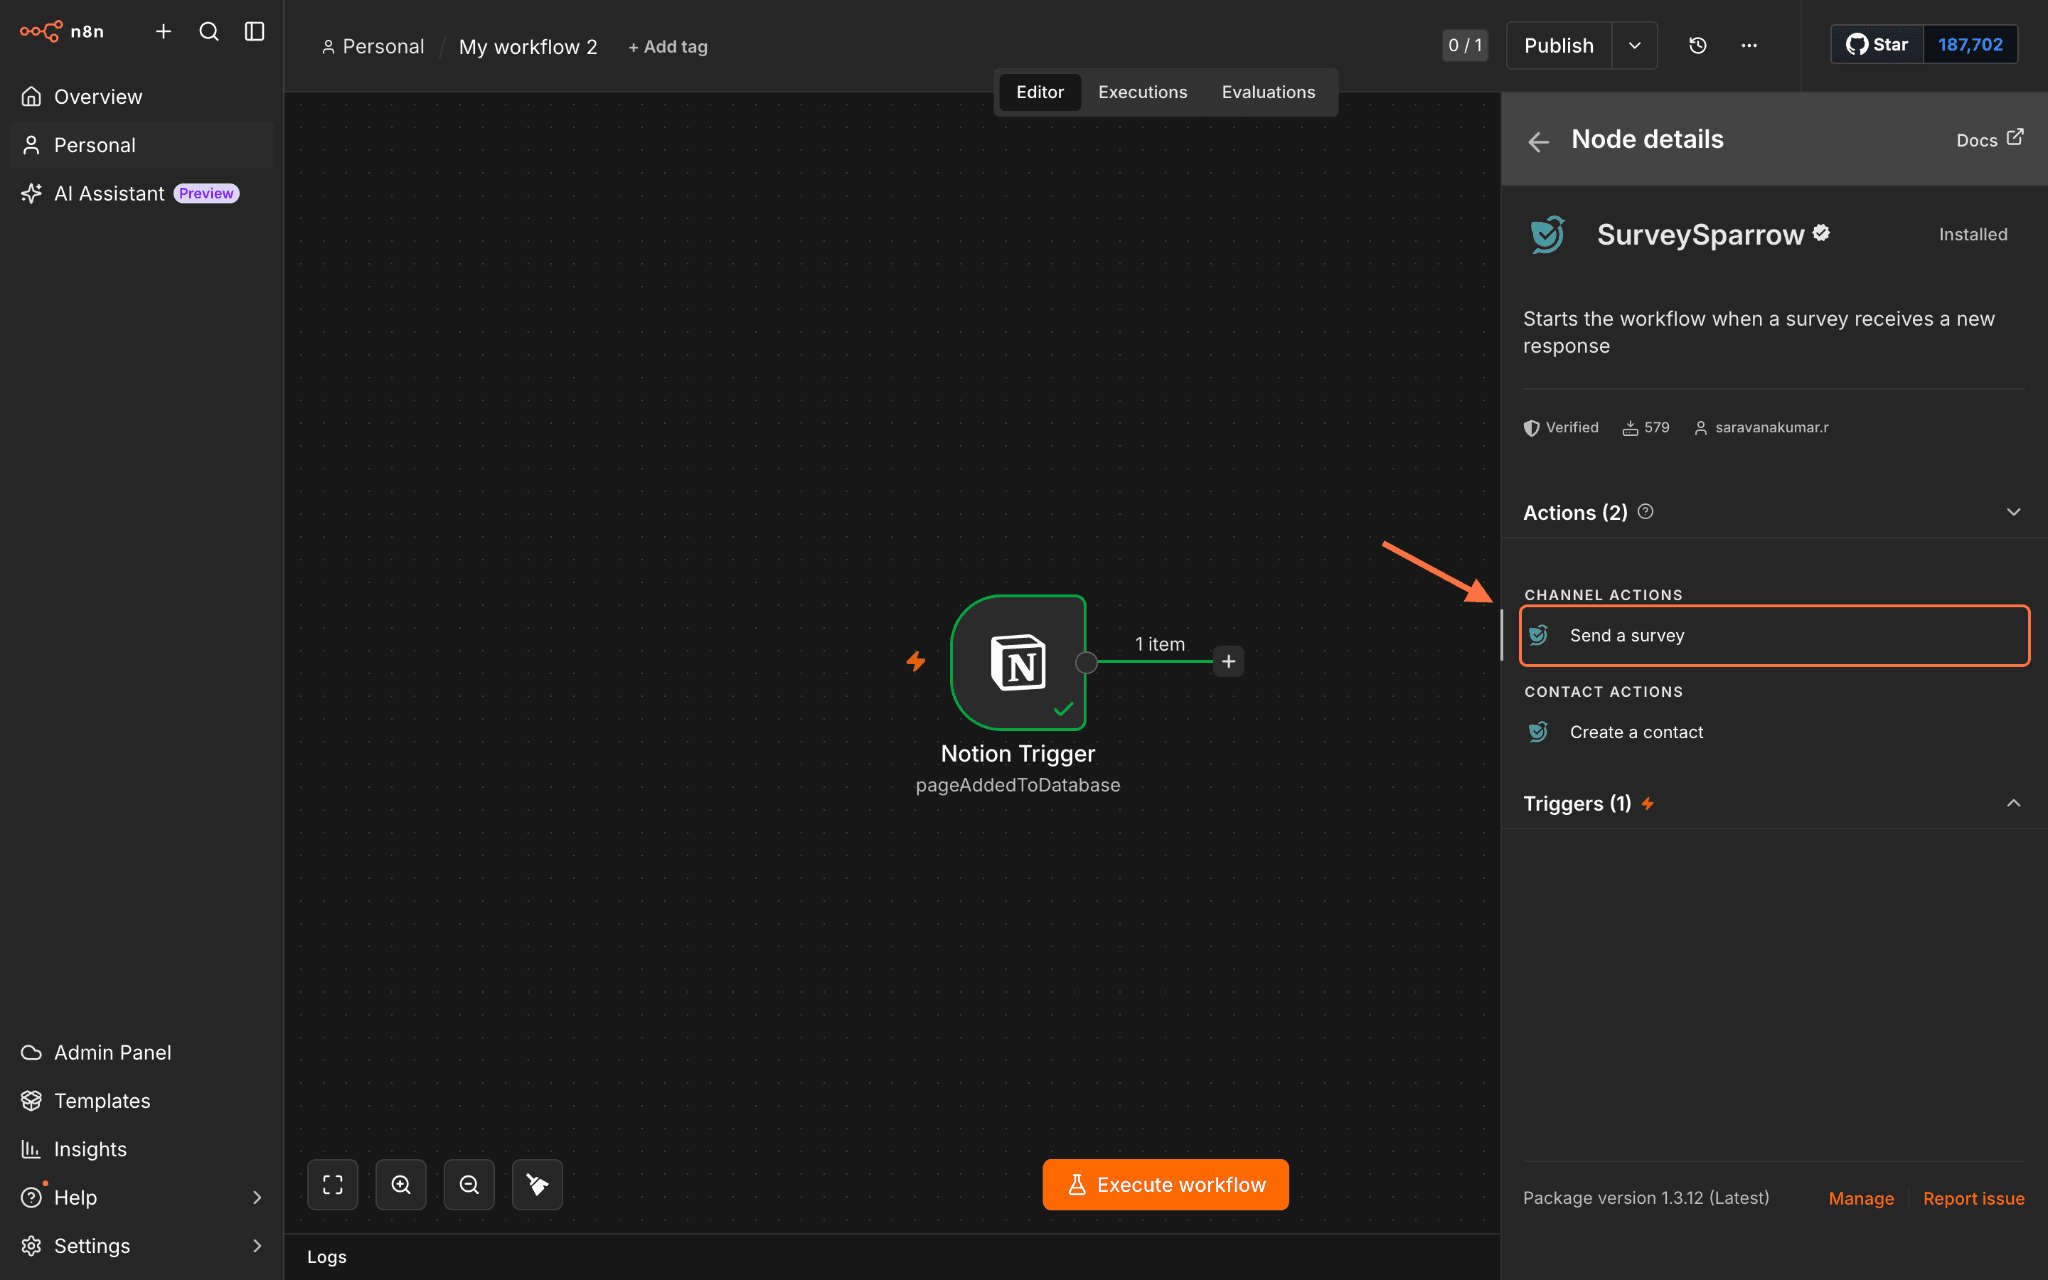
We’ve got a Notion node as the trigger (whenever a page is created in a database), and we’ll explore the setup process for both actions.
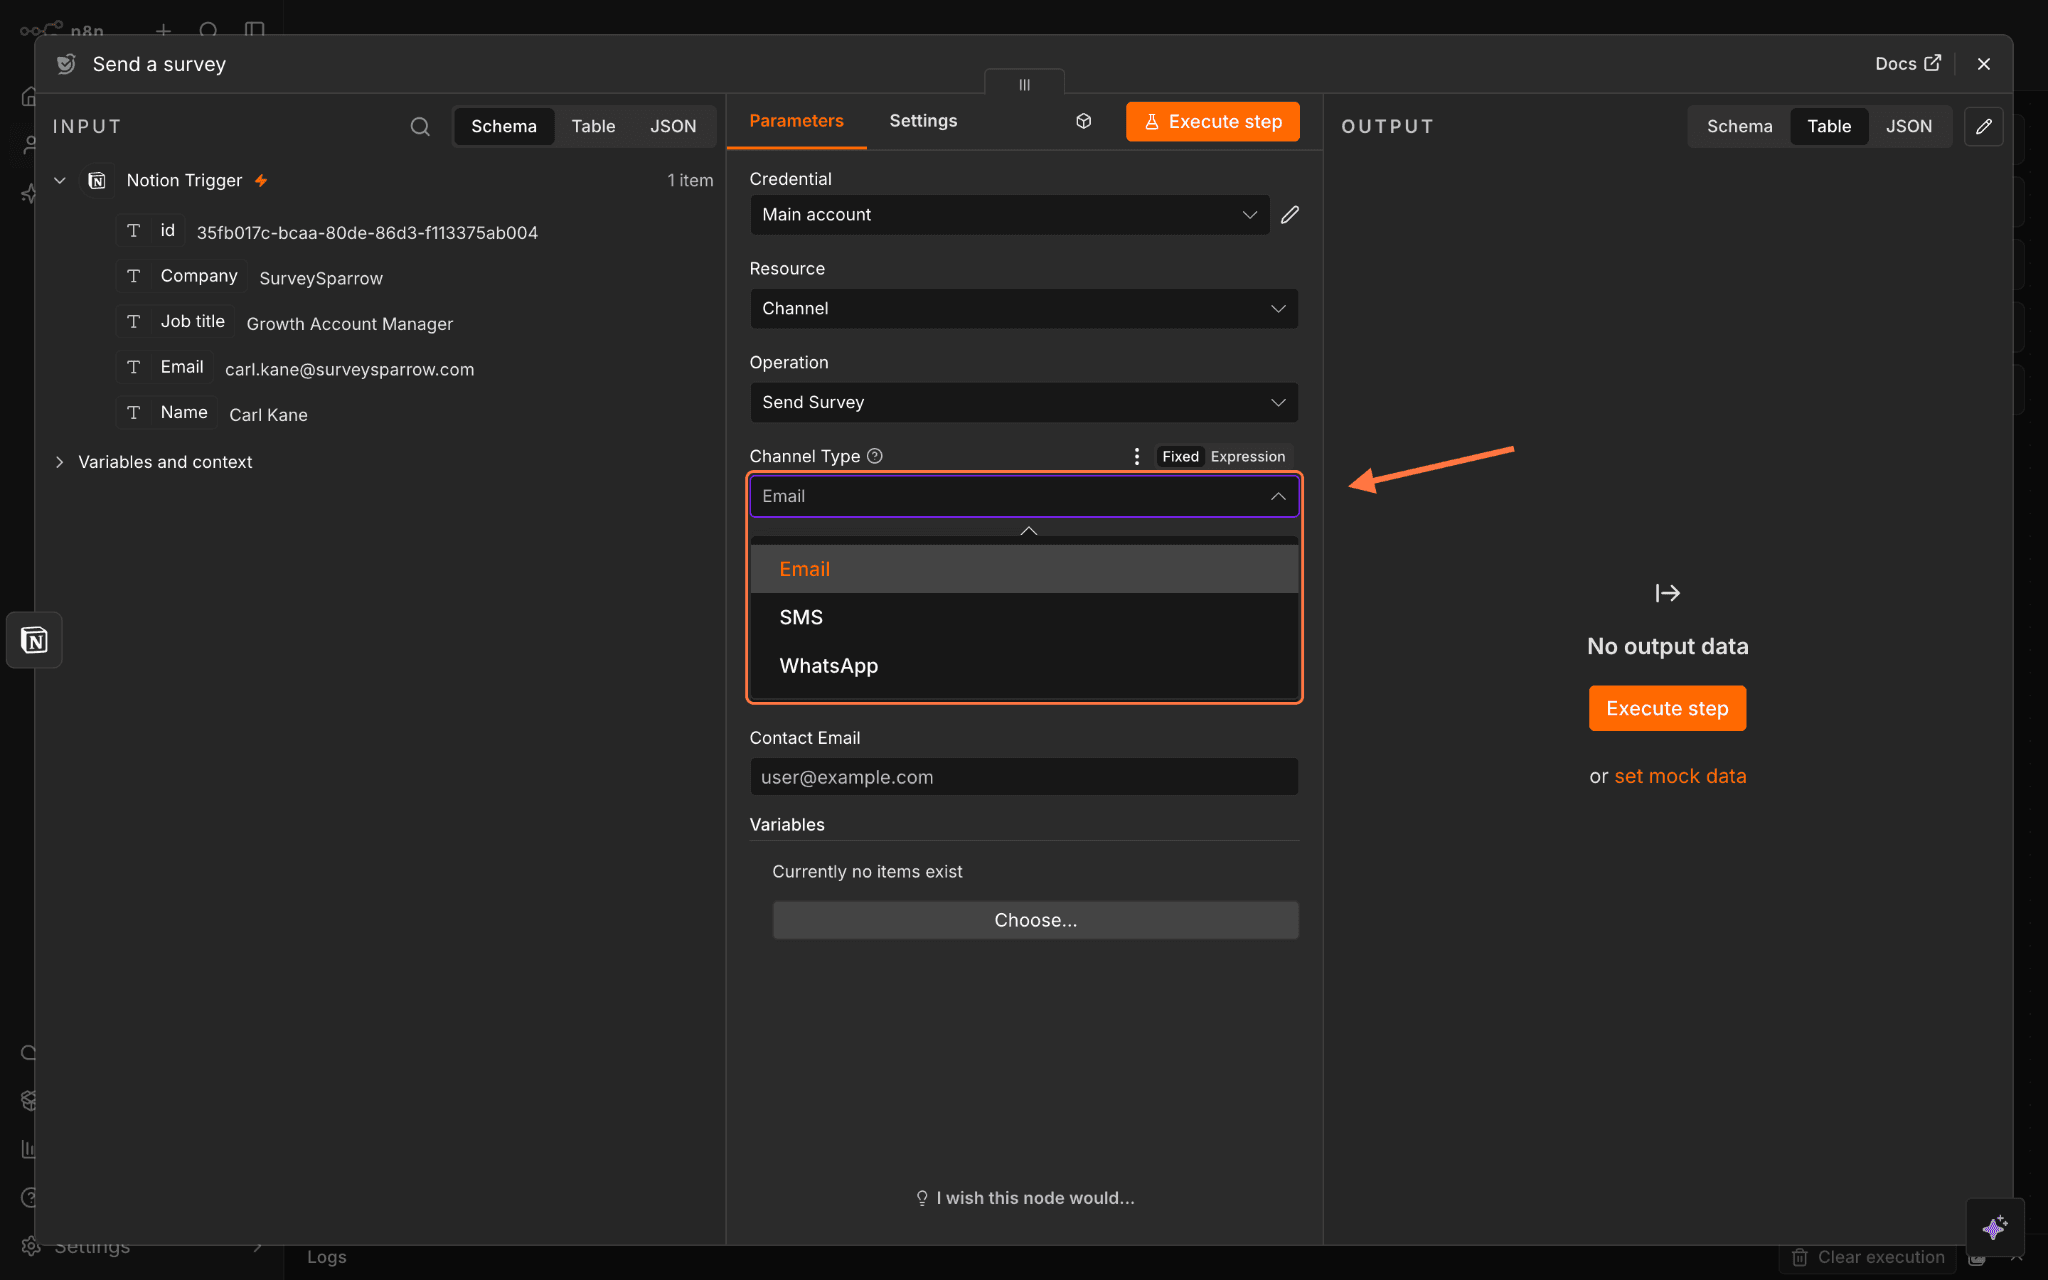
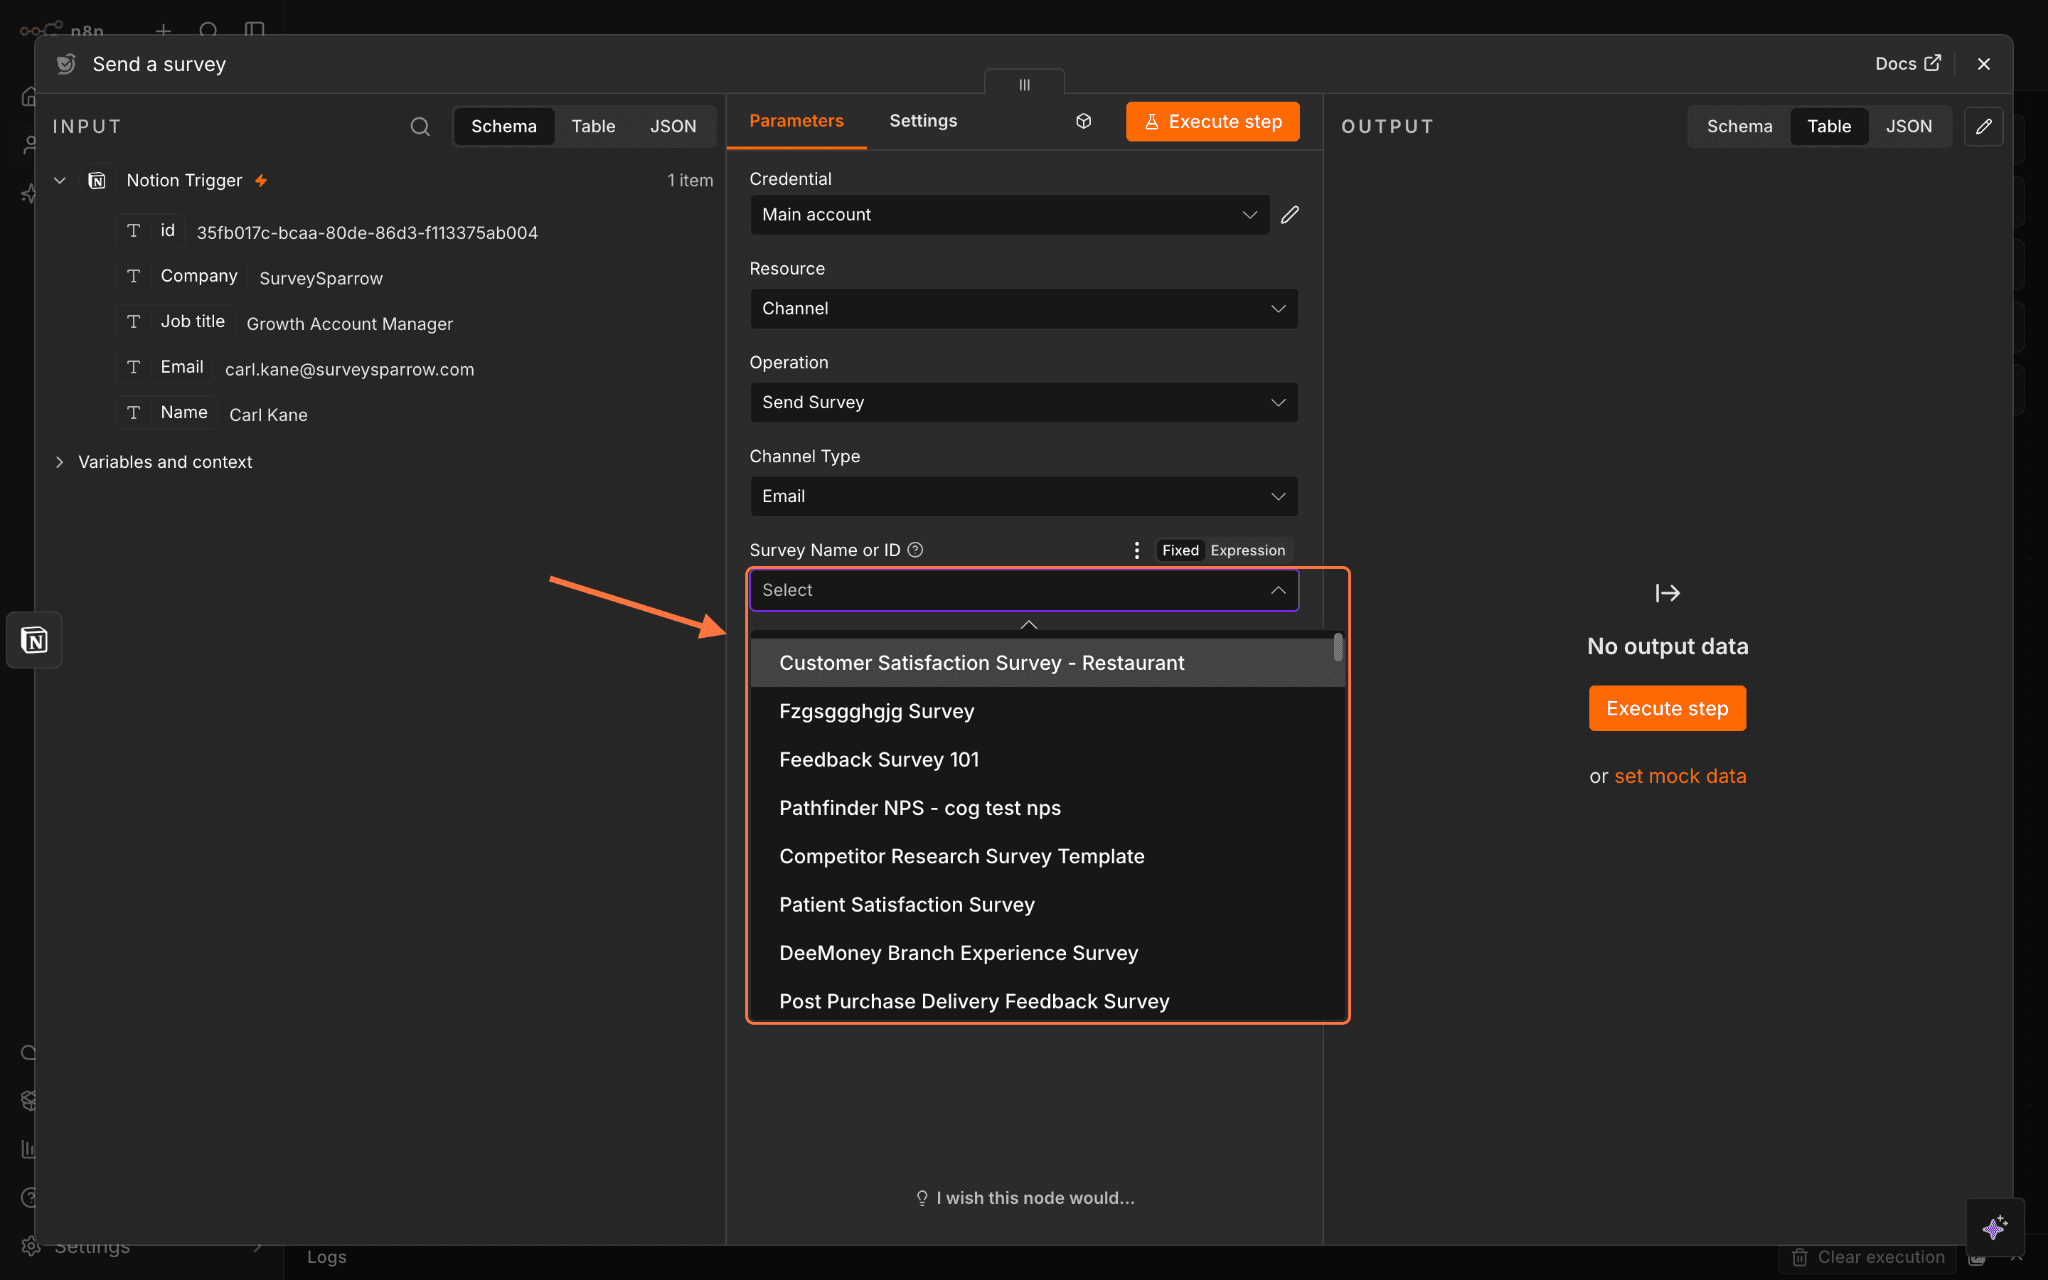
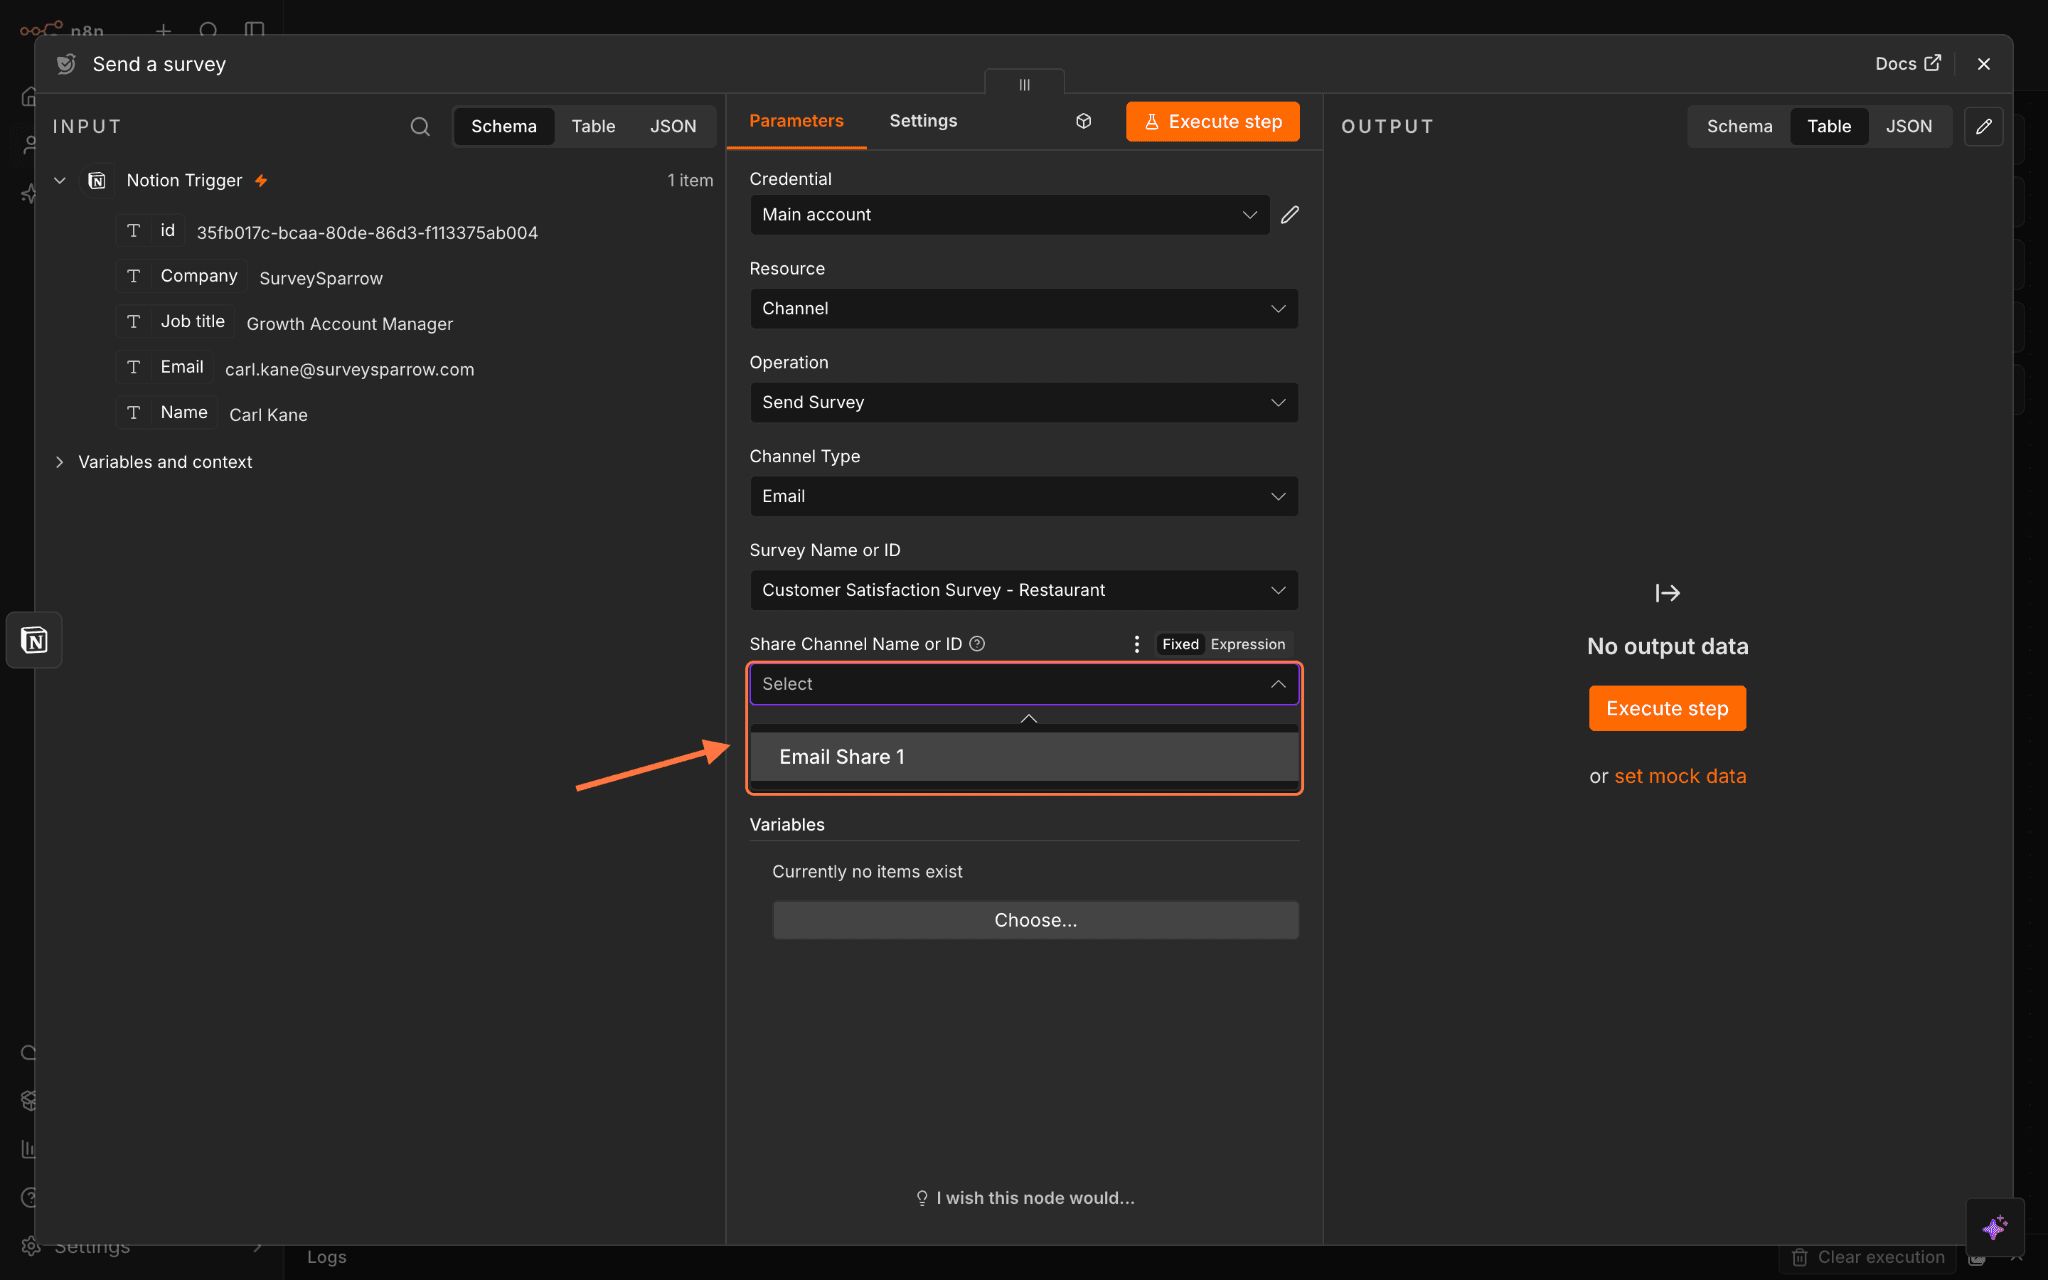
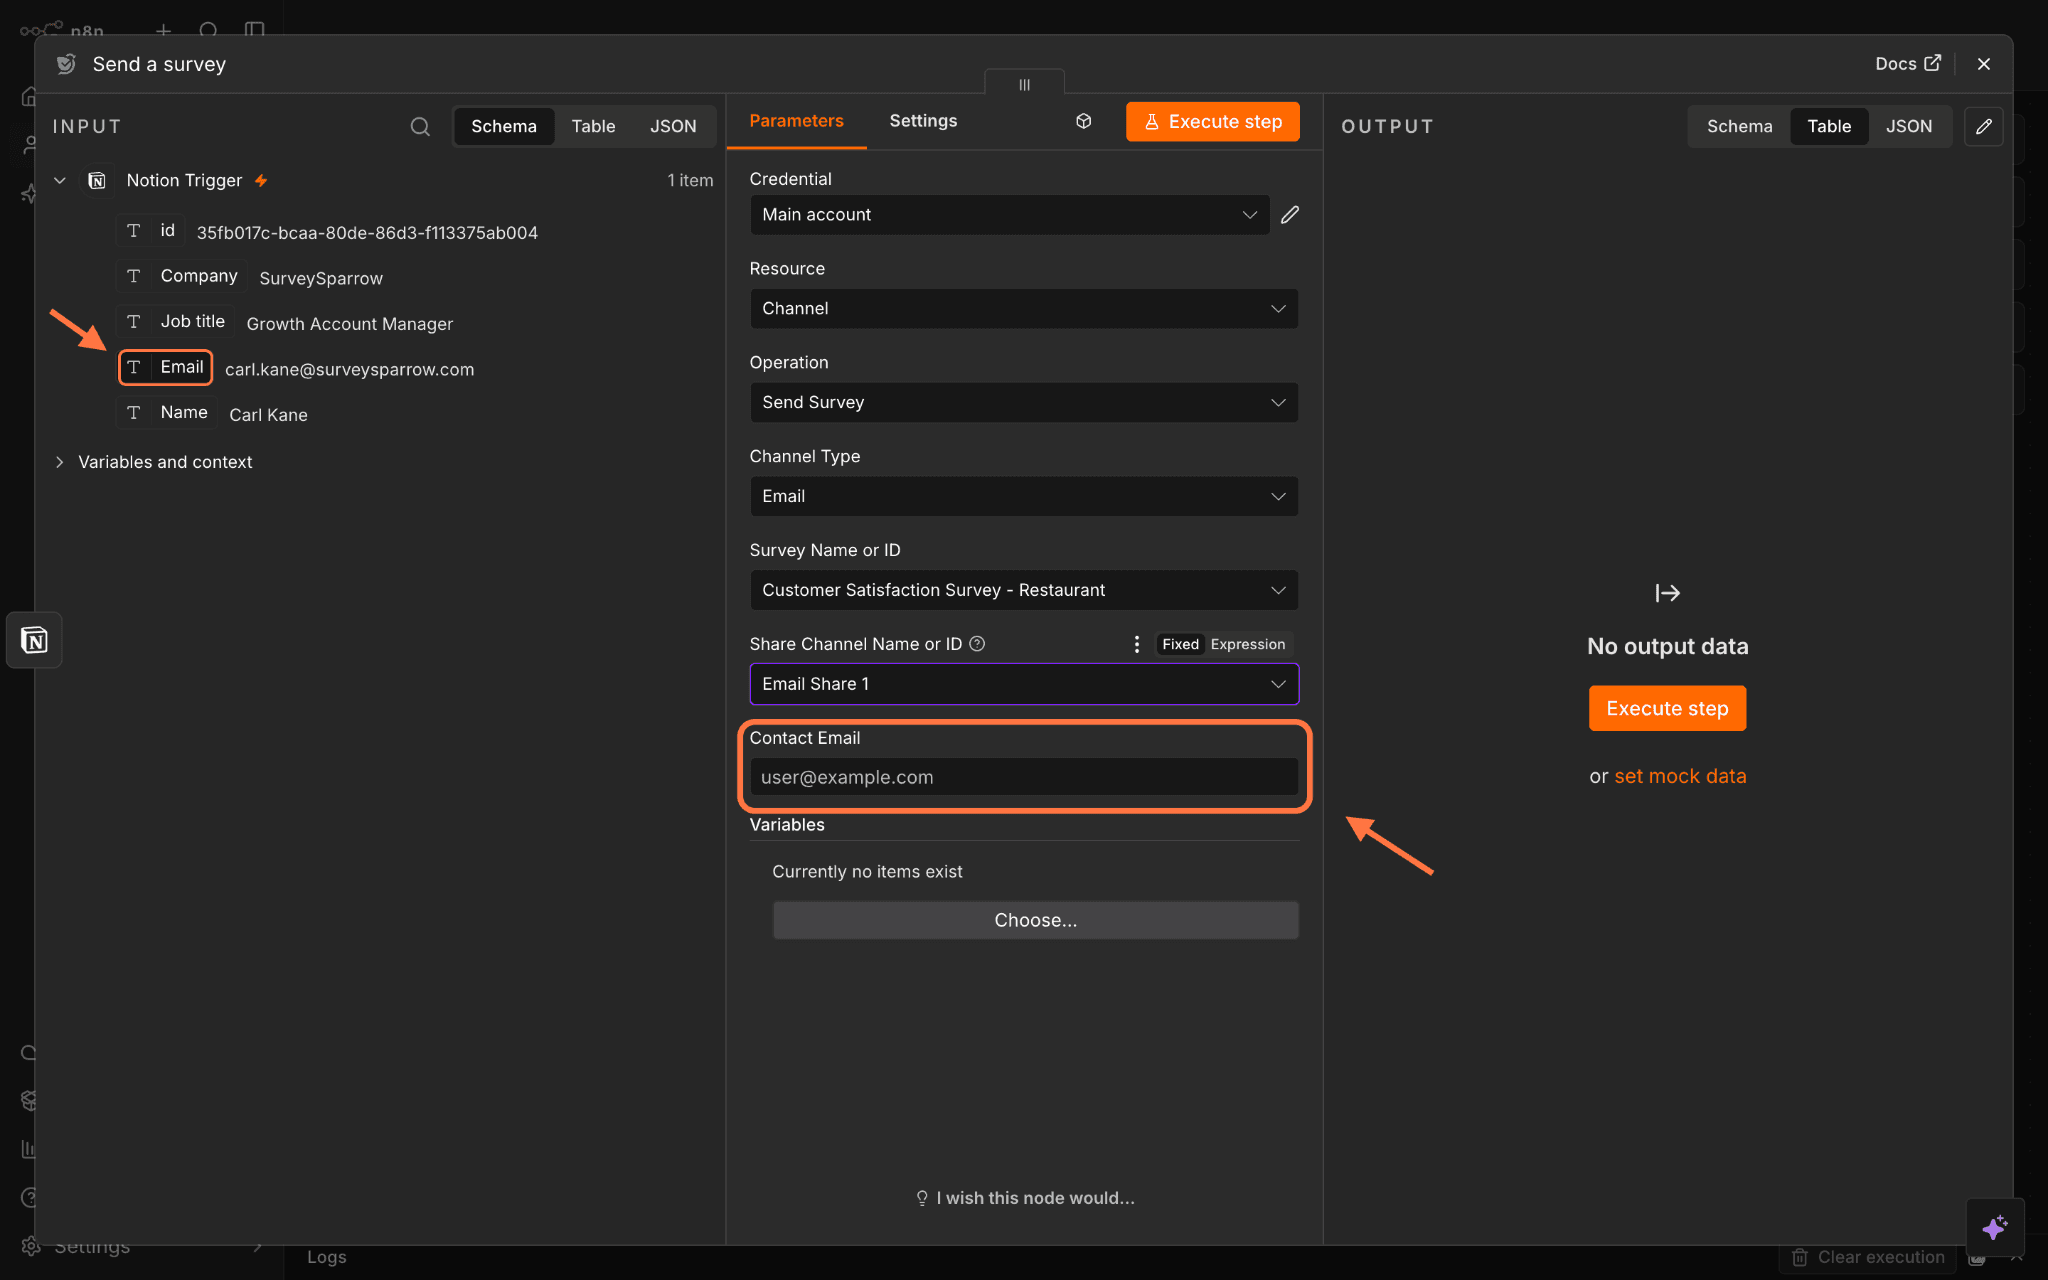
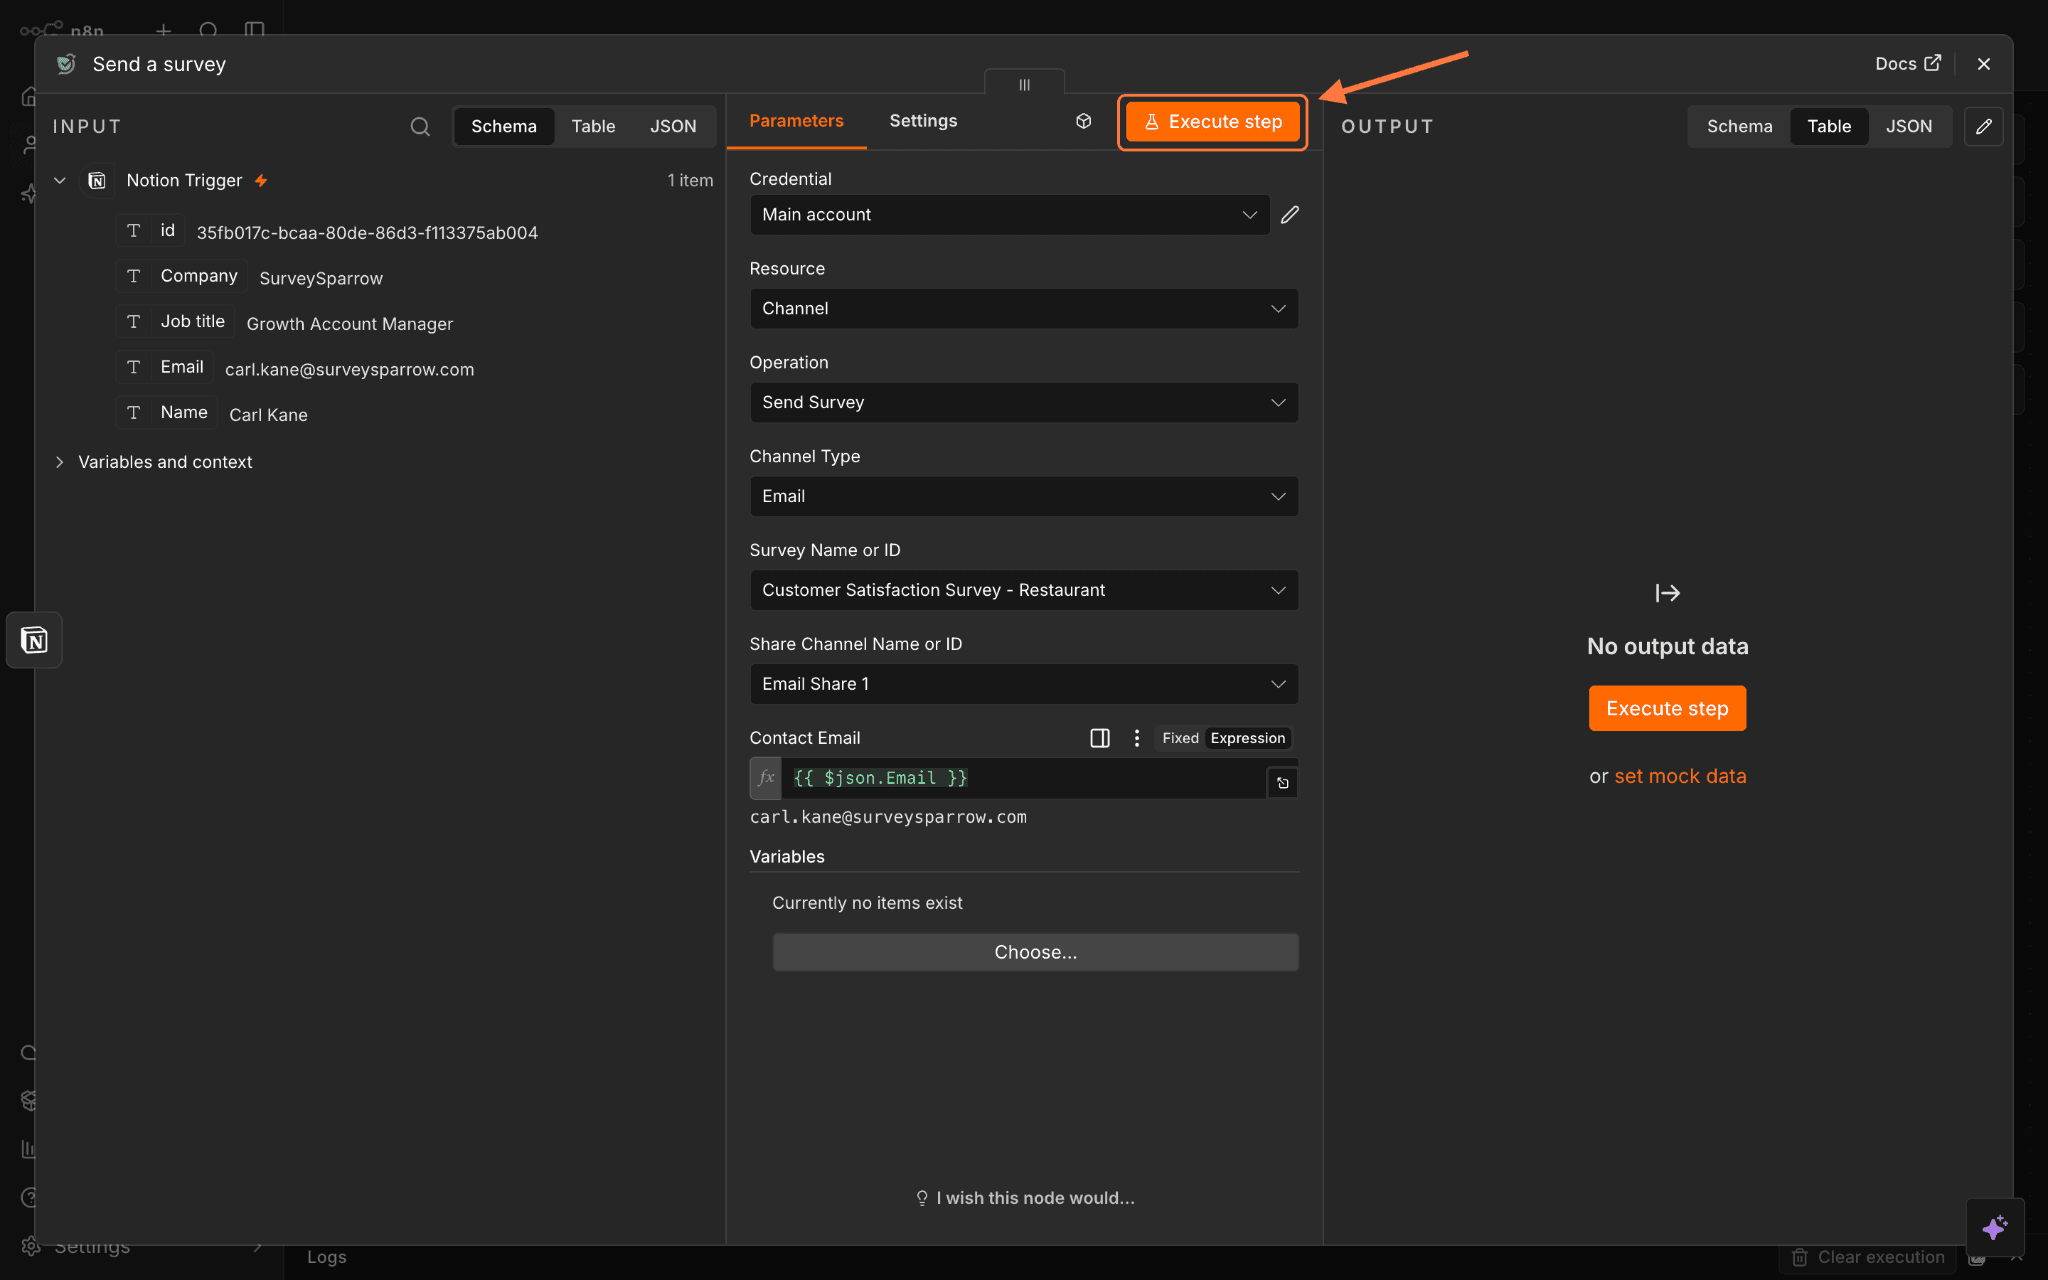
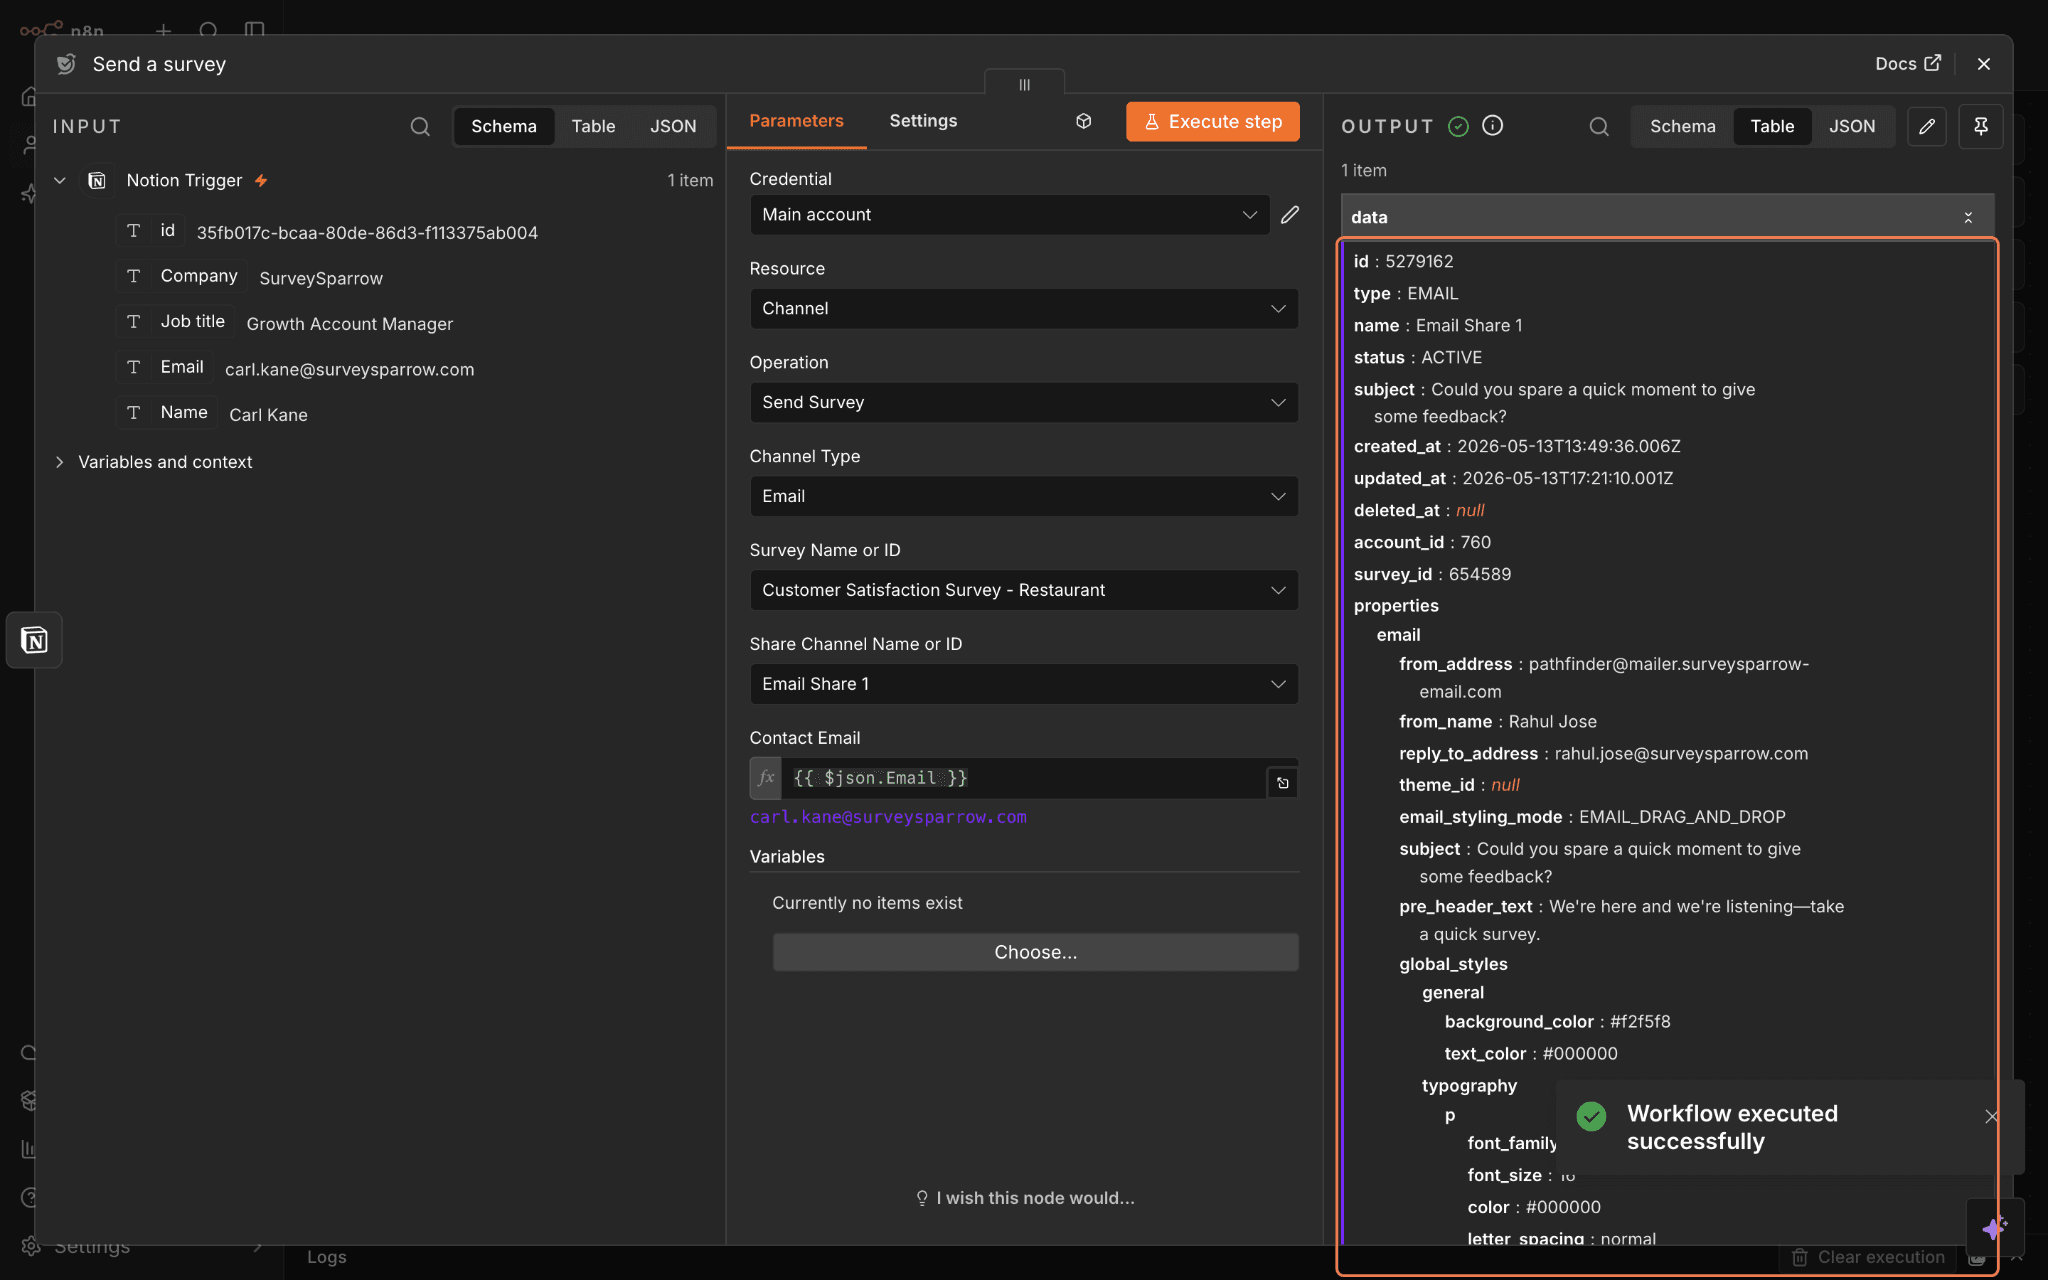
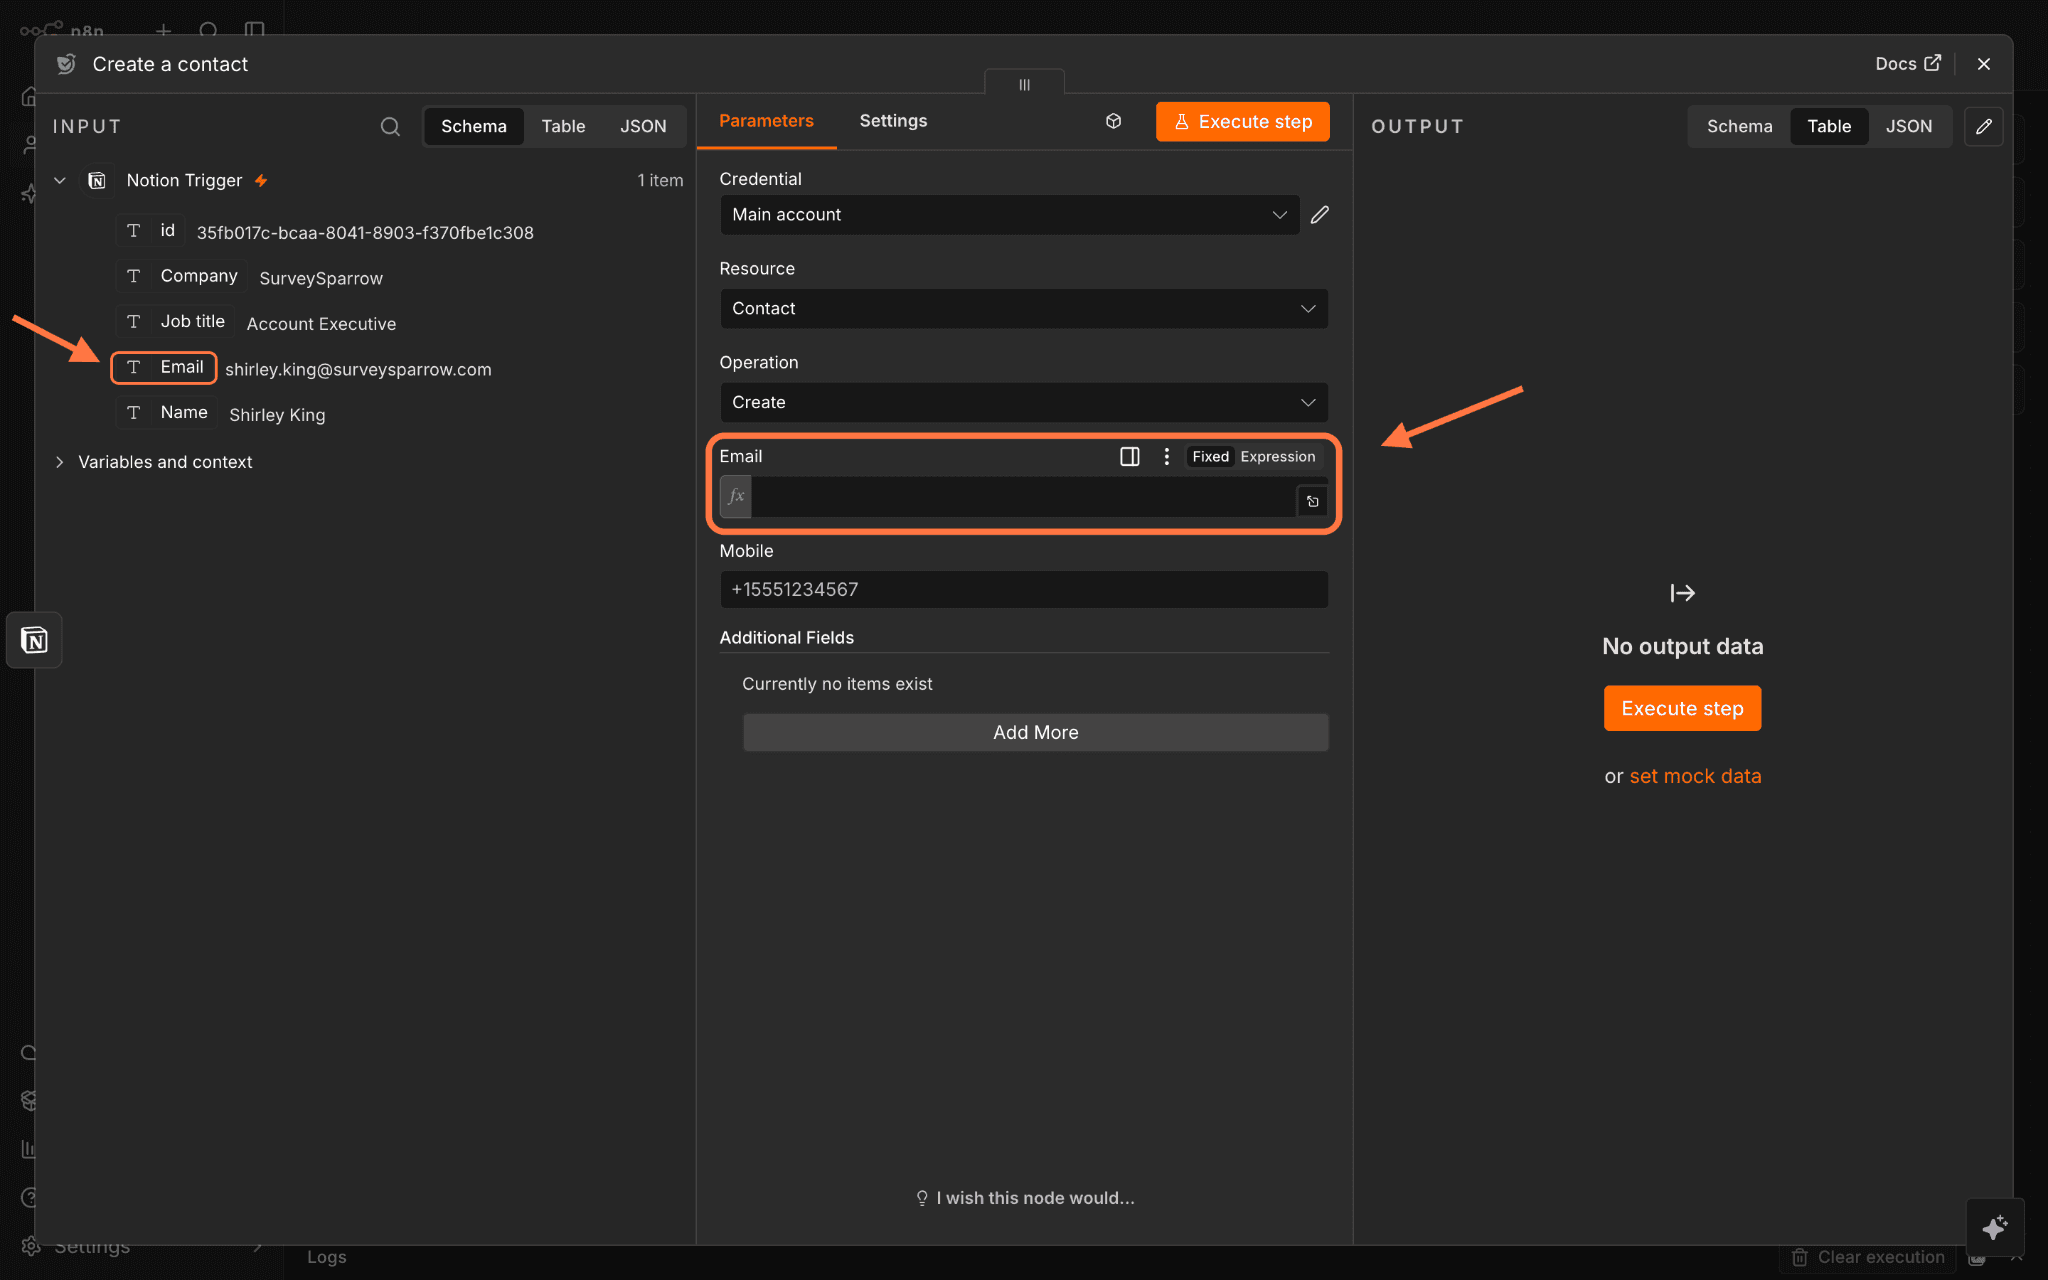
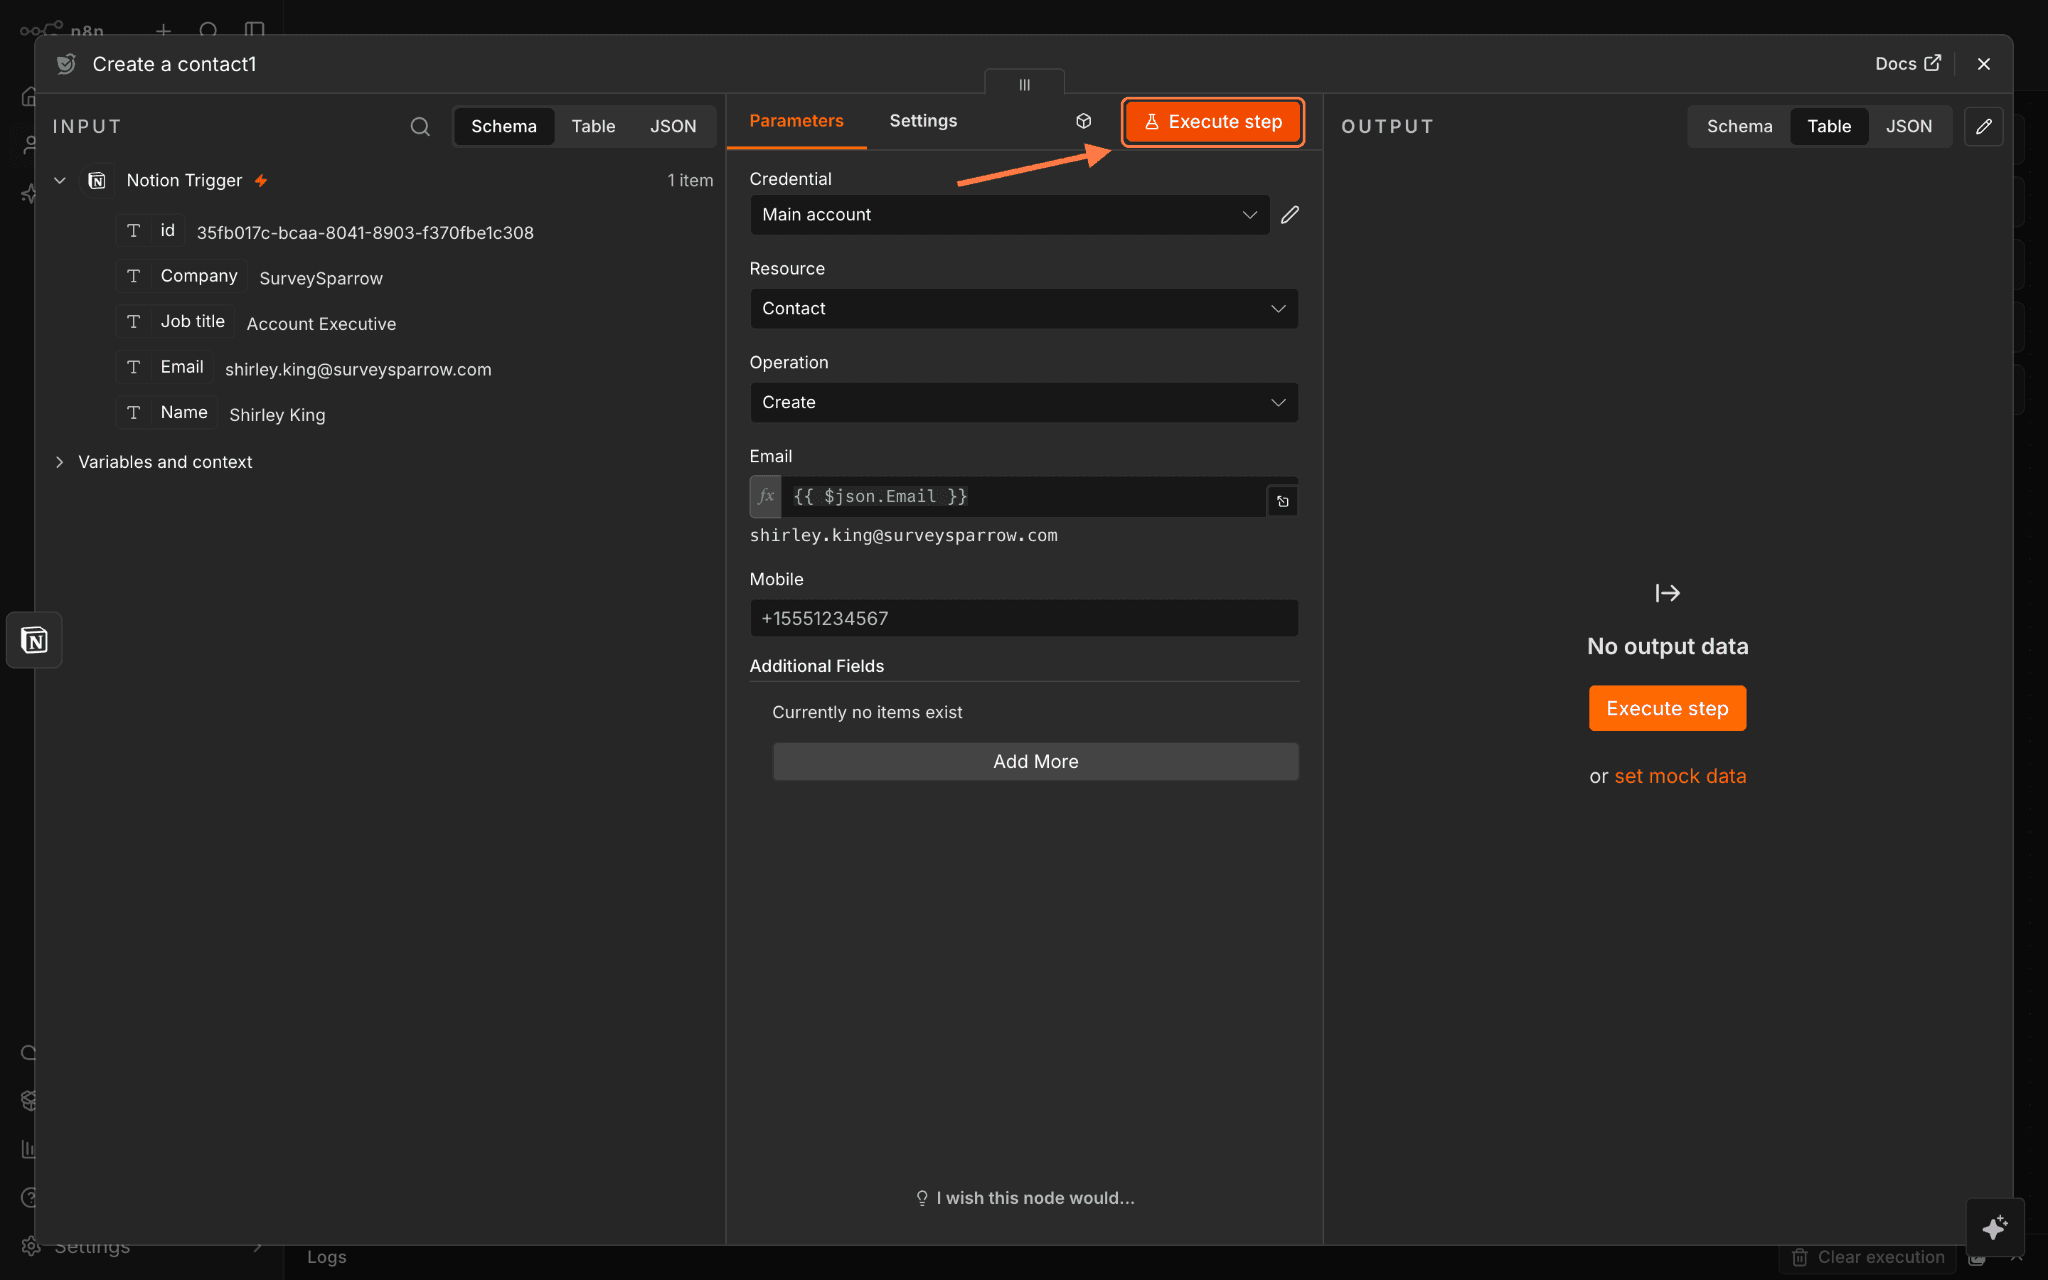
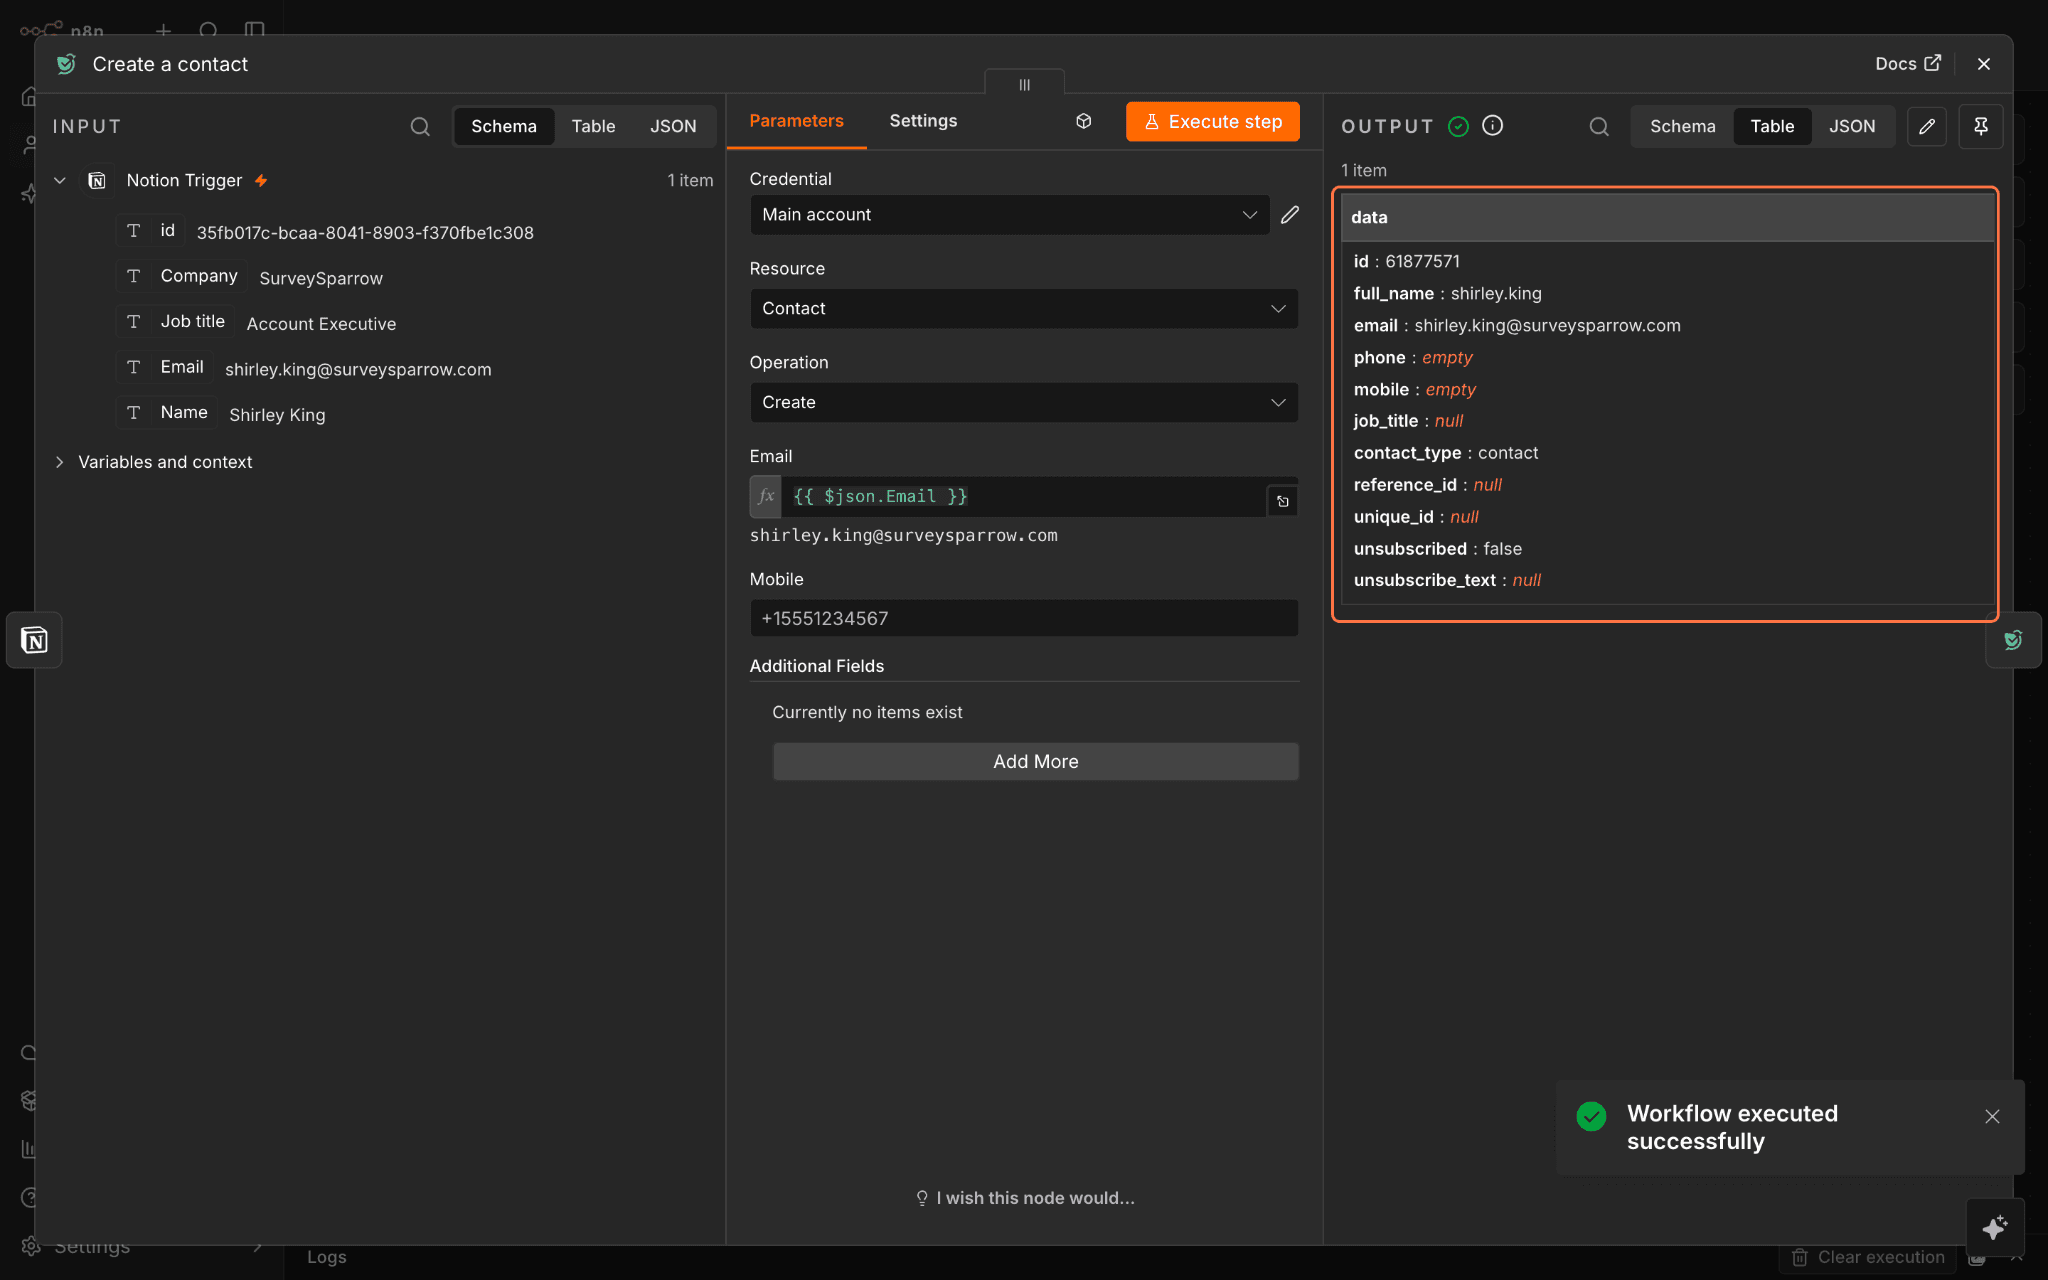
1. Open the SurveySparrow node, then click on Send a survey.2. When the configuration pops up, most of the settings are prepared. The default share channel type is email, but you can change it by clicking on the drop-down under Channel Type.3. Click on the drop-down under Survey Name or ID to choose the survey you want to send.4. You also need to choose a specific share channel of the type you selected. Click on the drop down under Share Channel Name or ID to choose the share channel.5. Inside the Contact Email field, you can choose to add a fixed email or a dynamic placeholder that takes the email from the newly added Notion page. To do the latter, drag and drop the Email value (under the Input section) into the Contact Email field.6. Test out the step by clicking on Execute step. When the run succeeds, you will see the details in the Output section.7. Let’s now look at the configuration process for the other action. After opening the SurveySparrow node, click on Create a contact.8. Just like the earlier action, most of the initial settings are already done. But you need to add the data placeholders that will be used to create the contact. The two default placeholders are Email and Mobile. Drag the respective values from the Input section and drop them into the fields.9. Test the workflow by clicking on Execute step. When the run succeeds, you’ll see the details in the Output section. You can add further nodes as needed. When satisfied, publish the workflow exactly as shown earlier.
By connecting SurveySparrow to your n8n workflows, you can automate the feedback loop — from sending surveys at the right moment to acting on responses instantly — without any manual effort. Whether you're syncing response data across tools, triggering surveys based on real-world events, maintaining your contact lists, or setting up multi-step processes, the SurveySparrow node helps you automate them all.
Try it out today and feel free to reach out to ourcommunity in case of any questions!