
SMTP Email Configuration
SurveySparrow’s SMTP Email Configuration lets you use your email service provider (Eg: Gmail, SendGrid, MailChimp, etc.) along with SurveySparrow to send a large number of emails all at once. All you need to do is get your email service provider’s SMTP server details, configure it in your SurveySparrow account, and start sending emails from SurveySparrow with your own service provider.
Let’s see how we can configure it:
1. Sign in to your SurveySparrow account.
2. Head to Account Settings. Under Email Settings, go to the Email section and click SMTP.
3. Enter your SMTP server details in the corresponding fields. The Outgoing Mail Server is the SMTP server address of your email service provider.
(For example, Gmail’s SMTP server address is smtp.gmail.com. This address varies for every email service provider)
4. Click Secure only if you wish to establish an SSL/TLS connection. (For ports 587 and 25, the connection will be secure by default and you need not select the Secure option here.).
5. Enter the username and your app password details. Click Add Email to save the details.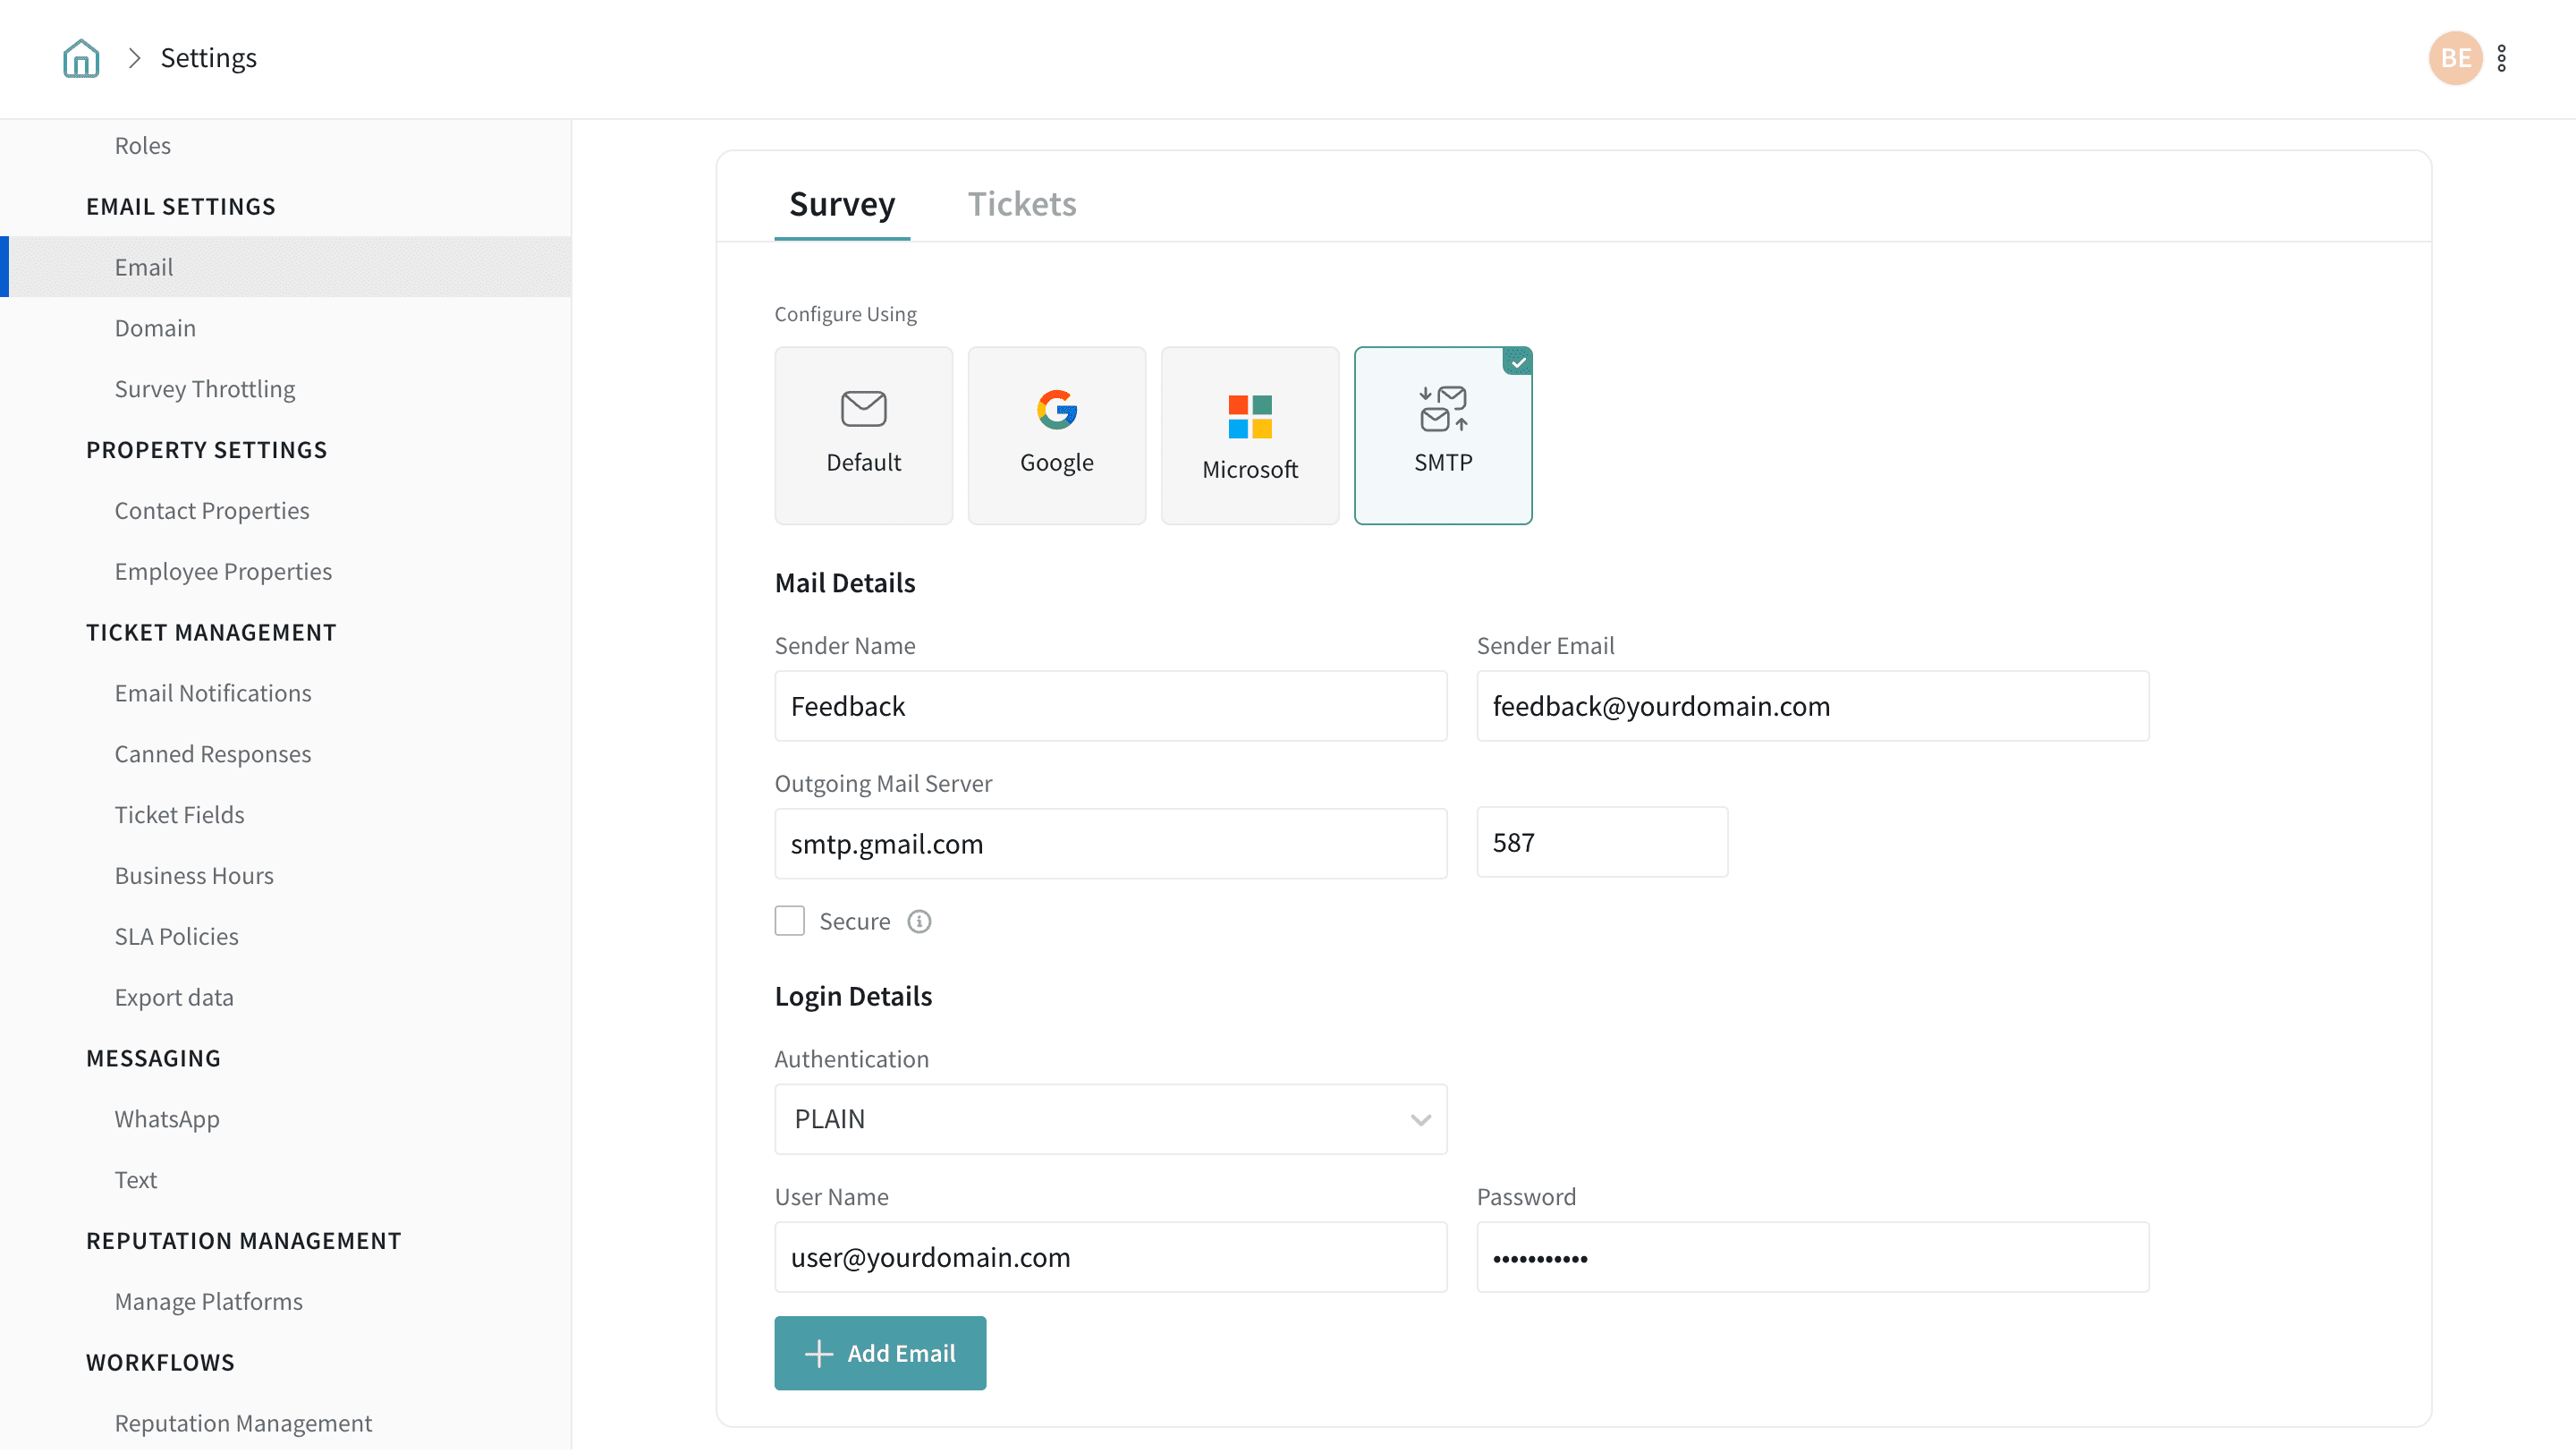
Verify settings on your Email Service Provider
1. After you have updated the SMTP server details and enabled it, check with your email service provider for confirmation.
2. Once the confirmation is complete, the mailbox is ready to be used to send surveys to your end users from your own mail server.
3. So now, when you share your survey via email, you can send it from the sender email address that you had entered.
4. This functionality lets you make sure that all your email transactions are outside SurveySparrow and will be completely managed and tracked at your own end. Note: Even when using your own SMTP server, contacts can still appear in the Bounced contacts list if email delivery fails (for example, due to IP whitelisting issues or the sending IP being on a block list maintained by the email provider).
5. You will just have to make sure that you configure your settings properly before you start sending emails from your own email server.
6. When everything is complete and verified, the SMTP configuration is ready and good to go!
Note
- If you’re using port 587 or port 25, the connection will be secure by default. Do NOT check the Secure option in that case.
- The configuration values/verification varies for different email servers. Ensure to fill the field with the right data. Contact your mail service provider in case of issues.
- Troubleshooting: Contacts marked as Bounced
- If you see a large number of contacts moved to the Bounced list after sending/distribution, check whether the sender IP addresses need to be whitelisted on your side (IP whitelisting issues were identified as a cause of recurring bounces).
- If legitimate email addresses are being marked as bounced, verify whether the sending IP address is on a block list maintained by the email provider (this was identified as a bounce cause in an investigation).
- As an immediate workaround, you can move contacts from Bounced back to Active/Subscribed so they can receive future surveys.
Please reach out to us if you have any questions. We are just a chat away!