Search
Amazon S3, or Simple Storage Service, is a highly scalable object storage service offered by Amazon Web Services that acts as a secure digital warehouse for storing and retrieving any amount of data from anywhere on the web.
By integrating SurveySparrow with Amazon S3, businesses can move away from manual CSV exports and unreliable SFTP workarounds in favor of standardized automation that pushes survey responses directly into their cloud environment.
Beyond simple data transfer, users can apply conditional sync rules to filter specific data, ensuring it remains clean and organized. This allows organizations to maintain a centralized, near real-time source of truth for customer insights. Possible use cases include:
In this article, we’ll walk you through connecting your SurveySparrow account to Amazon S3 and setting up powerful response mappings from start to finish, specifically:
1. Inside your SurveySparrow account, click on the settings icon.
2. Scroll down the left panel in the settings page till you see the Apps and Integrations option, then click on it.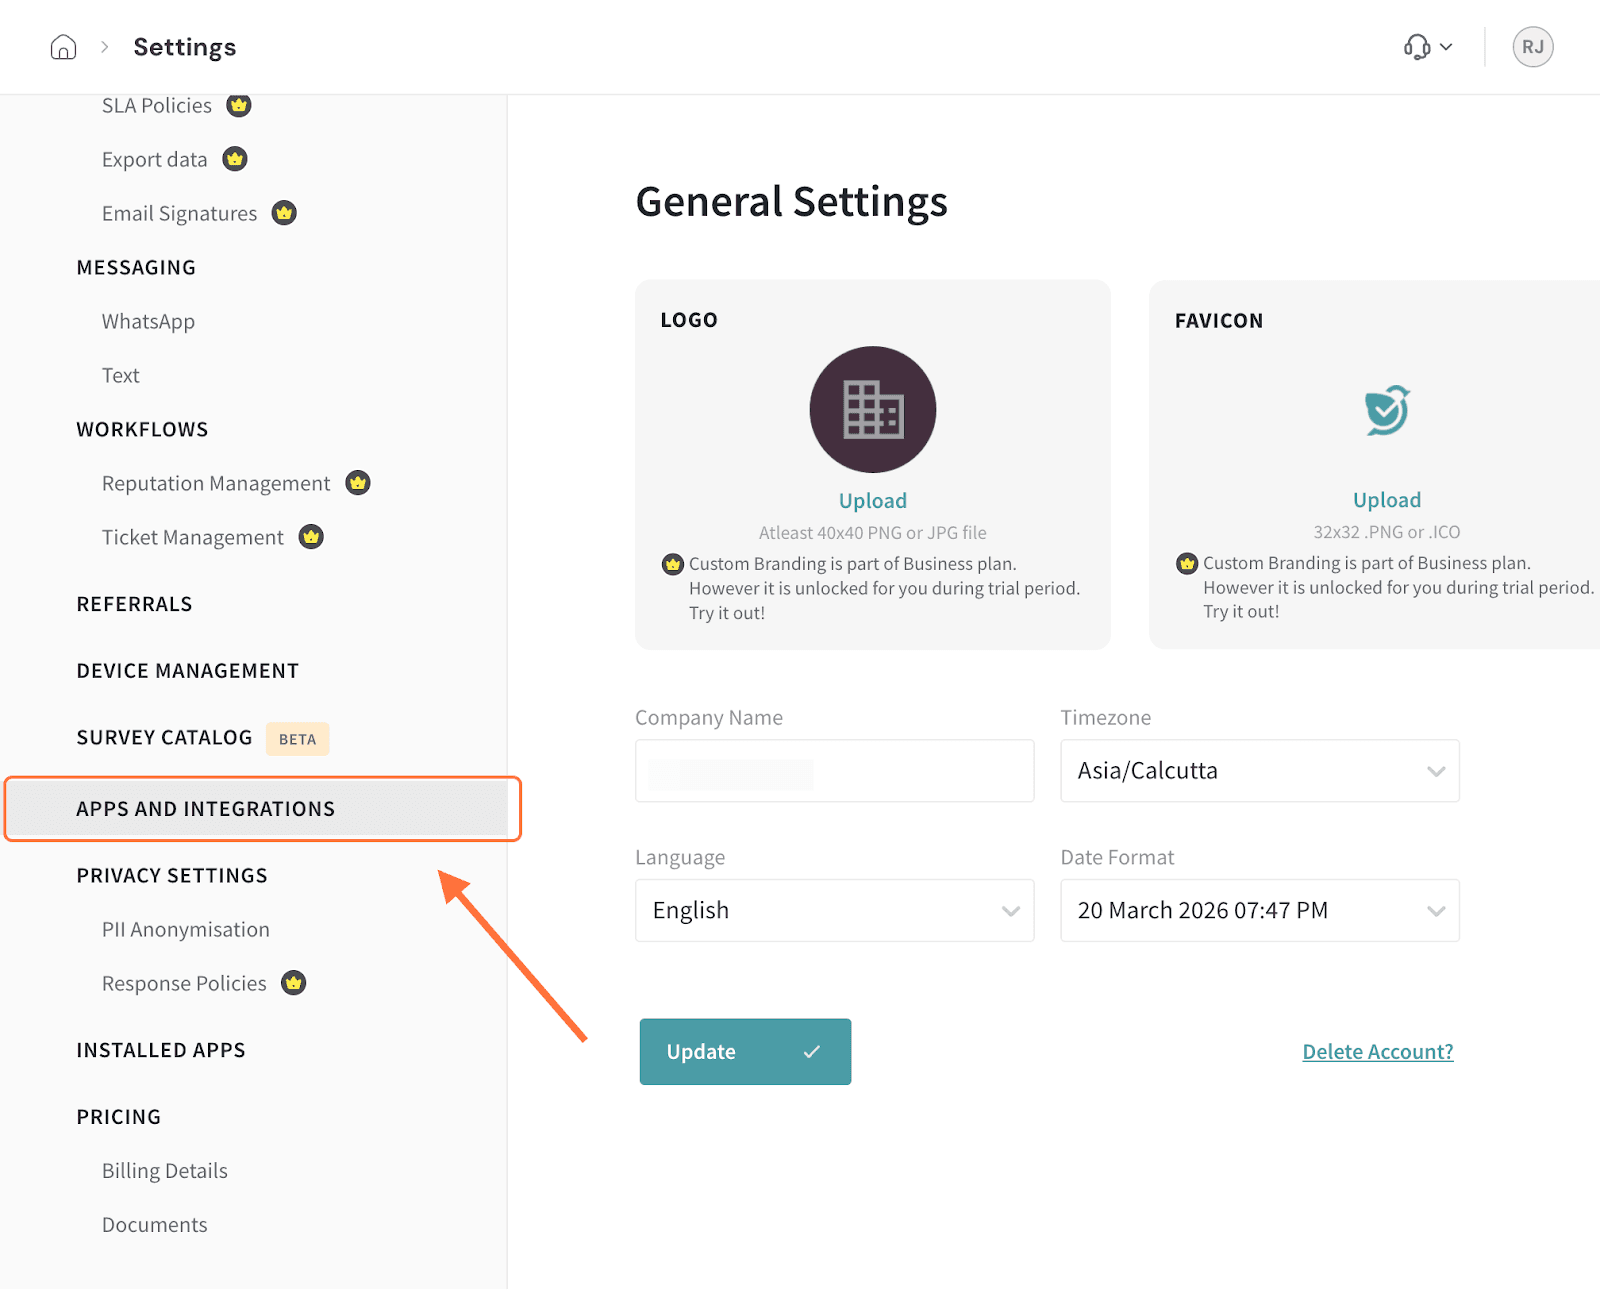
3. Search for the Amazon S3 integration using the search box (or scrolling through the integrations), then click on the toggle when you see it.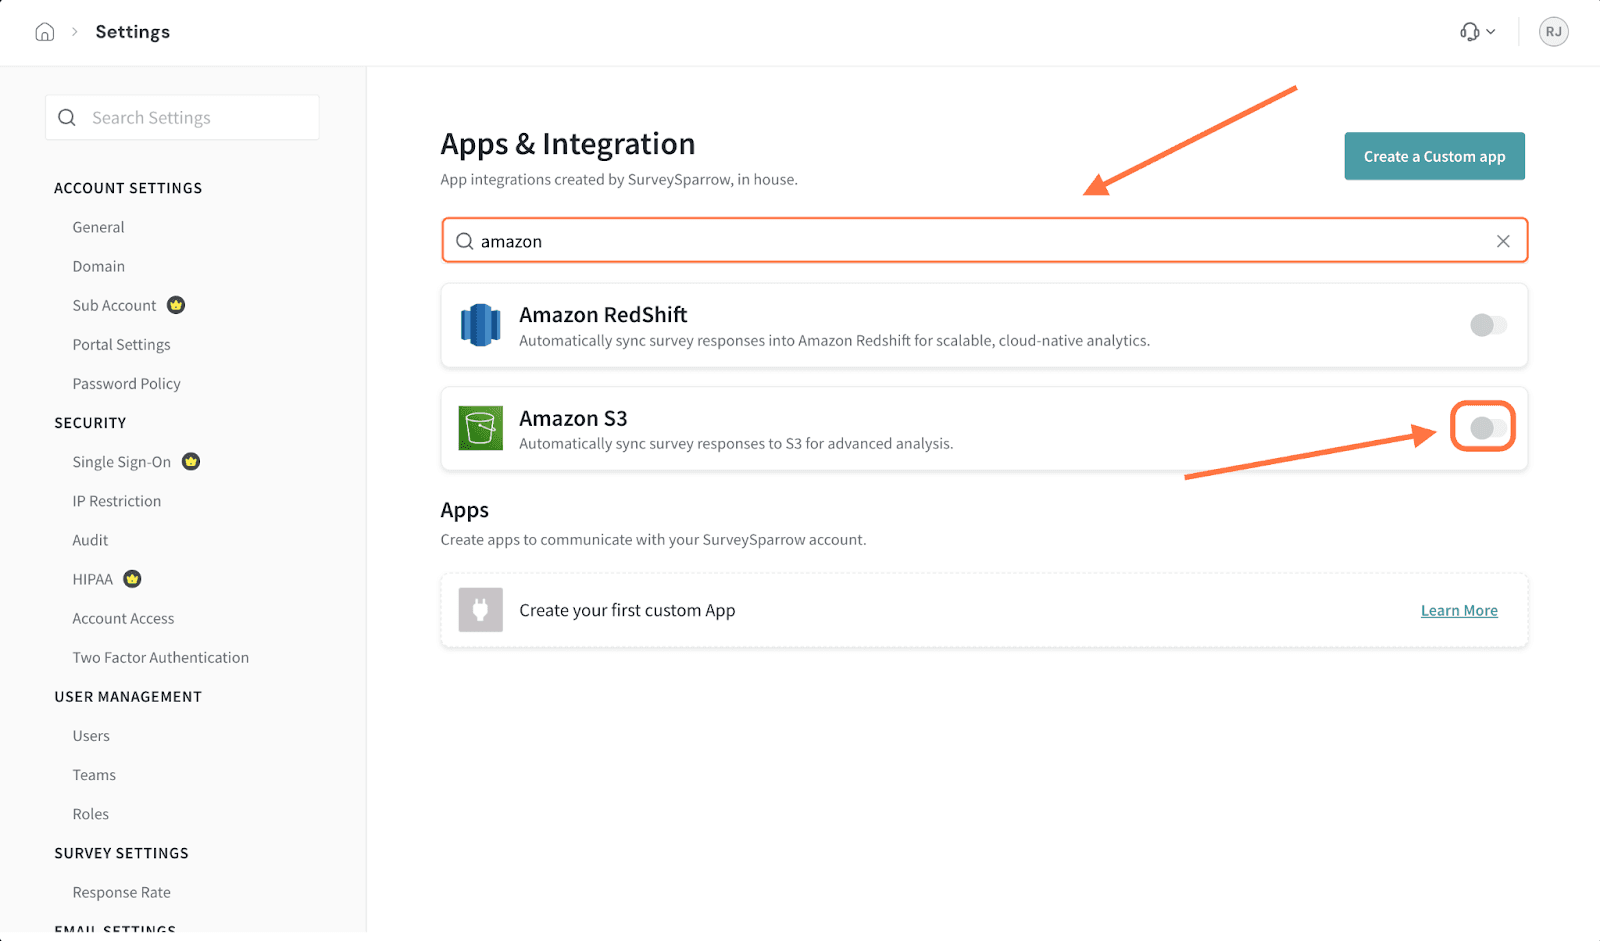
4. Next, in the setup screen you’ll need to enter your AWS Access Key ID and AWS Secret Access Key.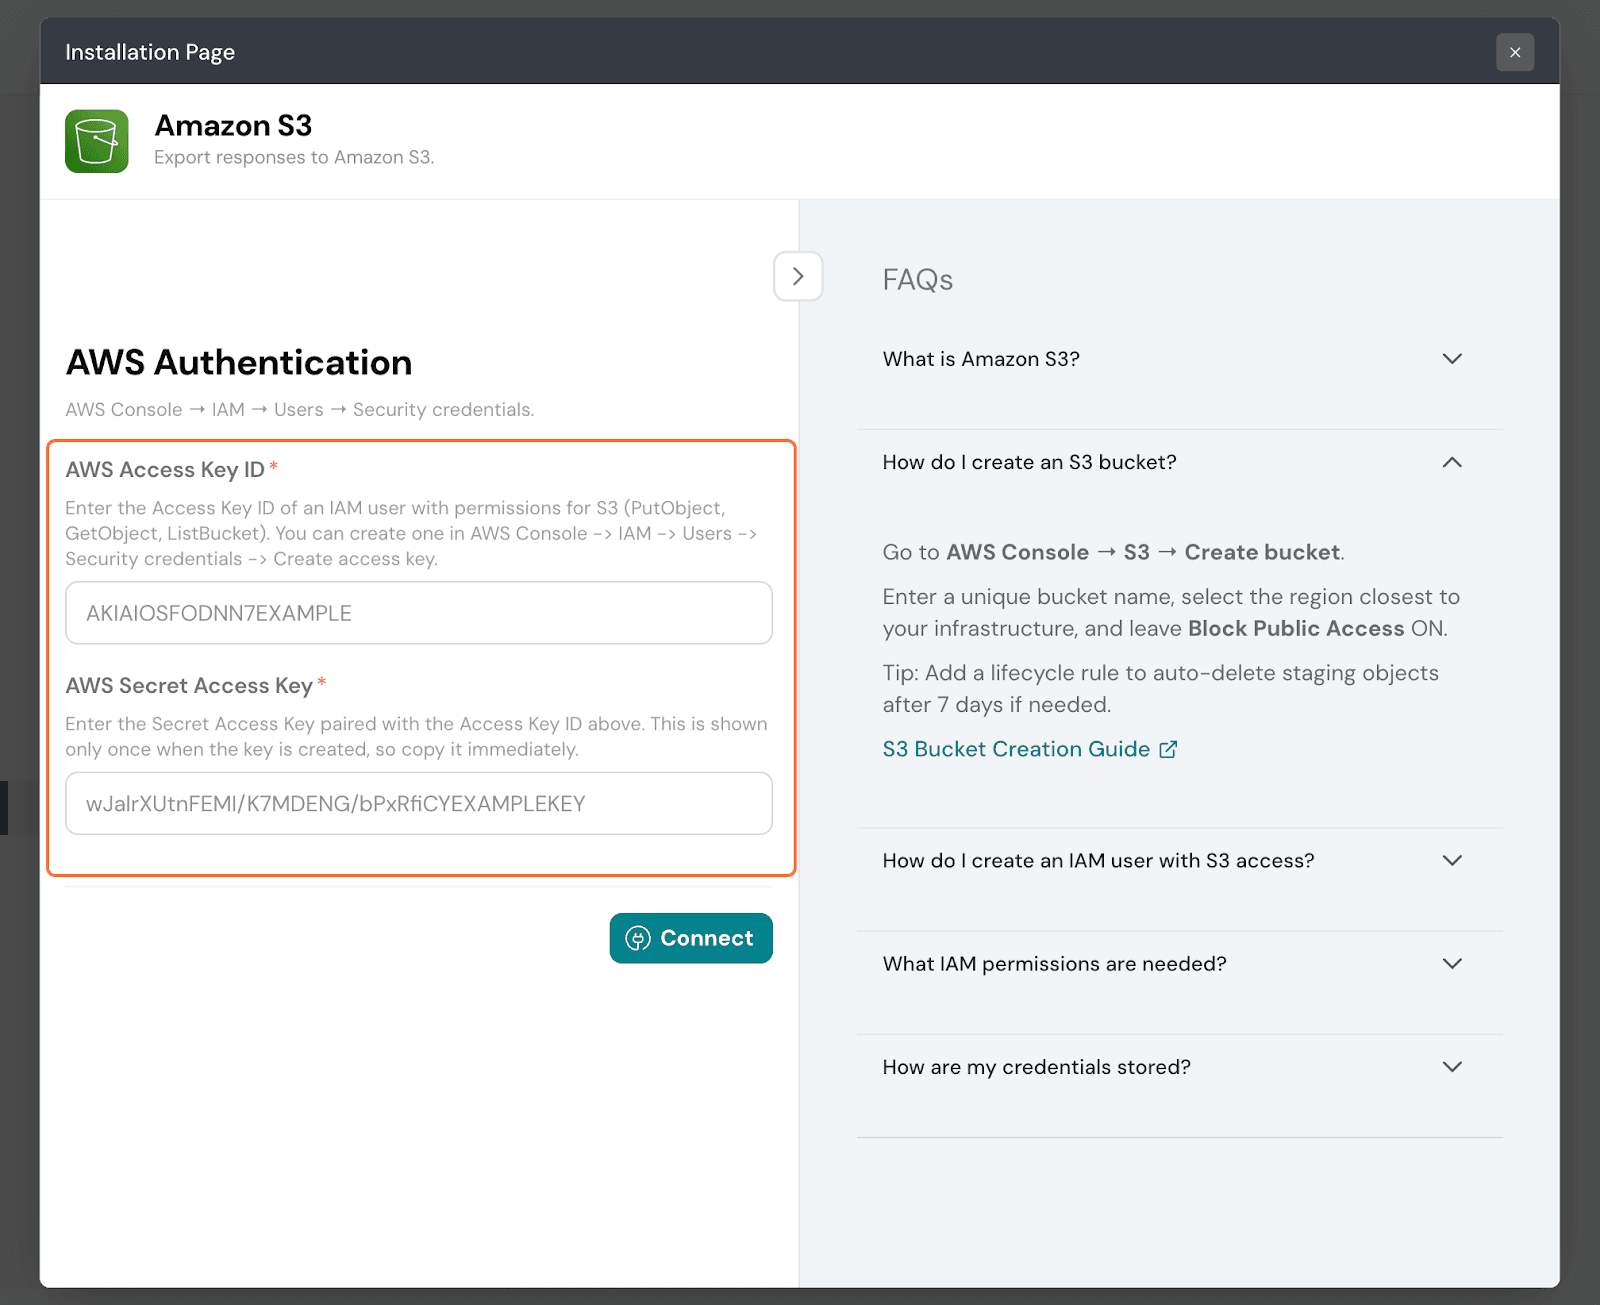
Note: When creating the access key ID, ensure these permissions are enabled: PutObject, GetObject and ListBucket.
5. After entering the details back in SurveySparrow, click Connect.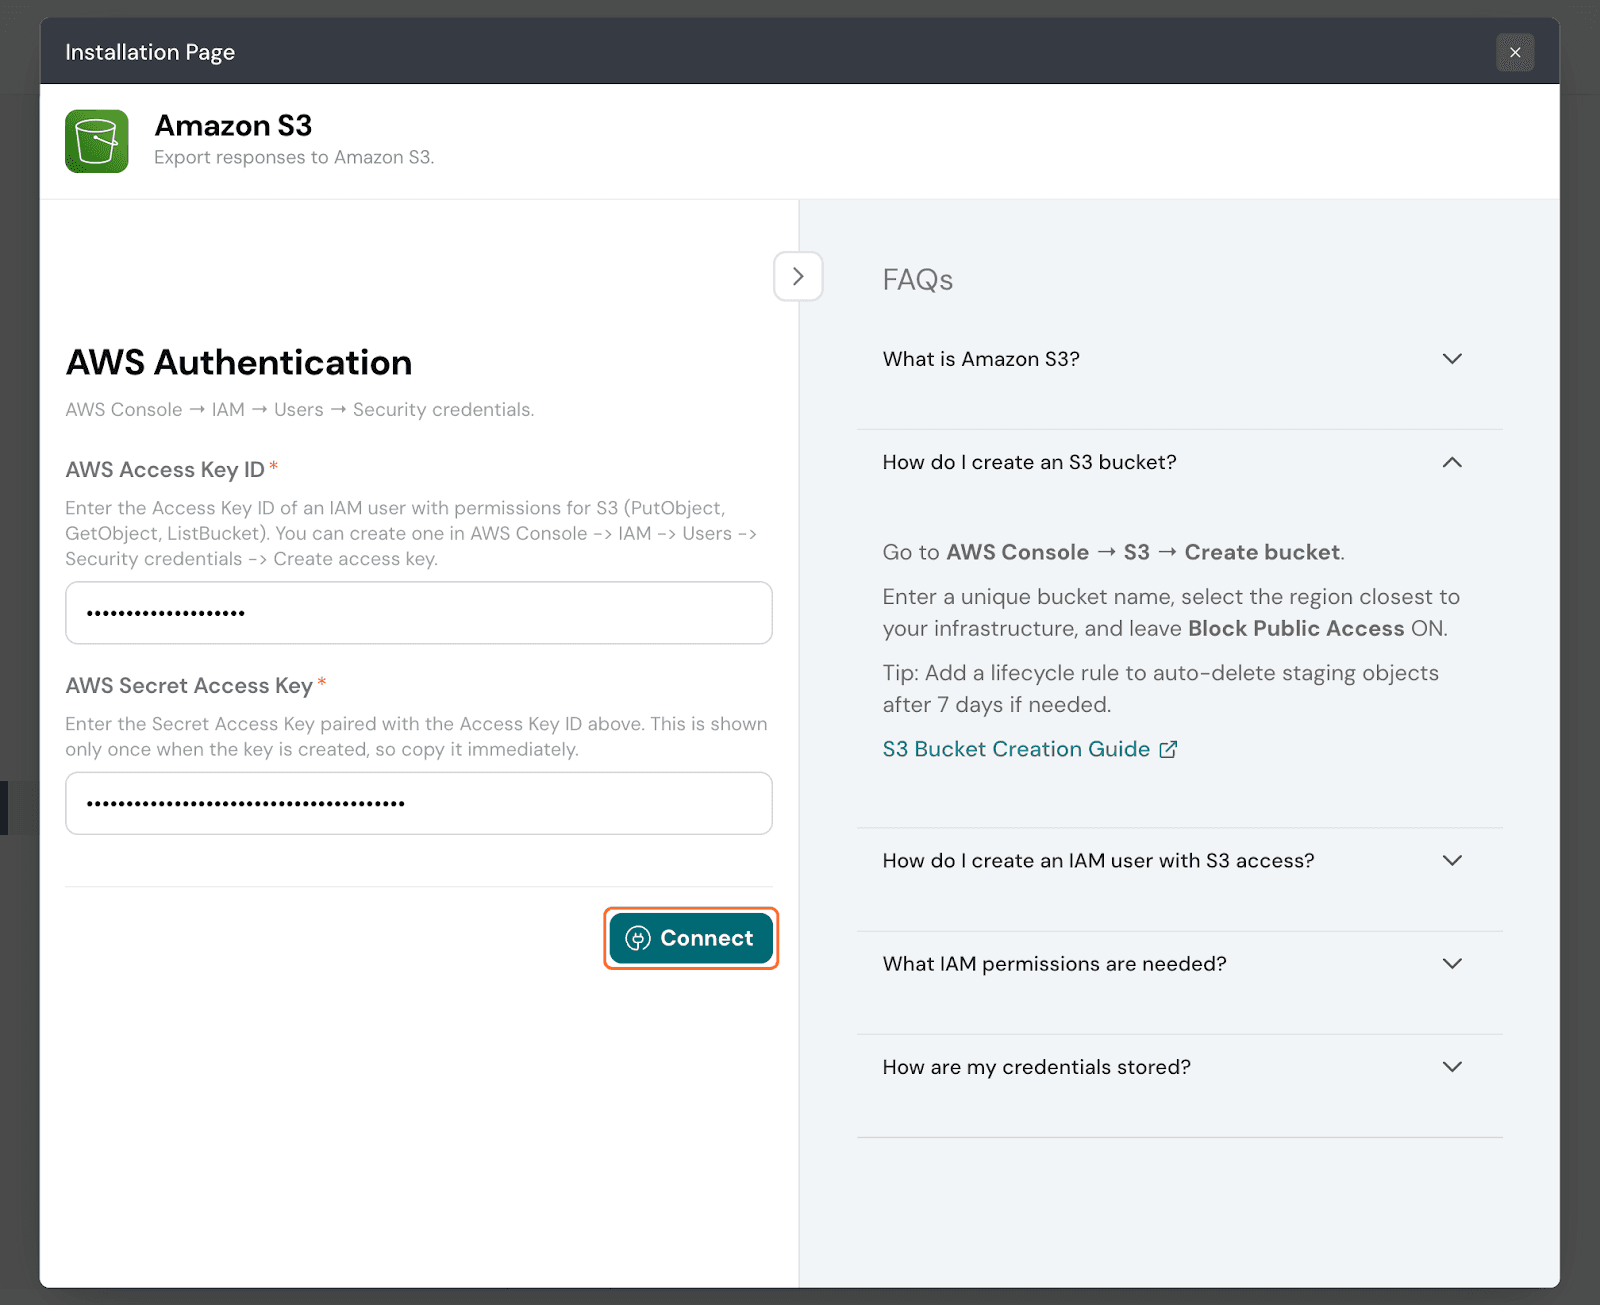
1. Open a survey and click on the Integrate/Configure tab.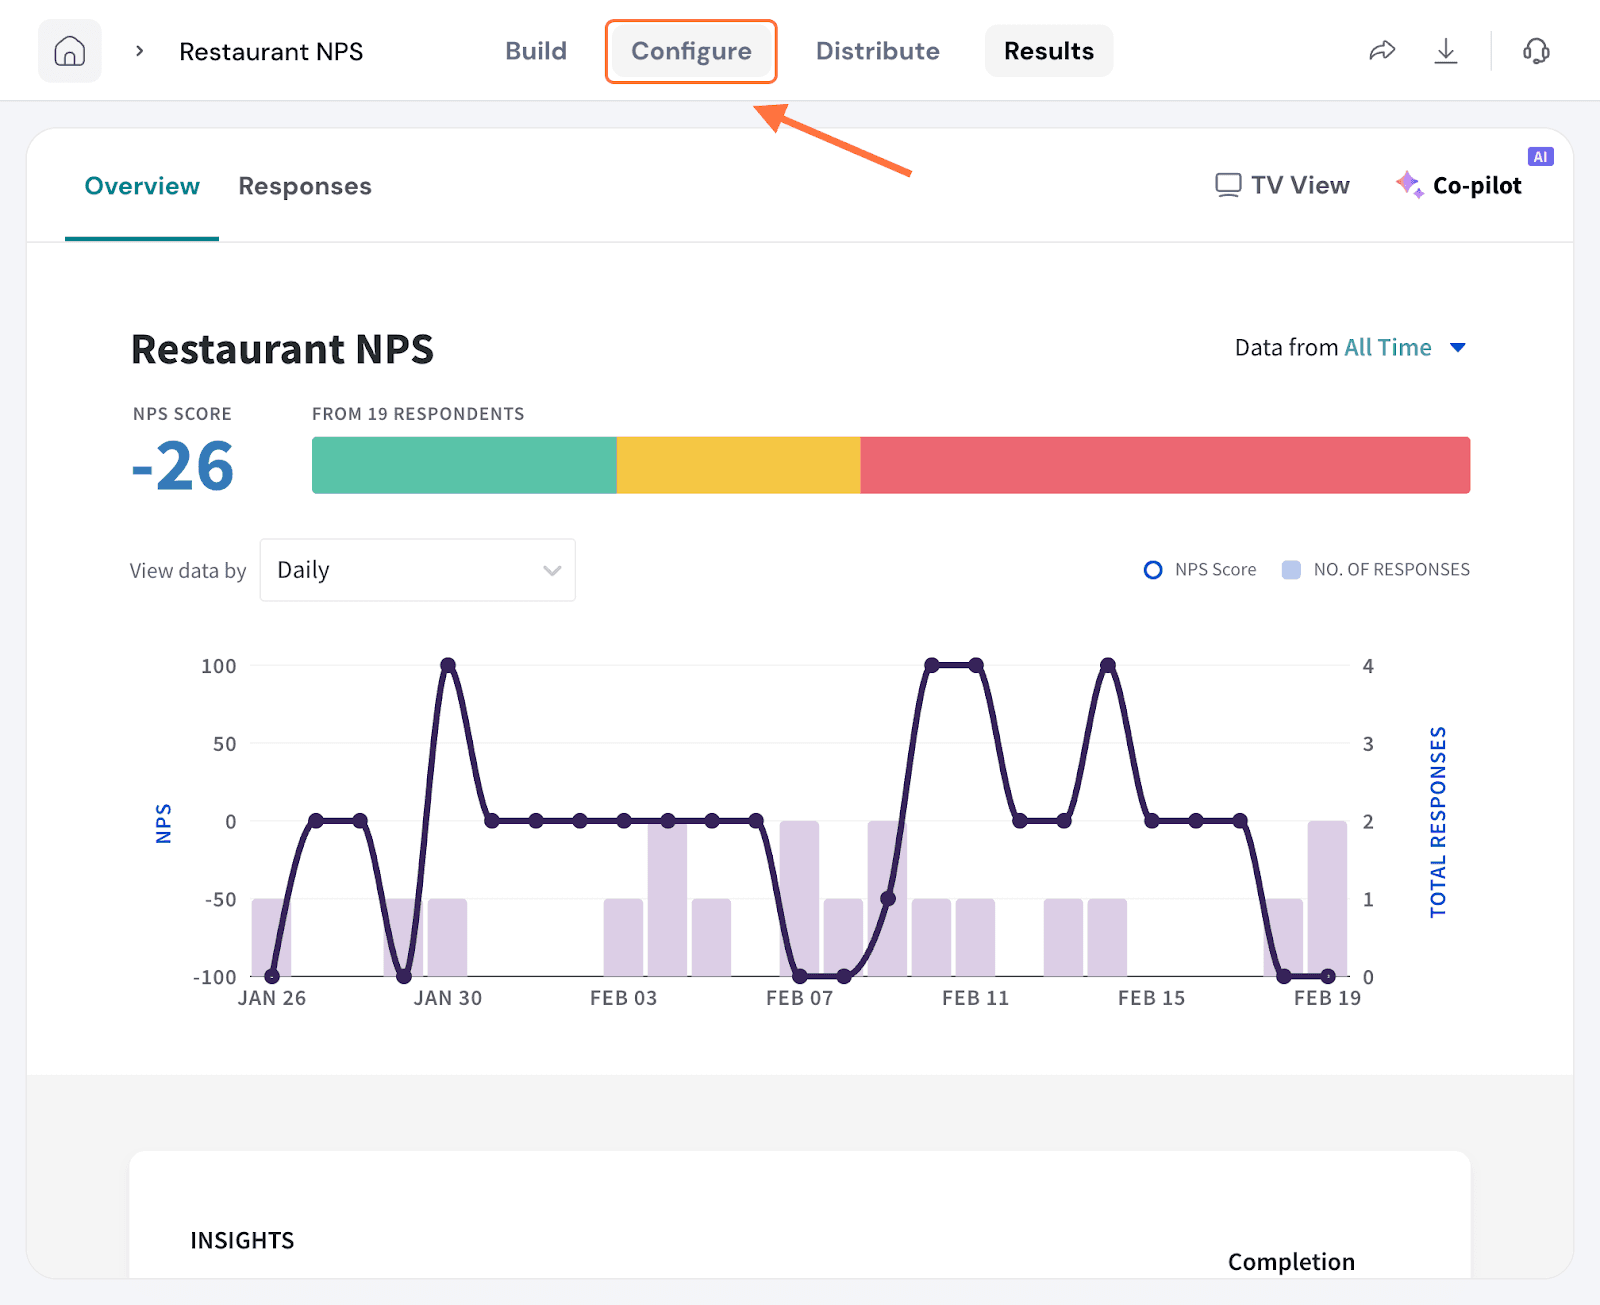
2. Search for the Amazon S3 integration using the search box (or by scrolling through the integrations). When it appears, click on the toggle.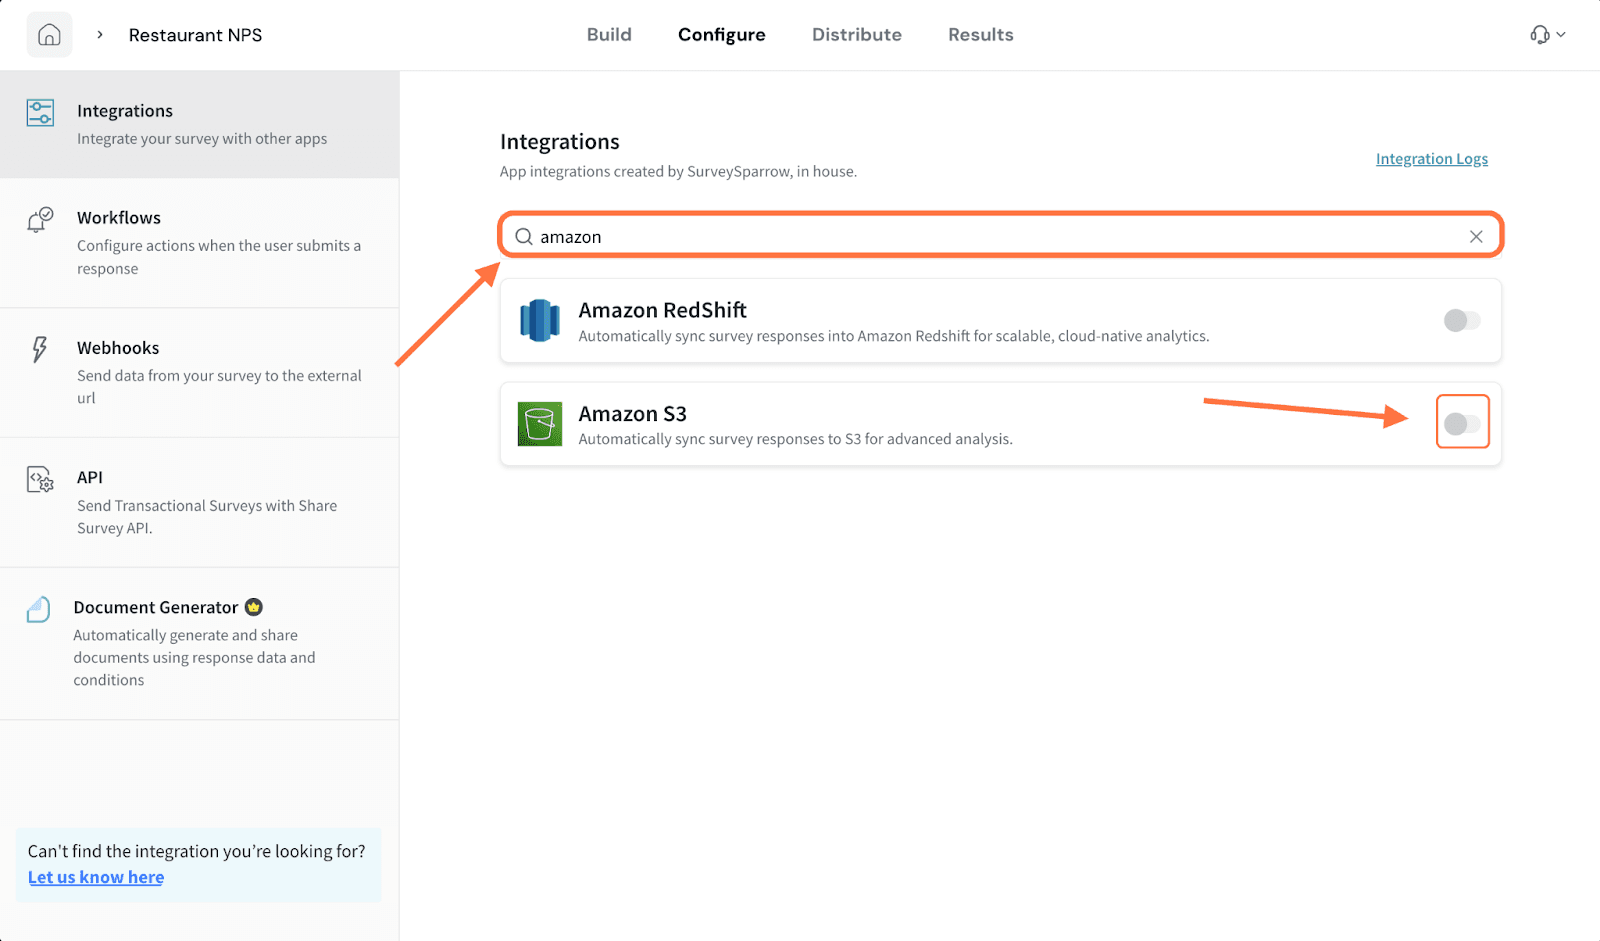
3. When the integration setup screen opens, you must first connect the destination bucket. You must start by selecting the AWS region. Click on the drop-down under AWS Region and select from the options.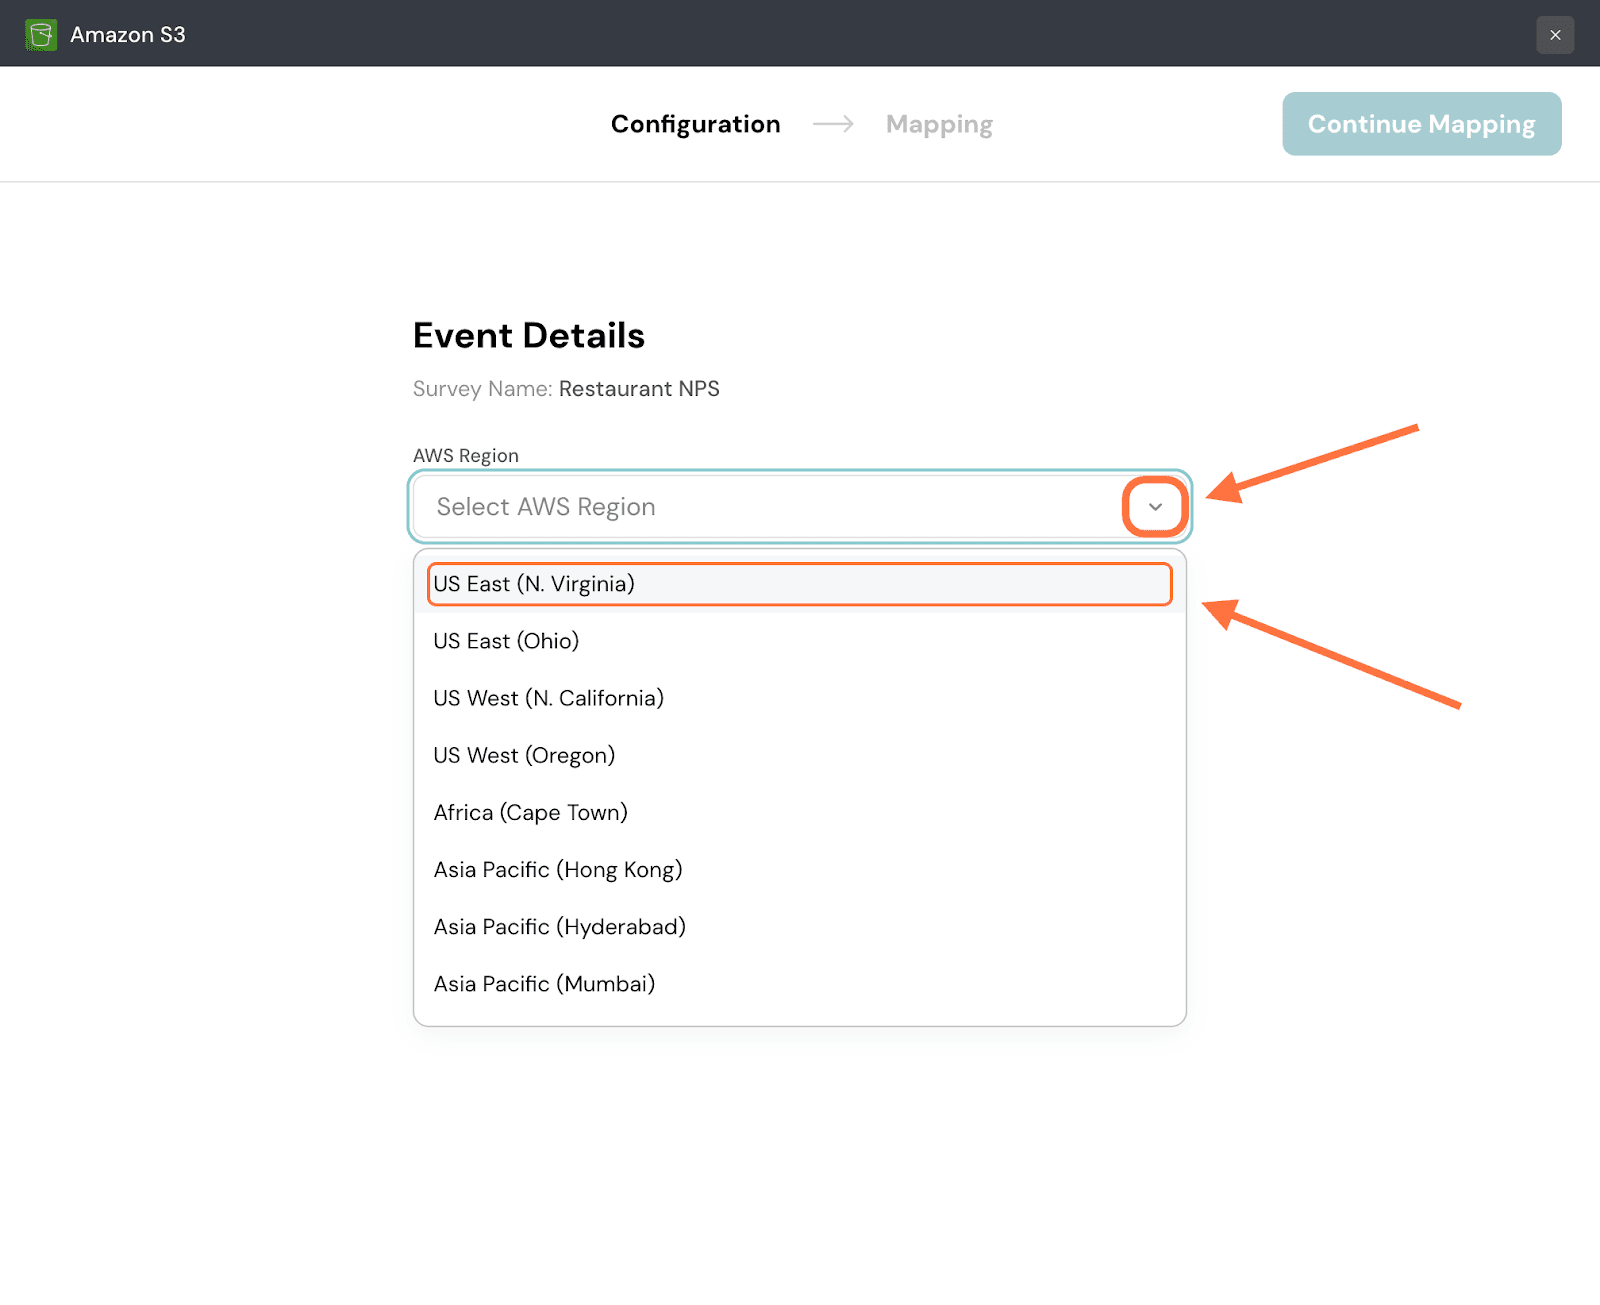
4. Next, enter the S3 Bucket Name.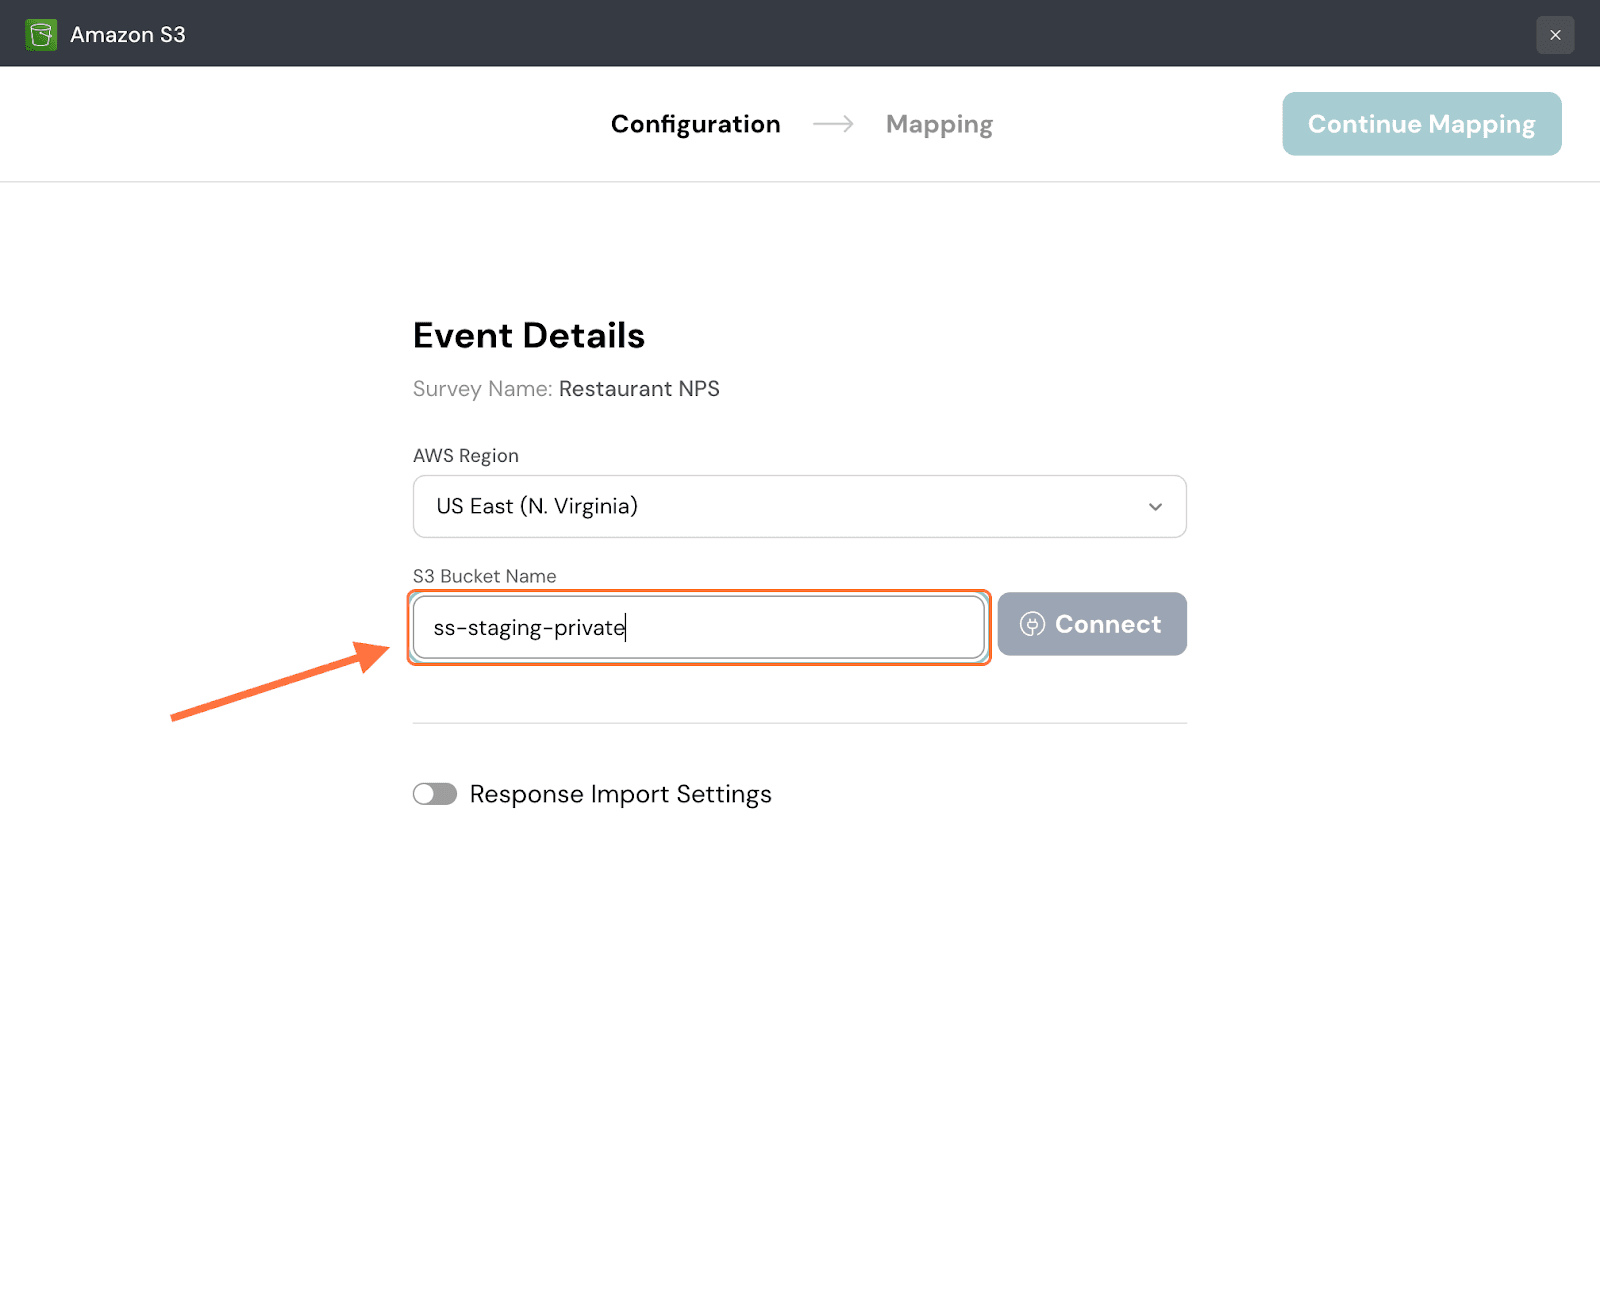
4. Click on Connect.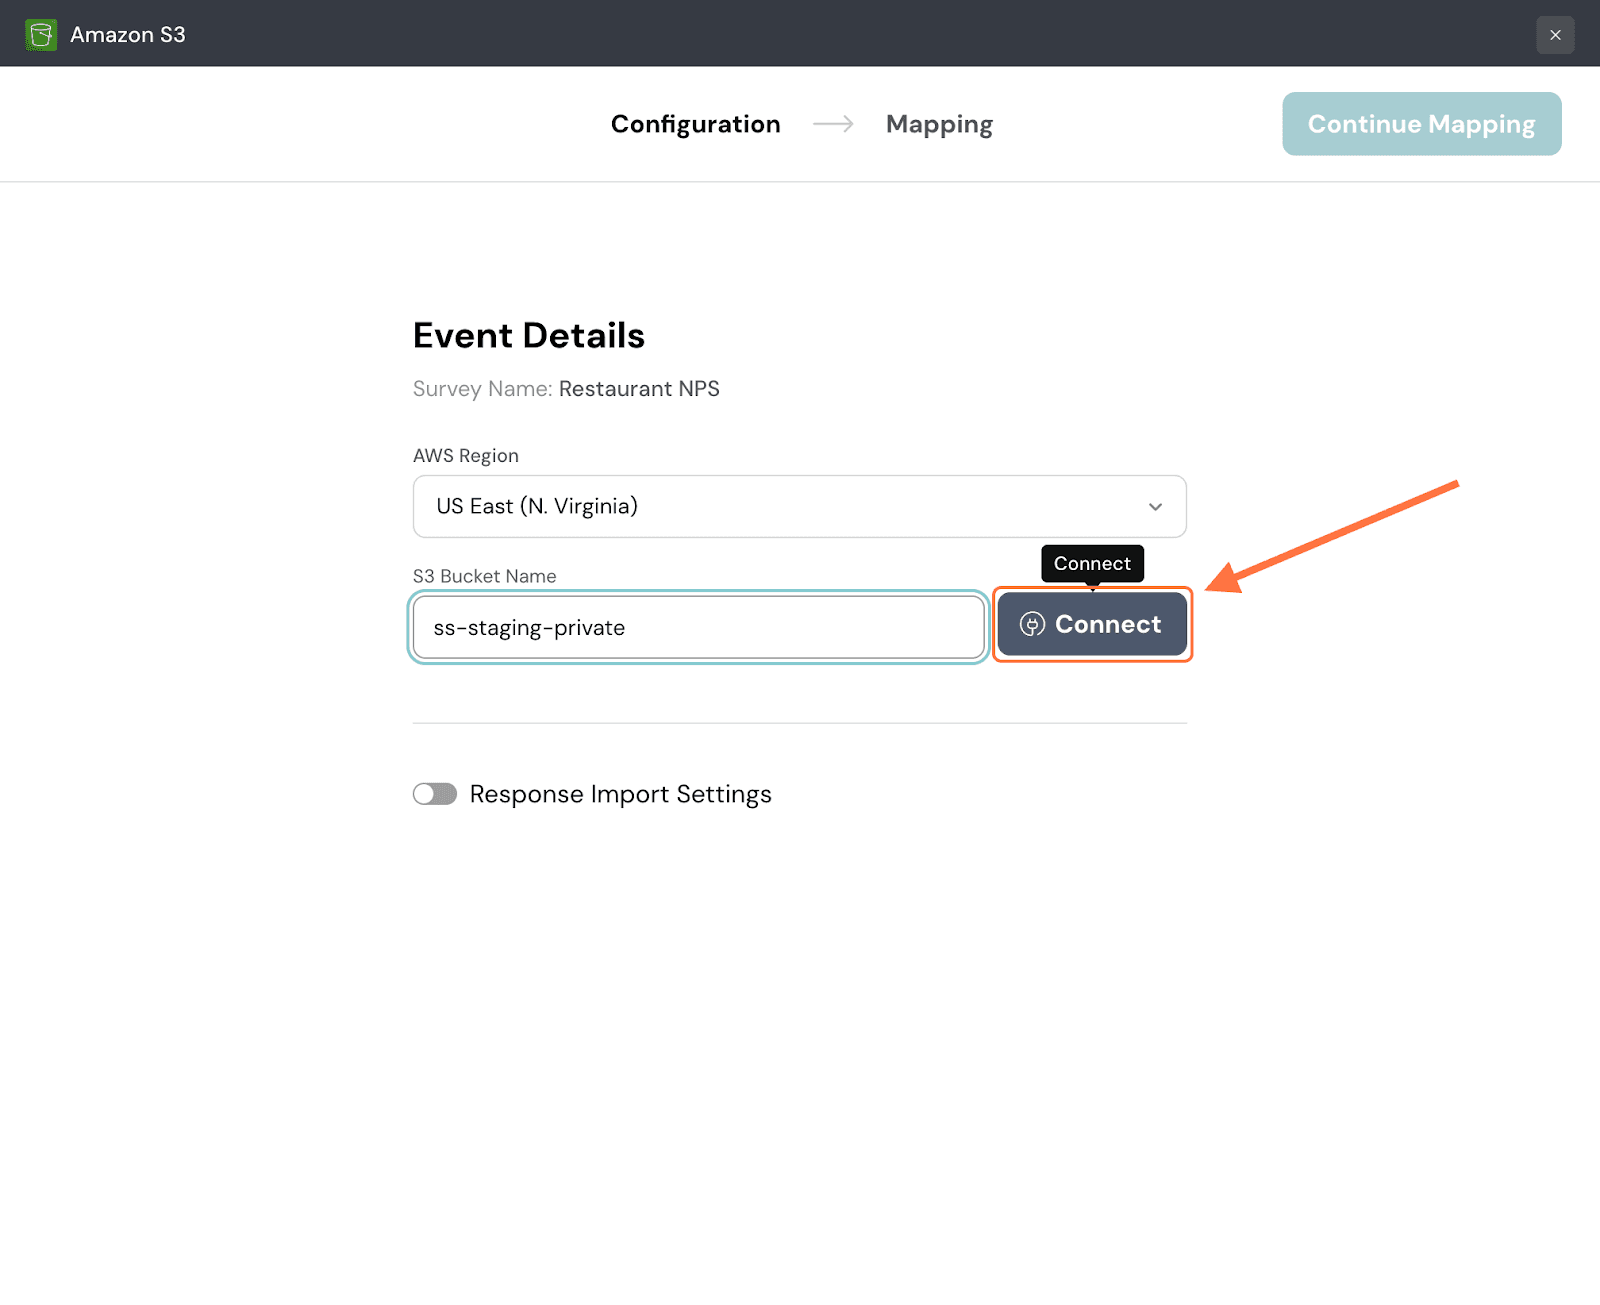
5. After connecting the S3 Bucket, you need to choose the folder. Click on the drop-down under Folder and choose from the options.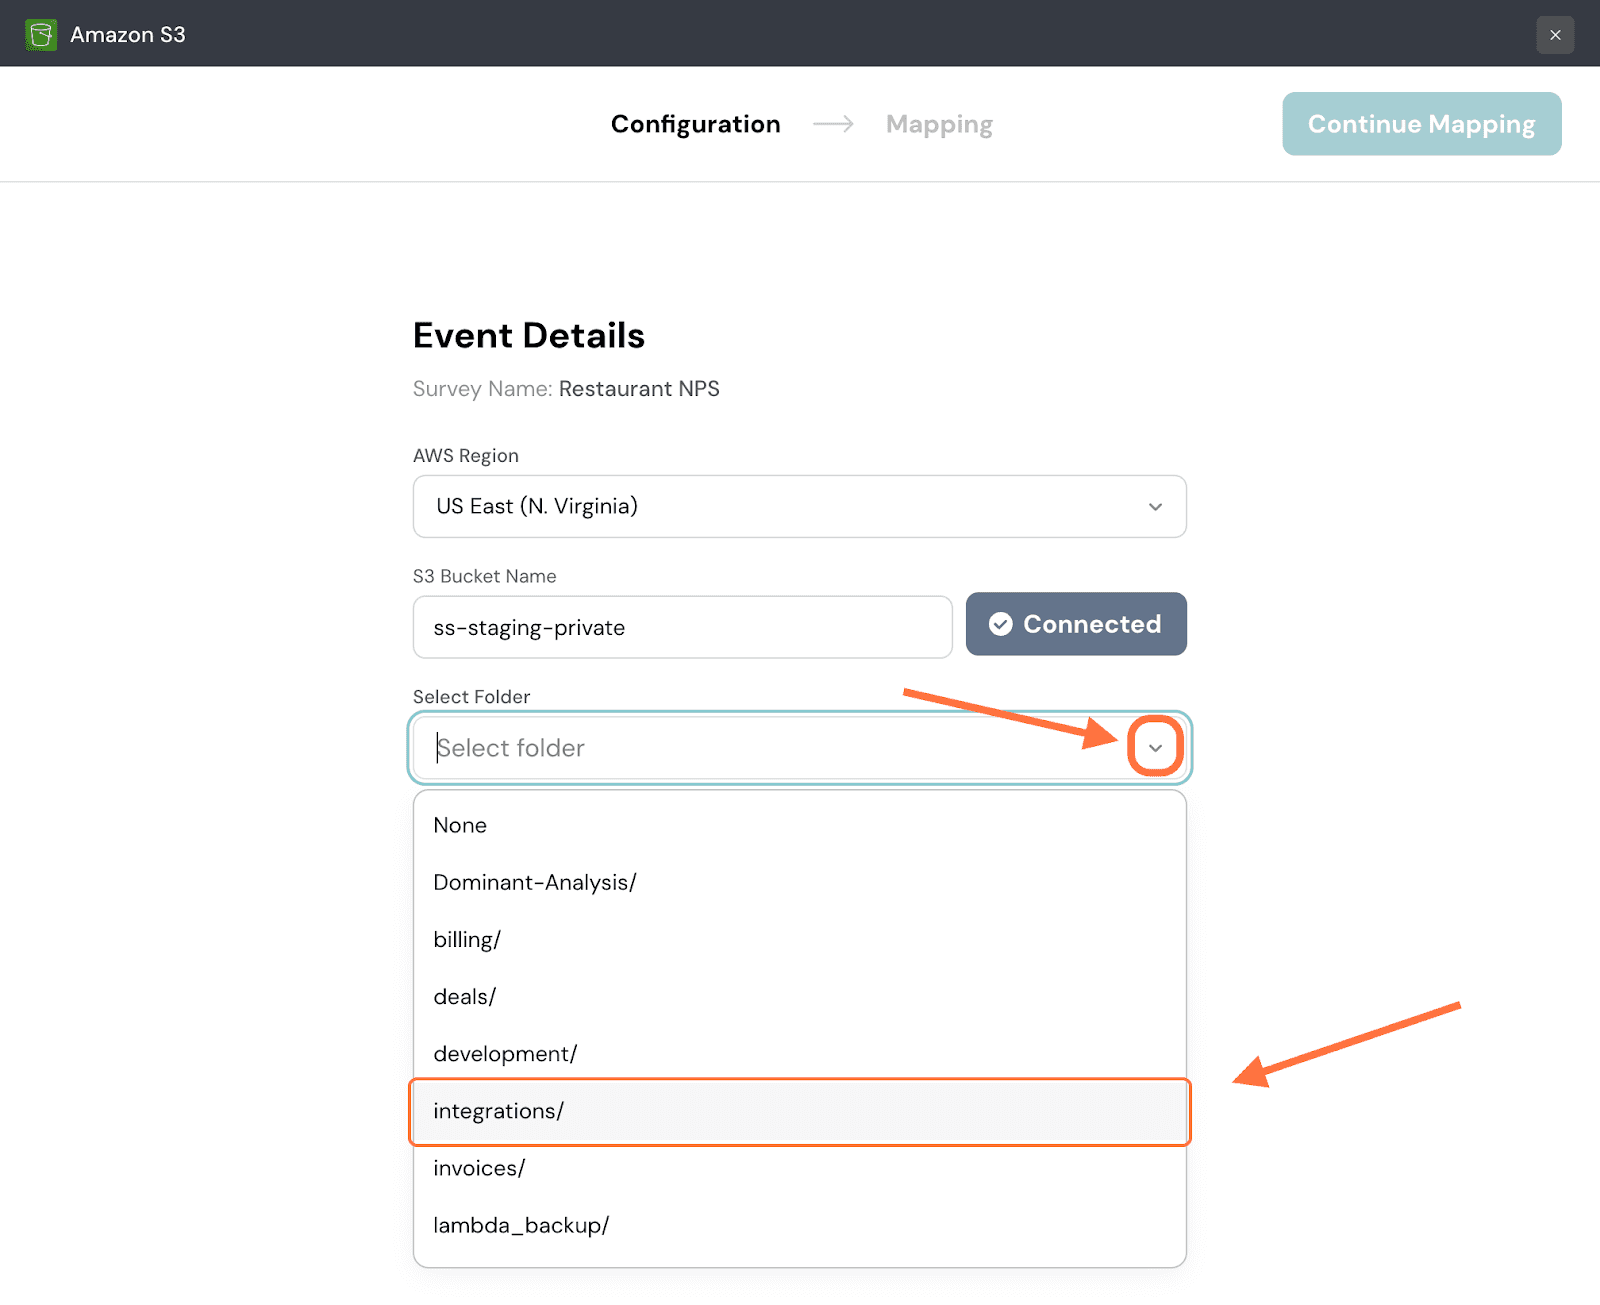
6. With Amazon S3, every mapping is a new file (and can be exported in 1 of 3 formats: CSV, JSON or XLS). You cannot map responses into an existing file/table. So name your file and select the export format.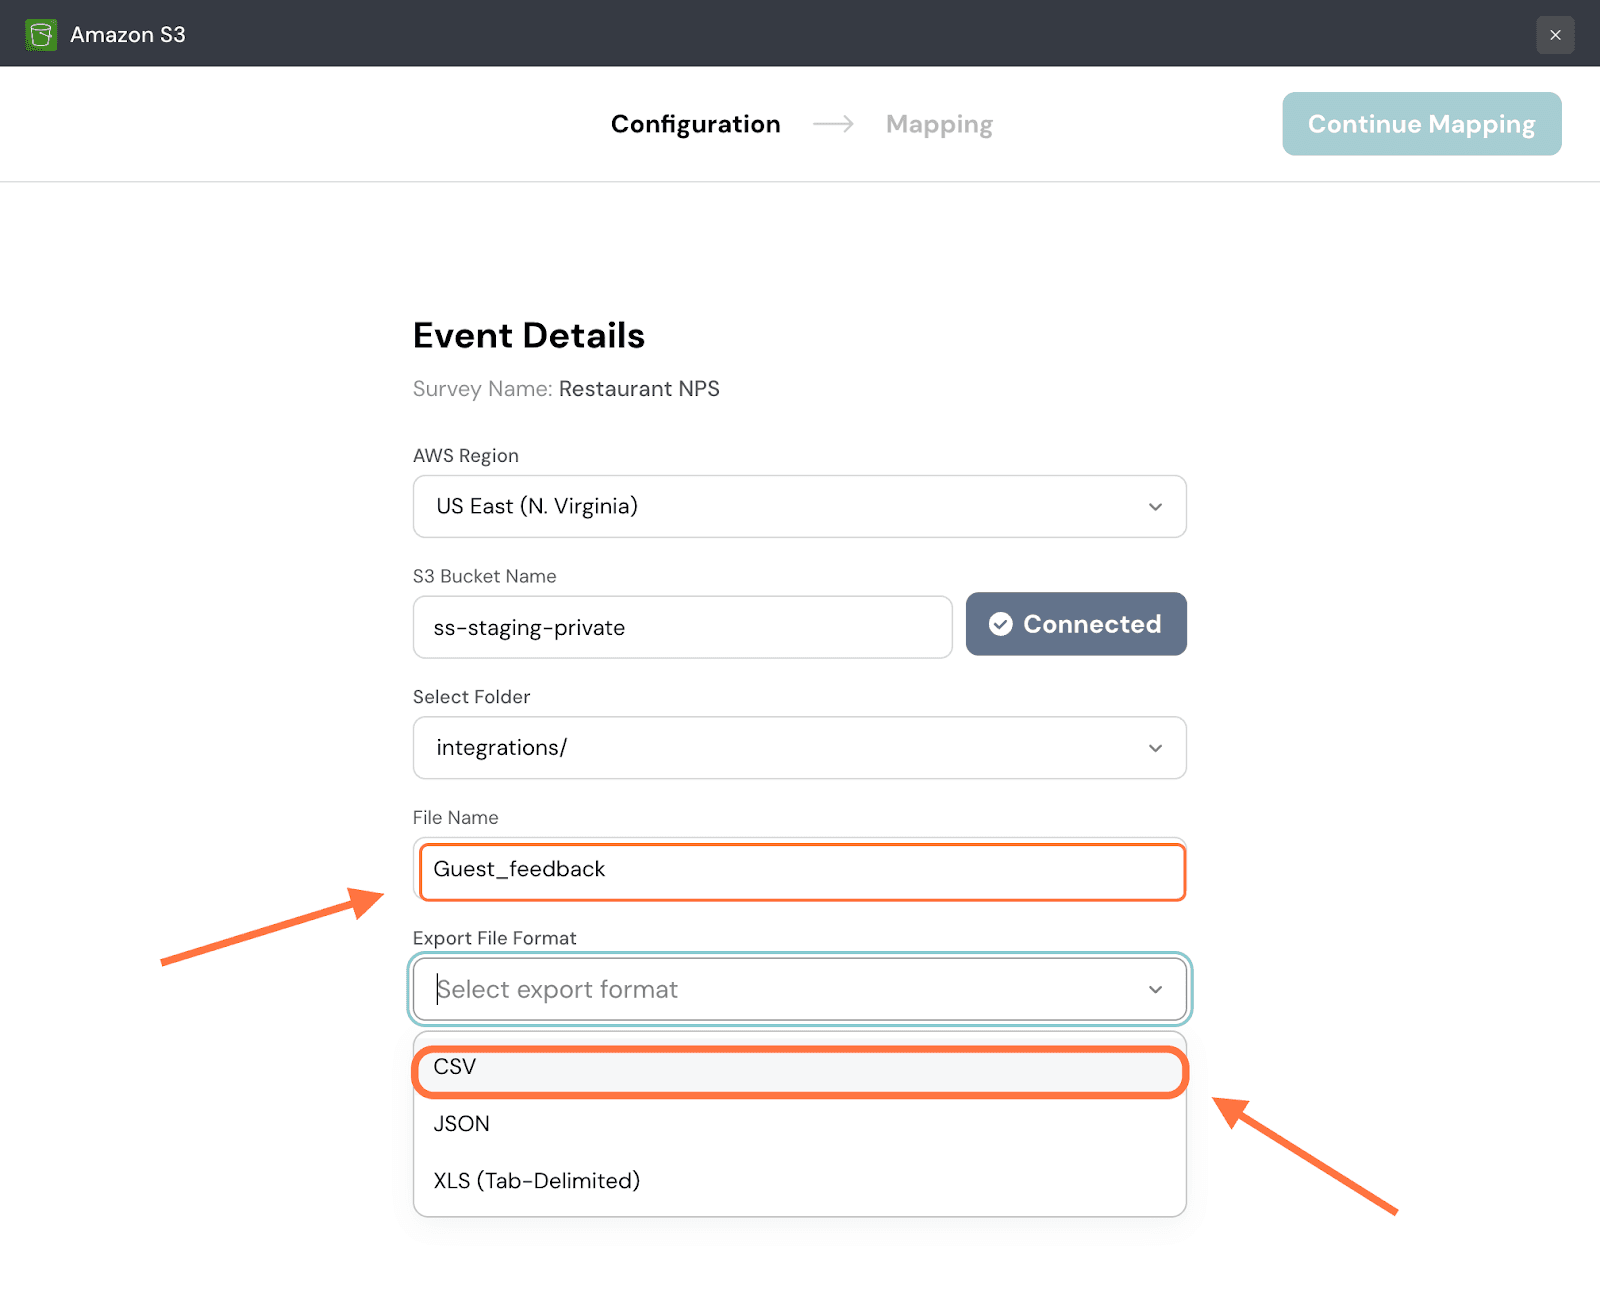
7. By default, only new responses are imported. If you want to only import responses from a specific date, click on the toggle next to Response Import Settings.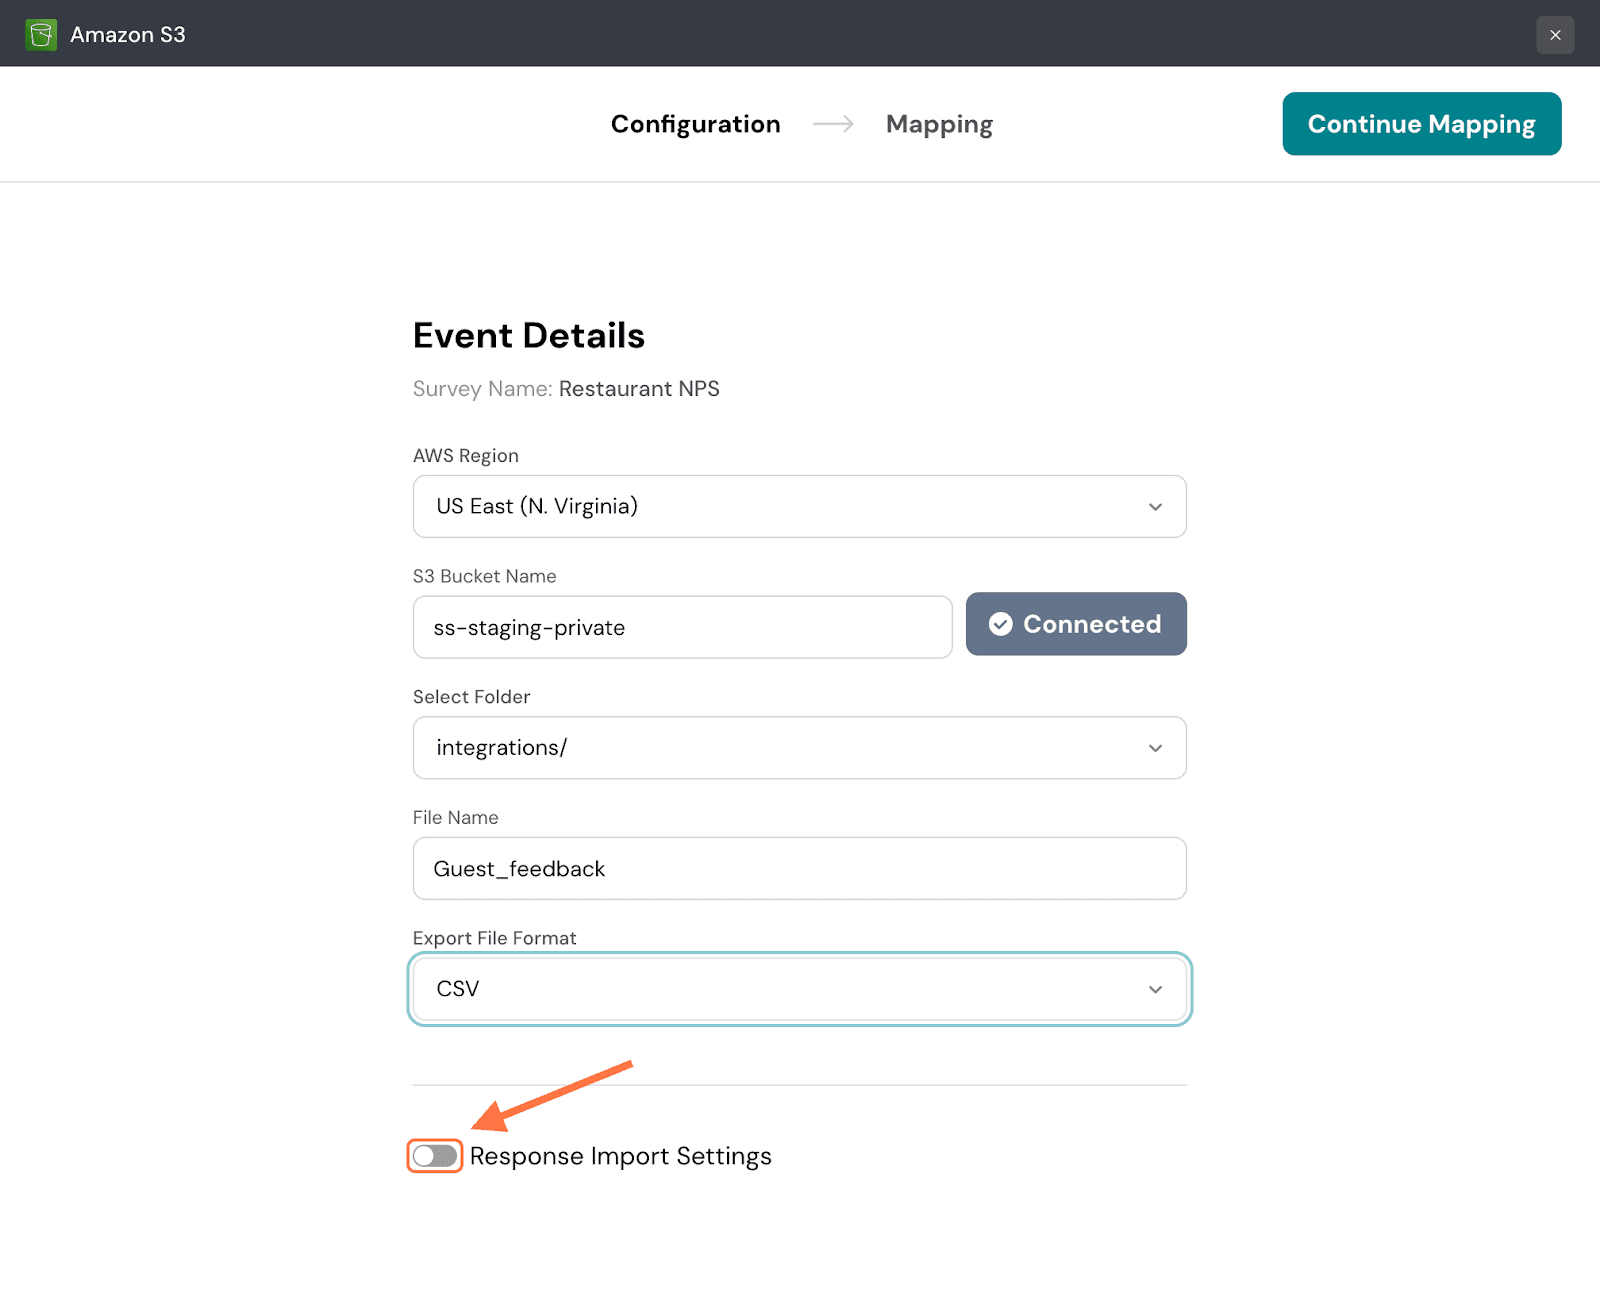
9. When you hover over the Specific Date option, a calendar will appear. Choose a date, then click on Apply.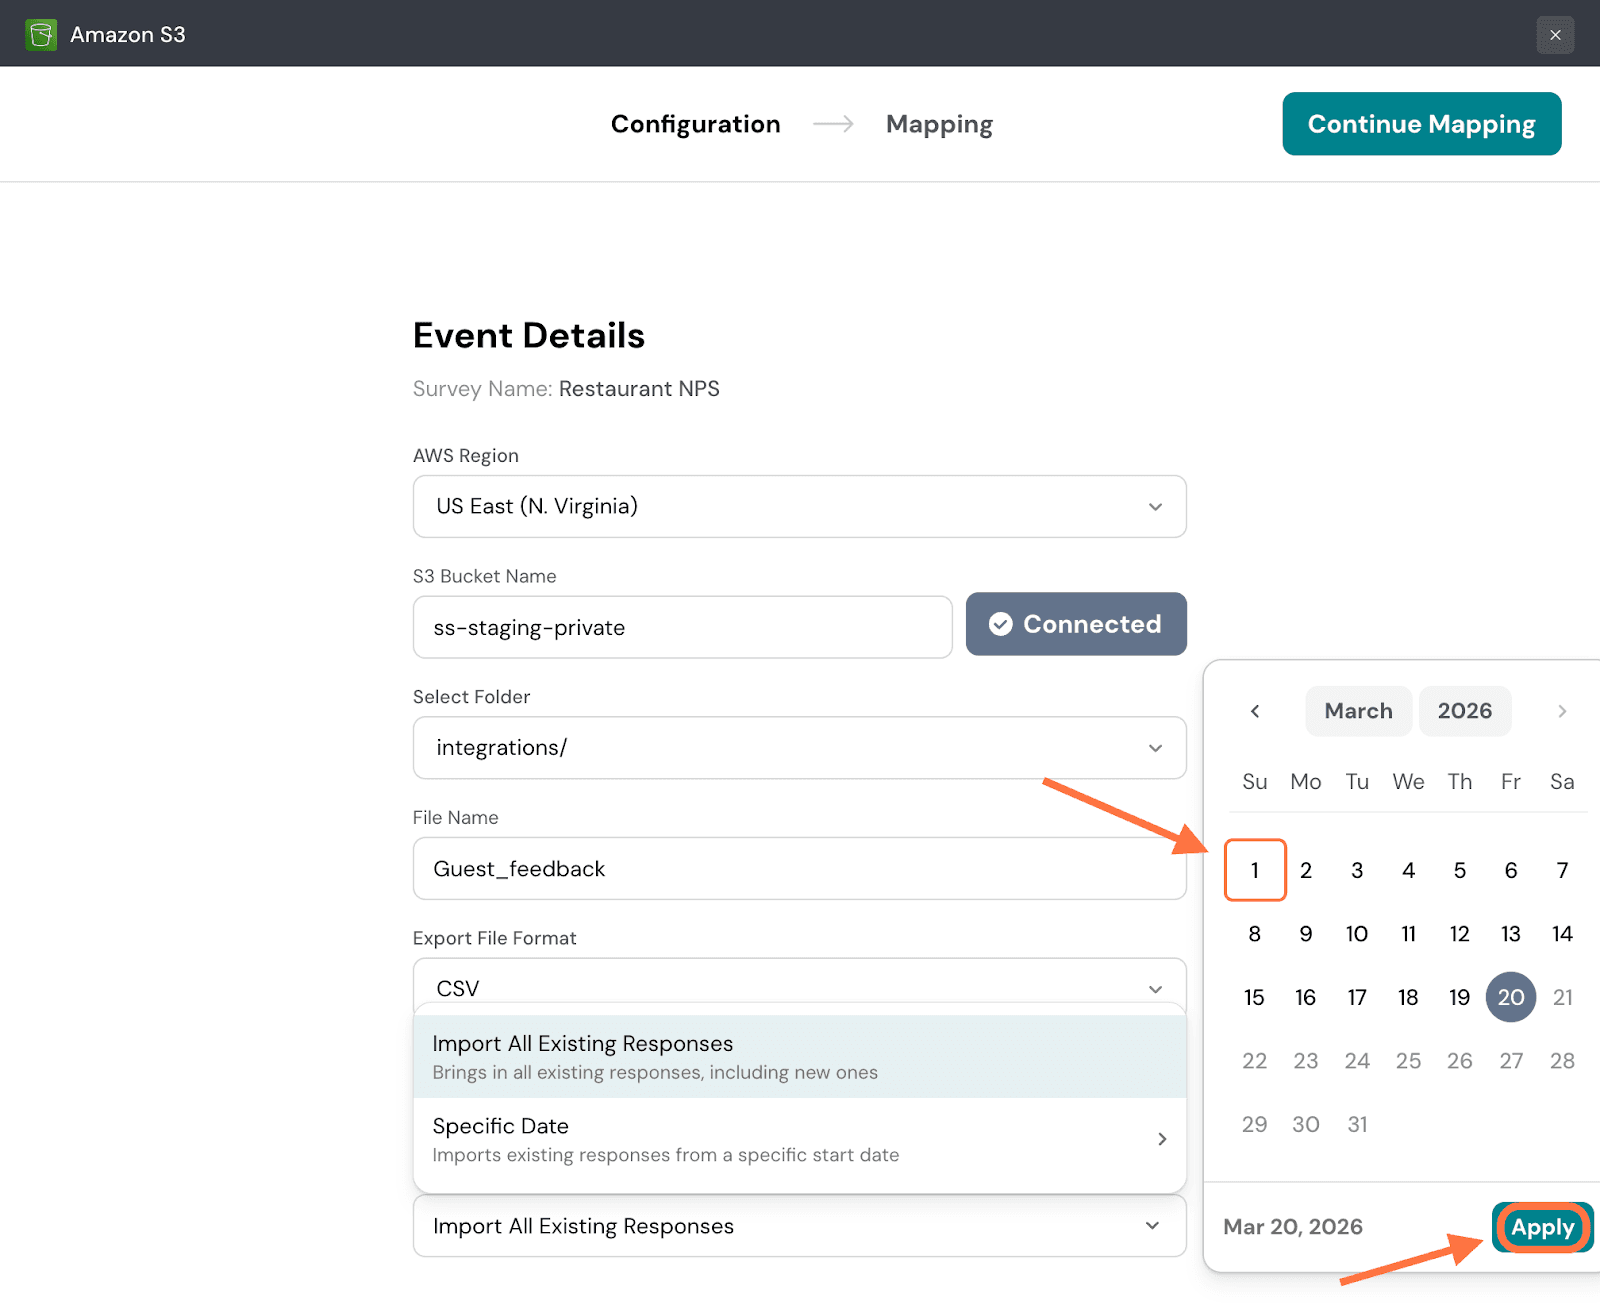
10. Click on Continue Mapping.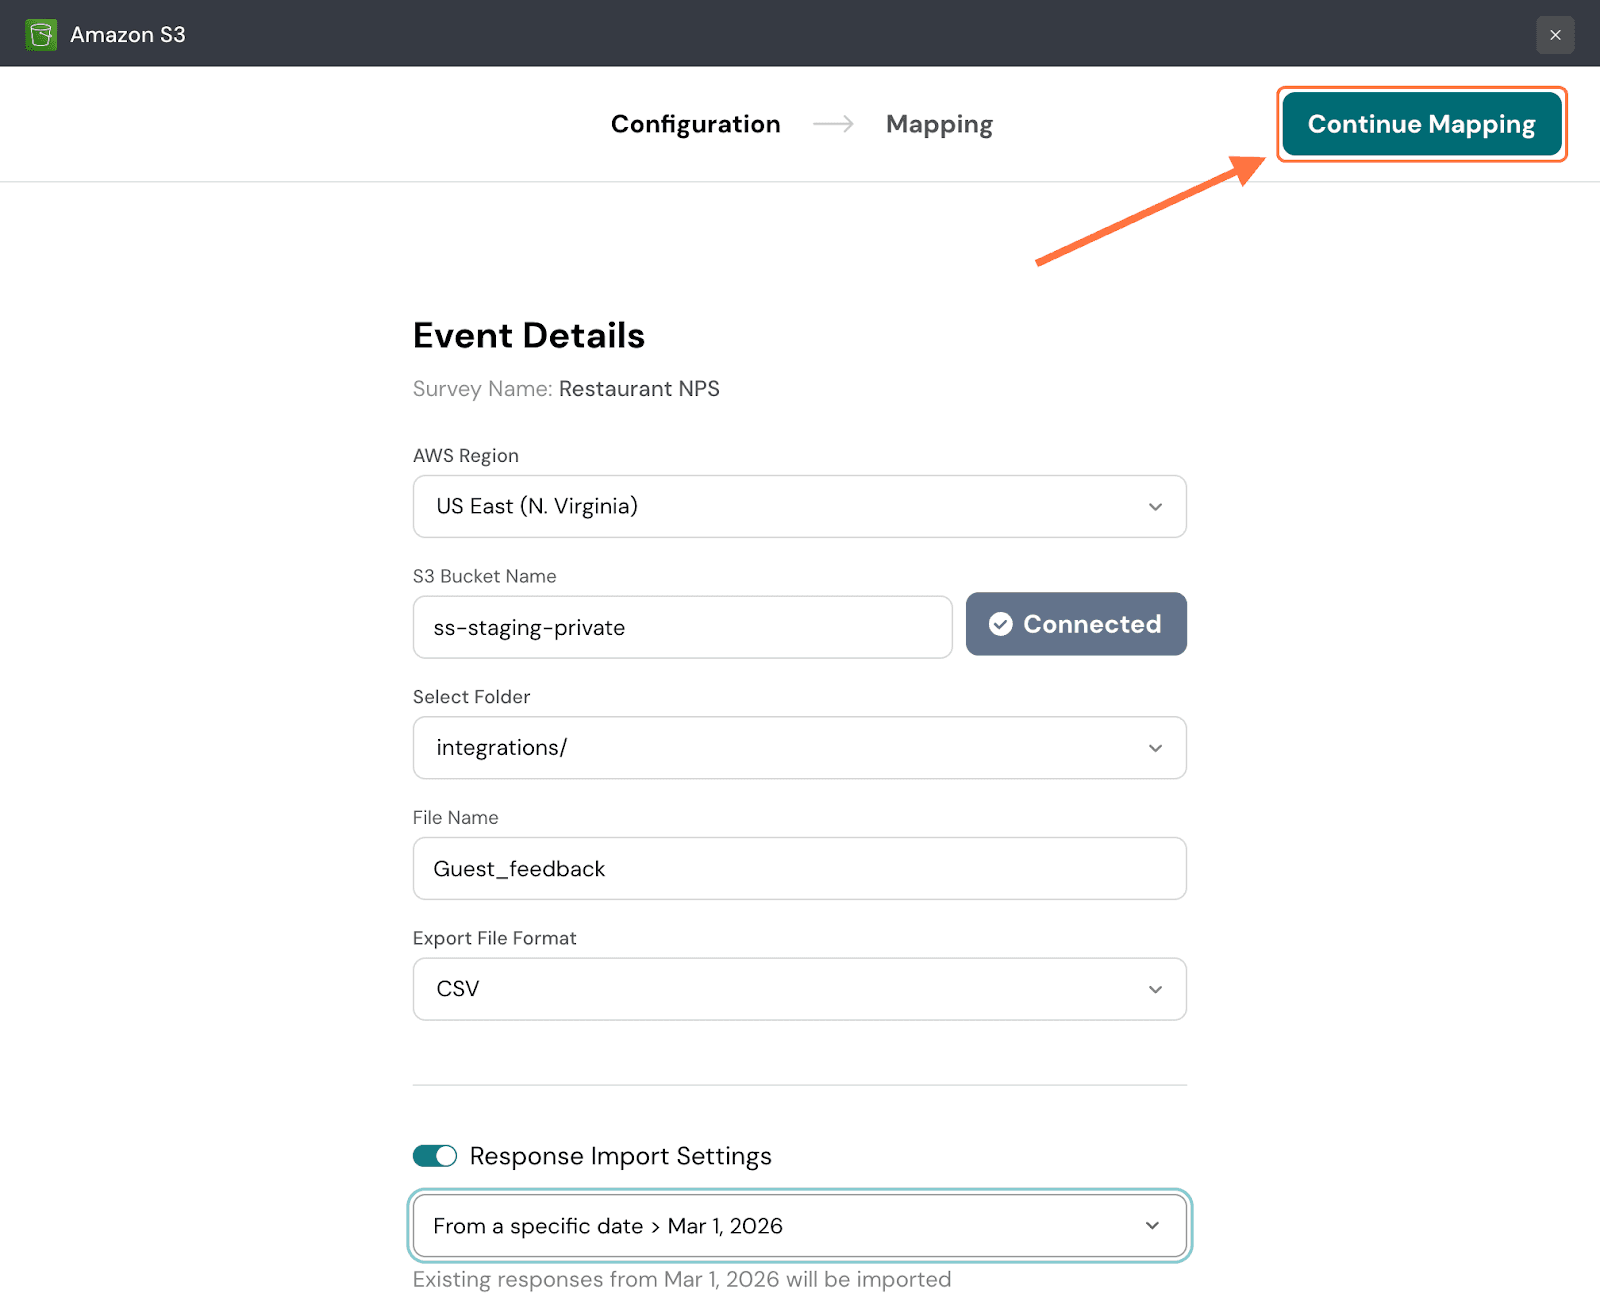
11. Now in the Mapping section, you need to configure which response properties are going to Amazon S3. First you can set conditions to decide which type of response gets synced to Amazon S3. Click on Set Conditions.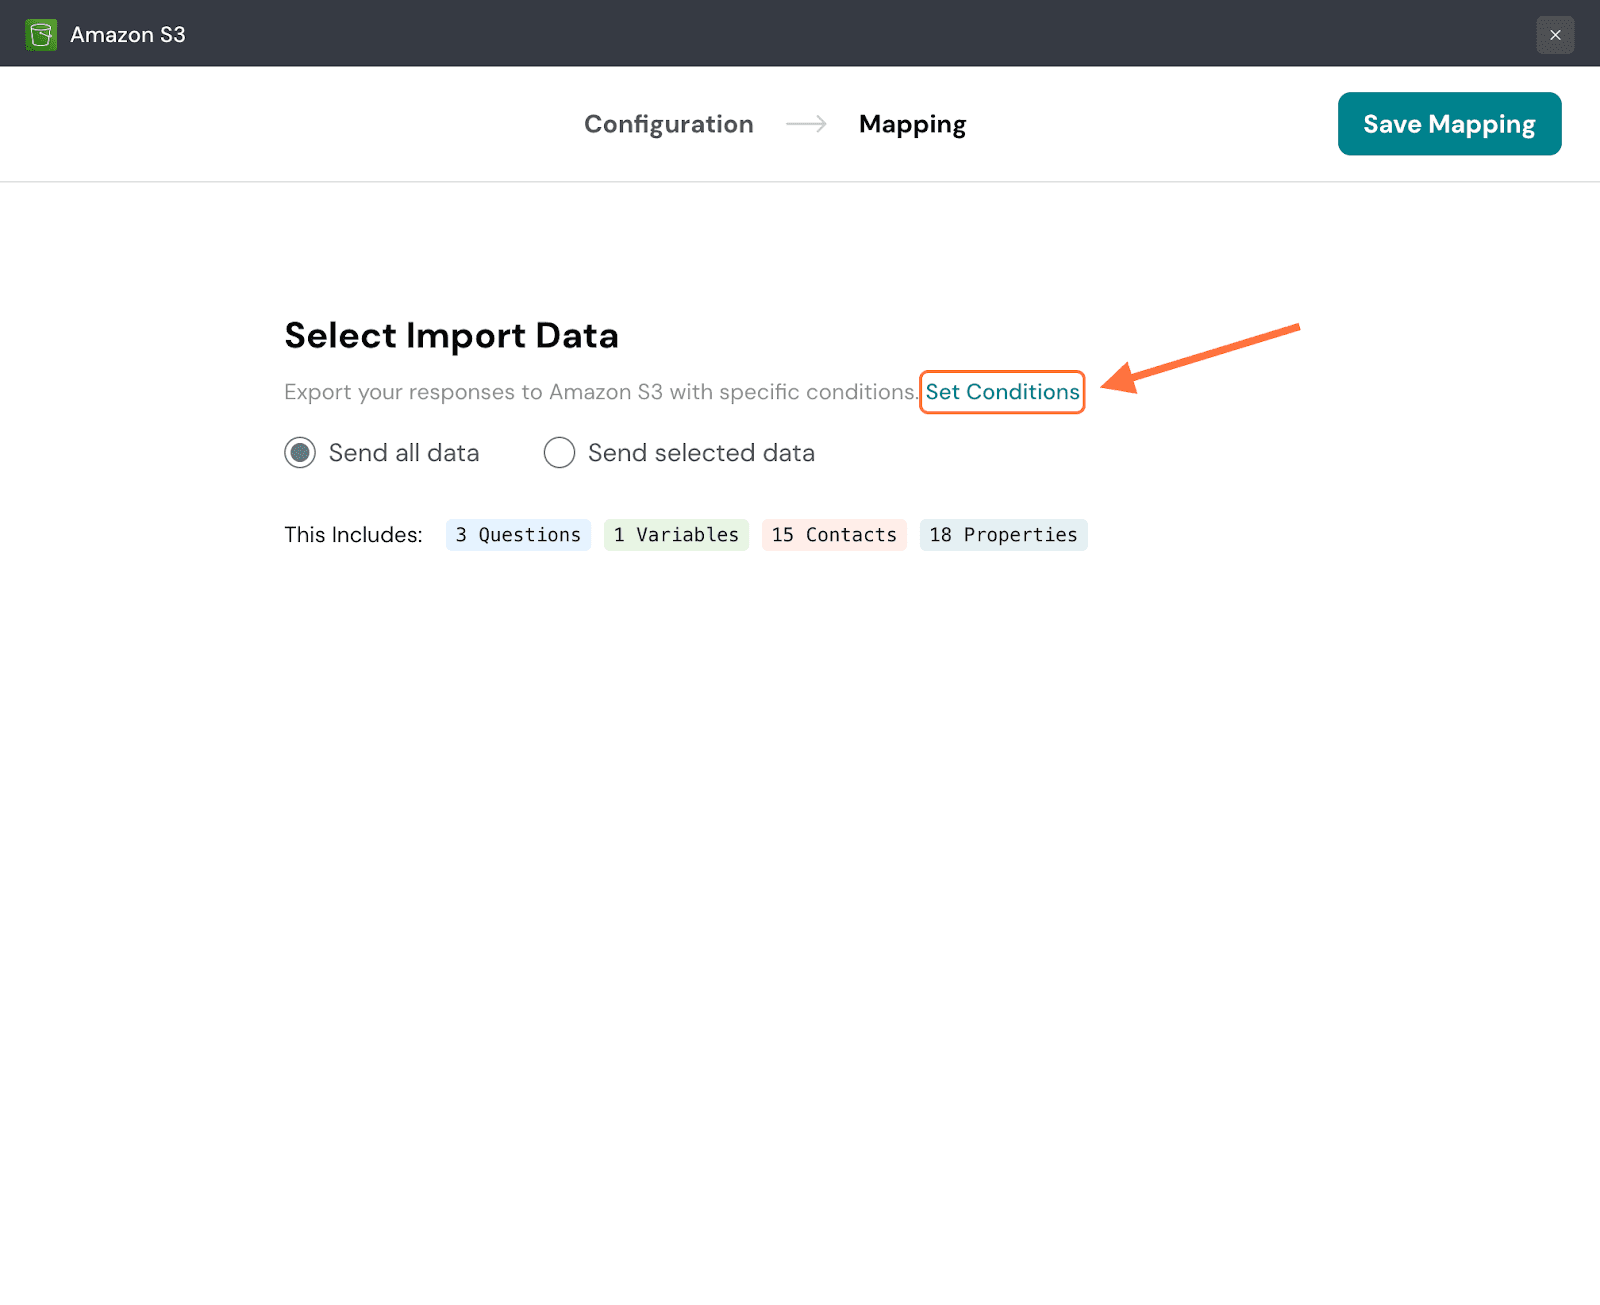
12. In the condition setting modal, you can set a conditional logic for the conditions: either any or all. The default setting is any, but if you’d like to change the logic, click on the drop-down next to it.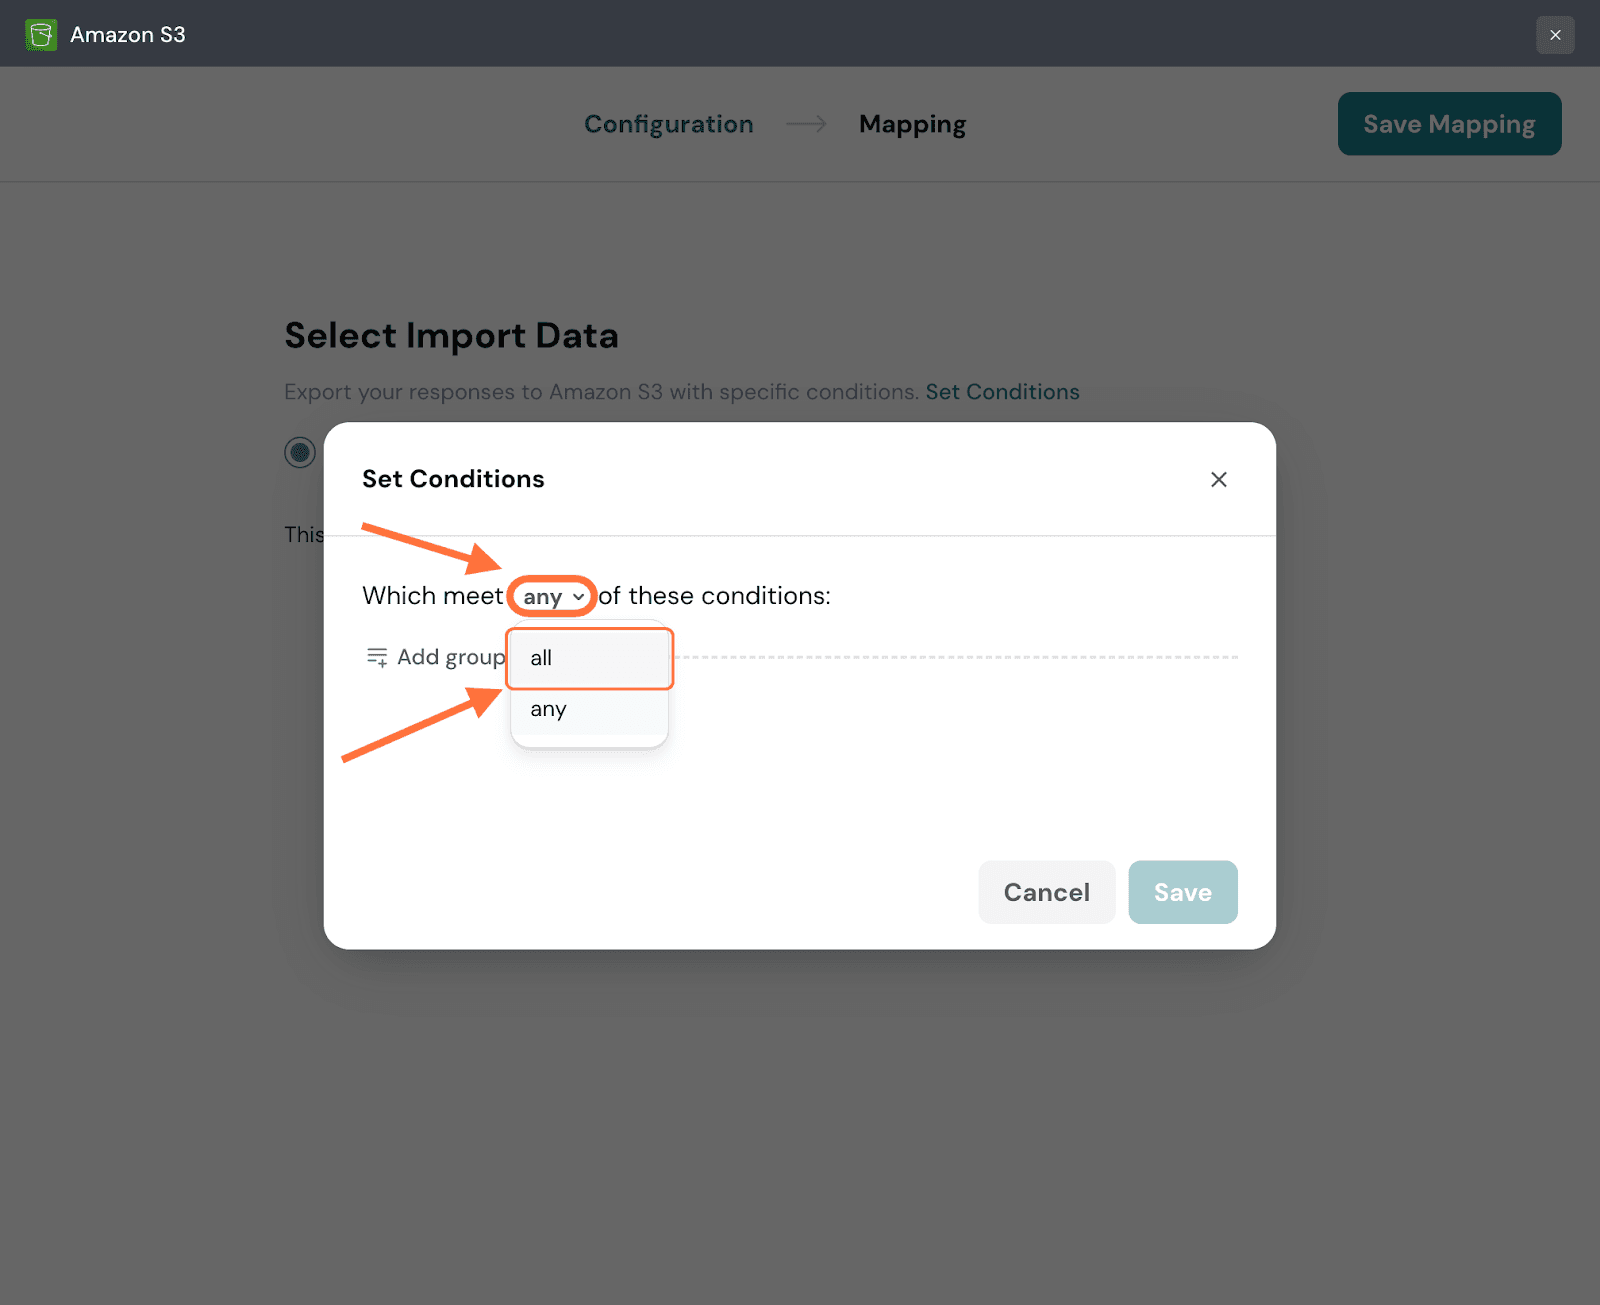
13. To add conditions, click on Add Group.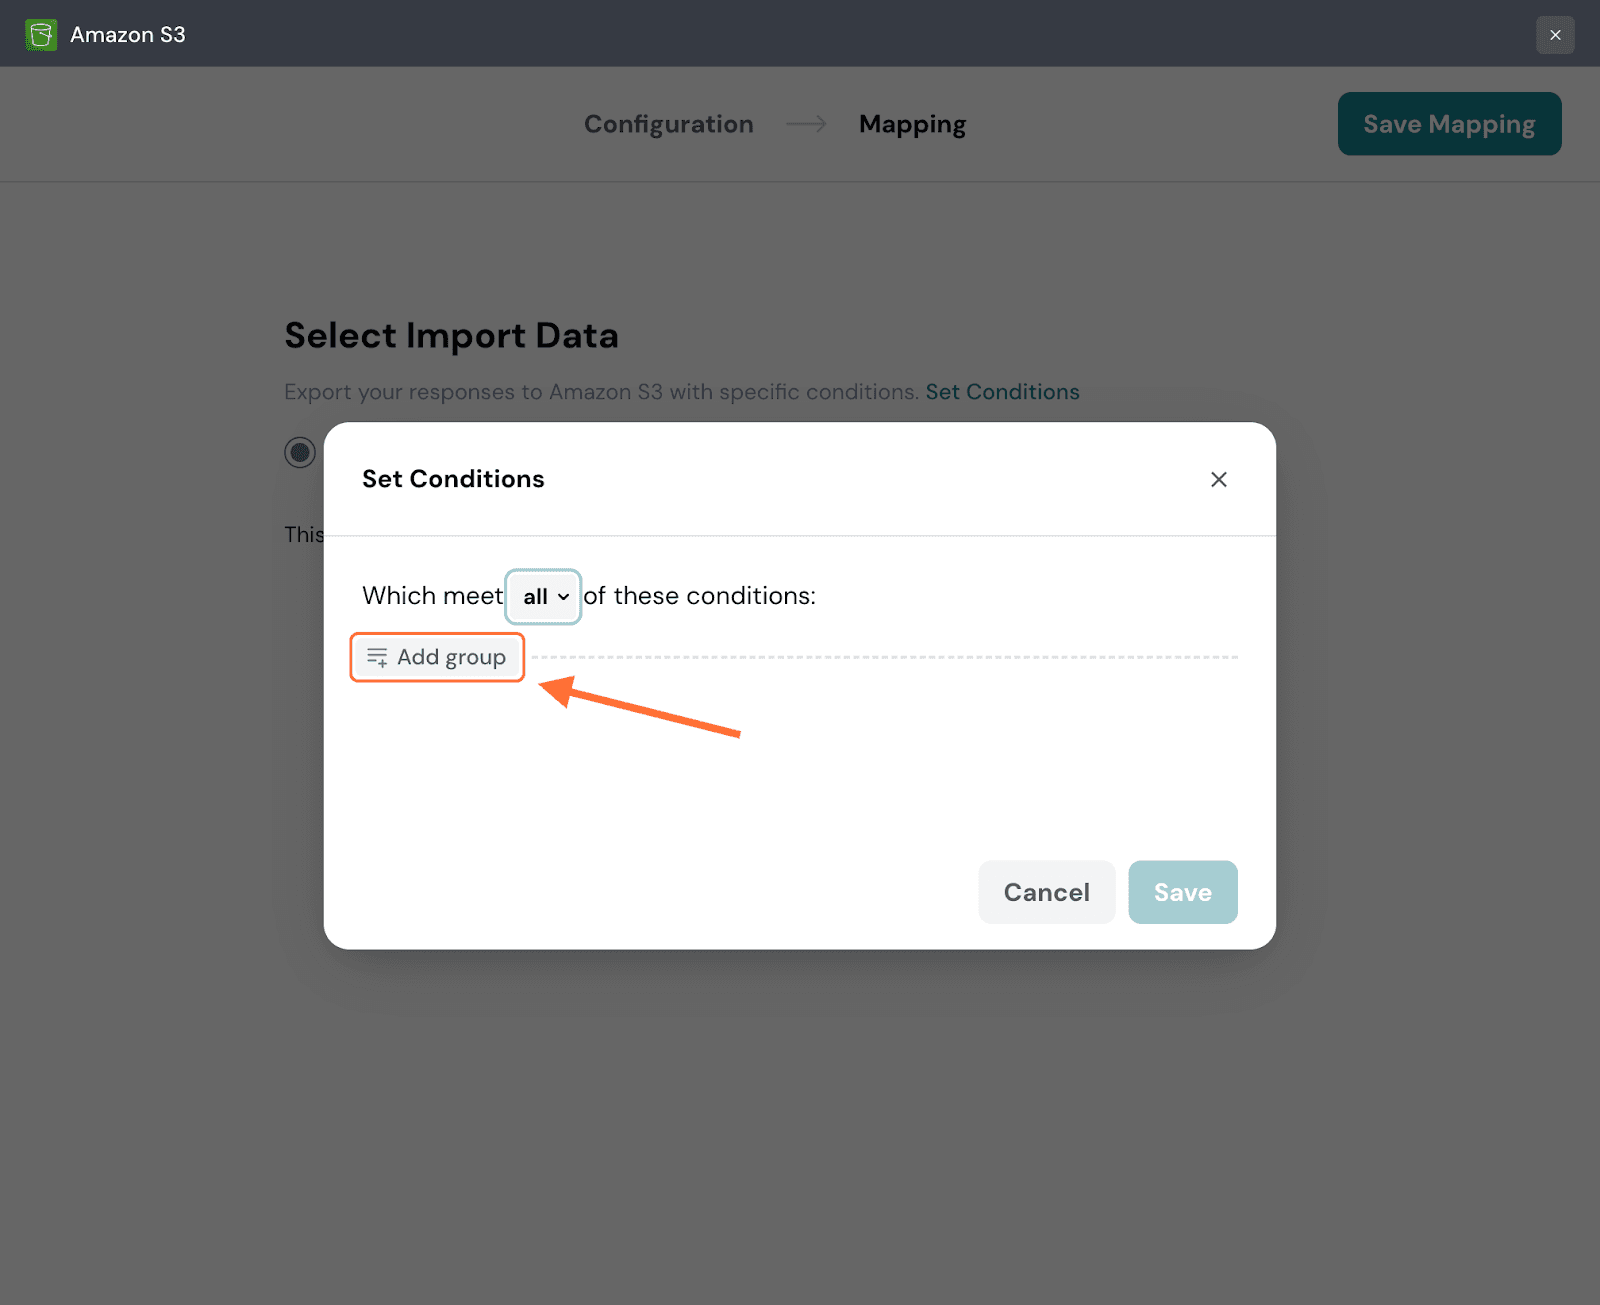
14. Choose a category of data from the drop-down menu to which the condition must apply. For this instance, let’s go with a question.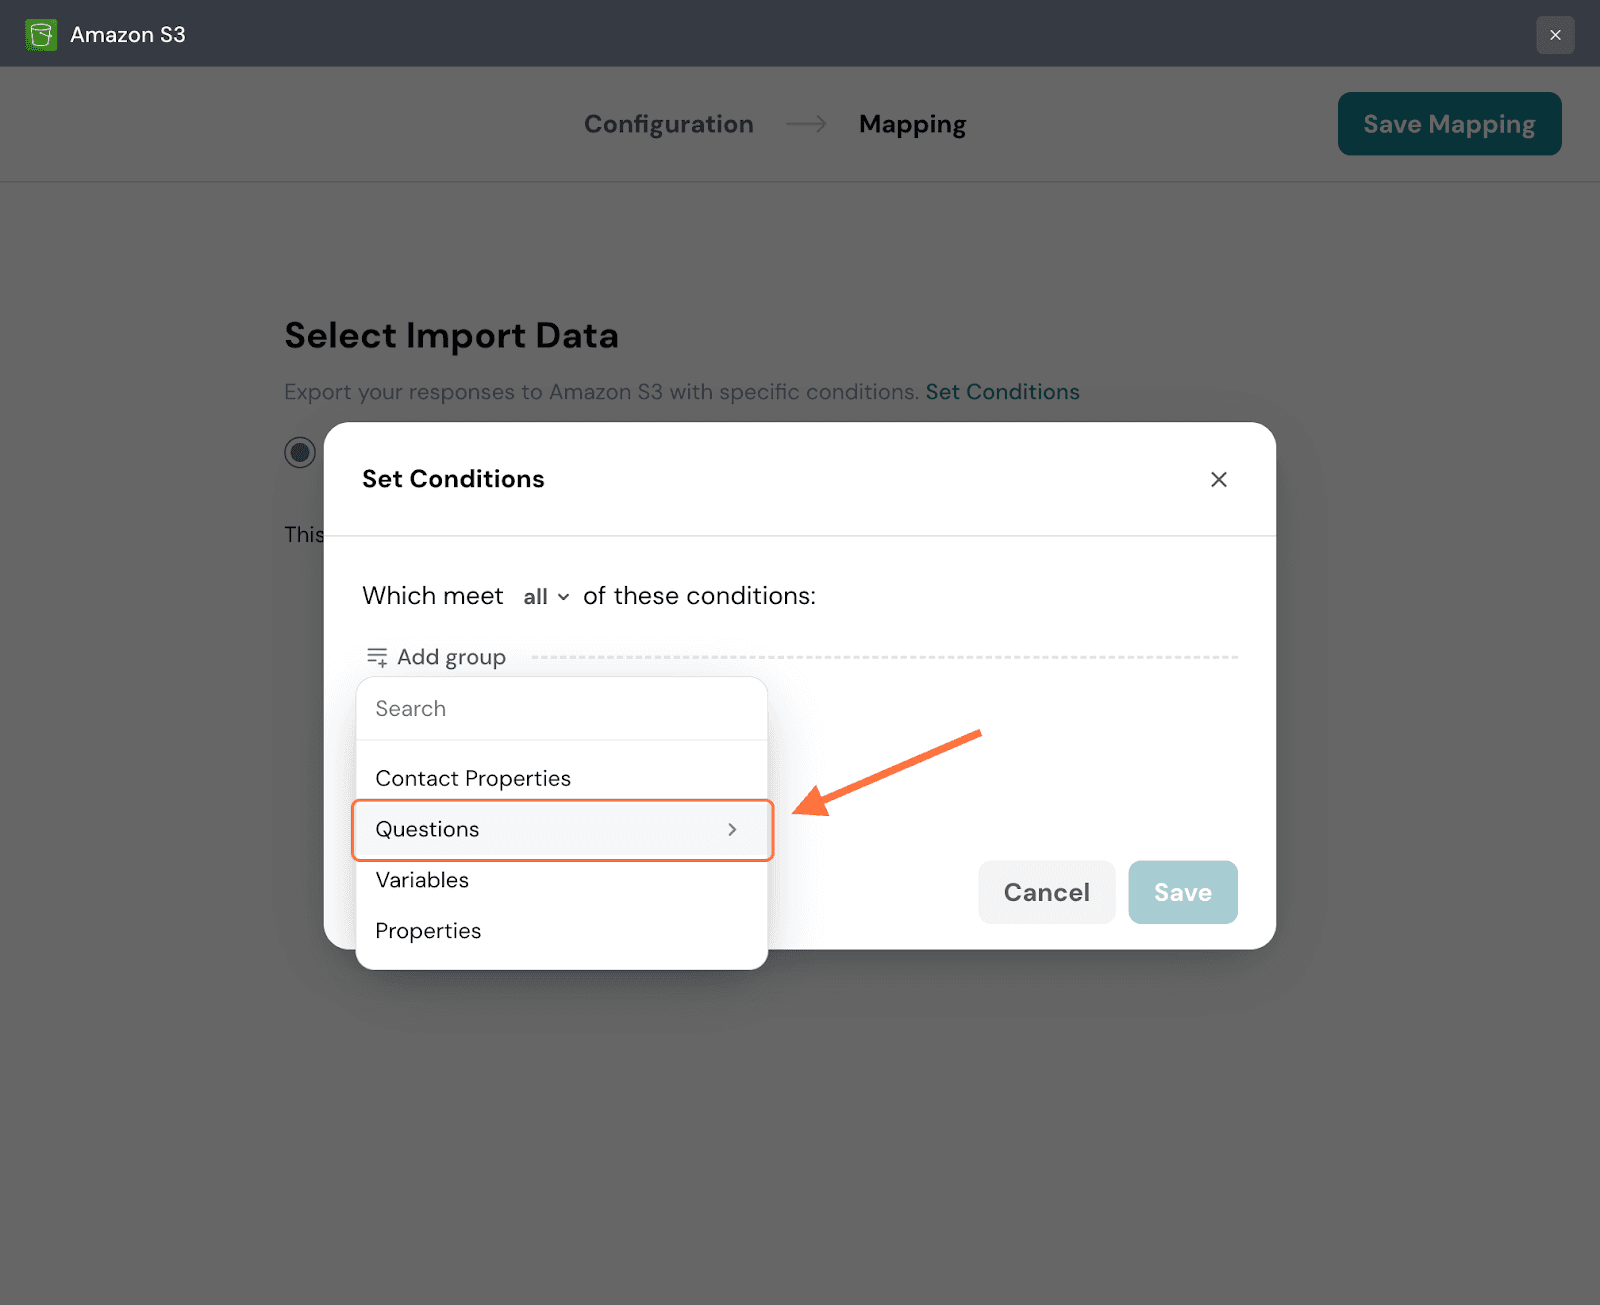
15. Choose a particular item from that category, in this instance a question.
16. Click on Choose Condition to start defining the condition.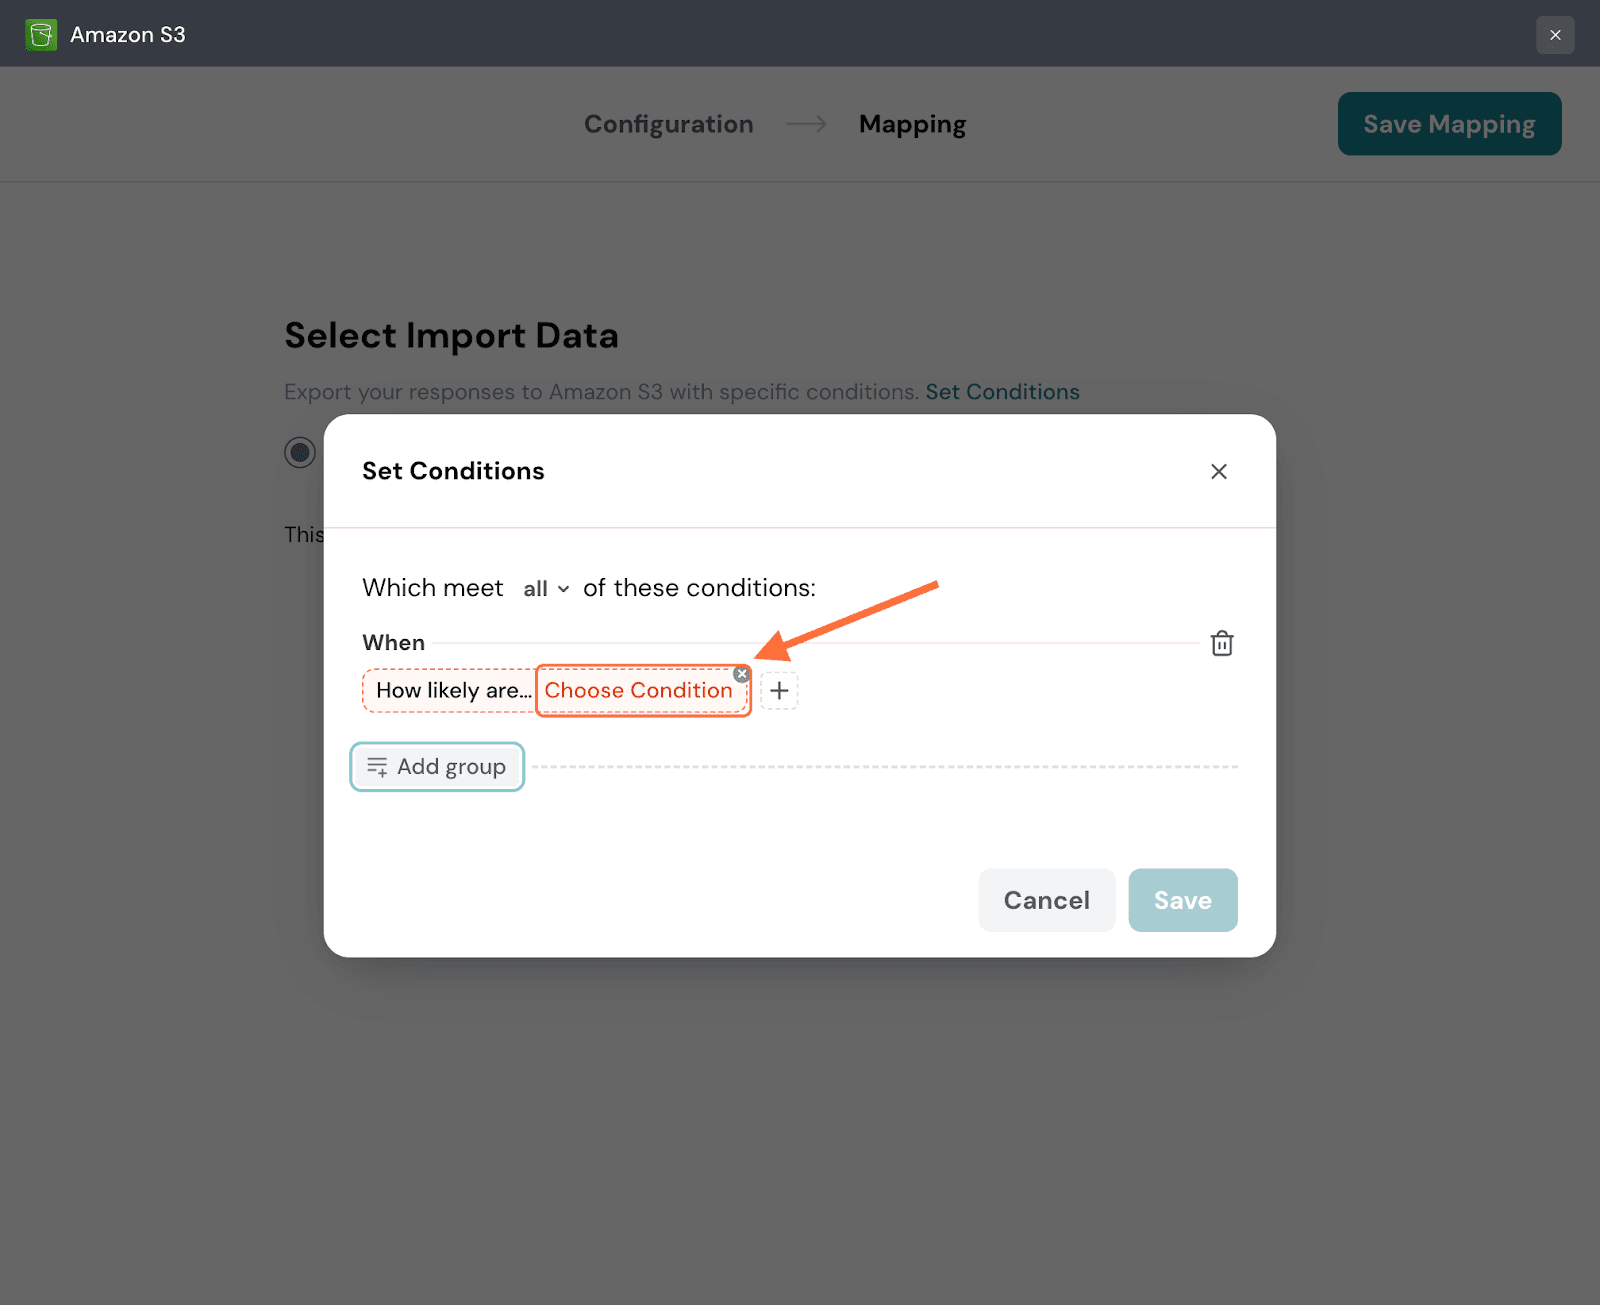
17. A list of comparison operators appears, choose one.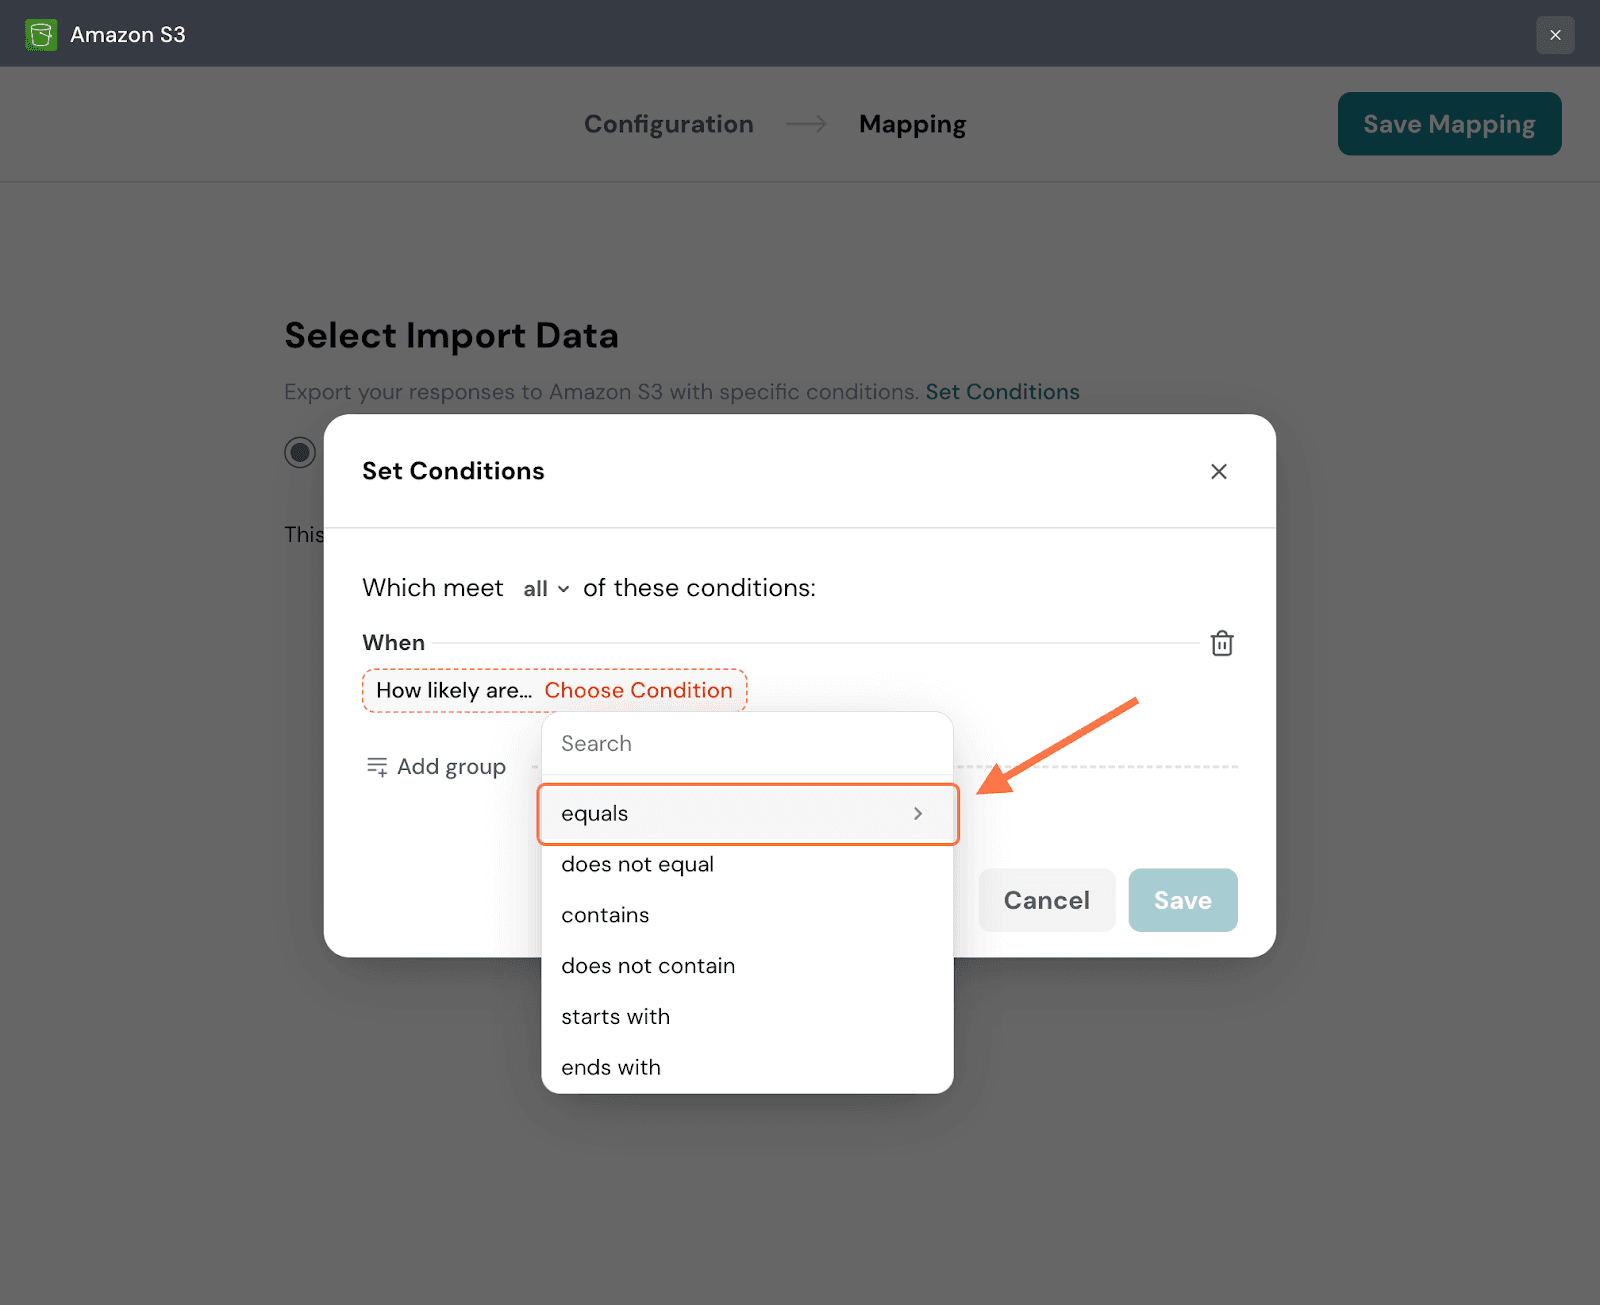
18. Input a value for the data to be tested against and then click Apply.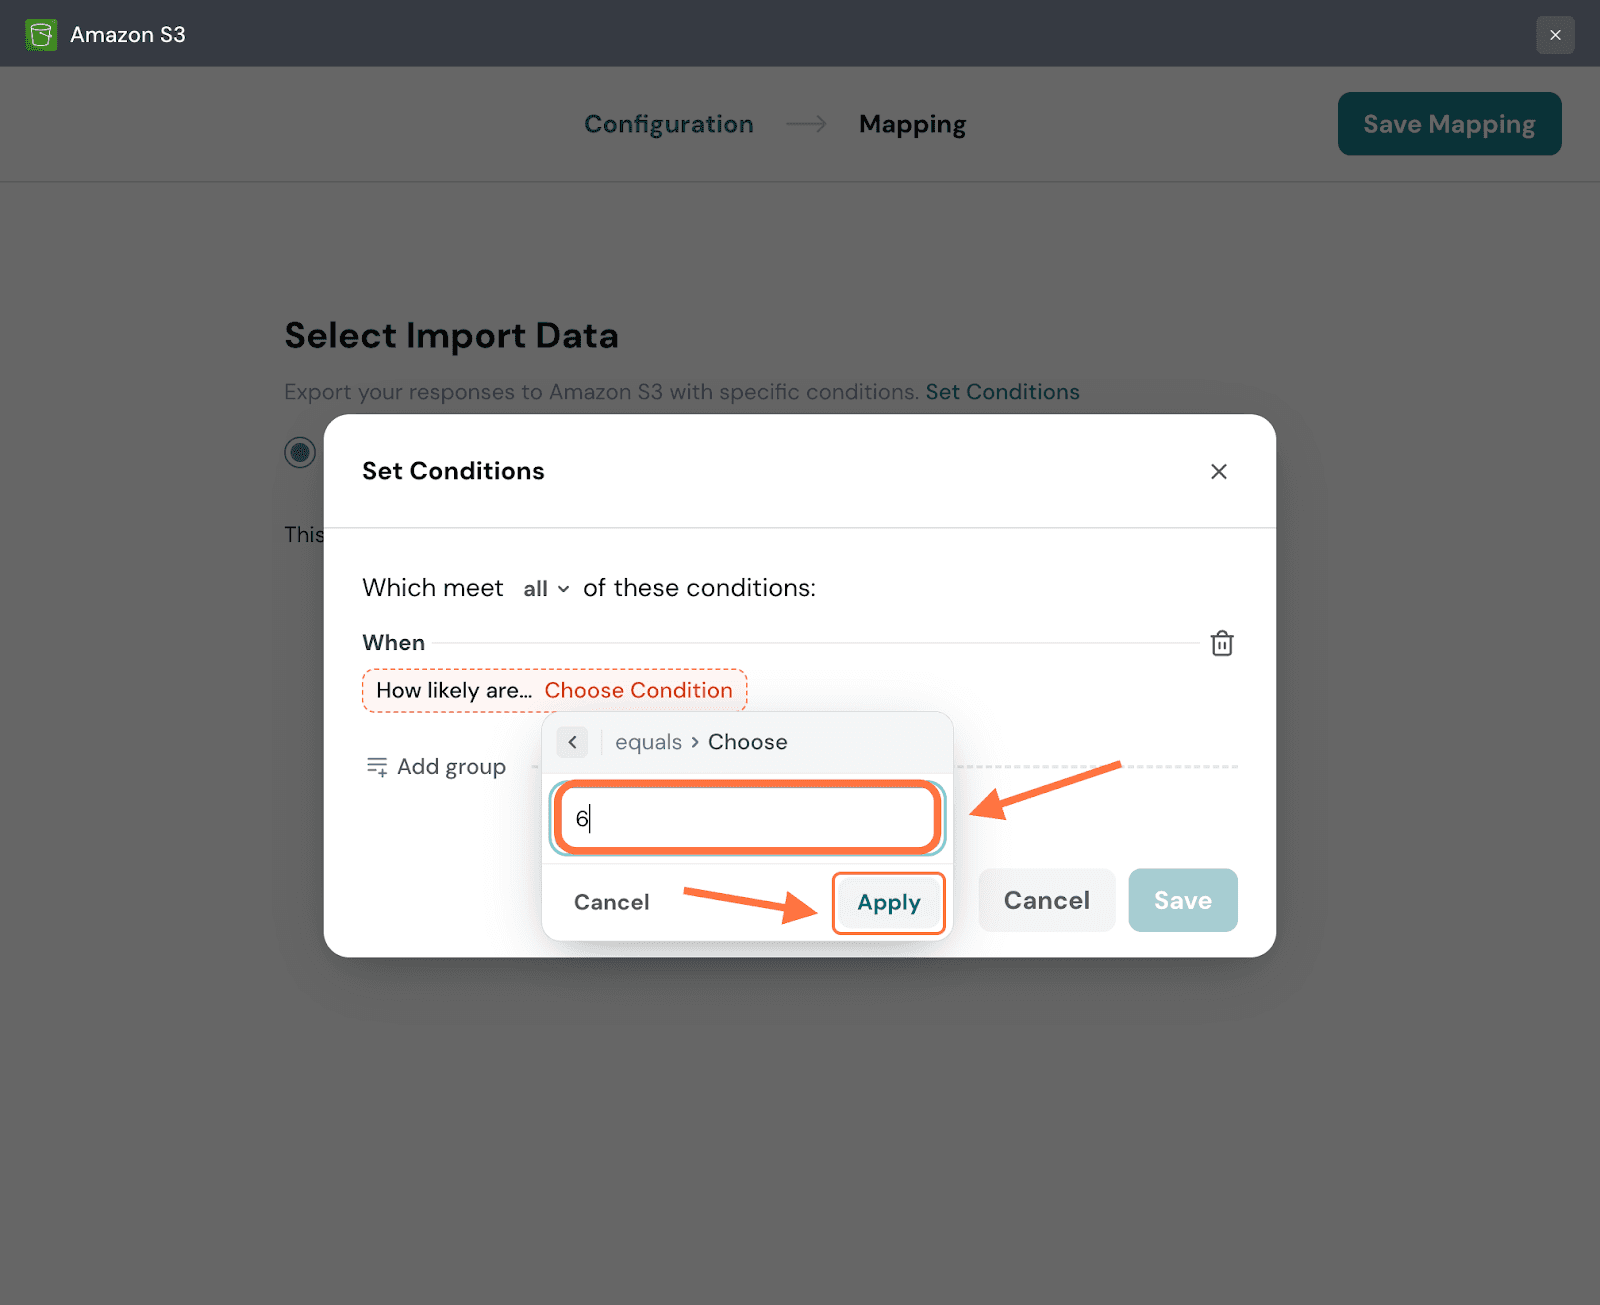
19. You can turn a condition into a group of conditions by hovering near it and then clicking on the plus icon that appears to the right. Repeat the same steps as above to create another condition.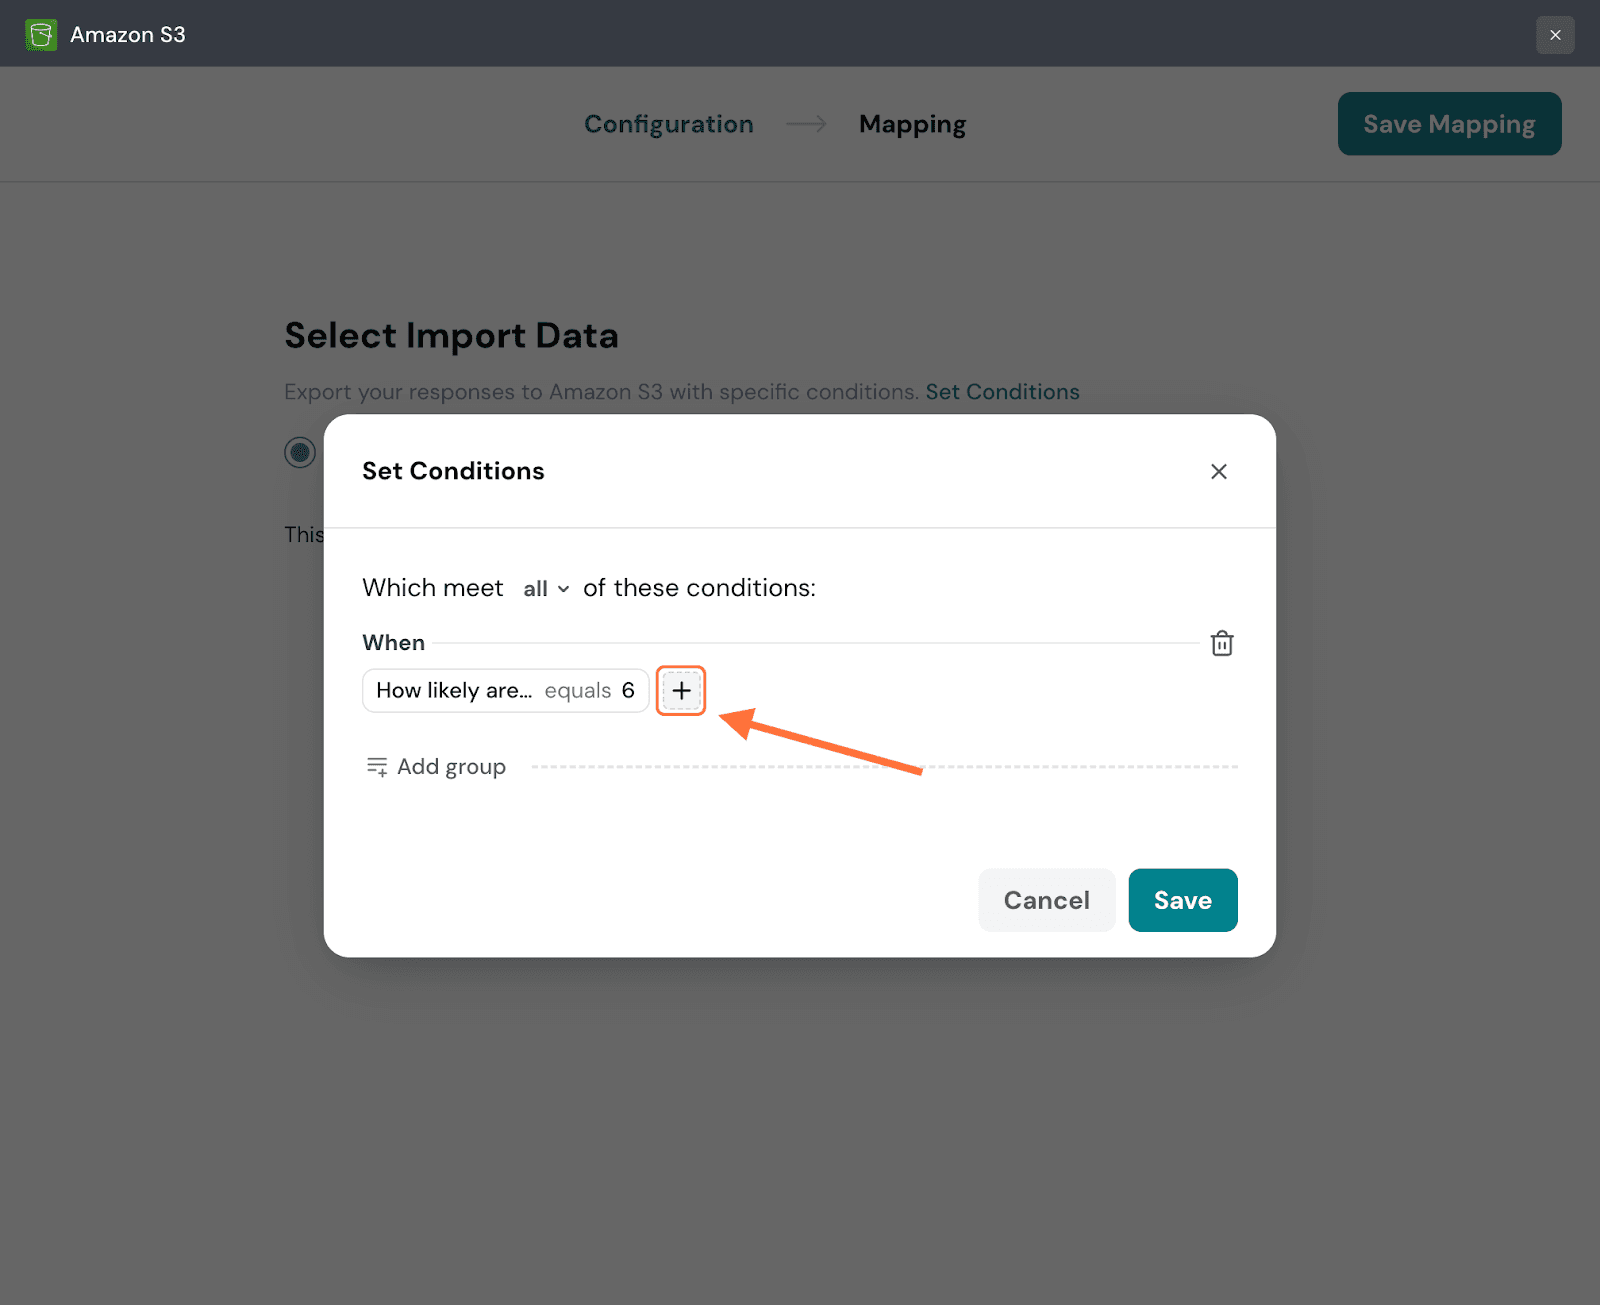
20. Within a group of conditions you can set conditional logic: and/or. The default is and, but if you’d like to change it, click on the drop-down.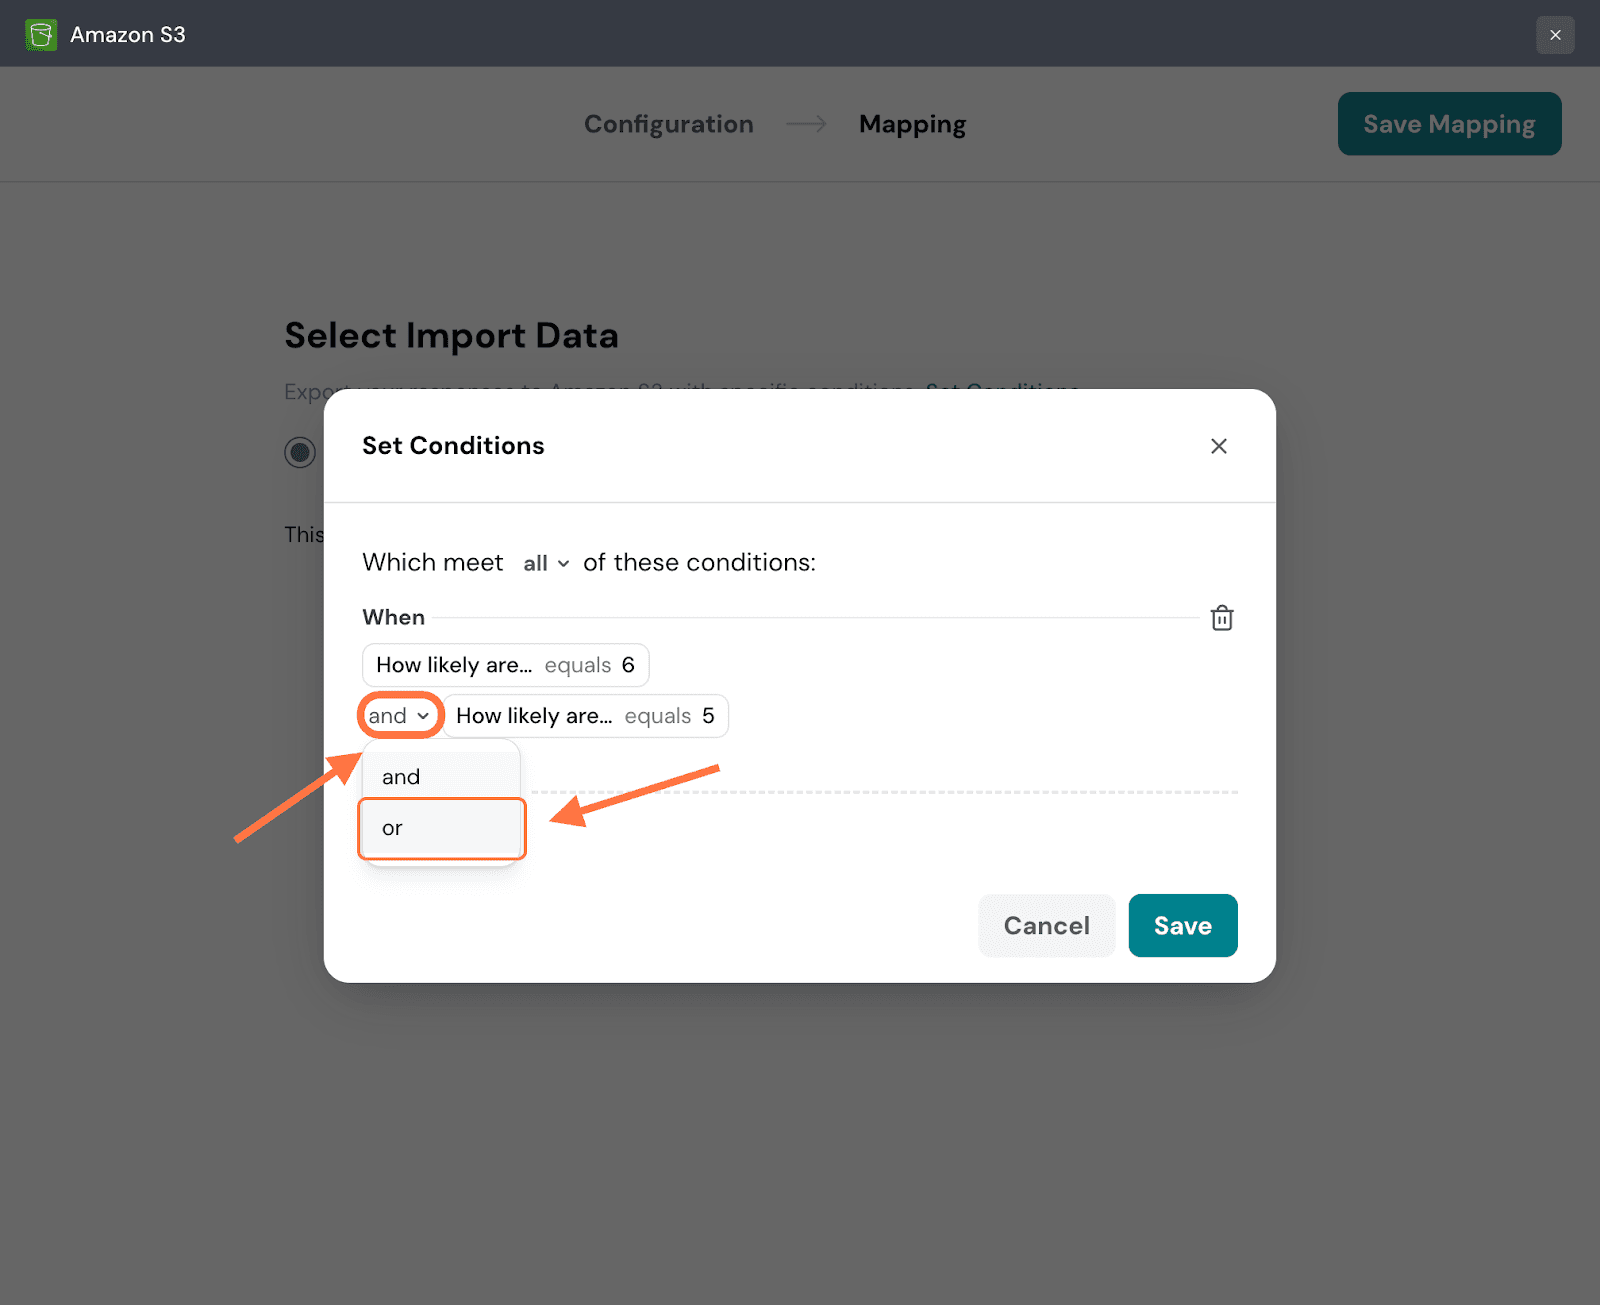
21. Click on Add Group to add more conditions/condition groups. When you’re done, click Save.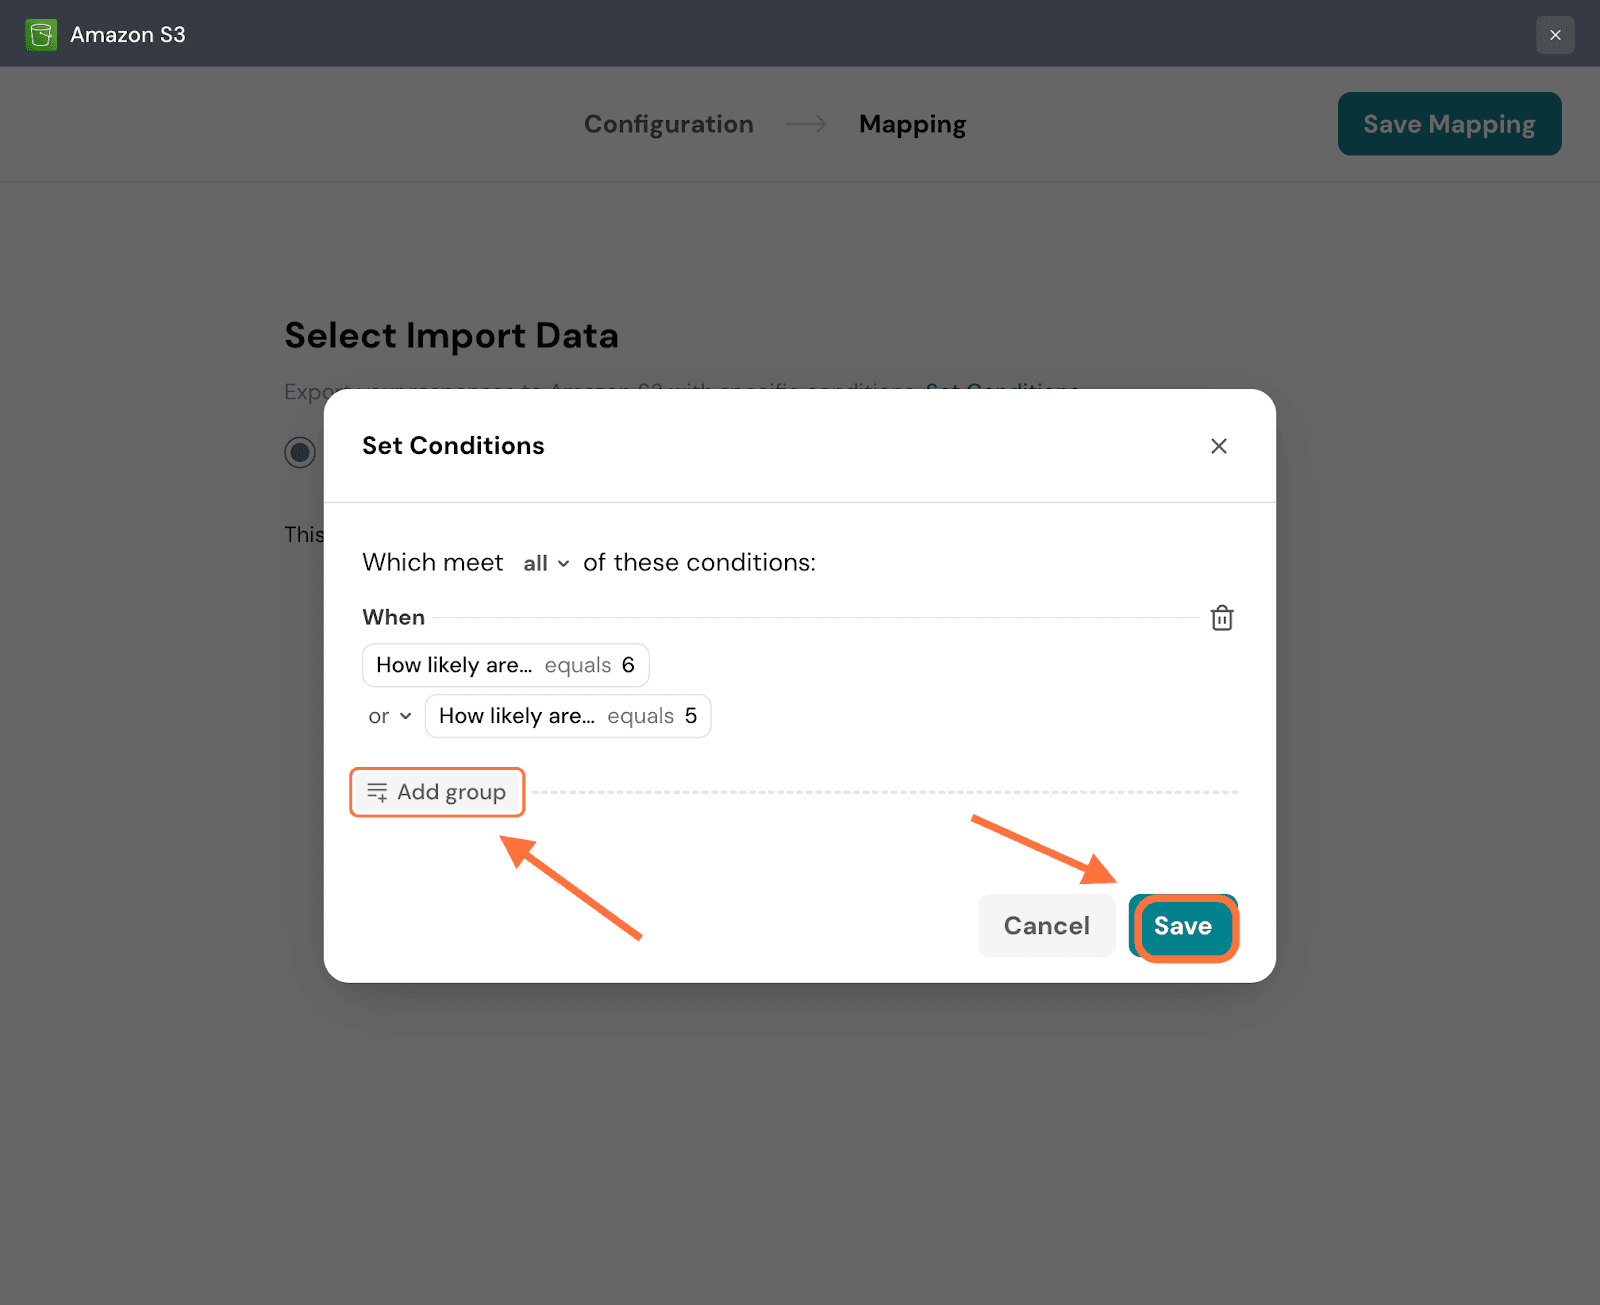
22. In the mapping section, the default option is to send all the response data. You can see all the response properties and their quantities. But if you want to be selective, click the button next to Send Selected data.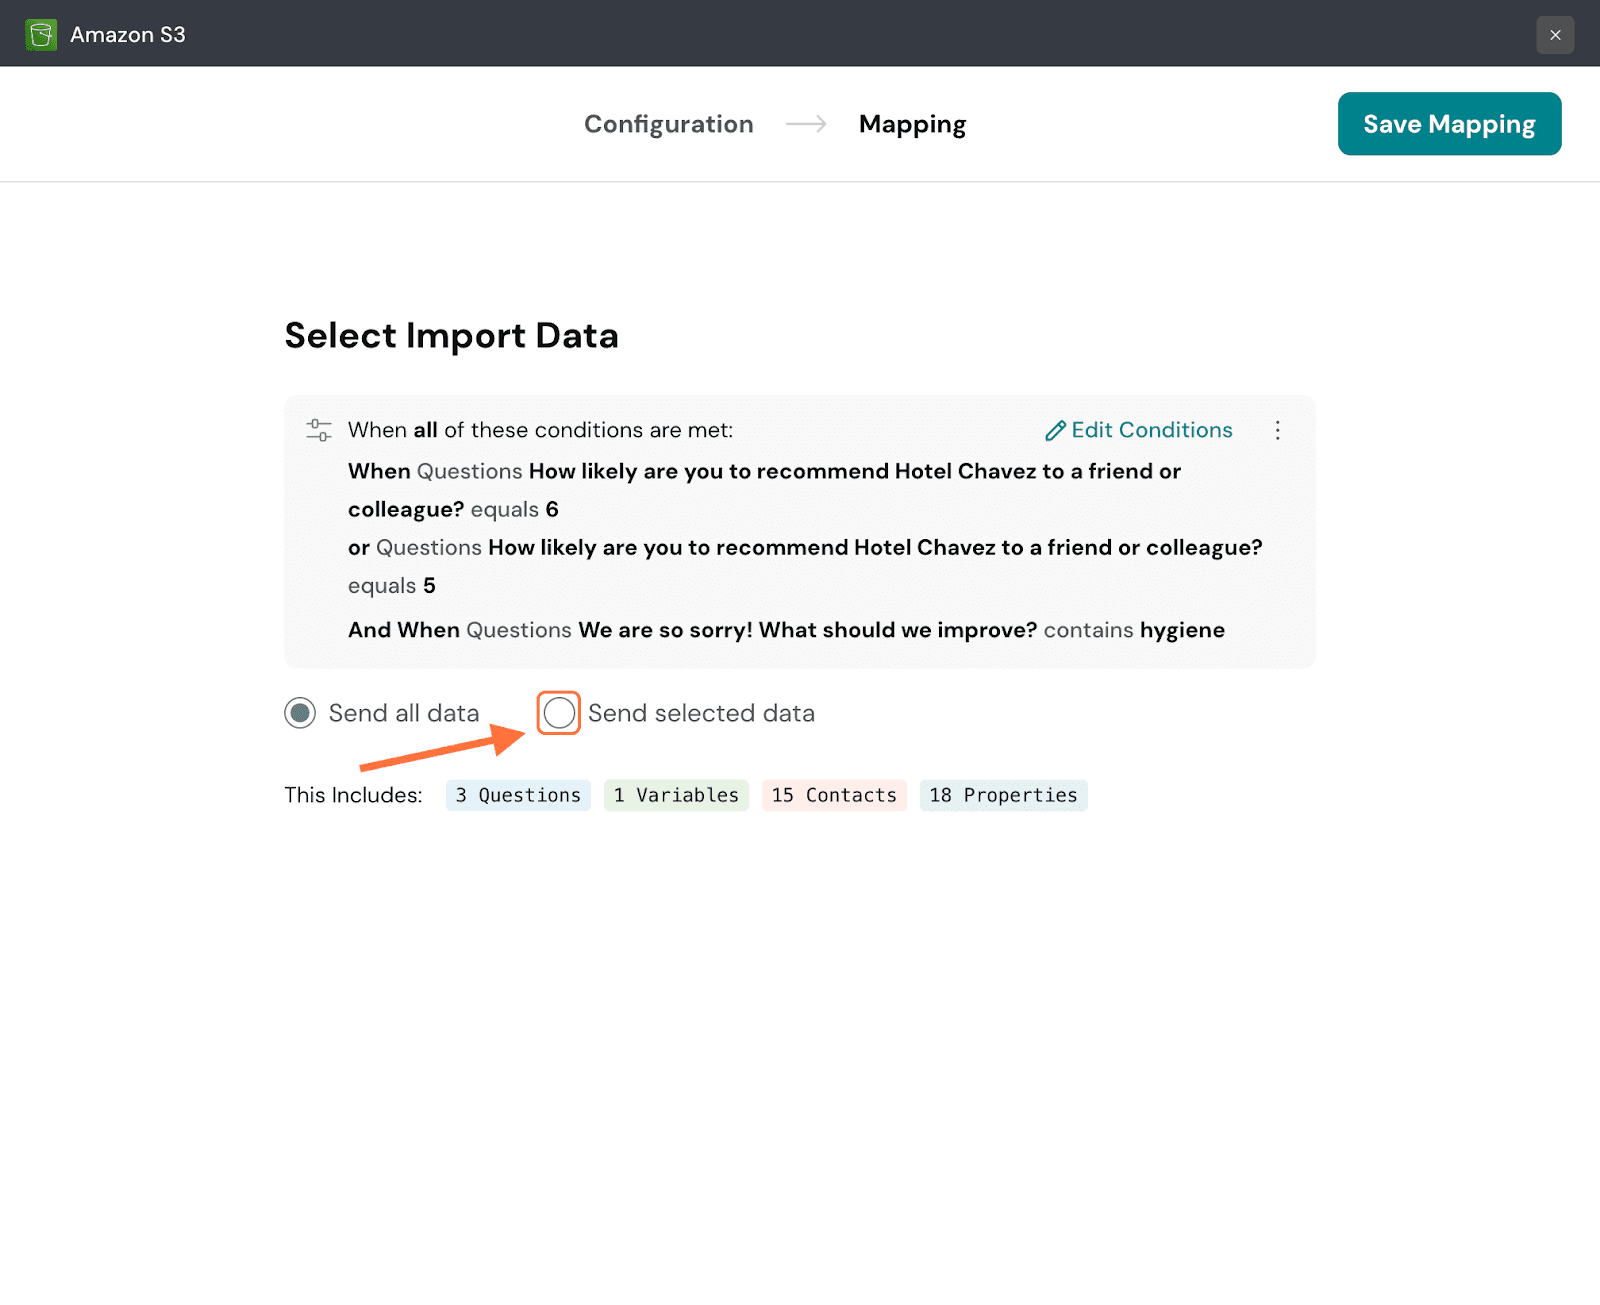
23. You will be shown a series of tabs for each response property. Each tab will have a list of items for that particular property. Click on the checkboxes of the items you want to import to Amazon S3. Navigate through the respective tabs and select the ones you want. You can also use the search box to find items.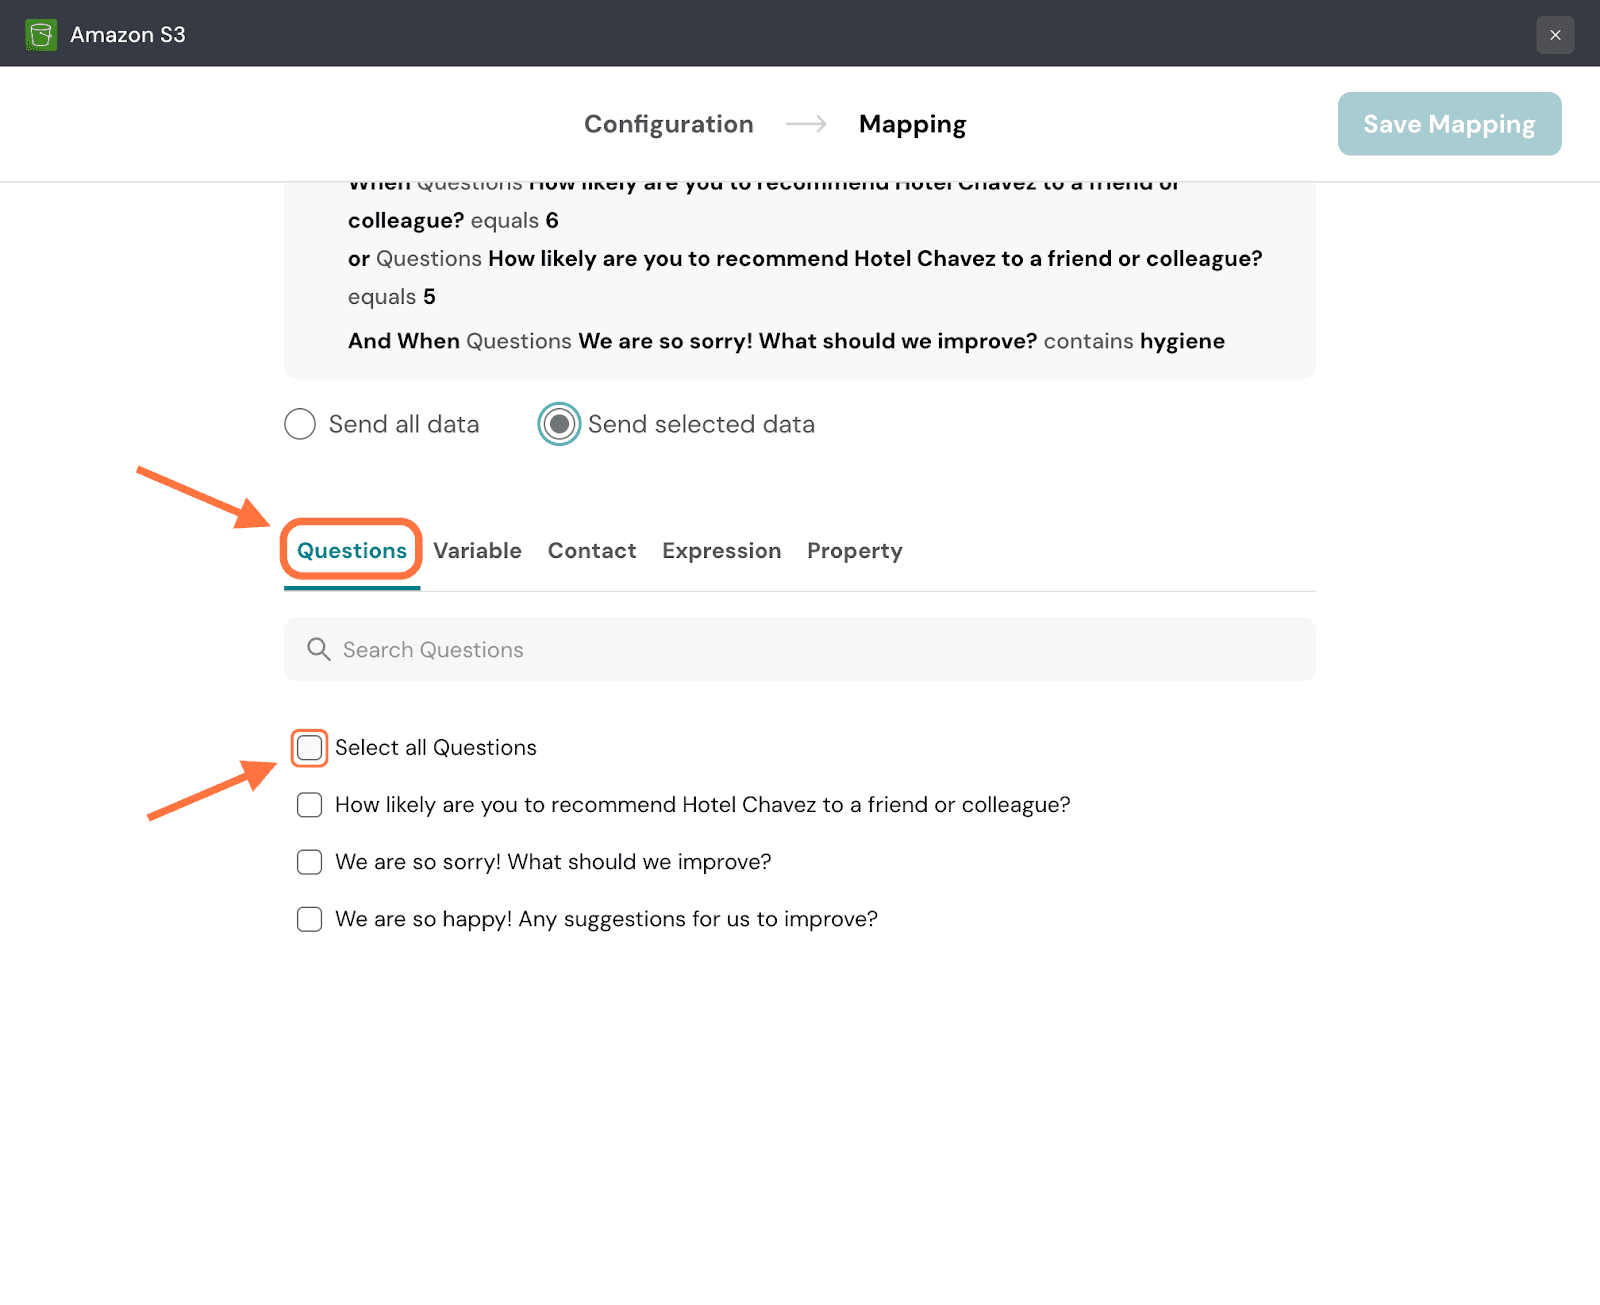
24. When you’re done, click on Save Mapping.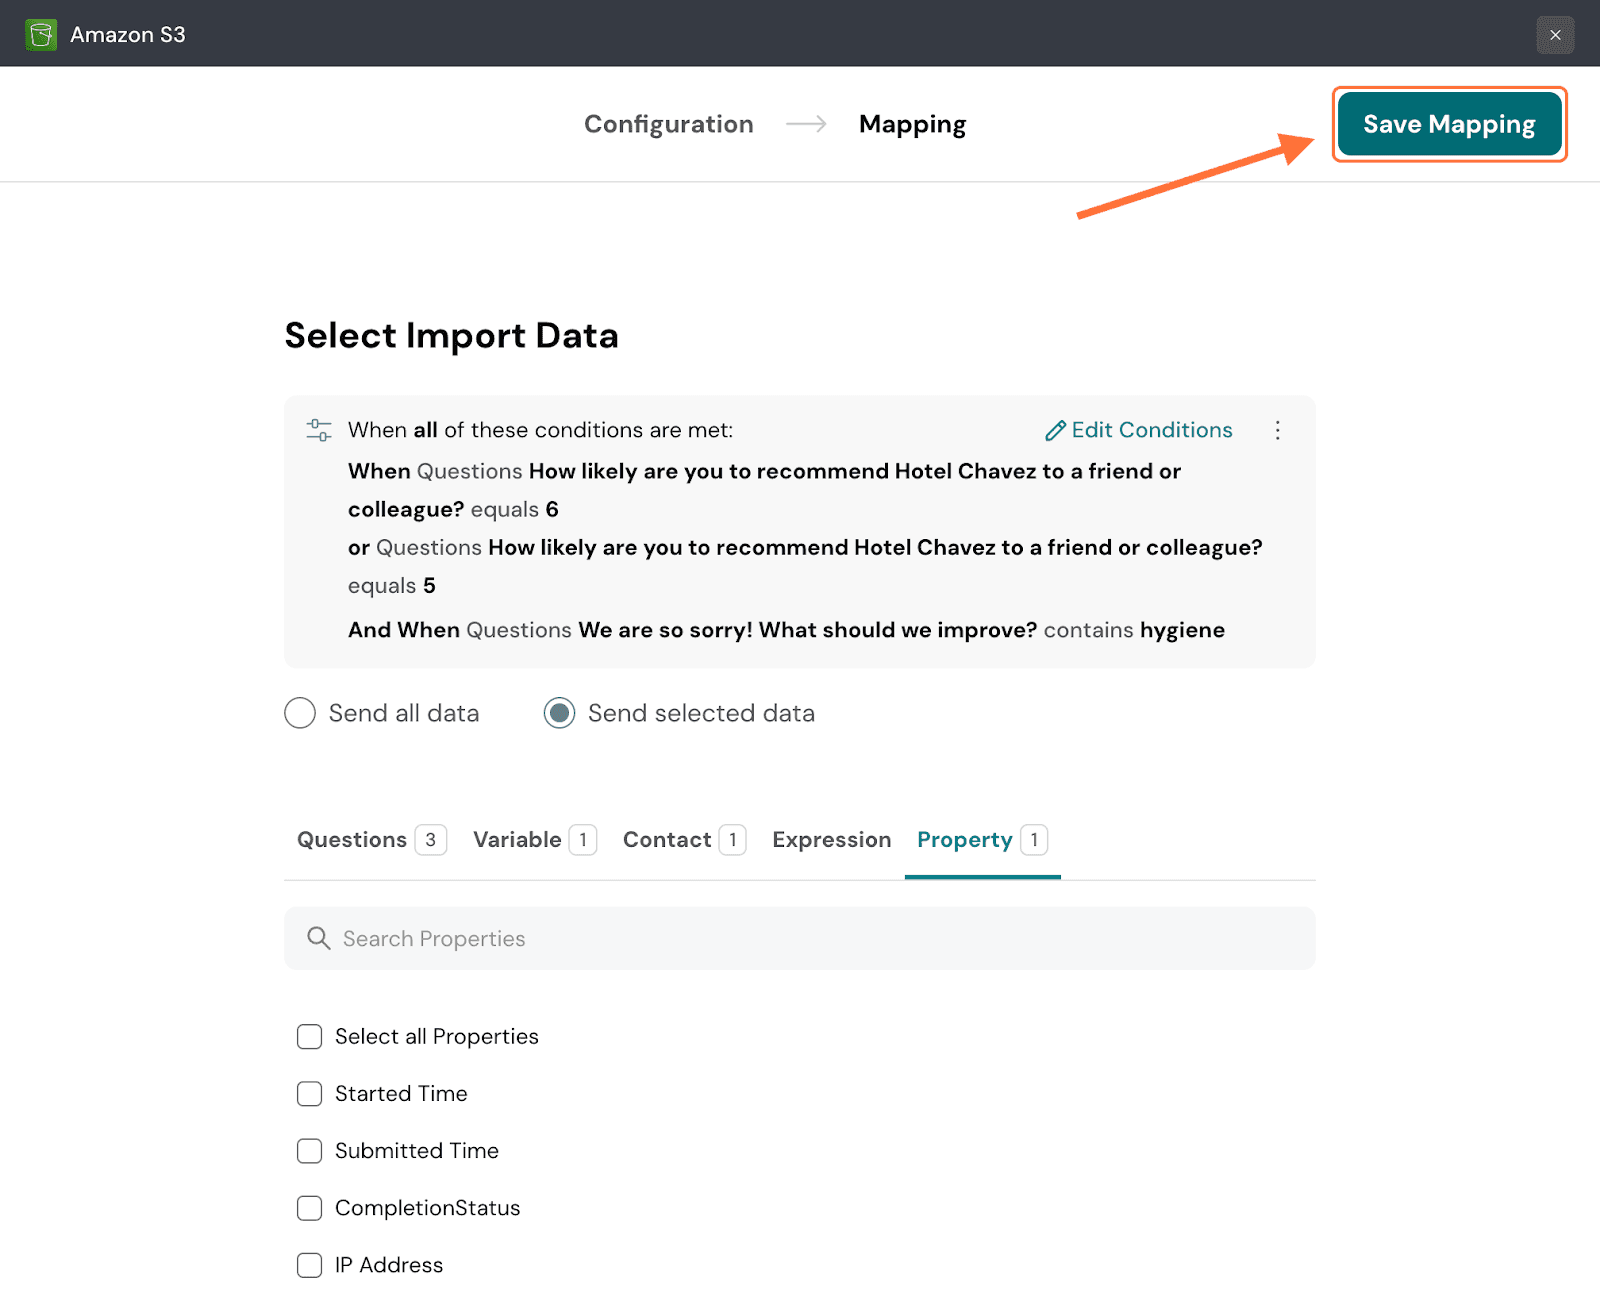
25. Create a name for the mapping and click on Save Mapping.
28. After the mapping is saved, you’ll be taken to a screen where you can access all saved mappings. To review the mapping configuration, click on the mapping.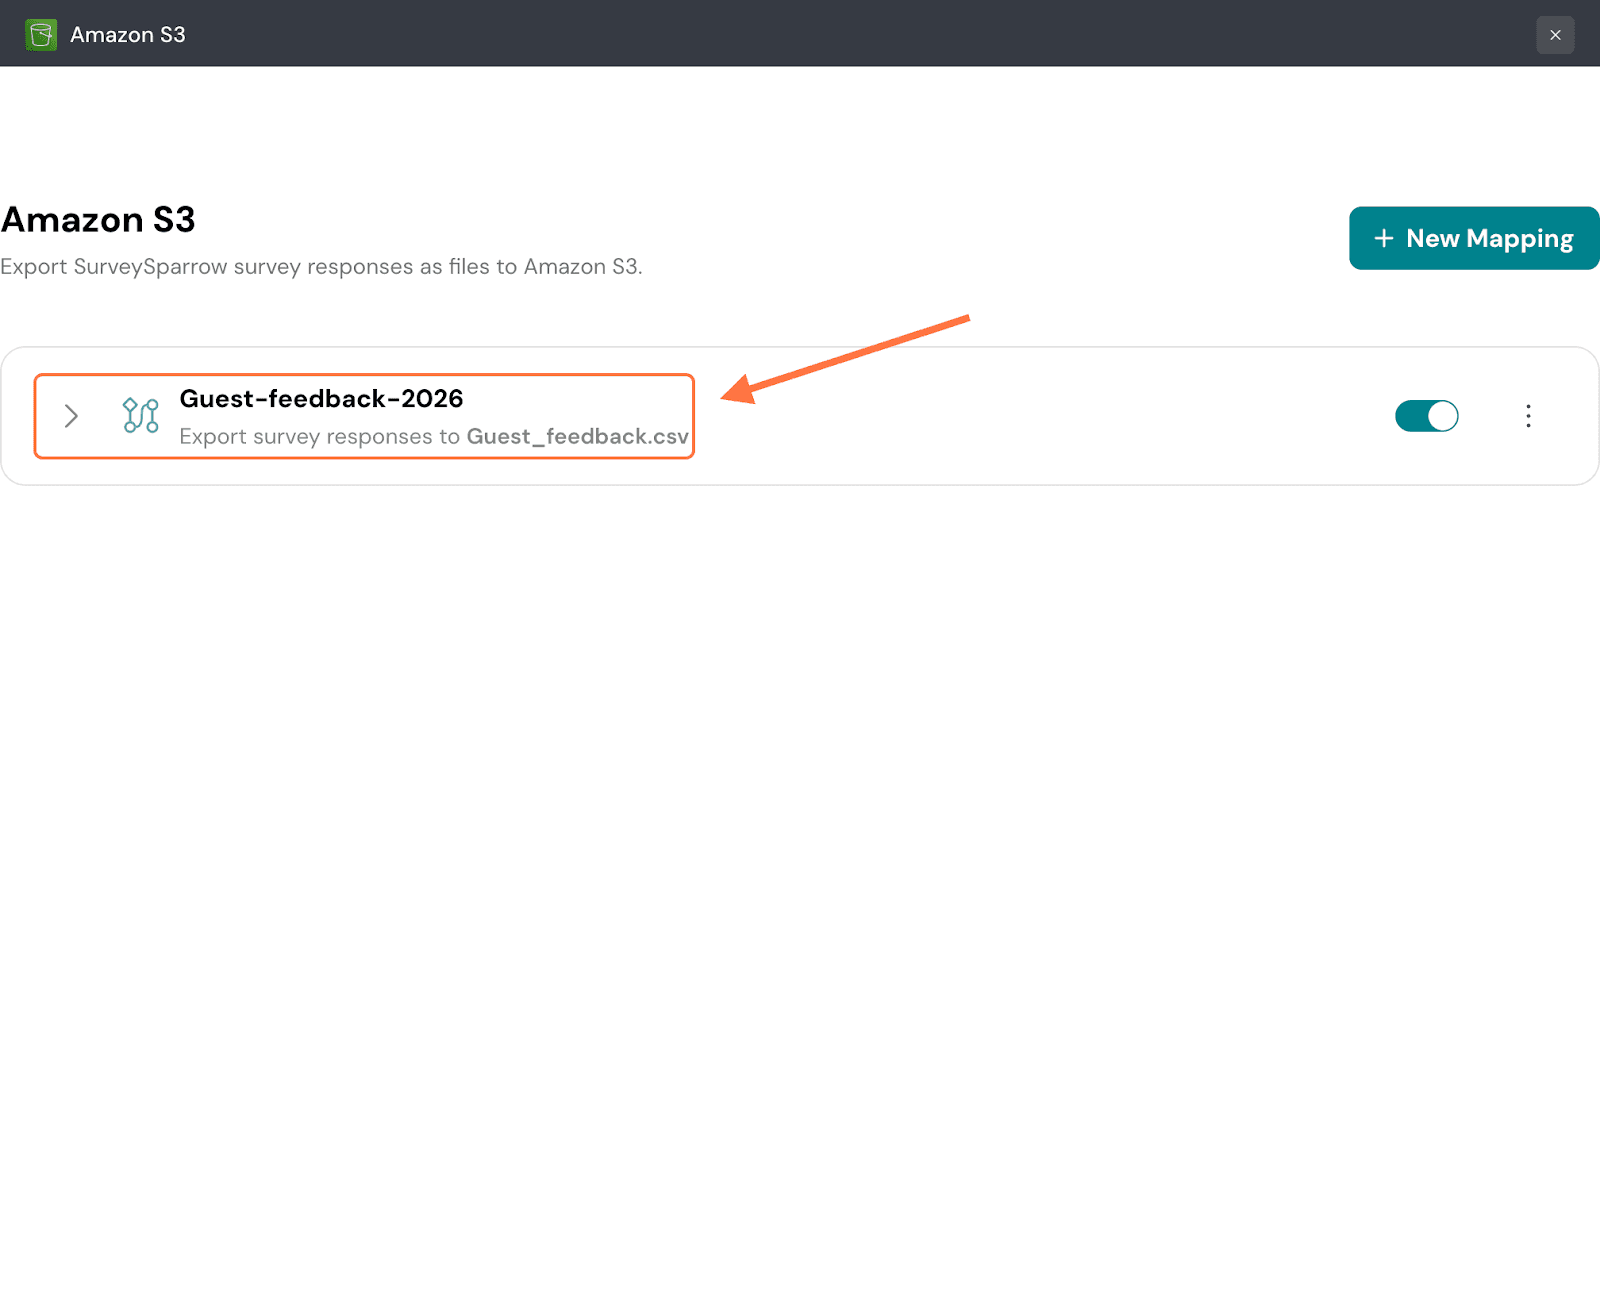
29. The mapping tab expands to show you its settings. If you’d like to modify it, click on the ‘Edit….’ button.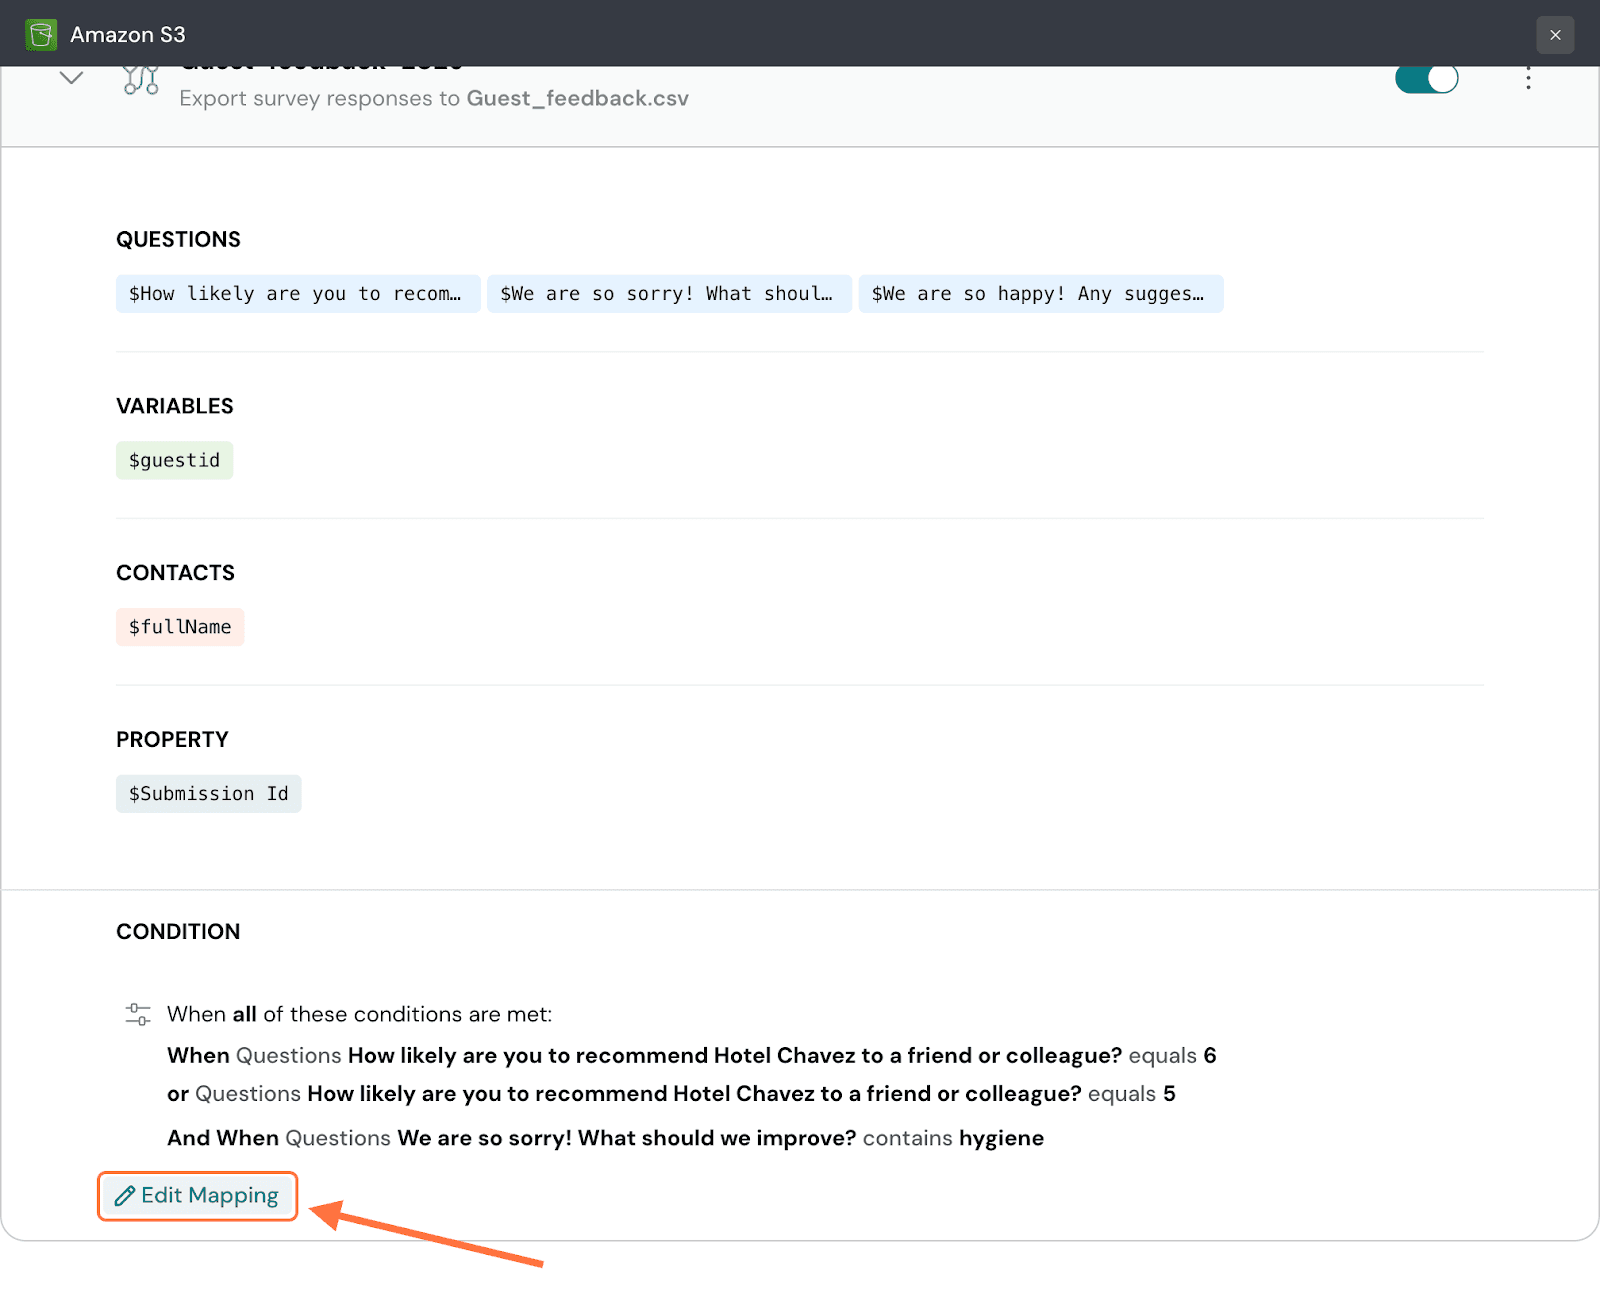
30. To pause the mapping, click on the green toggle button.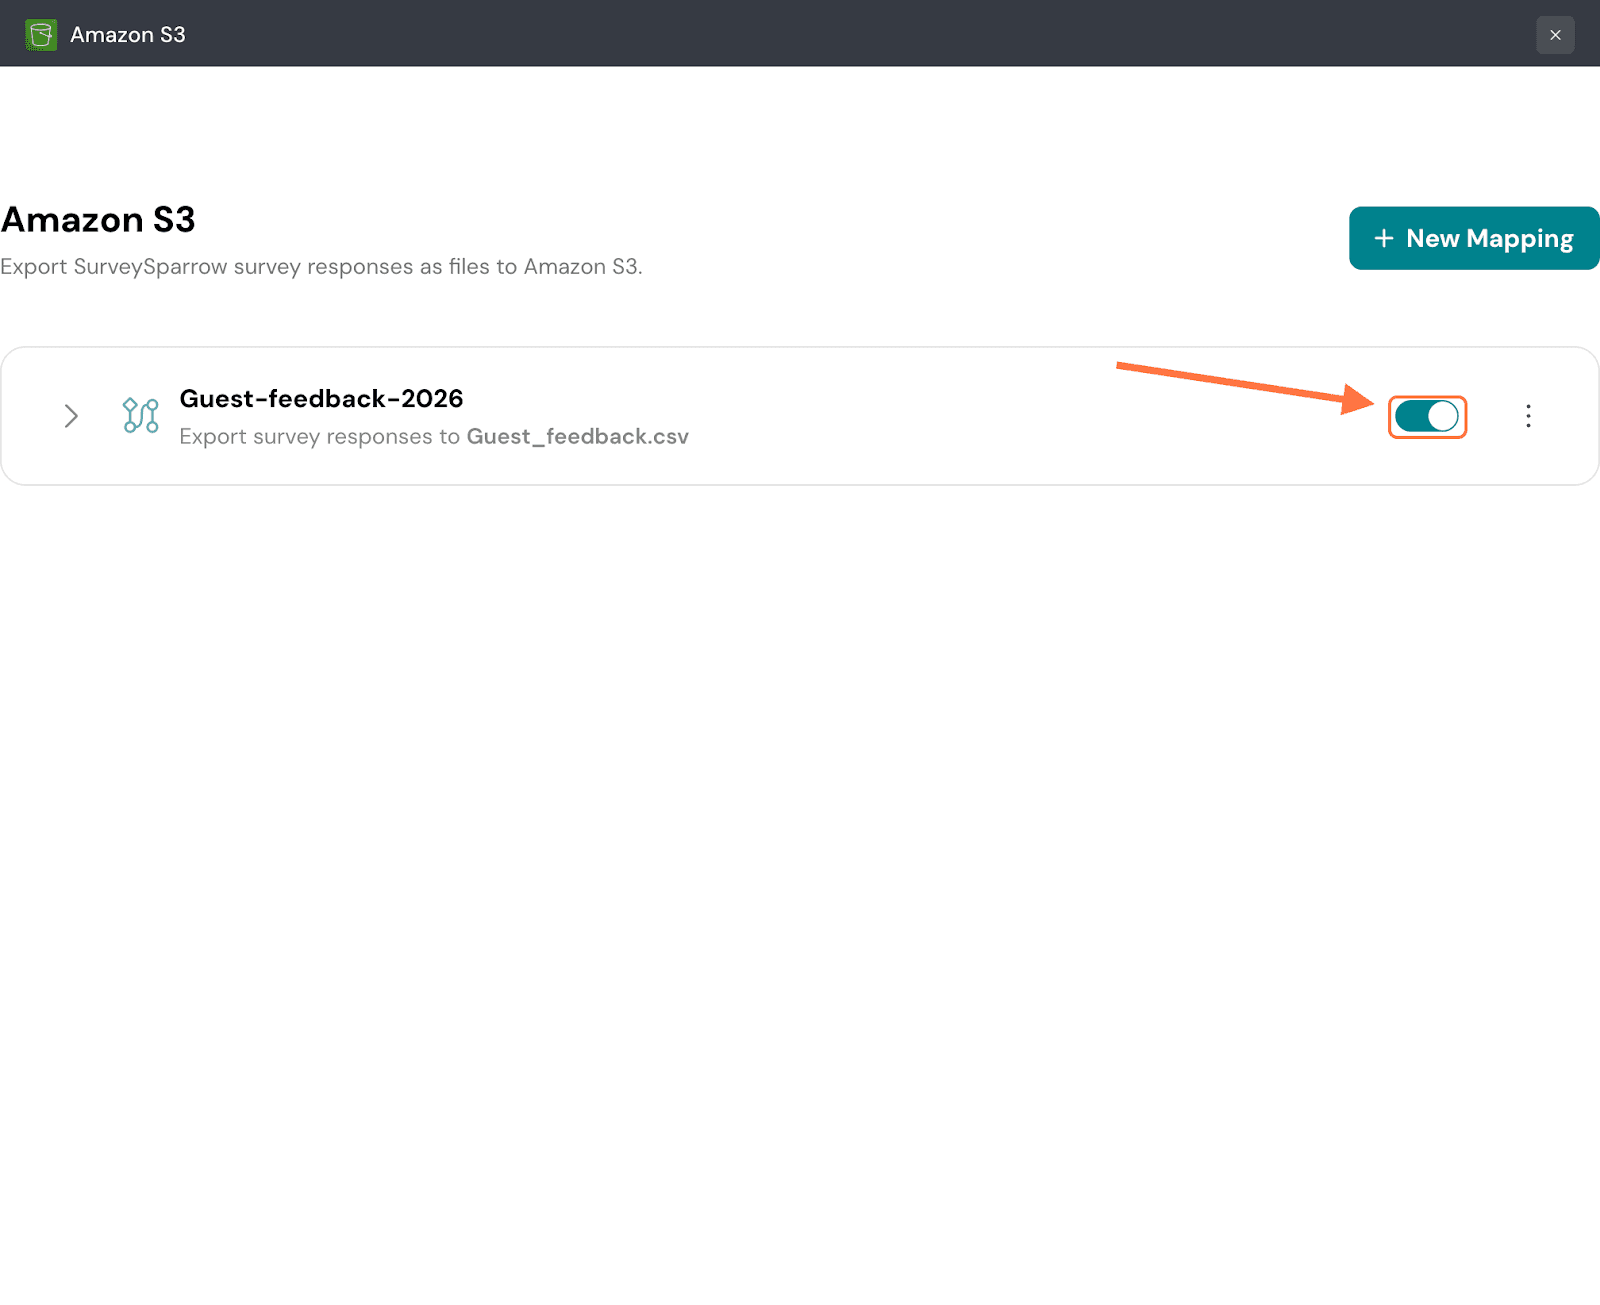
Note: Any responses that come in while the mapping is paused will not be synced to Amazon S3 later.
31. To delete the mapping, click on the vertical three-dot icon, then click on Delete.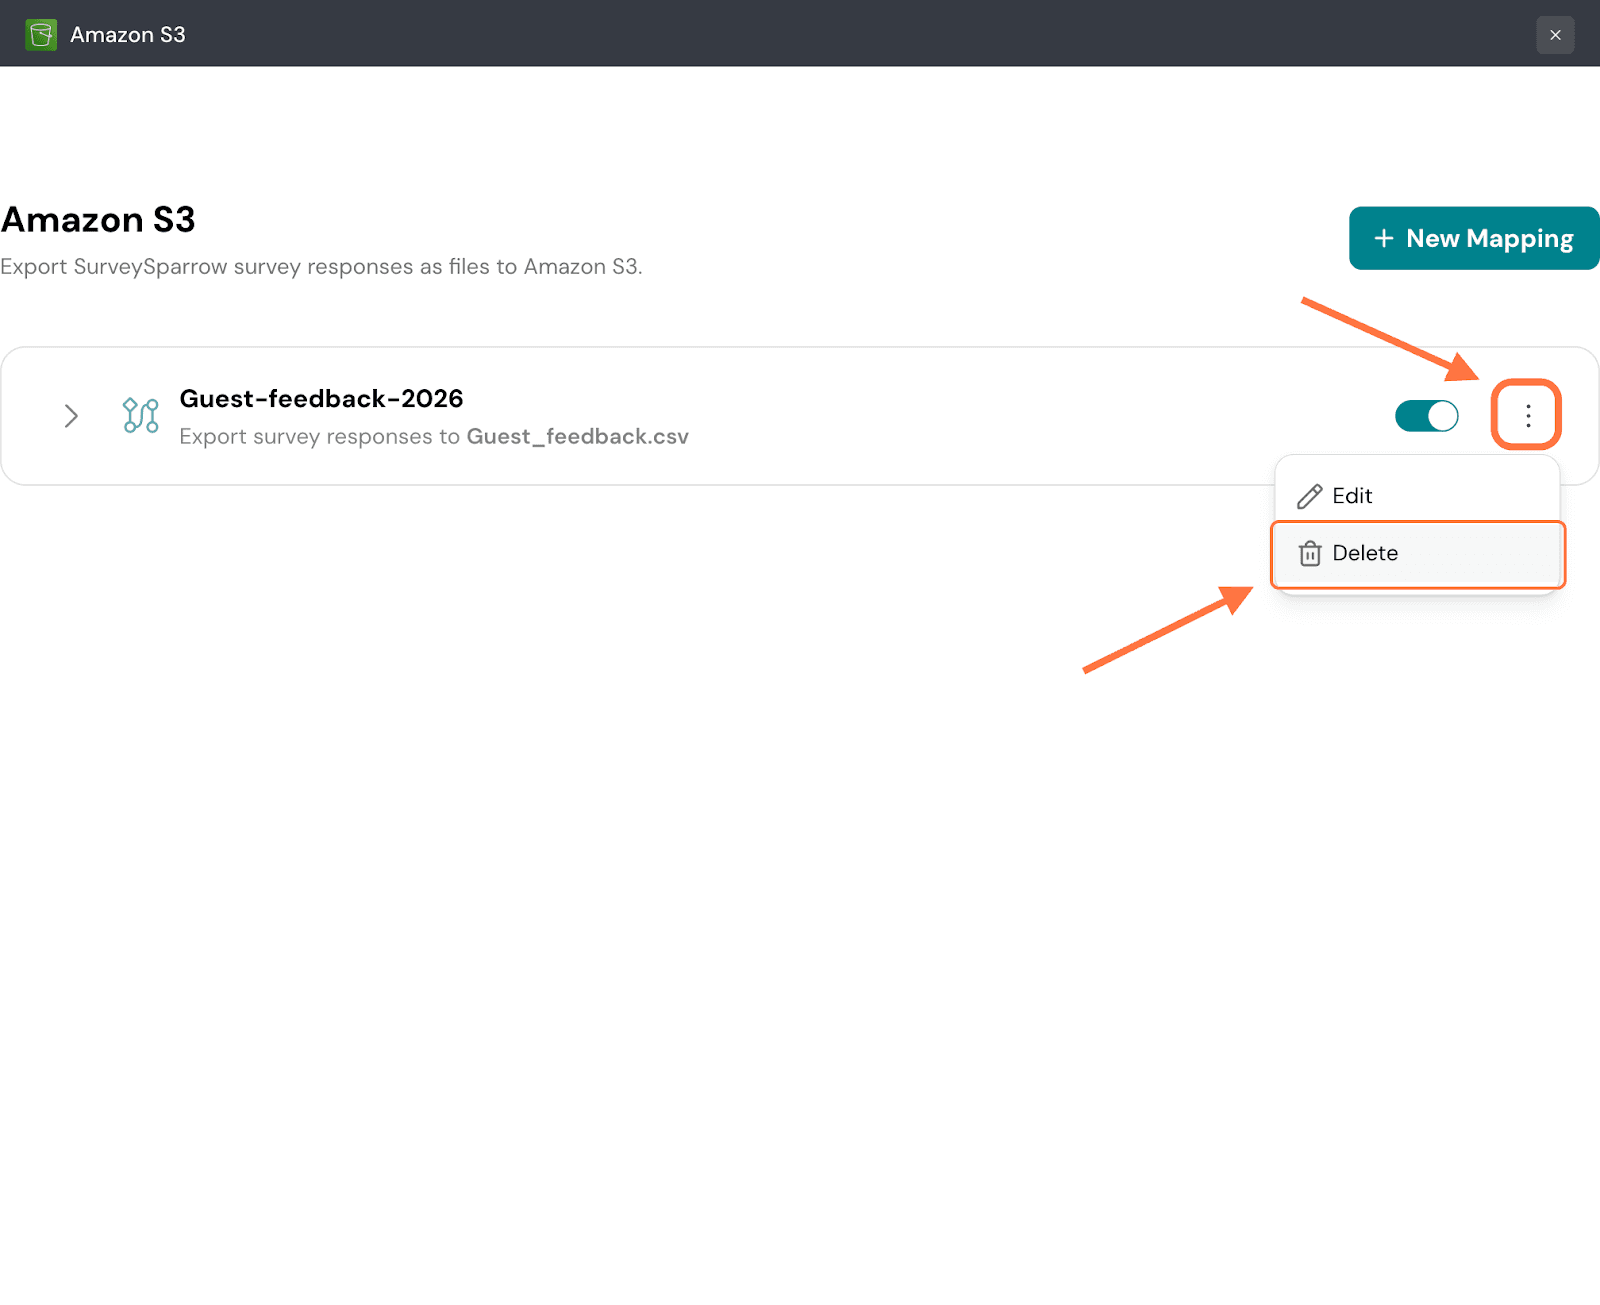
32. Click on Confirm to proceed.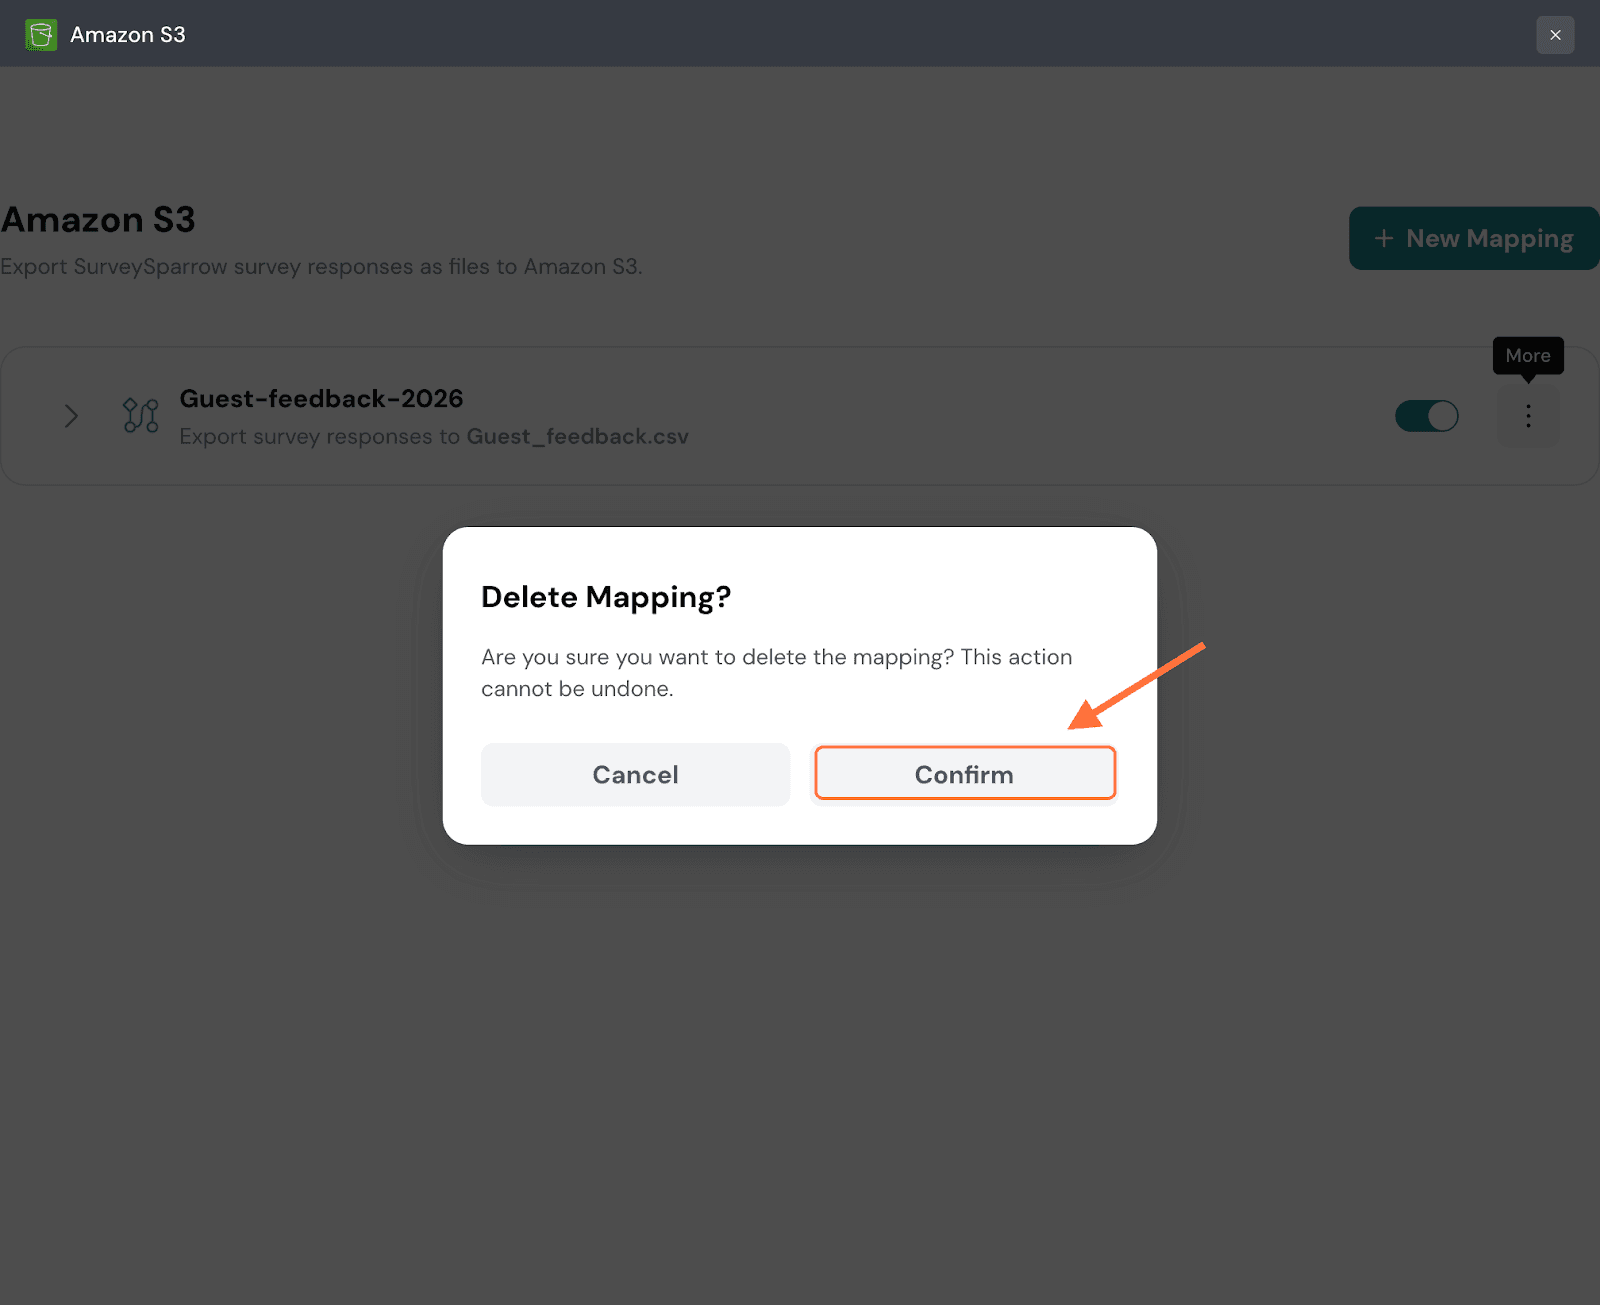
33. Click on New Mapping to add another mapping.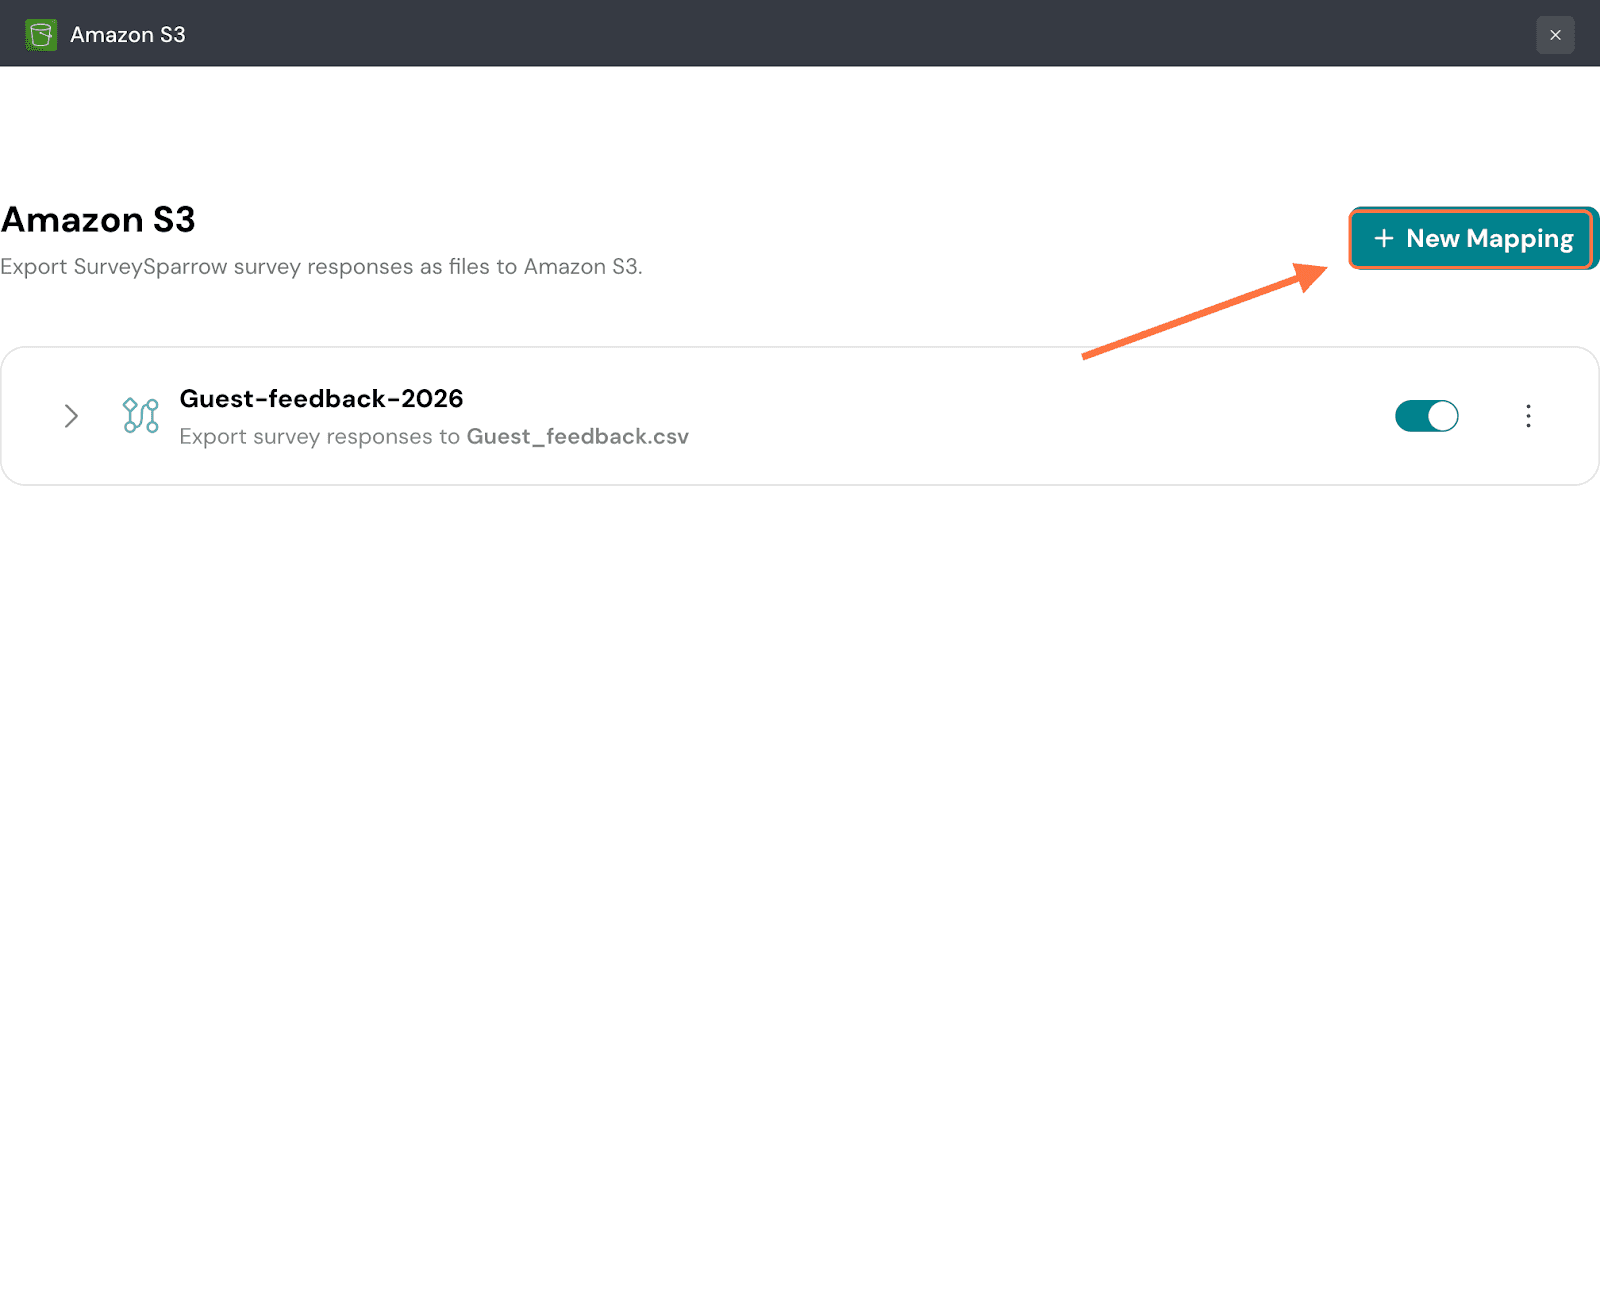
The SurveySparrow and Amazon S3 integration lets you automatically push survey responses directly into your S3 bucket — eliminating manual CSV exports and messy workarounds. With flexible conditional filters, you can send only the relevant responses, keeping your data clean, organized, and ready for analysis in a secure, scalable cloud storage environment.
Enjoy near real-time data flow and maintain a reliable single source of truth for all your customer insights.
Feel free to reach out to our community, if you have any questions!
Powered By SparrowDesk