Search
IBM watsonx is an enterprise-grade AI and data platform designed to help businesses scale and accelerate the impact of advanced artificial intelligence across their entire operations.
By integrating SurveySparrow with IBM watsonx, businesses can create a seamless pipeline that automatically flows customer feedback directly into this powerful AI environment, replacing fragmented manual exports with a standardized data architecture.
The primary benefit of this connection is that it provides a high-performance "single point of entry" for all your experience data, ensuring that your AI models are trained on the most current and trustworthy customer insights without requiring constant manual intervention from engineering teams. Here are some interesting use-cases:
In this article, we’ll walk you through connecting your SurveySparrow account to IBM watsonx and setting up powerful response mappings from start to finish, specifically:
1. Inside your SurveySparrow account, click on the settings icon.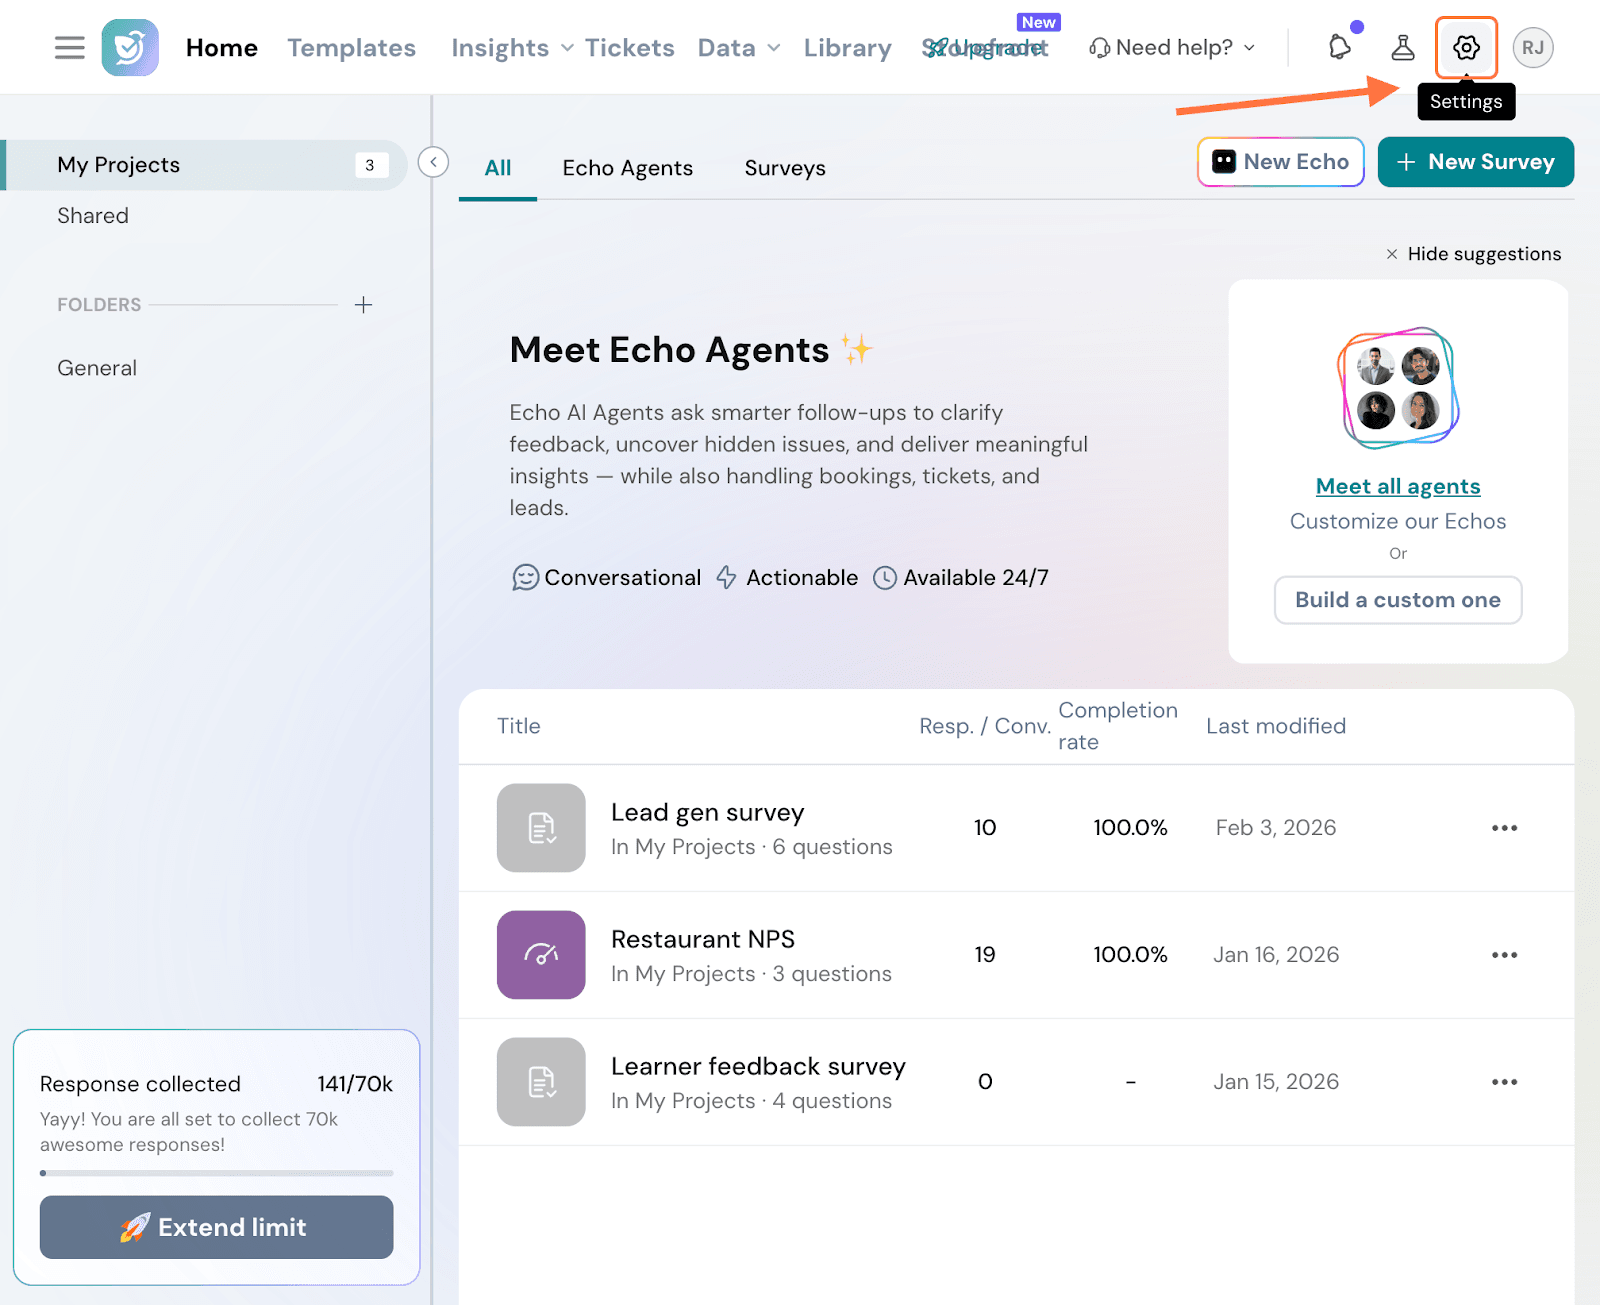
2. Scroll down the left panel in the settings page till you see the Apps and Integrations option, then click on it.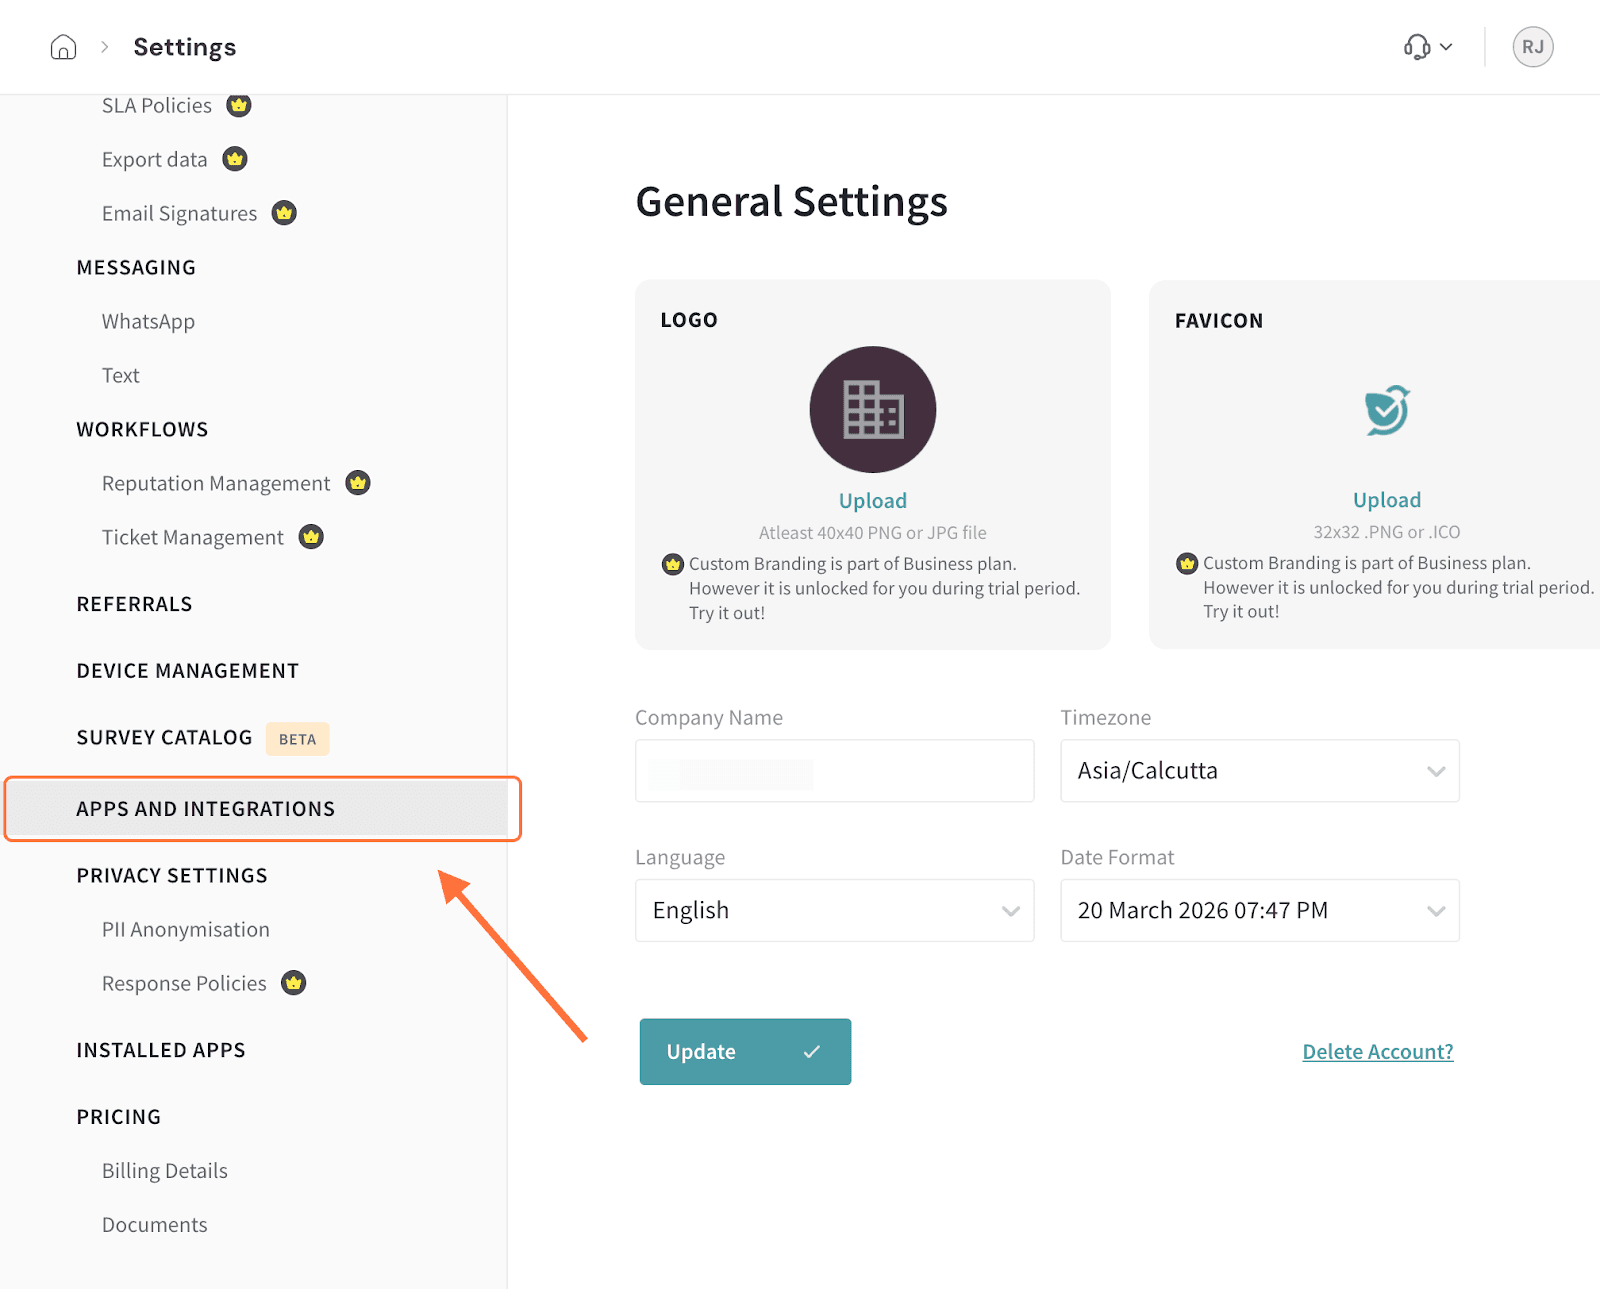
3. Search for the IBM watsonx integration using the search box (or scrolling through the integrations), then click on the toggle when you see it.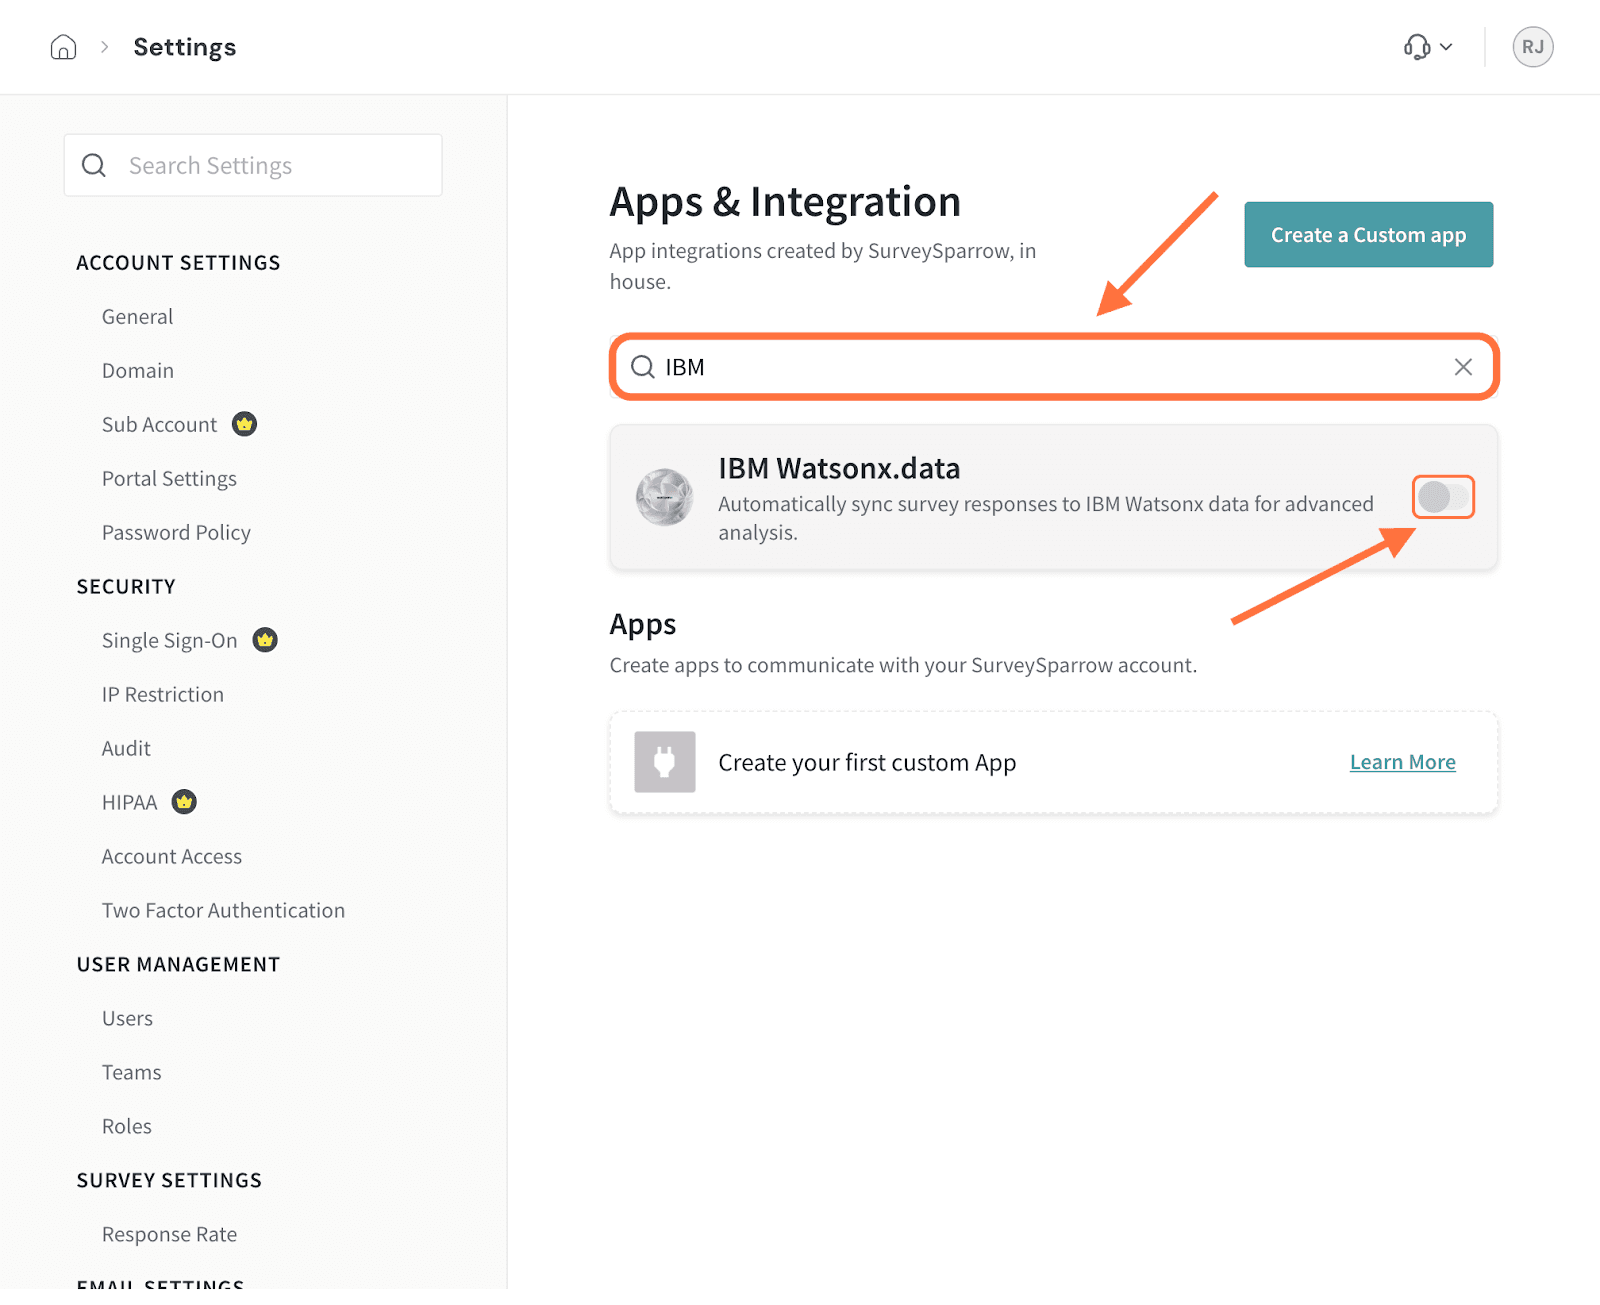
4. Next, in the setup screen you’ll need to enter your IBM Cloud API Key.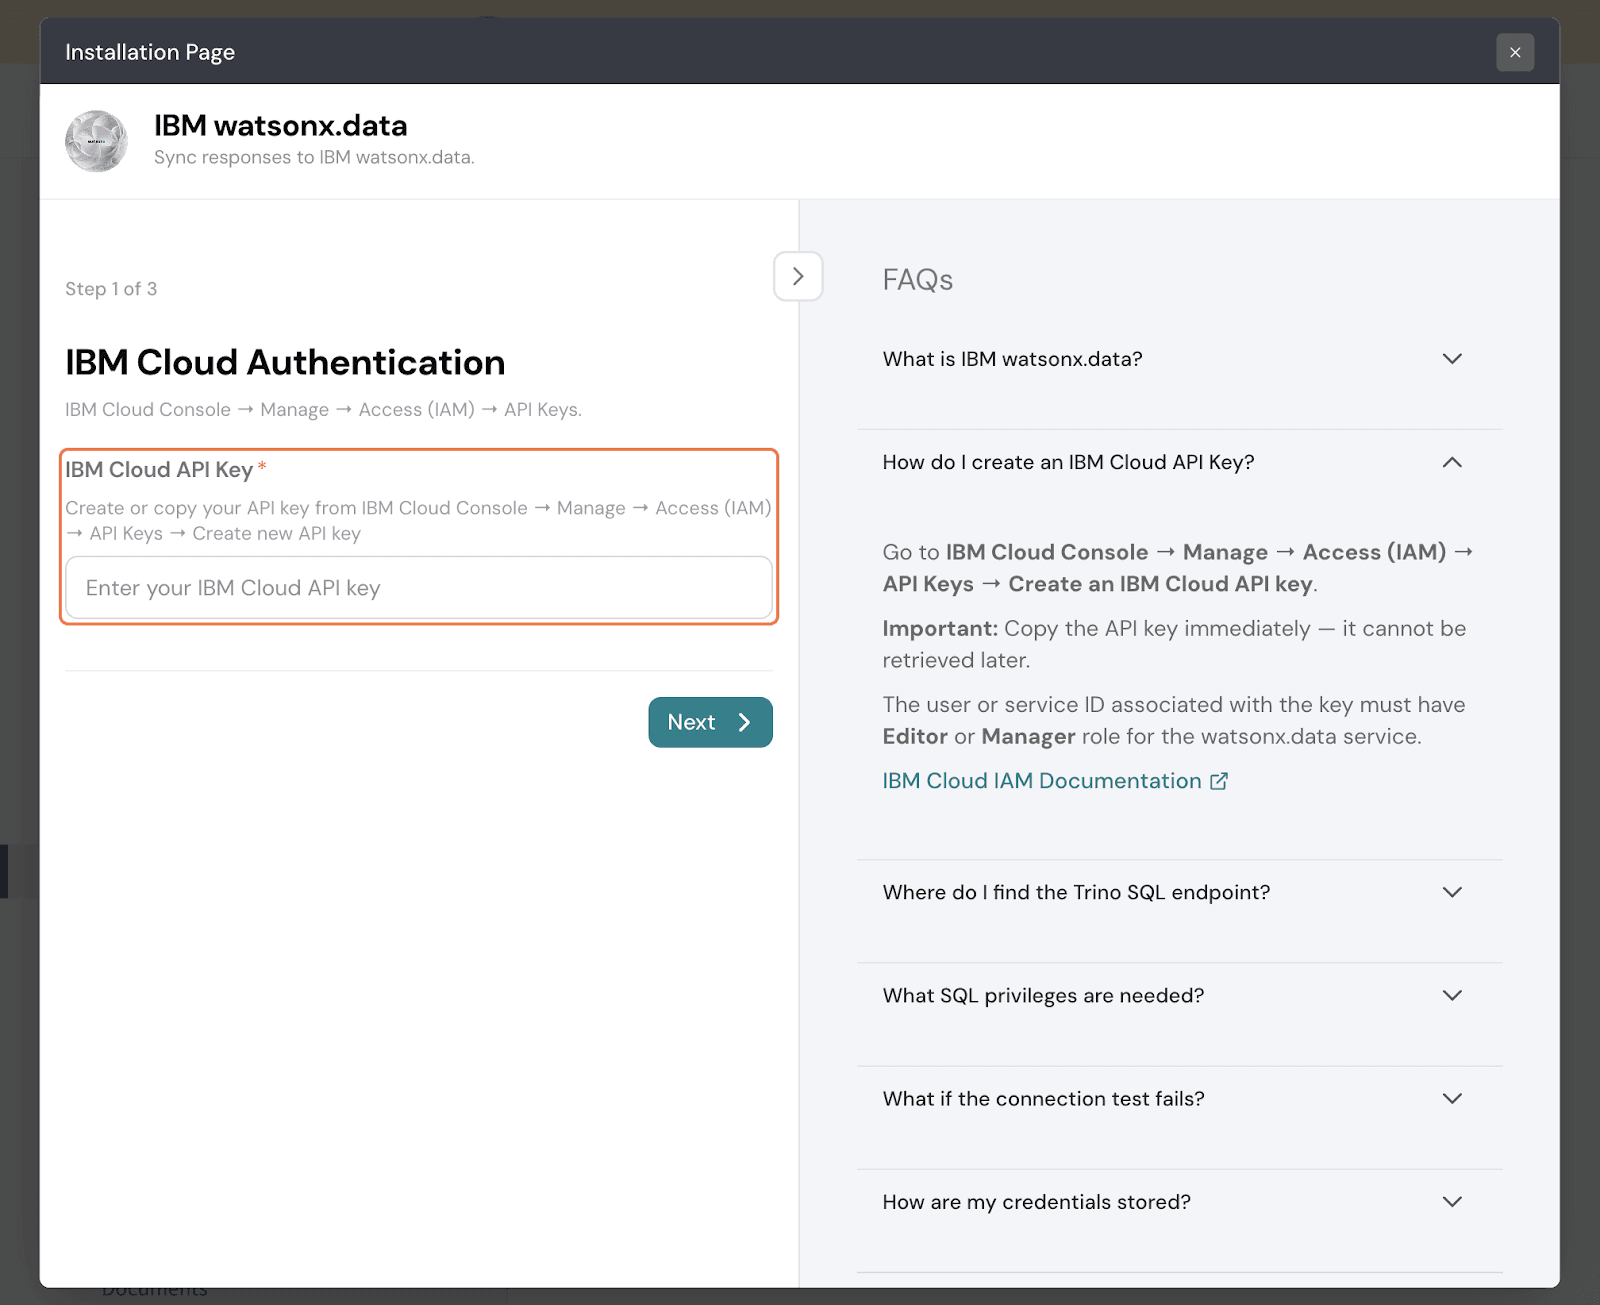
Note: To find the Cloud API Key, head to cloud.ibm.com. Click on Manage, and when the drop-down menu appears, click on Access (IAM).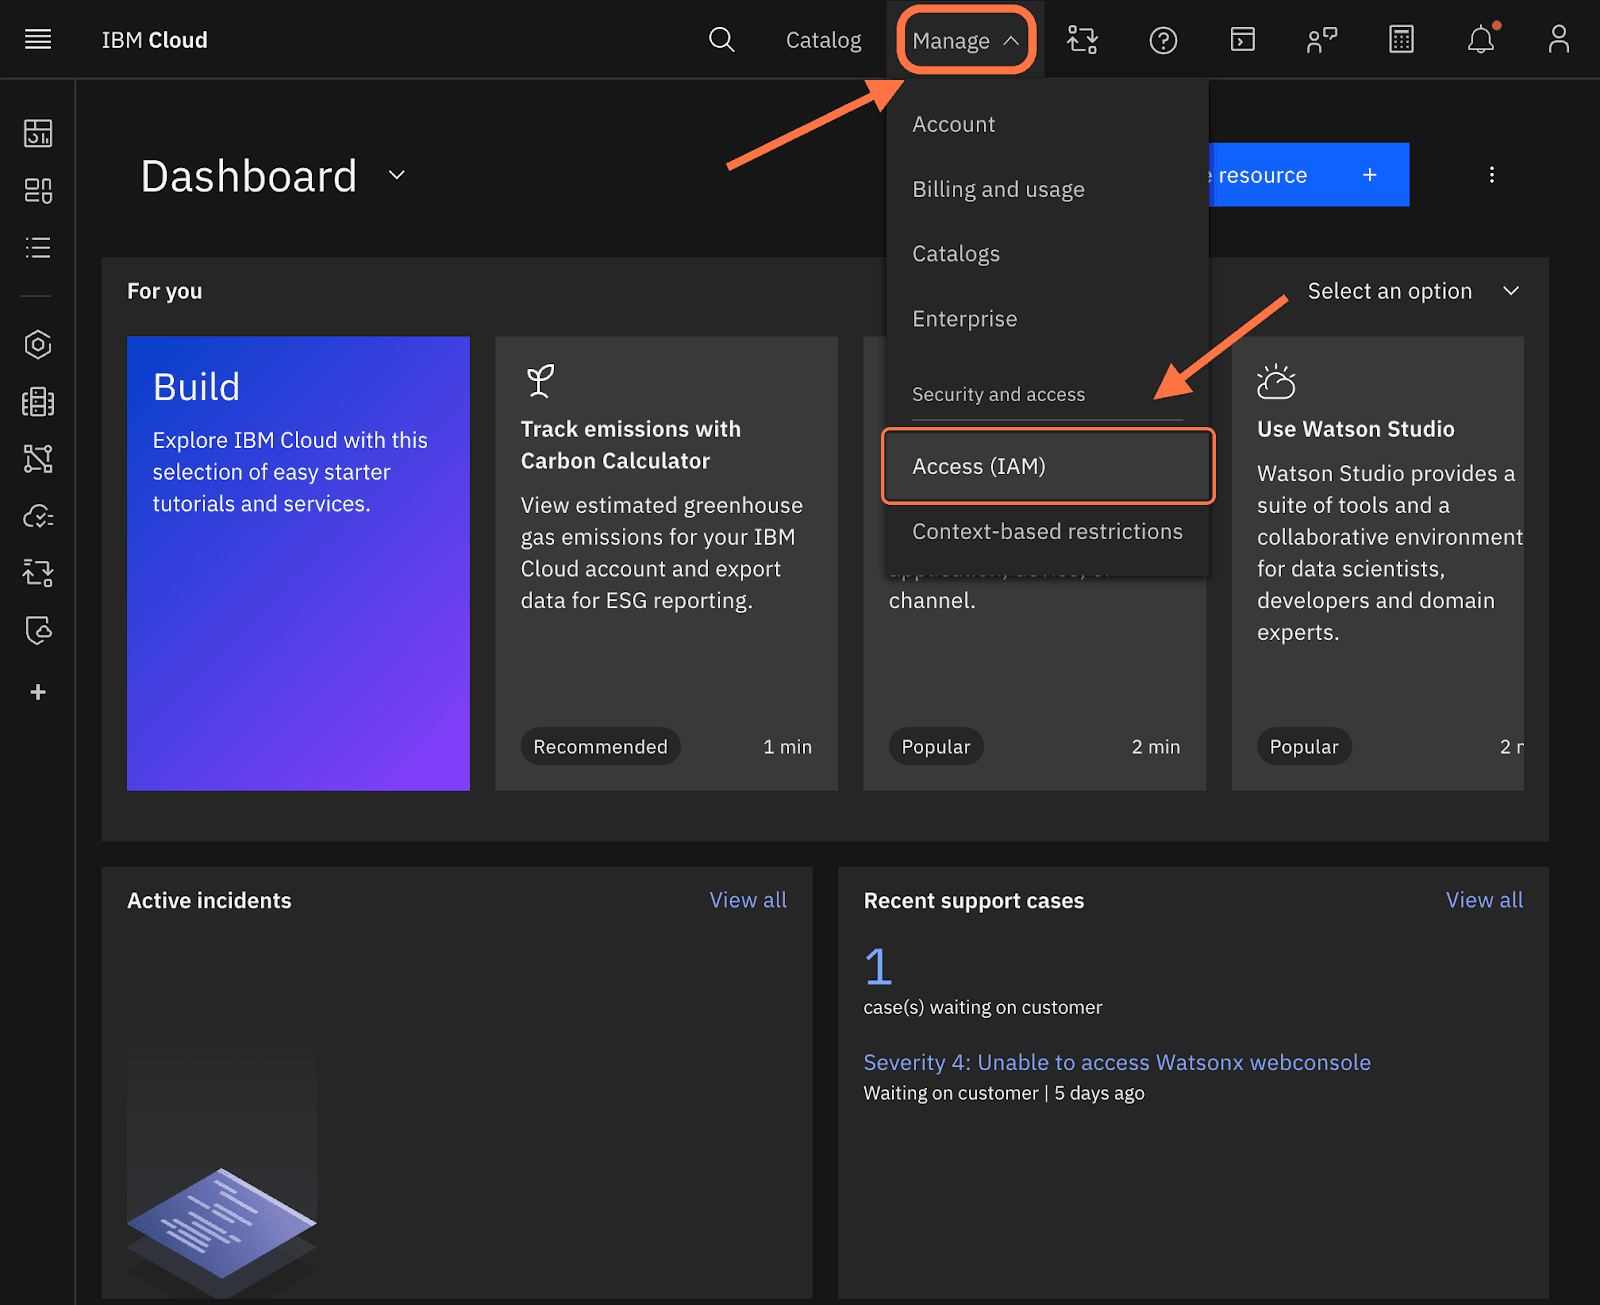
Click on API keys inside the left panel.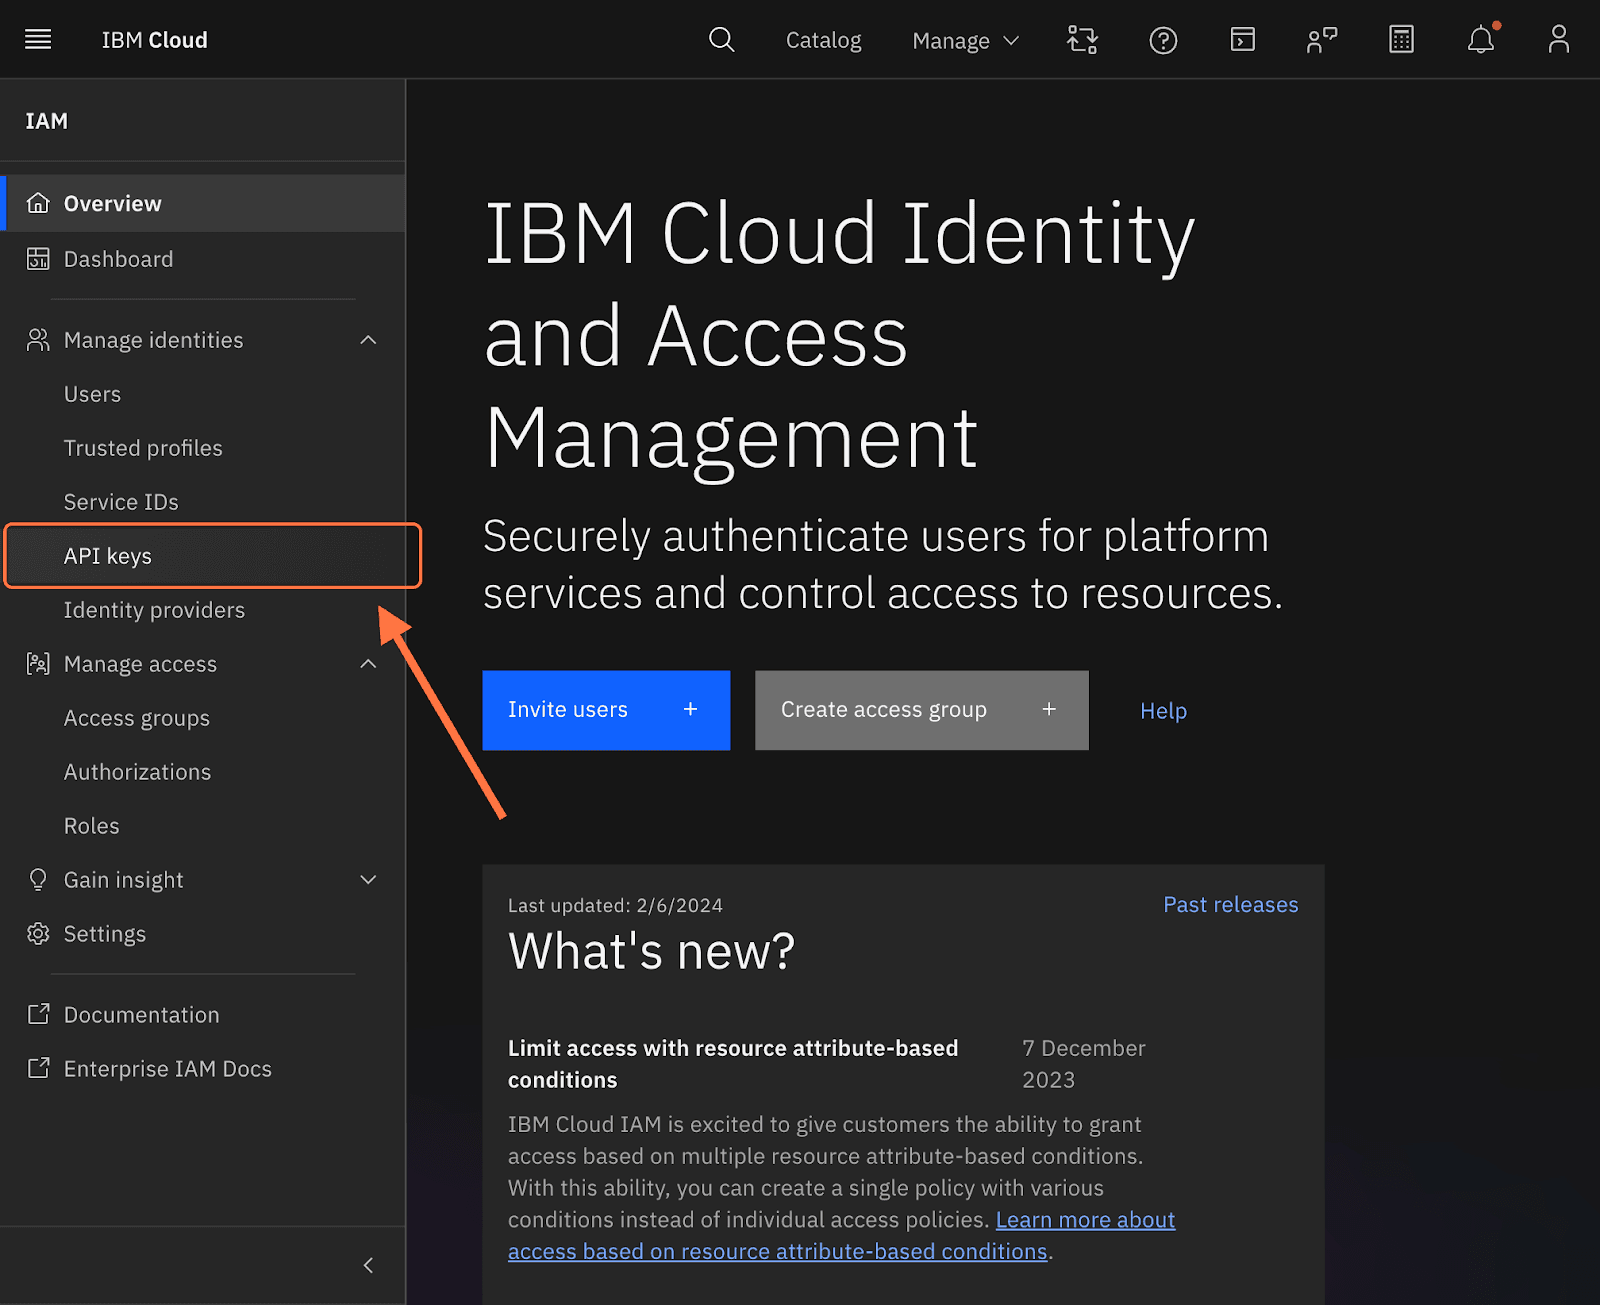
Click on Create.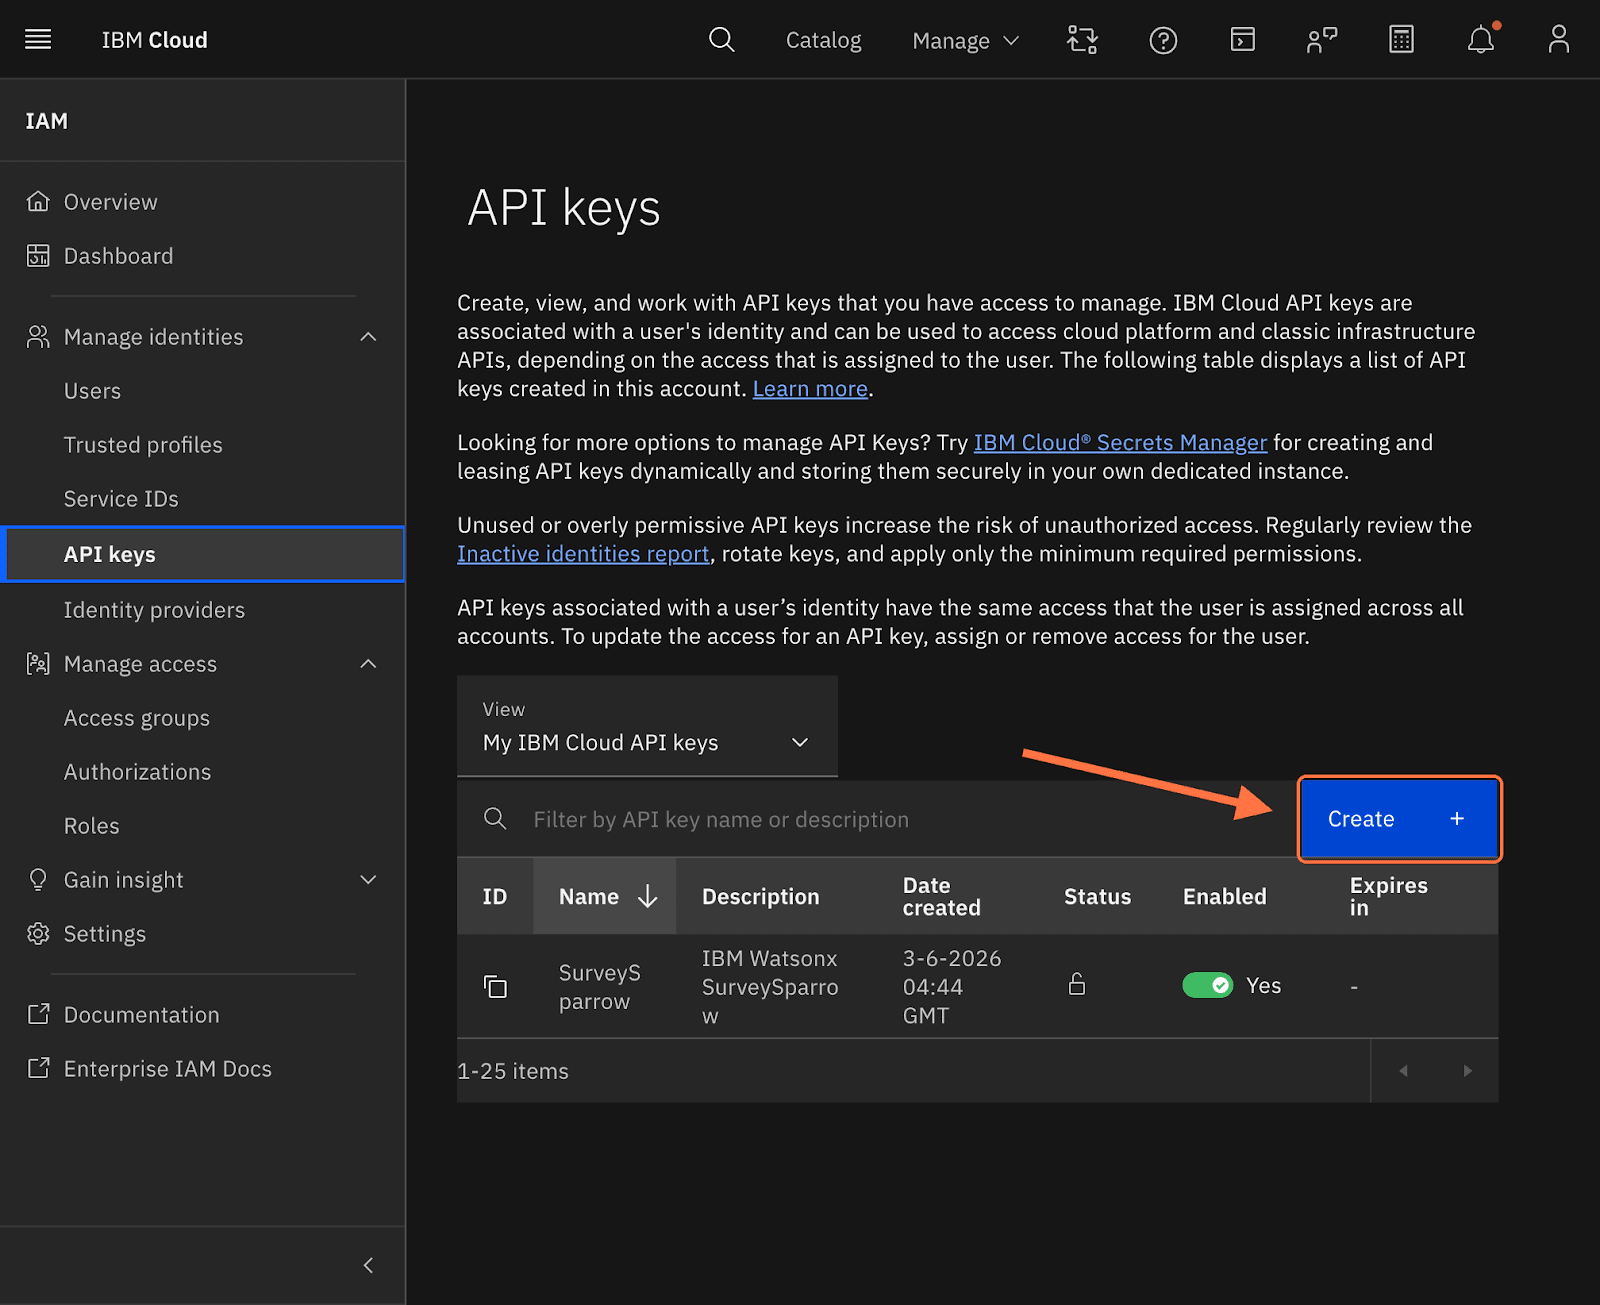
Add a name for the API key. If required, add a description and tweak the other settings as per your need. Once done, click Create.
5. Inside SurveySparrow, enter the API key and click on Next.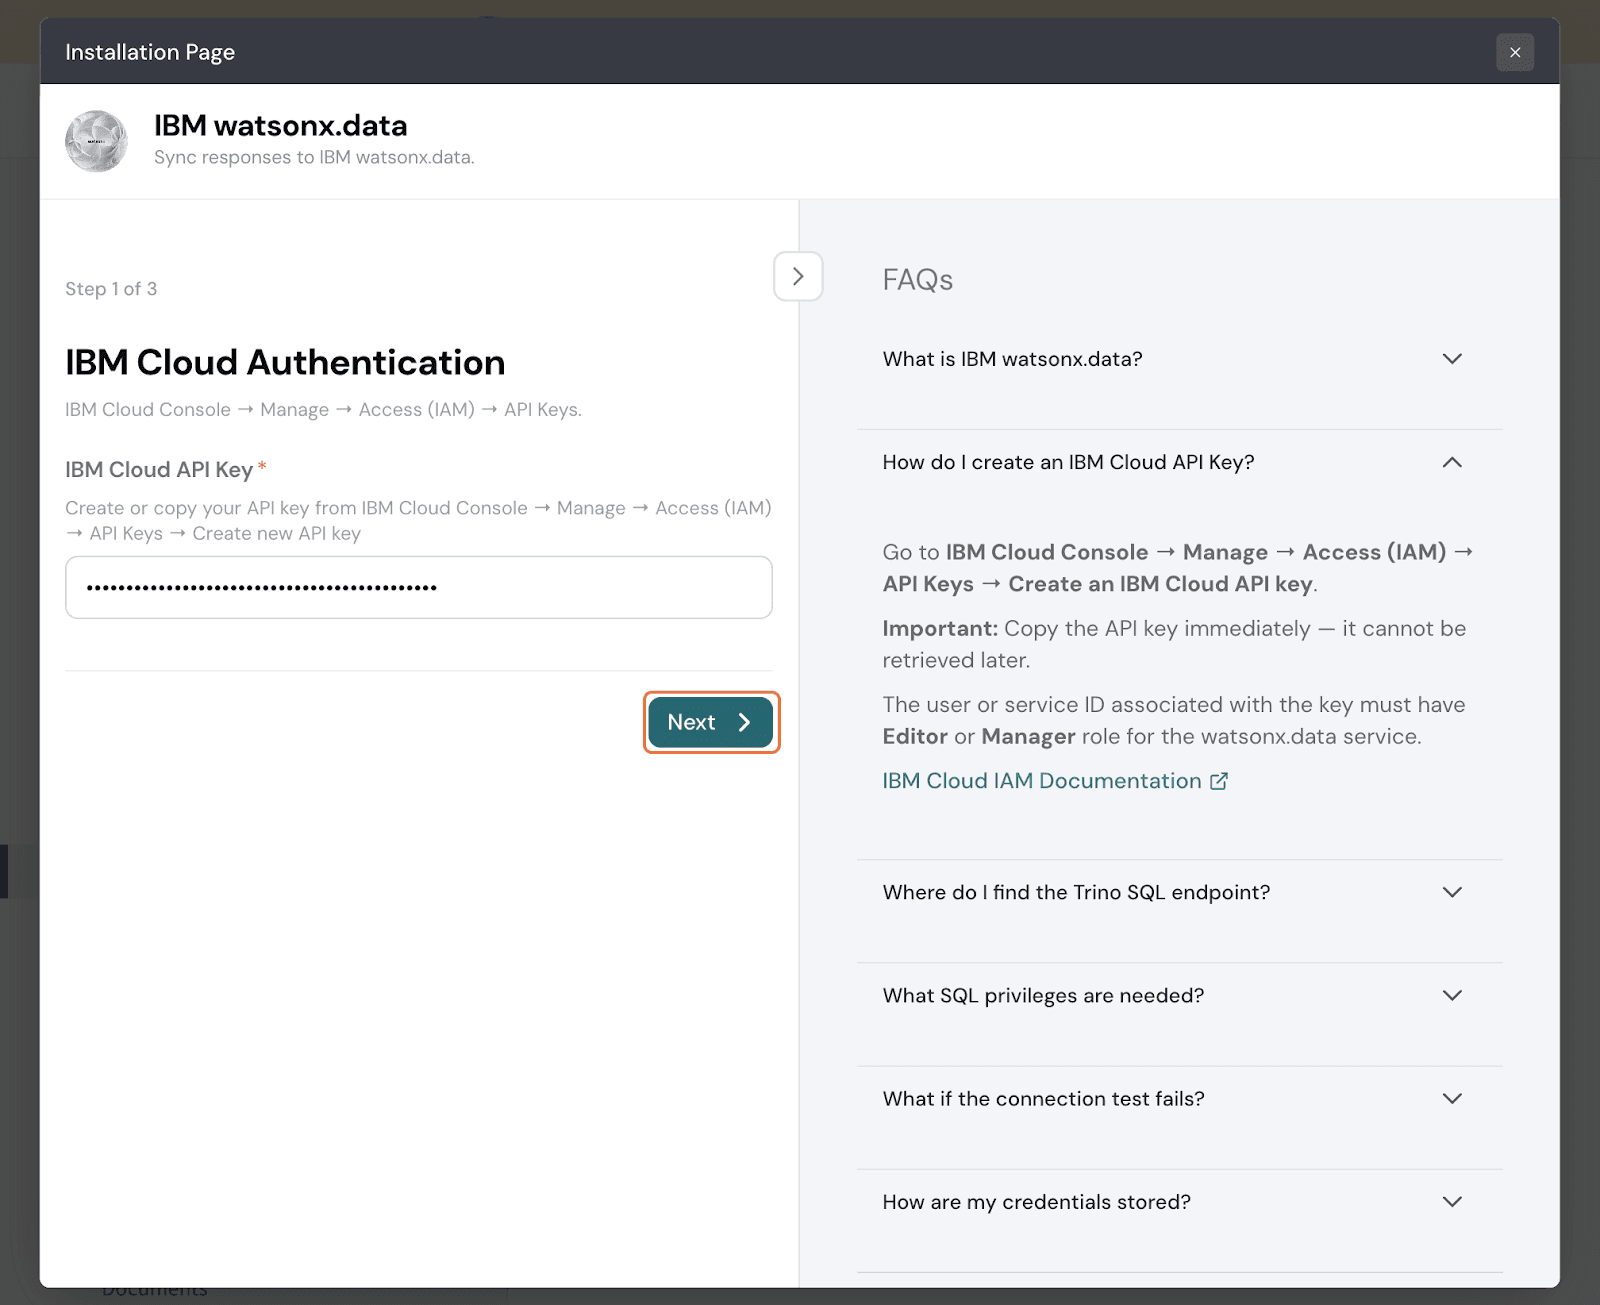
6. In the next screen, you must enter the SQL endpoint.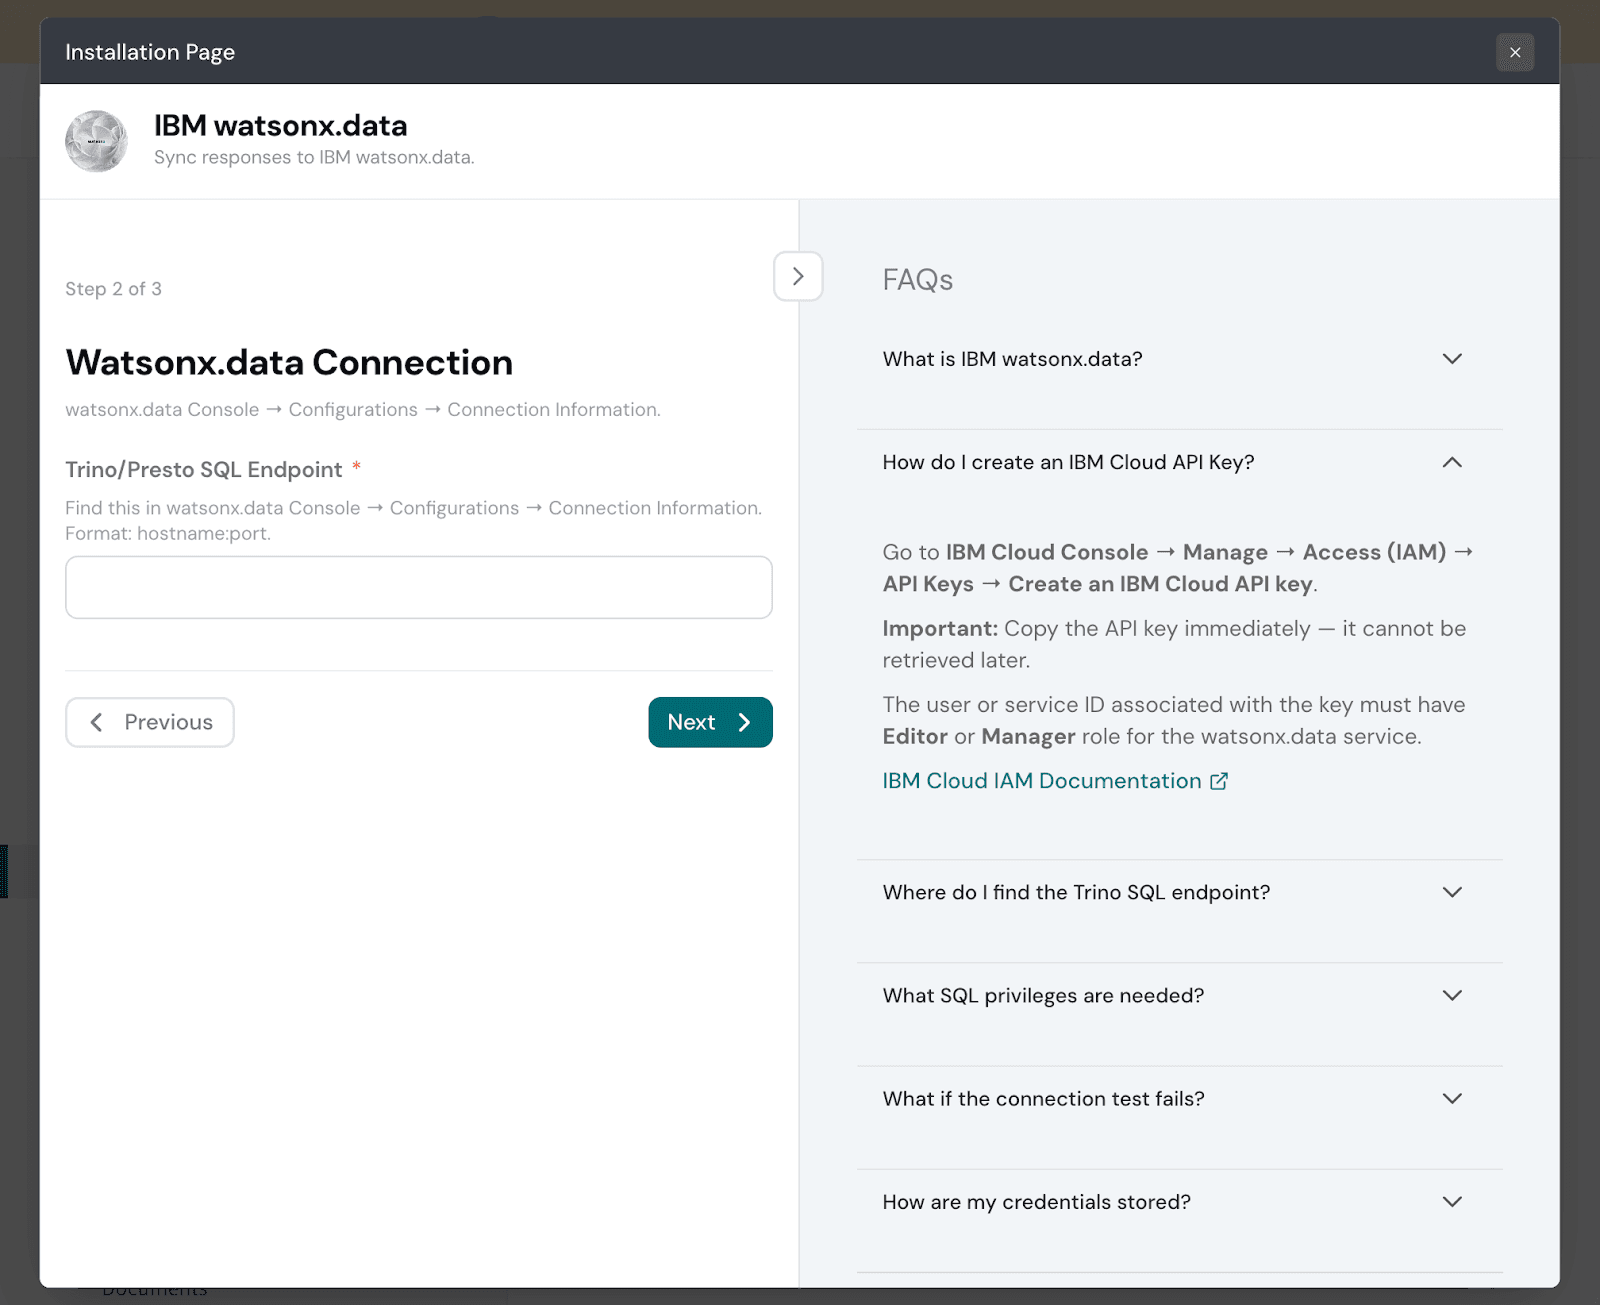
Note: To get the SQL Endpoint, head to the watsonx portal, and click on the left hamburger menu. Then click on Infrastructure manager.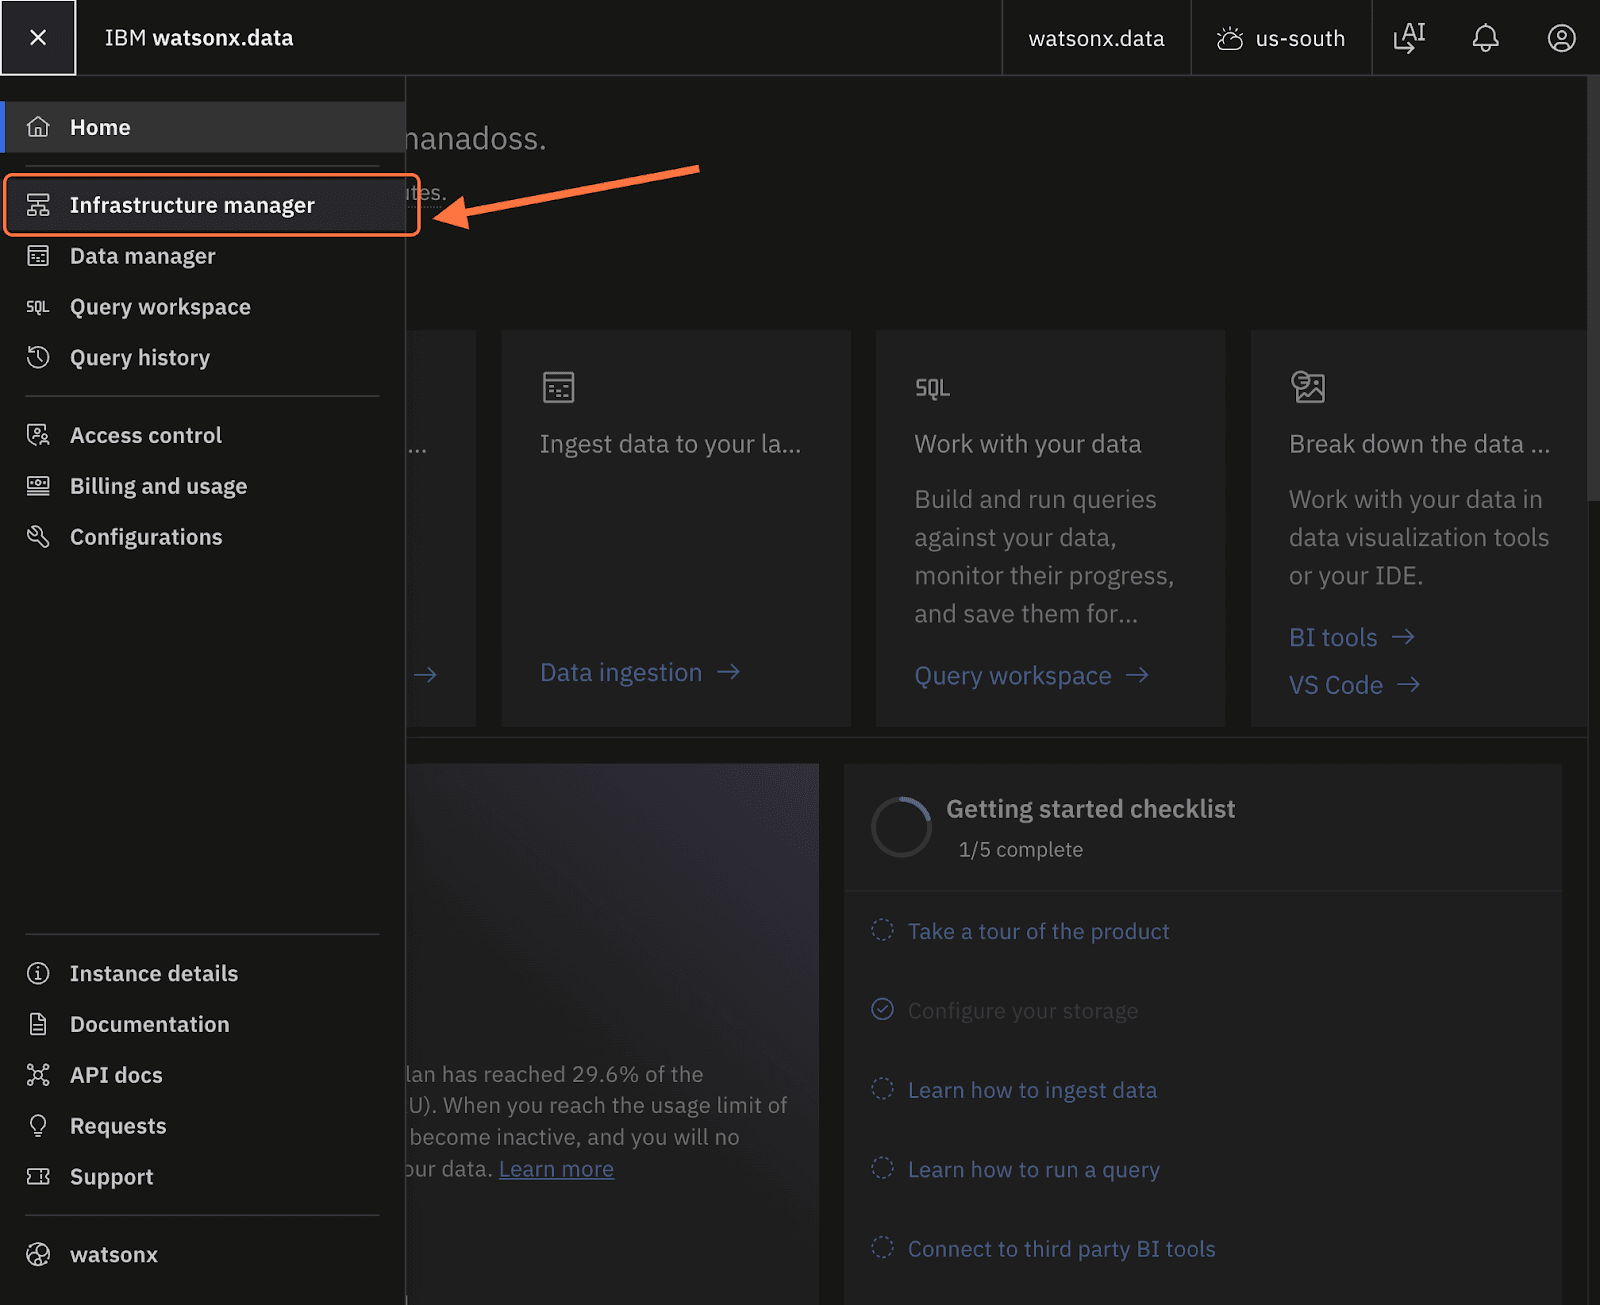
Inside the infrastructure manager, look at the Engines section and click on the Engine you want.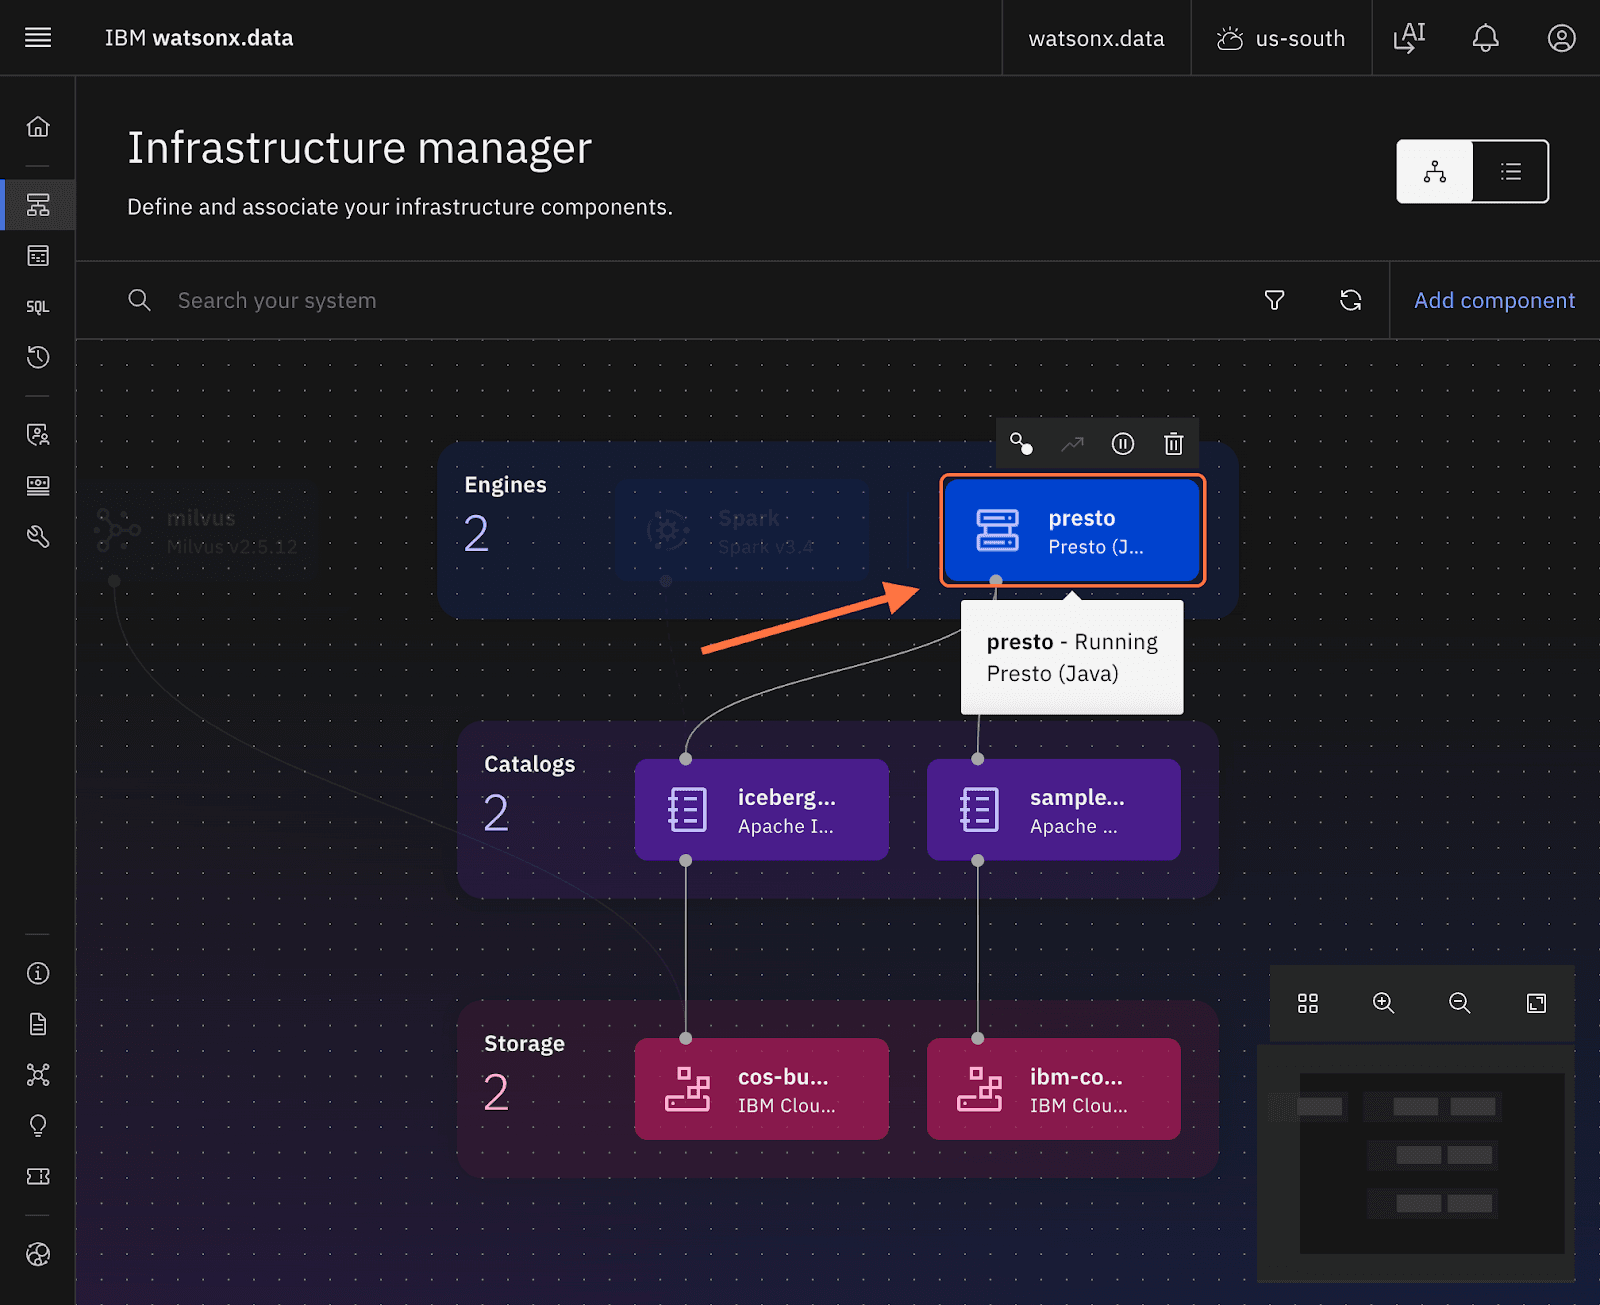
Hover over the Host, and click on the copy icon when you see it.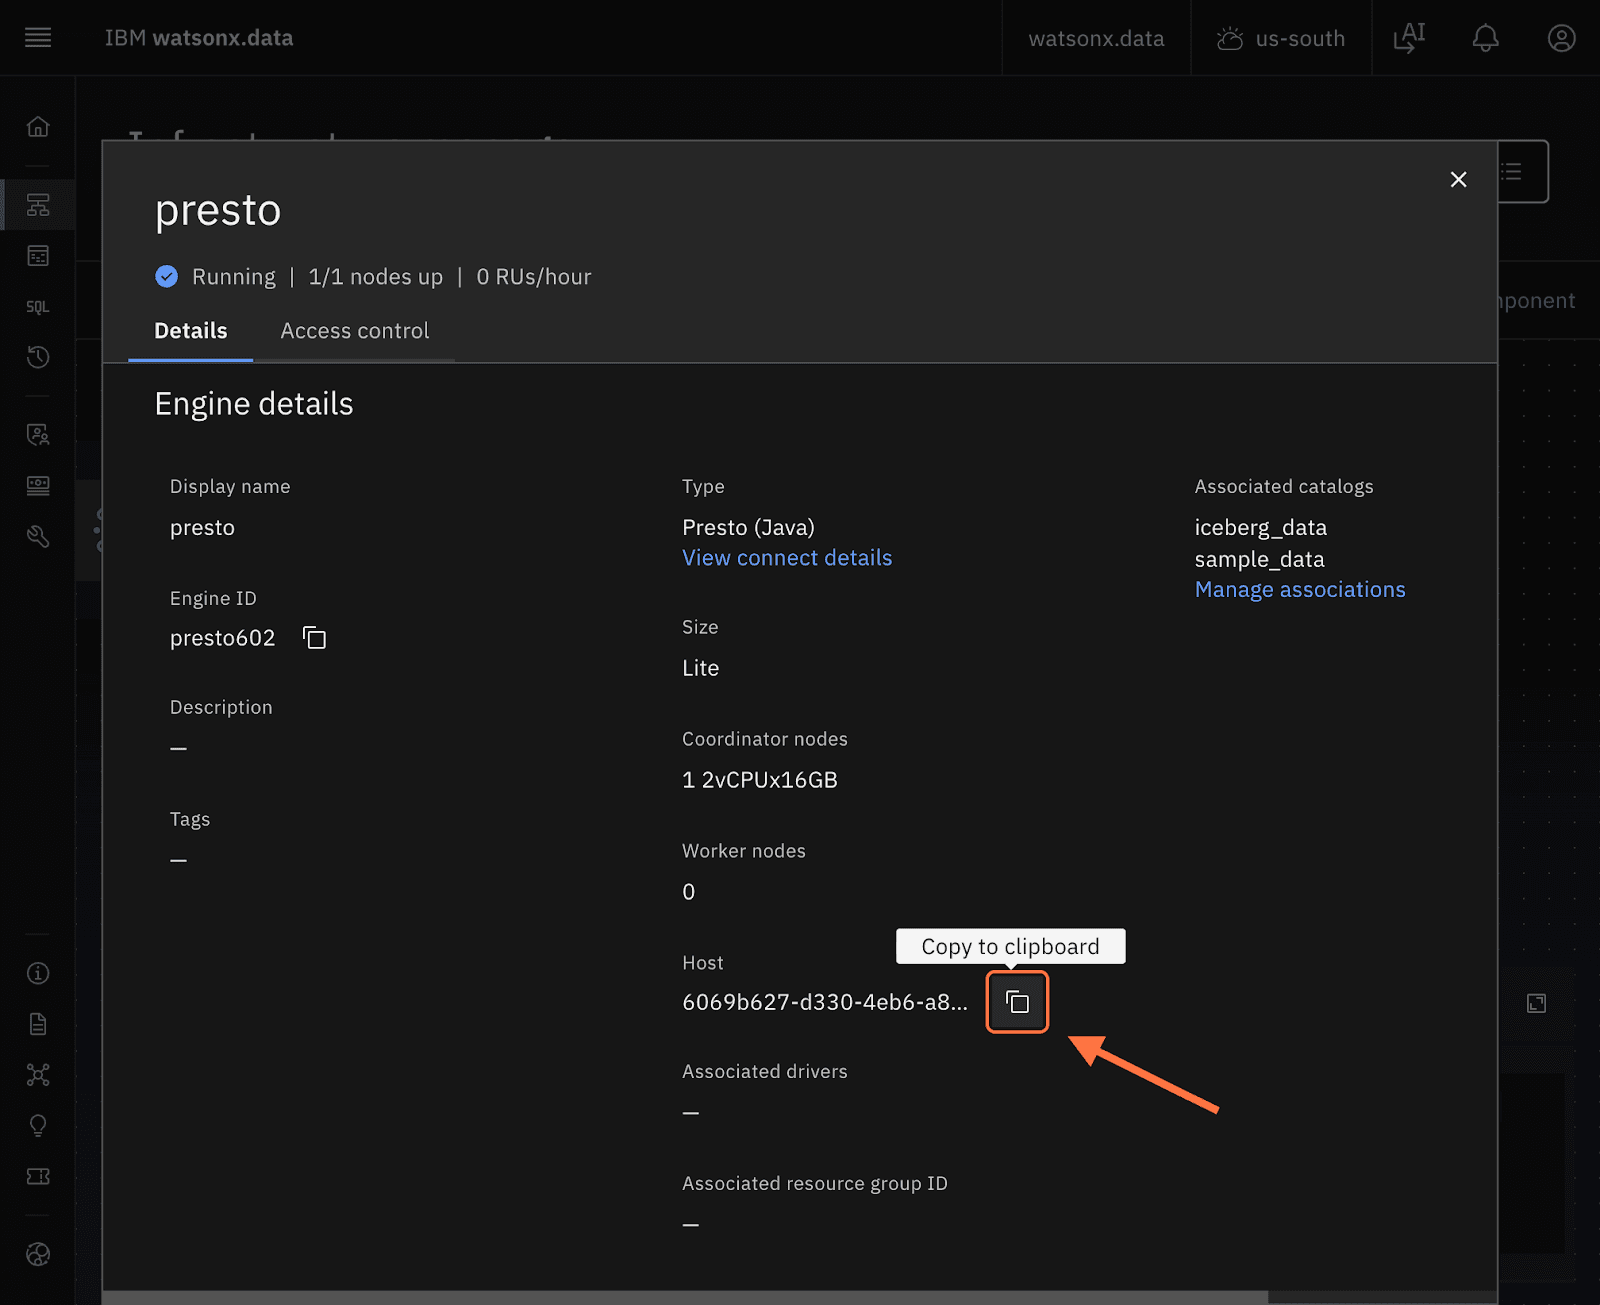
7. After entering the endpoint in SurveySparrow, click Next.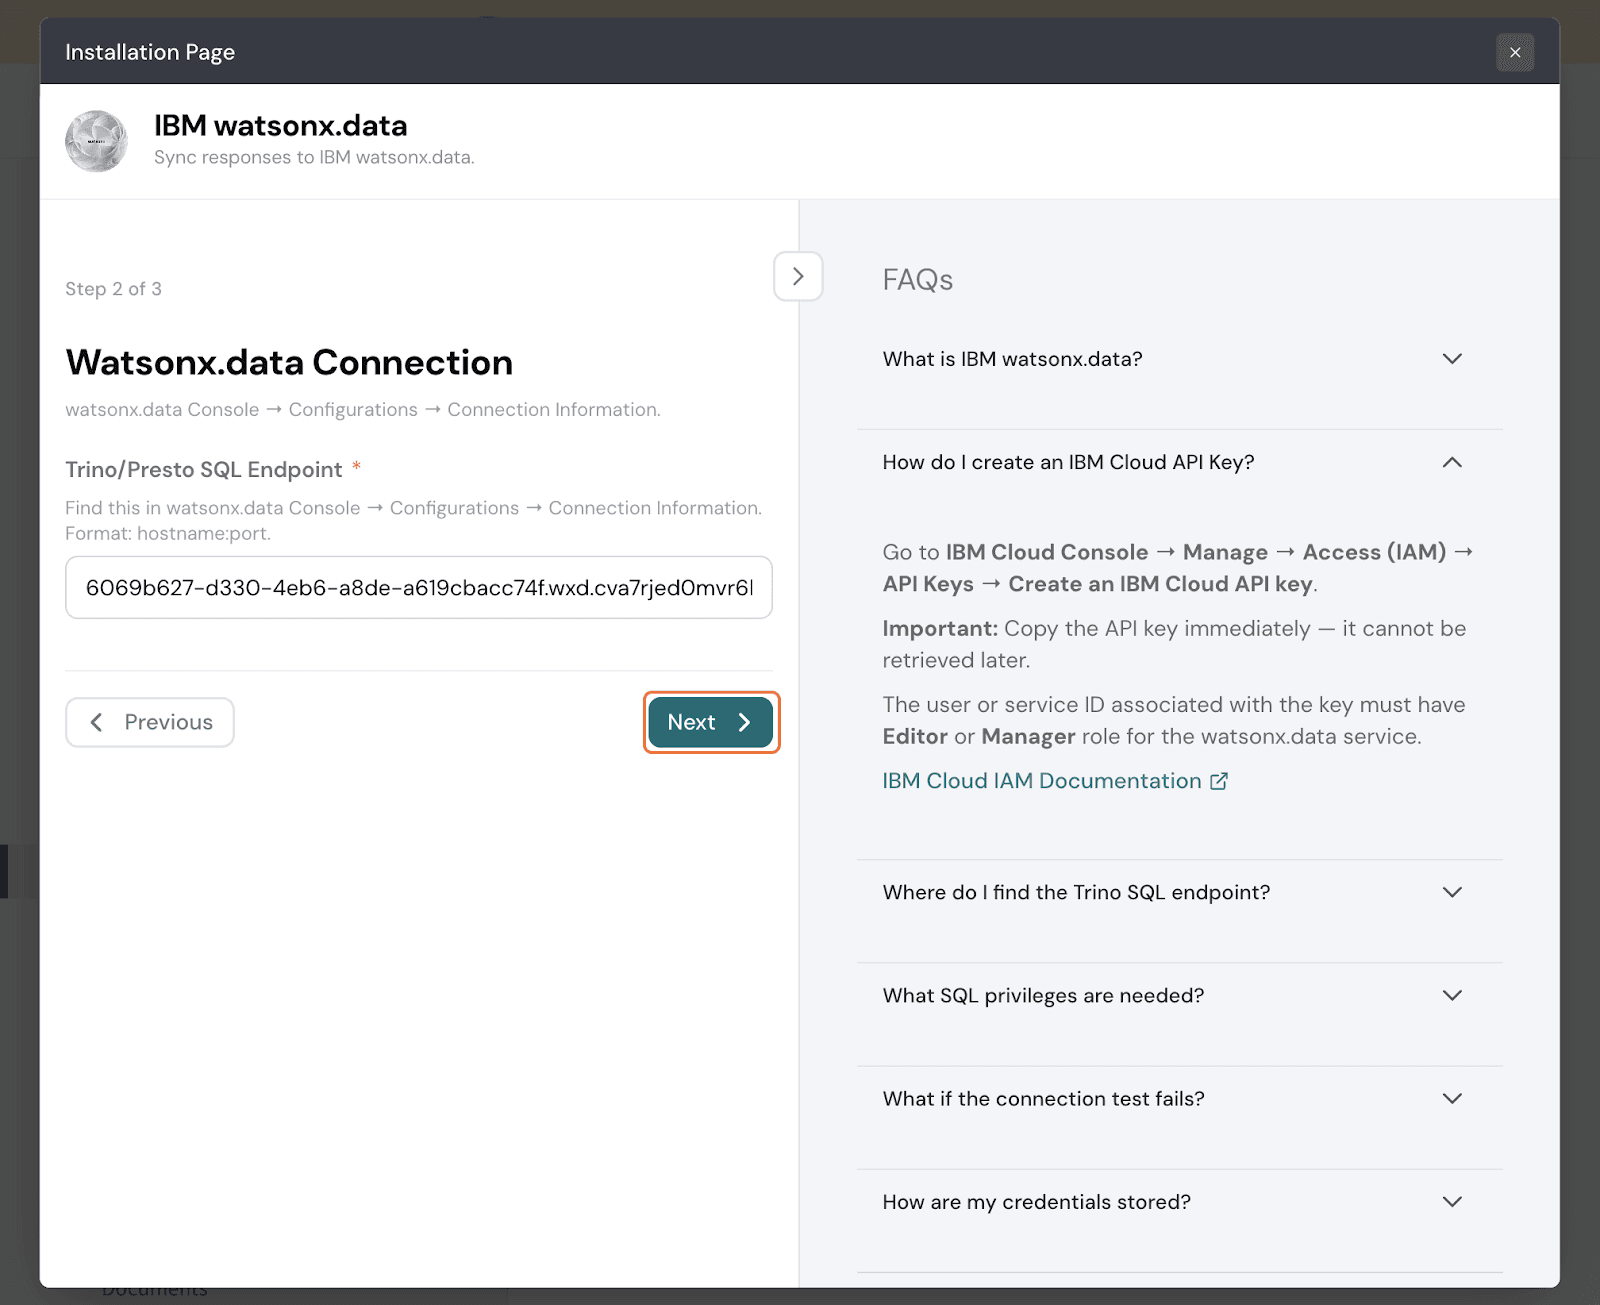
8. A final review screen appears. Once you’re satisfied, click Connect.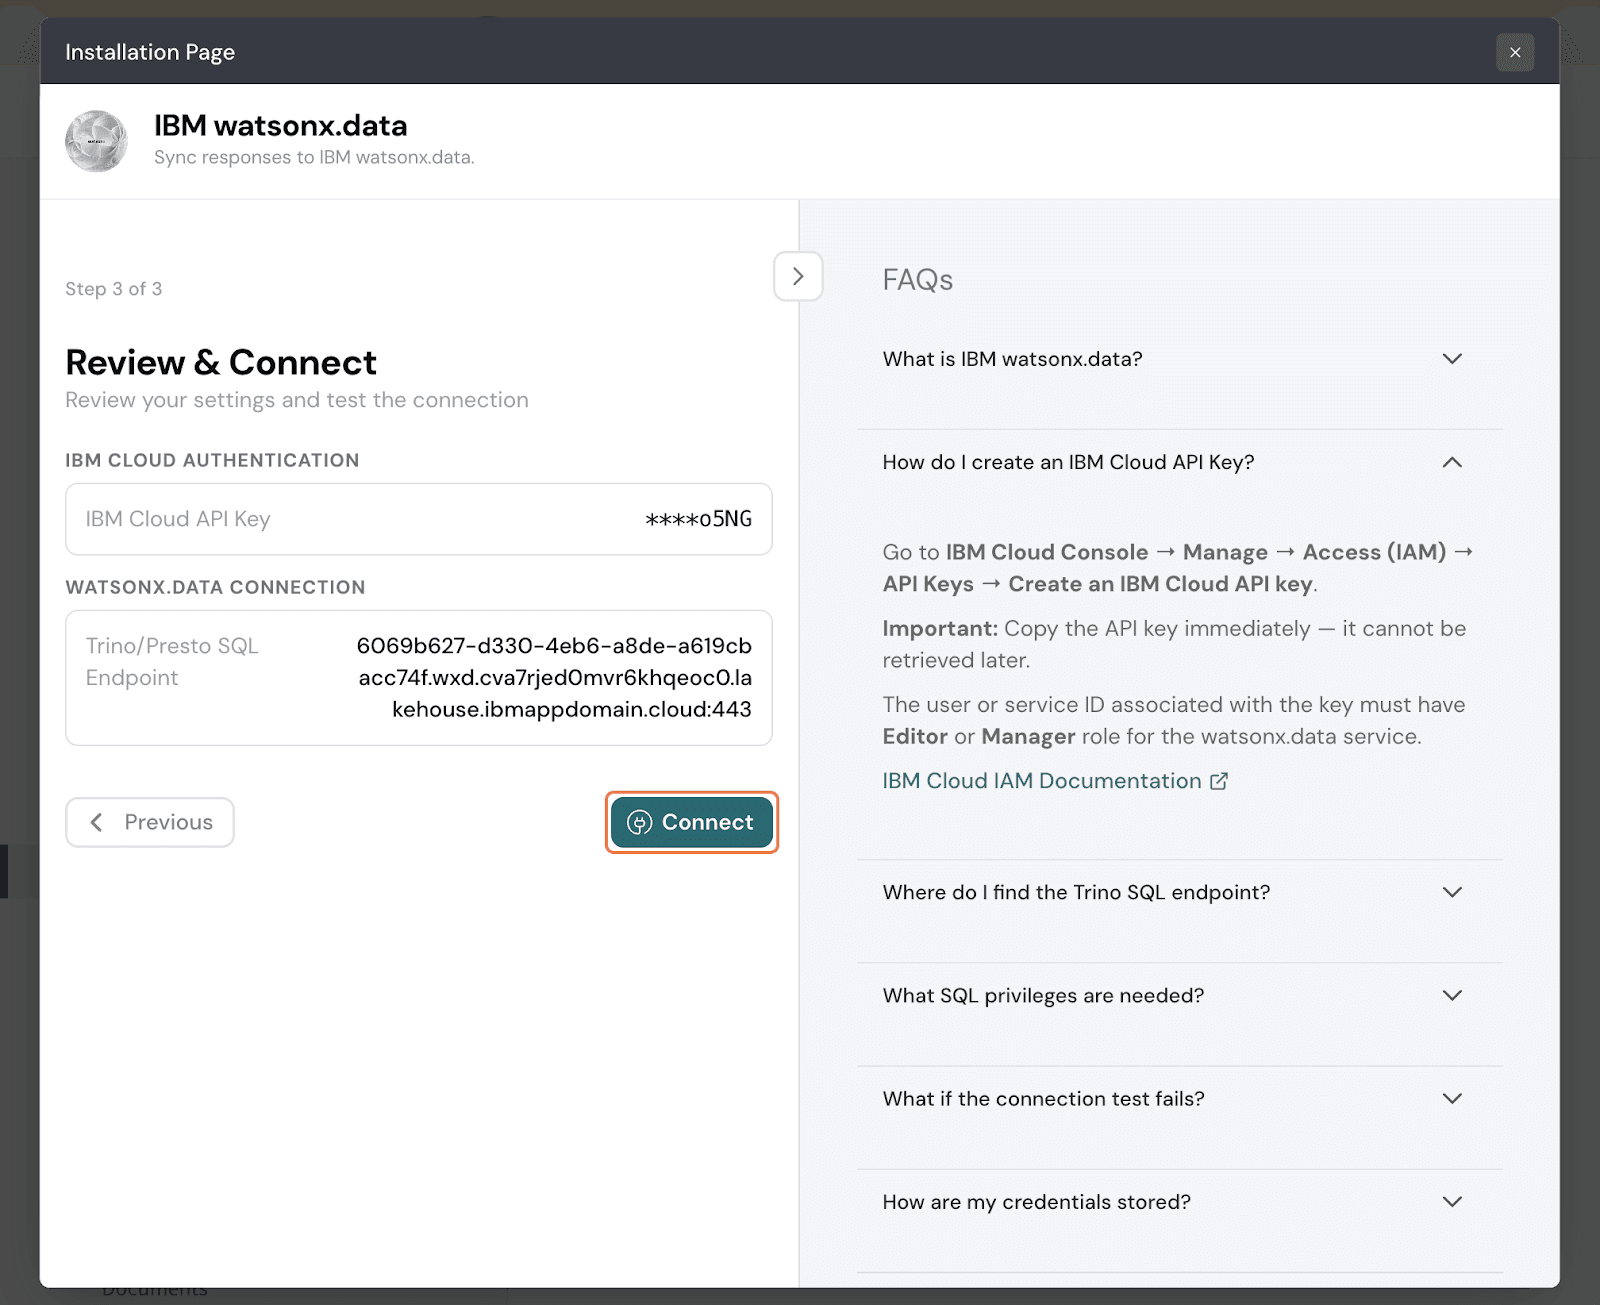
1. Open a survey and click on the Integrate/Configure tab.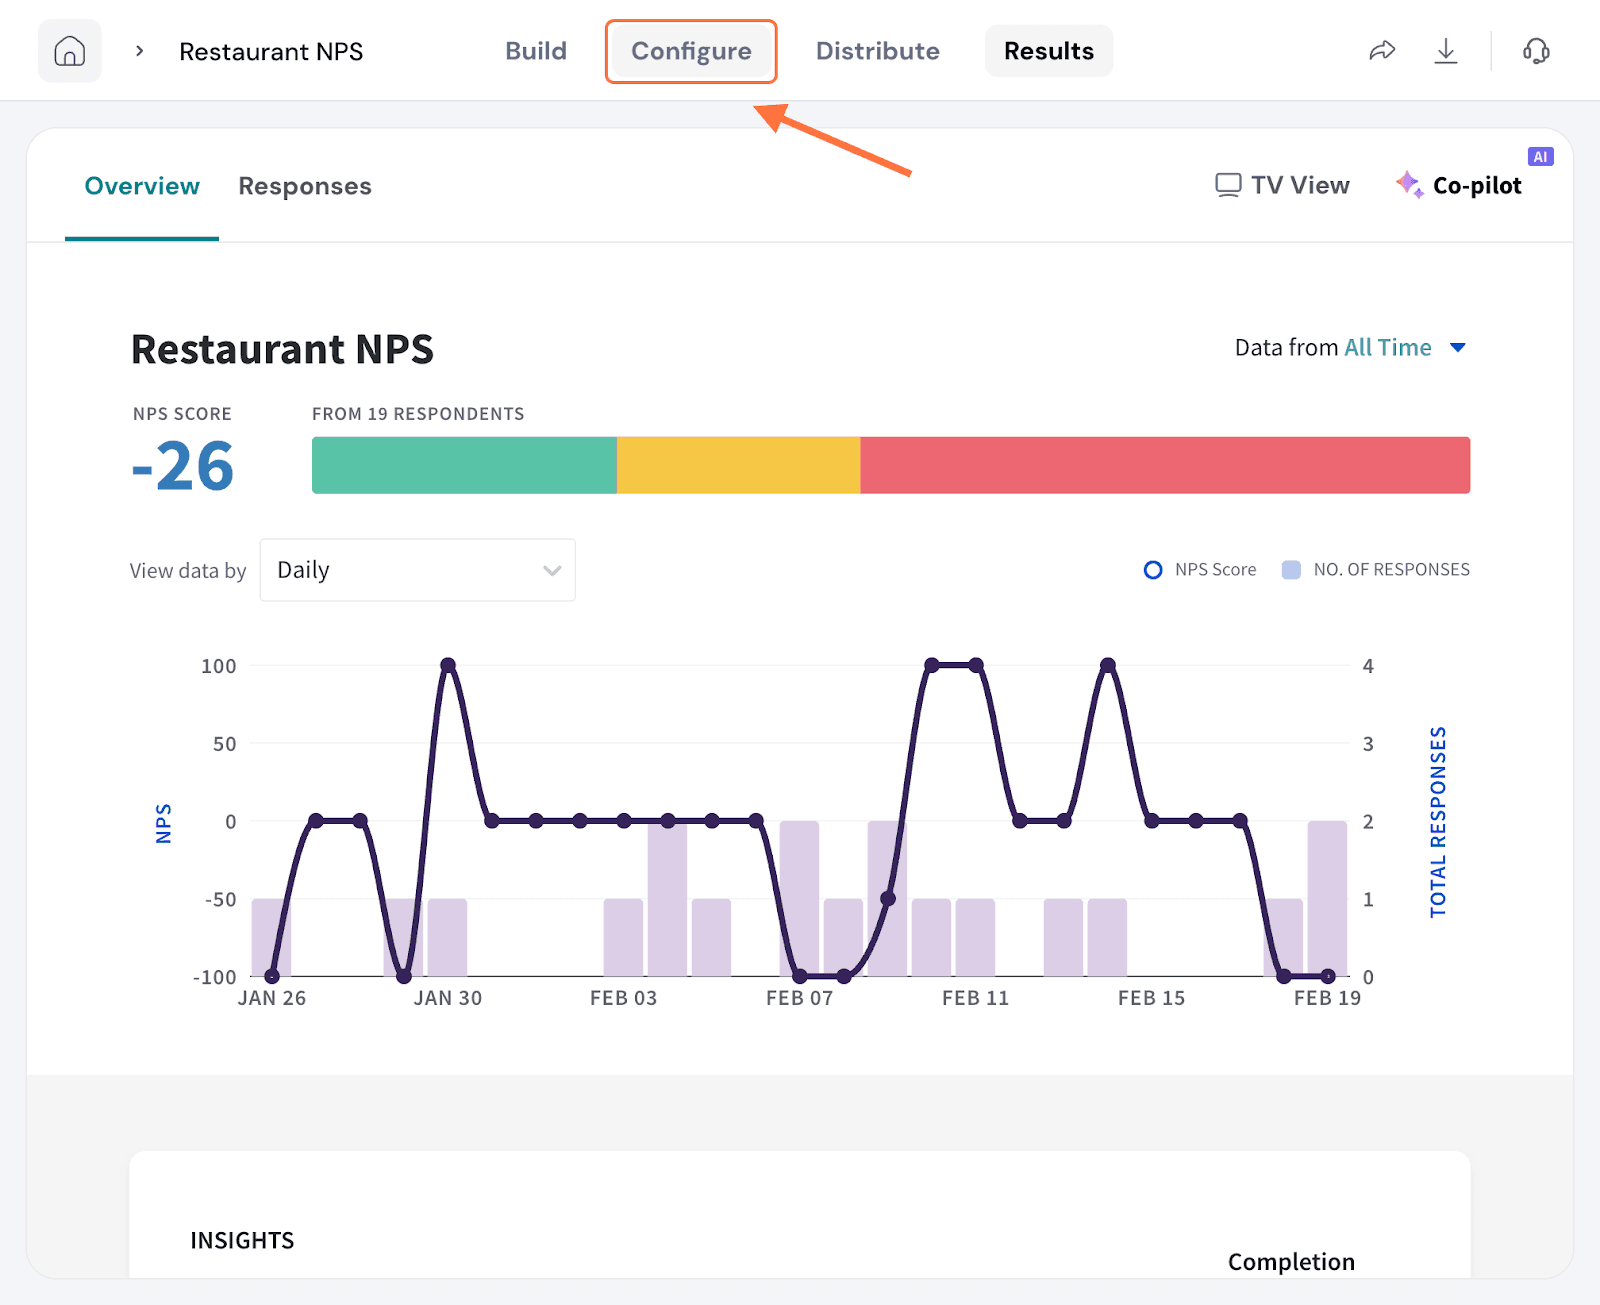
2. Search for the IBM watsonx integration using the search box (or by scrolling through the integrations). When it appears, click on the toggle.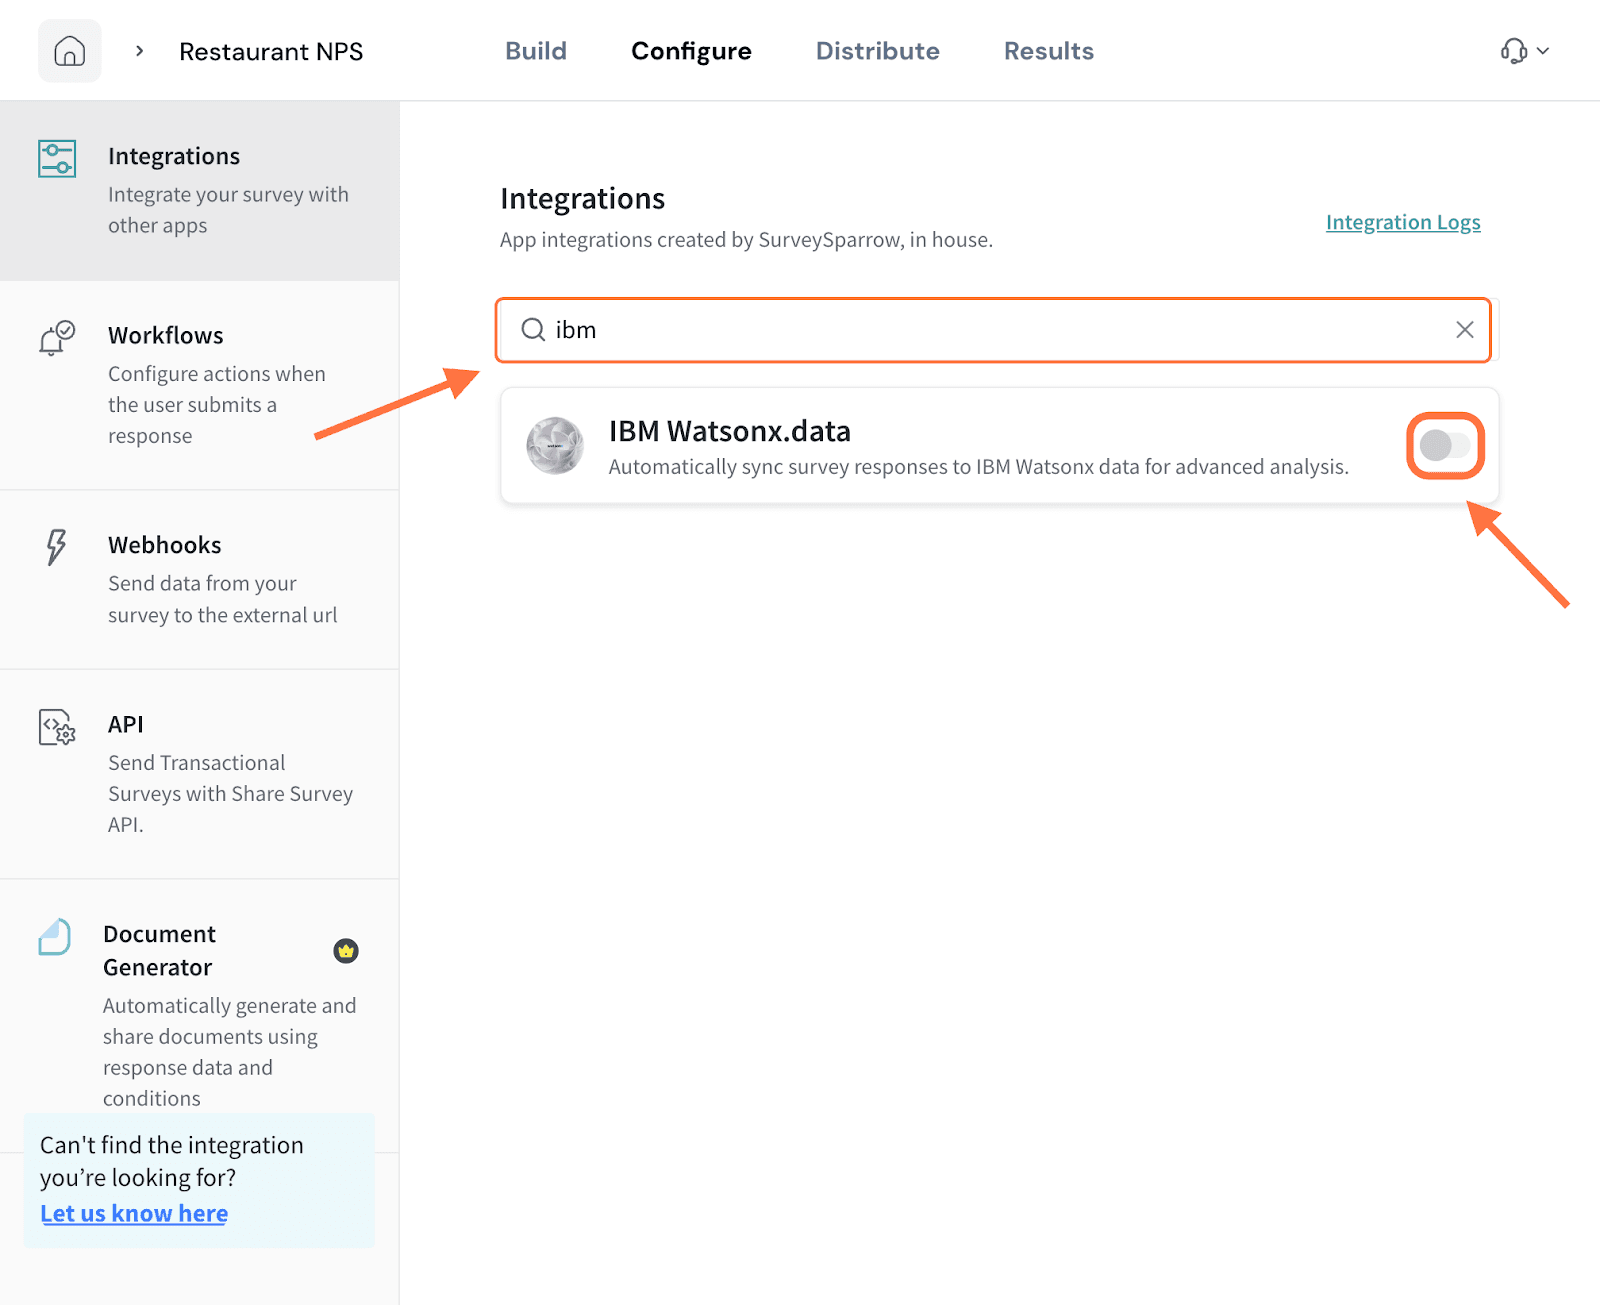
3. Inside the mapping configuration screen, you need to select the exact destination where the data is headed. First click on the drop-down under Catalog and choose from the options.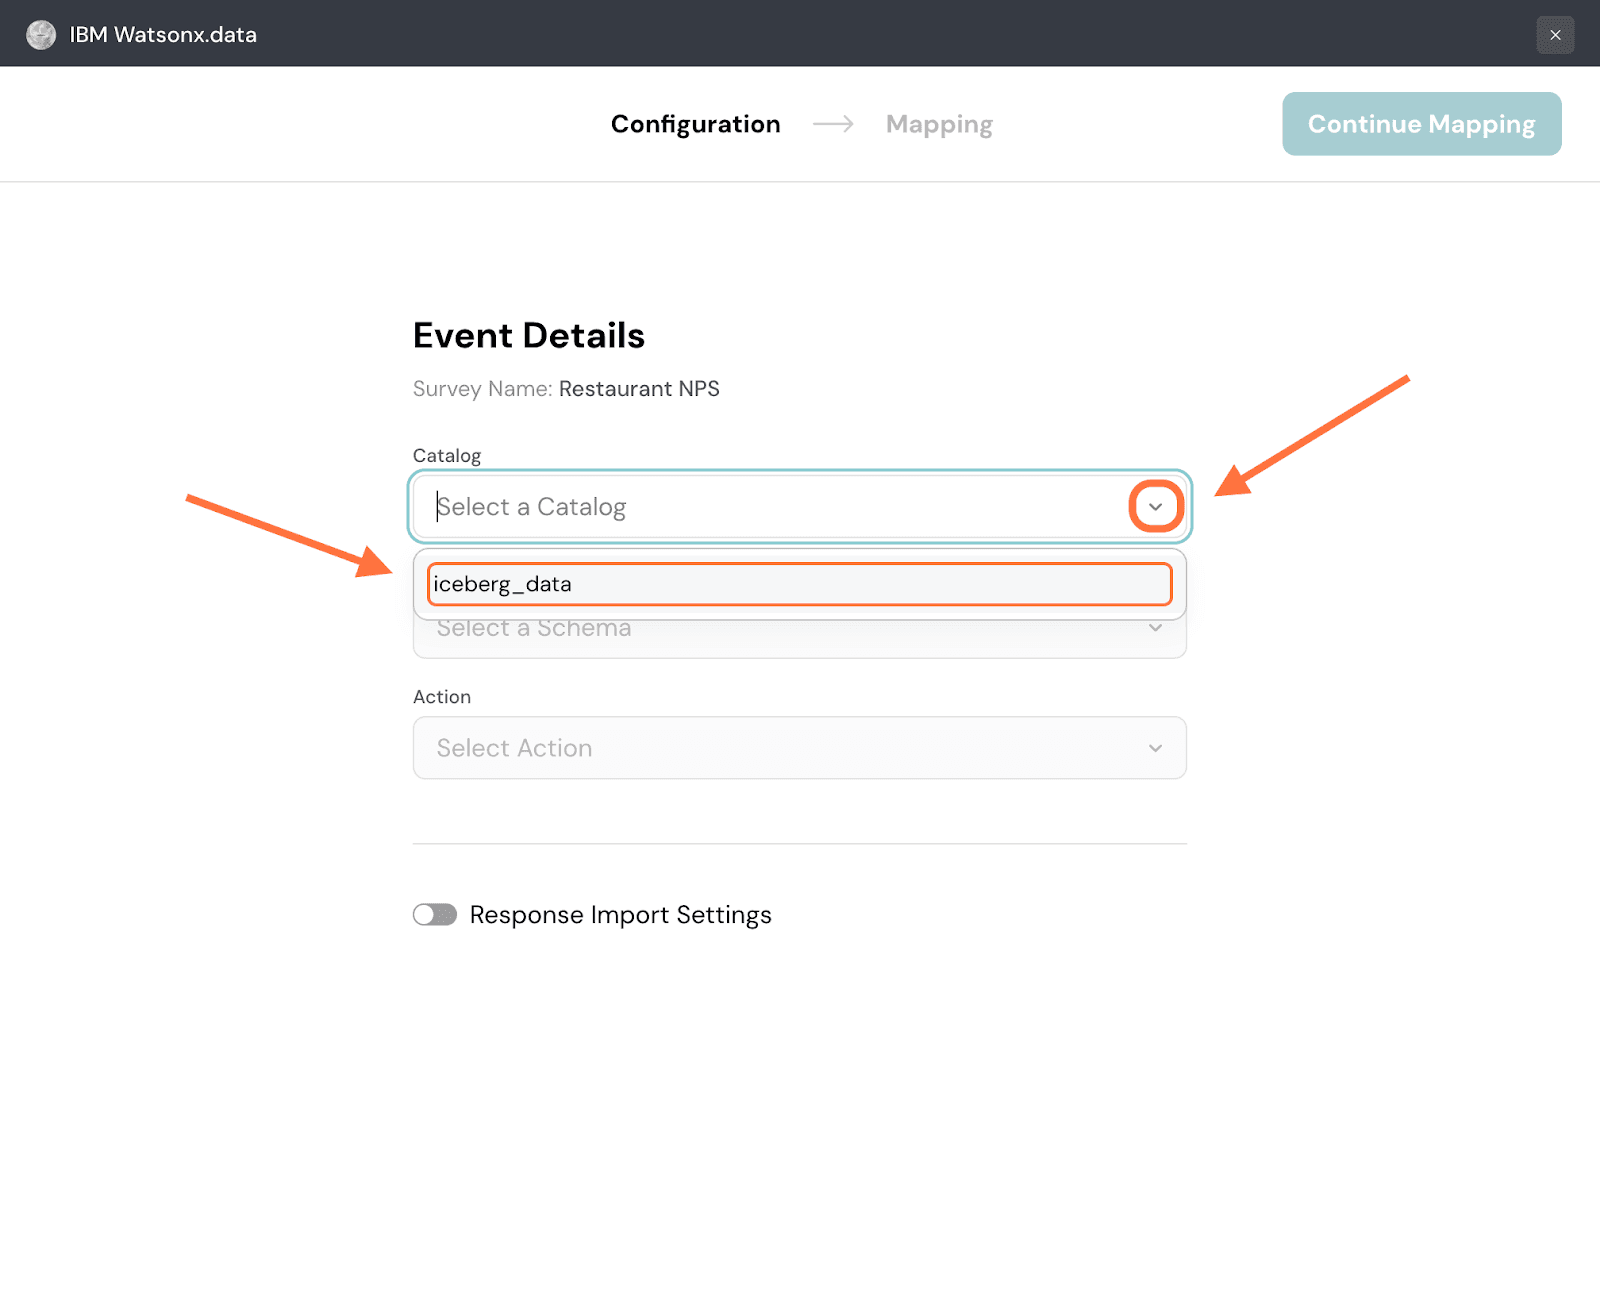
4. Next, click on the drop-down under Schema and choose from the options.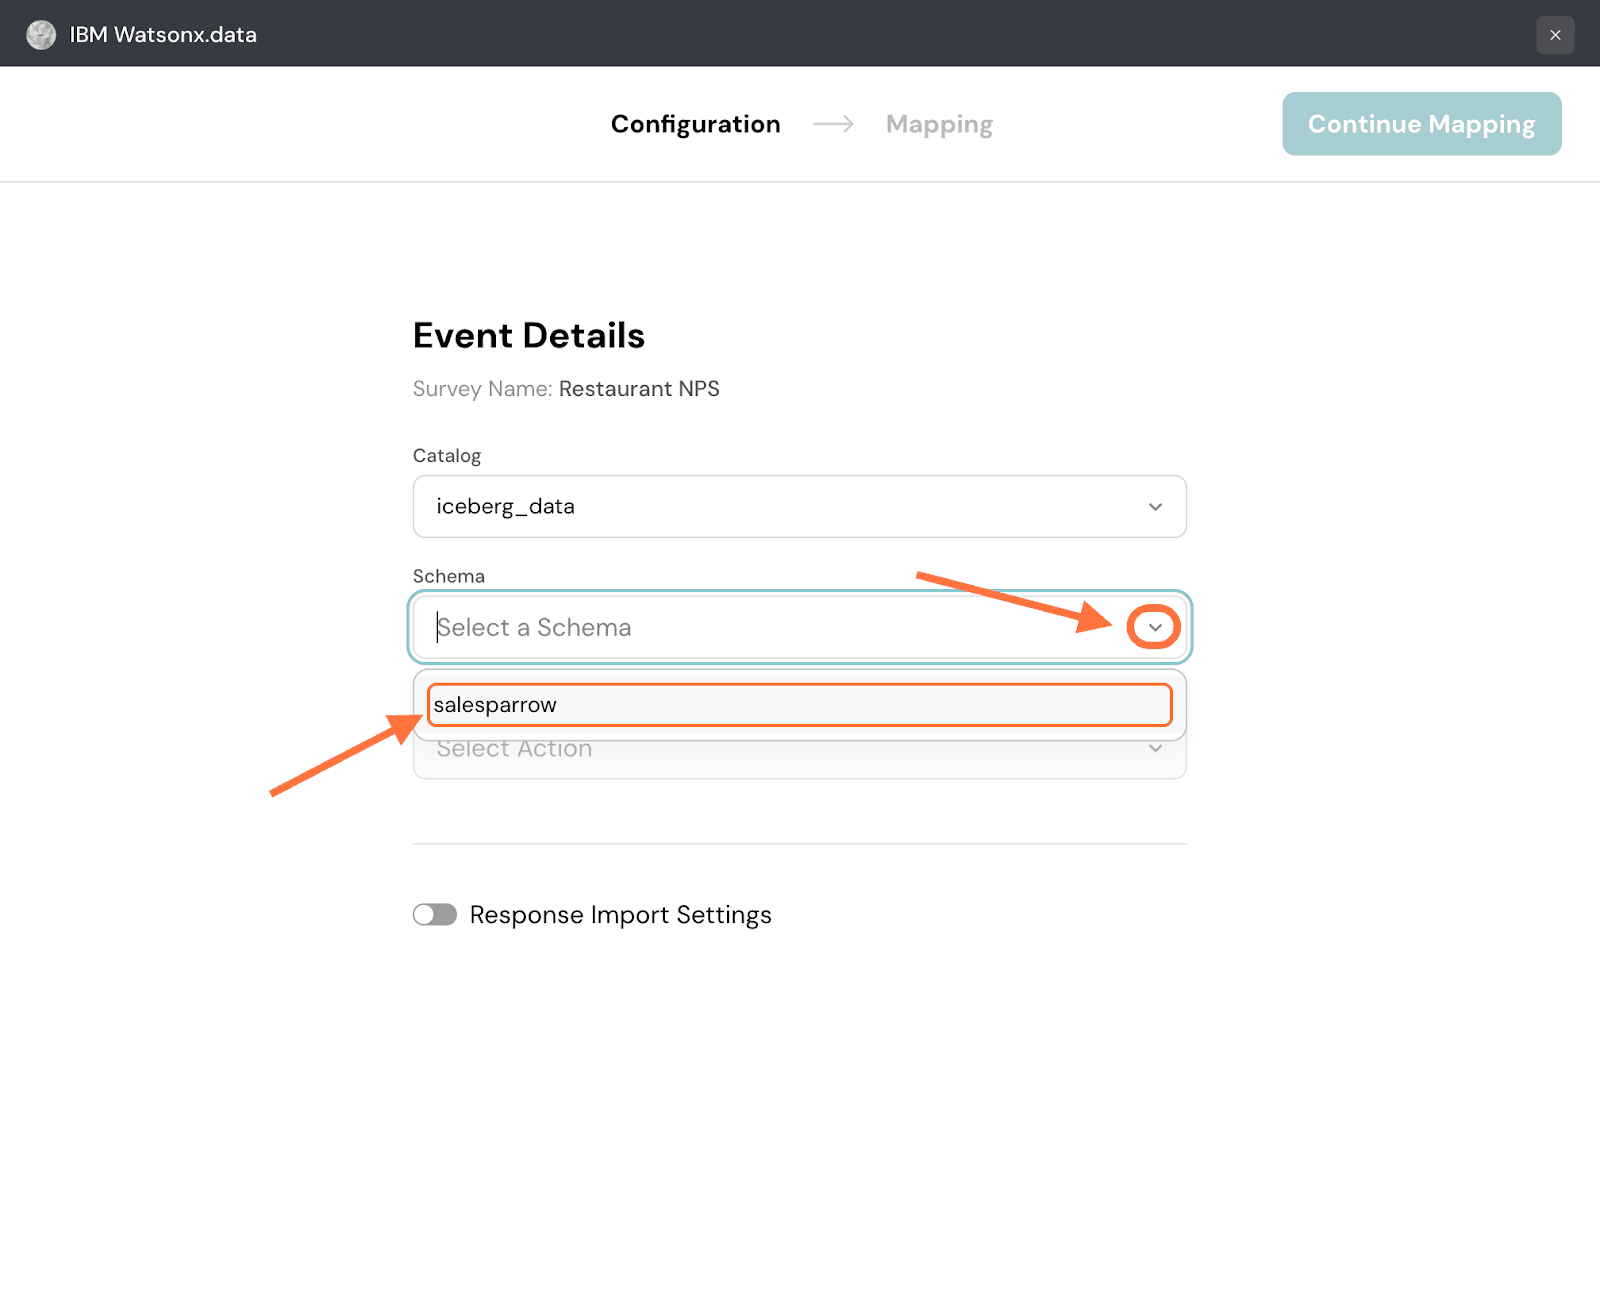
5. Now you must select the table to which you want to push the survey data. But you can either choose an existing table from the dataset or create a new one. Click on the dropdown under Action to decide. Both actions have different flows. We’ll first start with an existing table.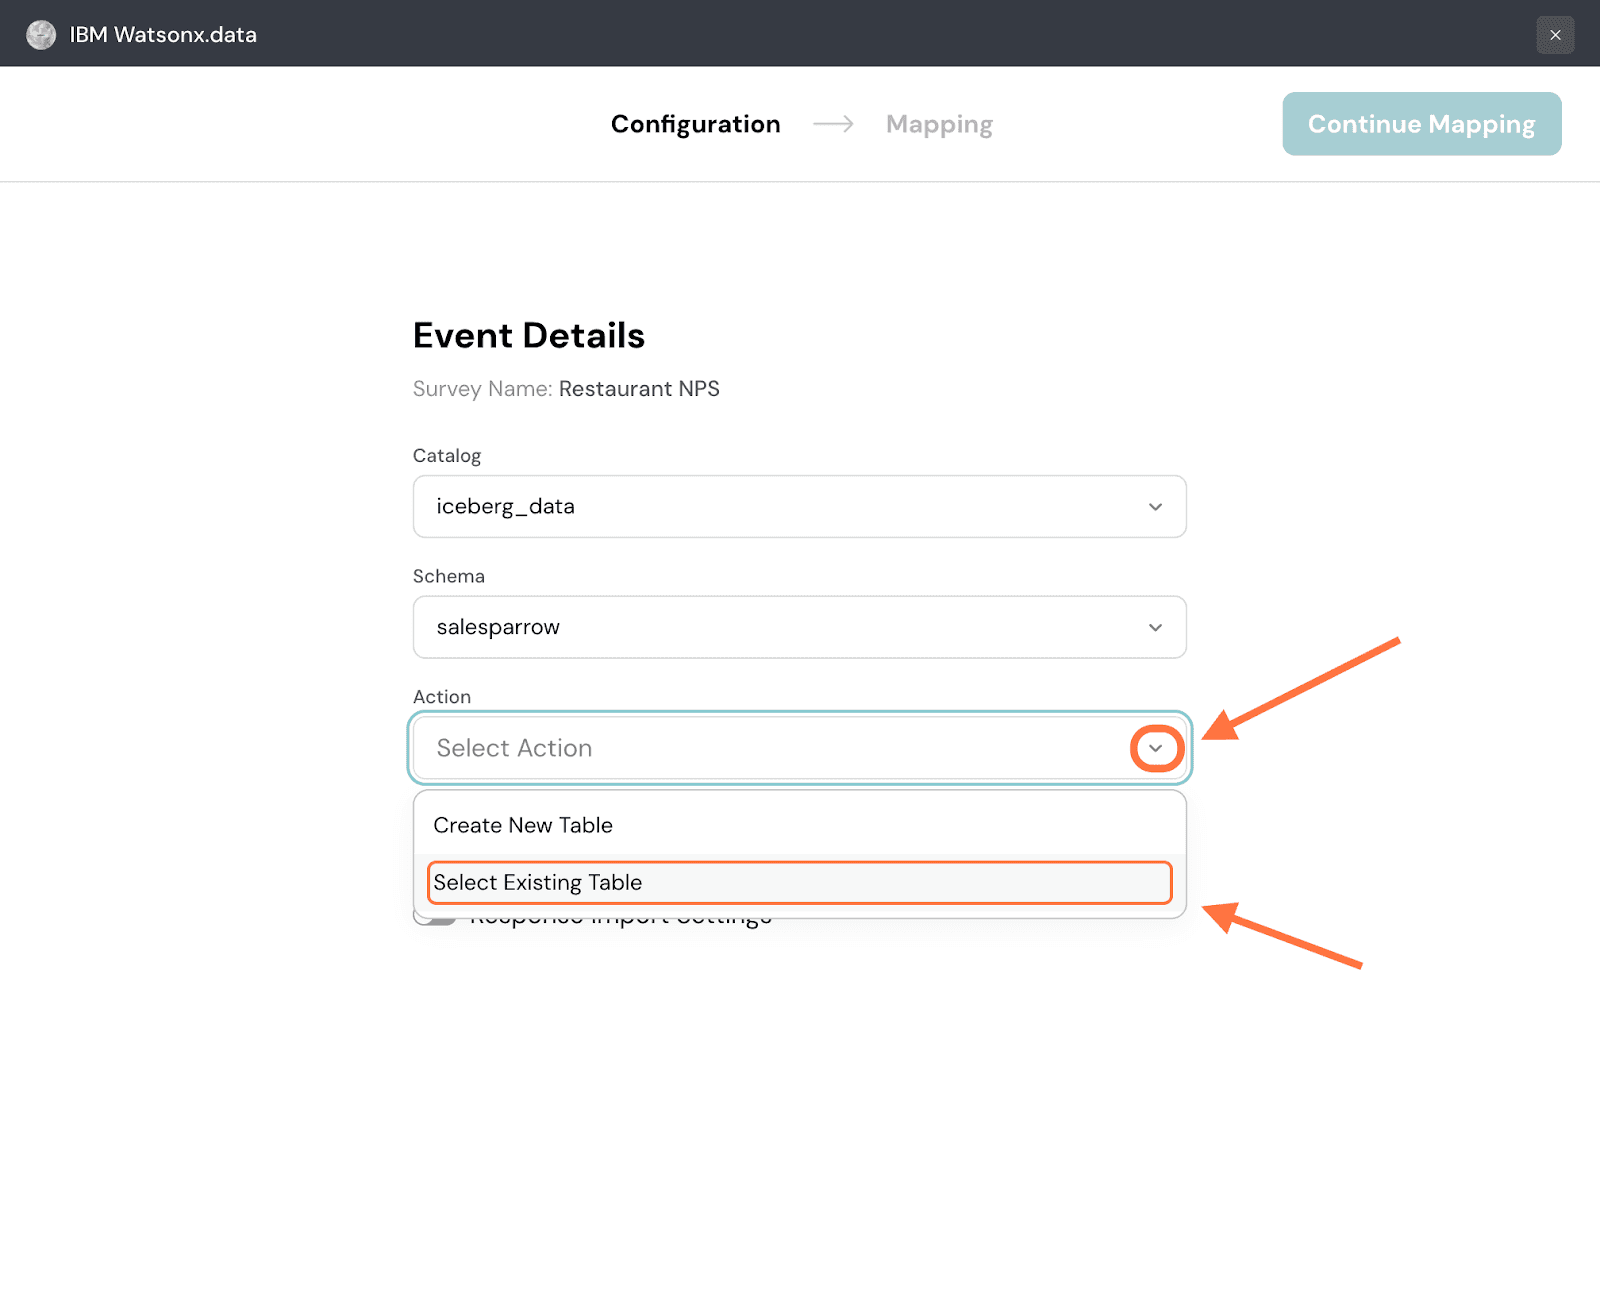
6. Next click on the drop-down button under Table and select from the options.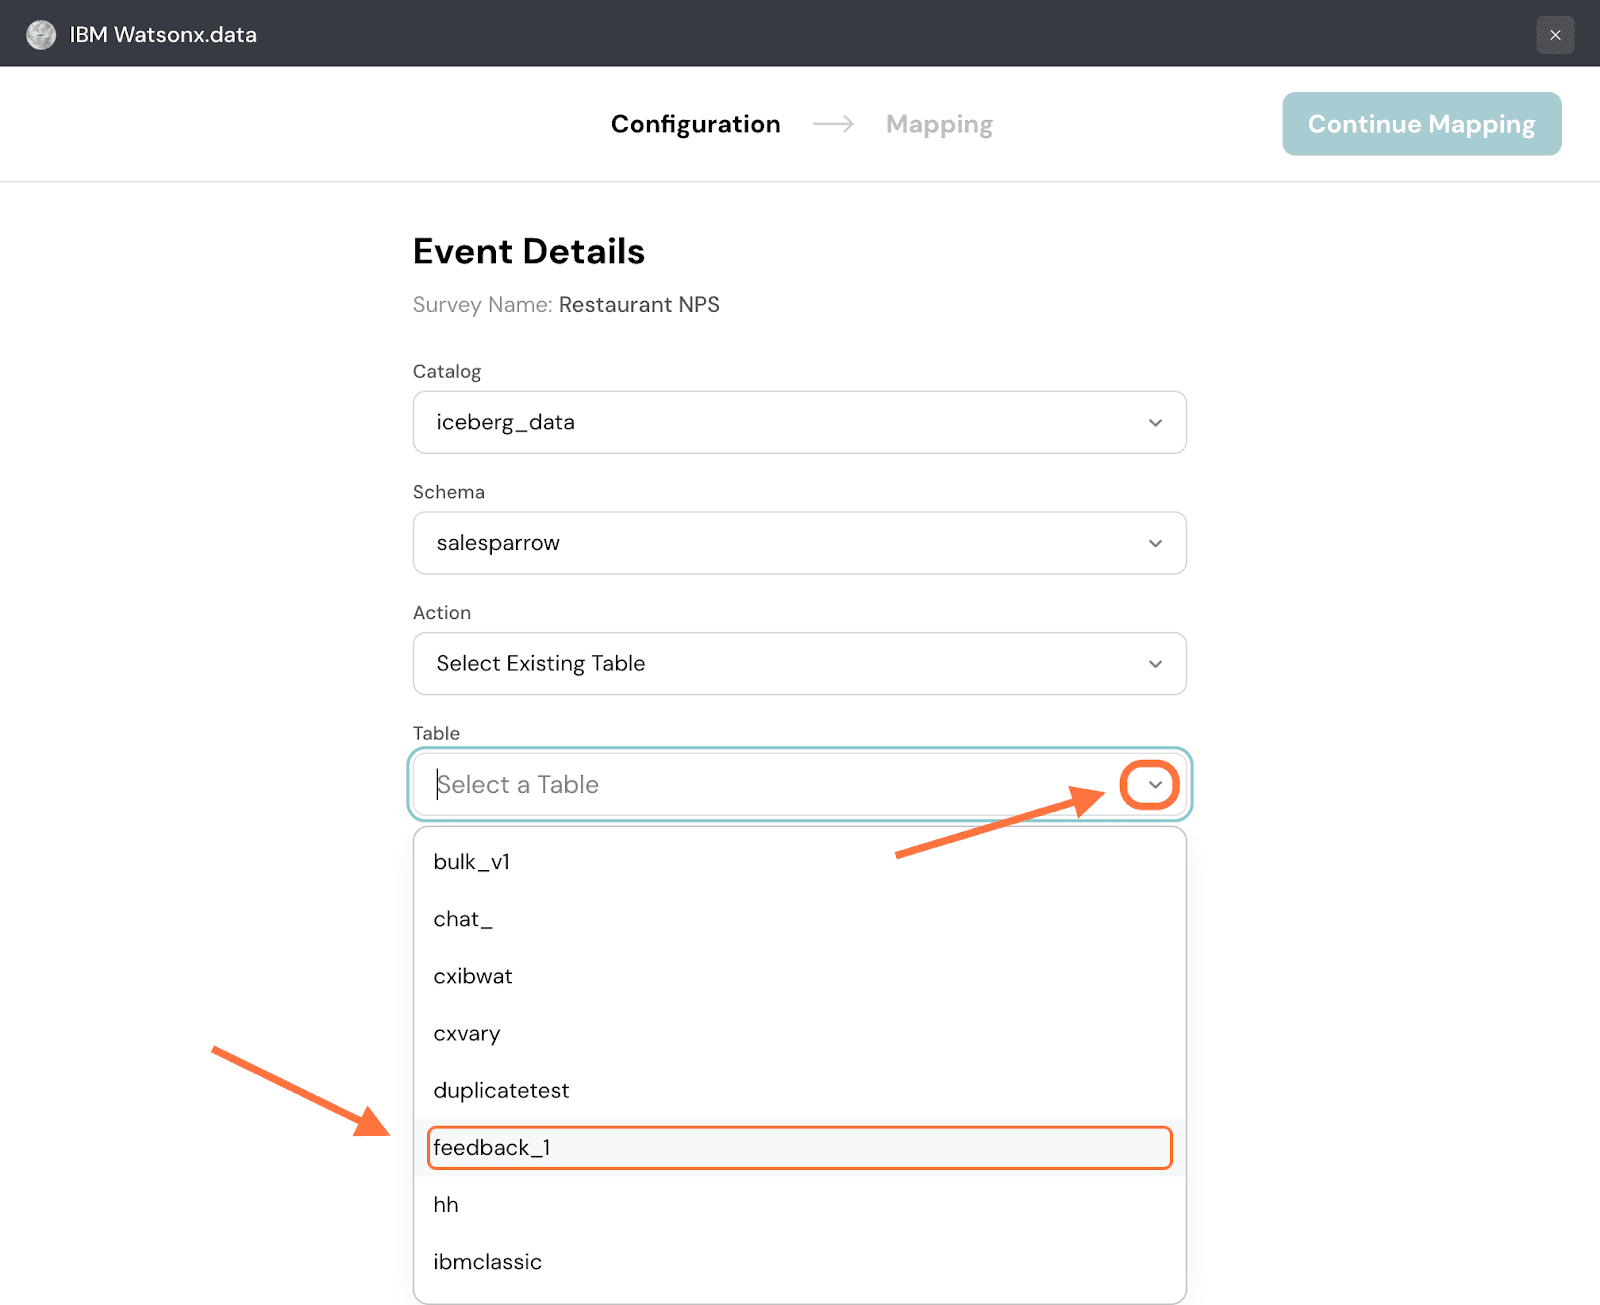
7. By default, only new responses are imported. If you want to only import responses from a specific date, click on the toggle next to Response Import Settings.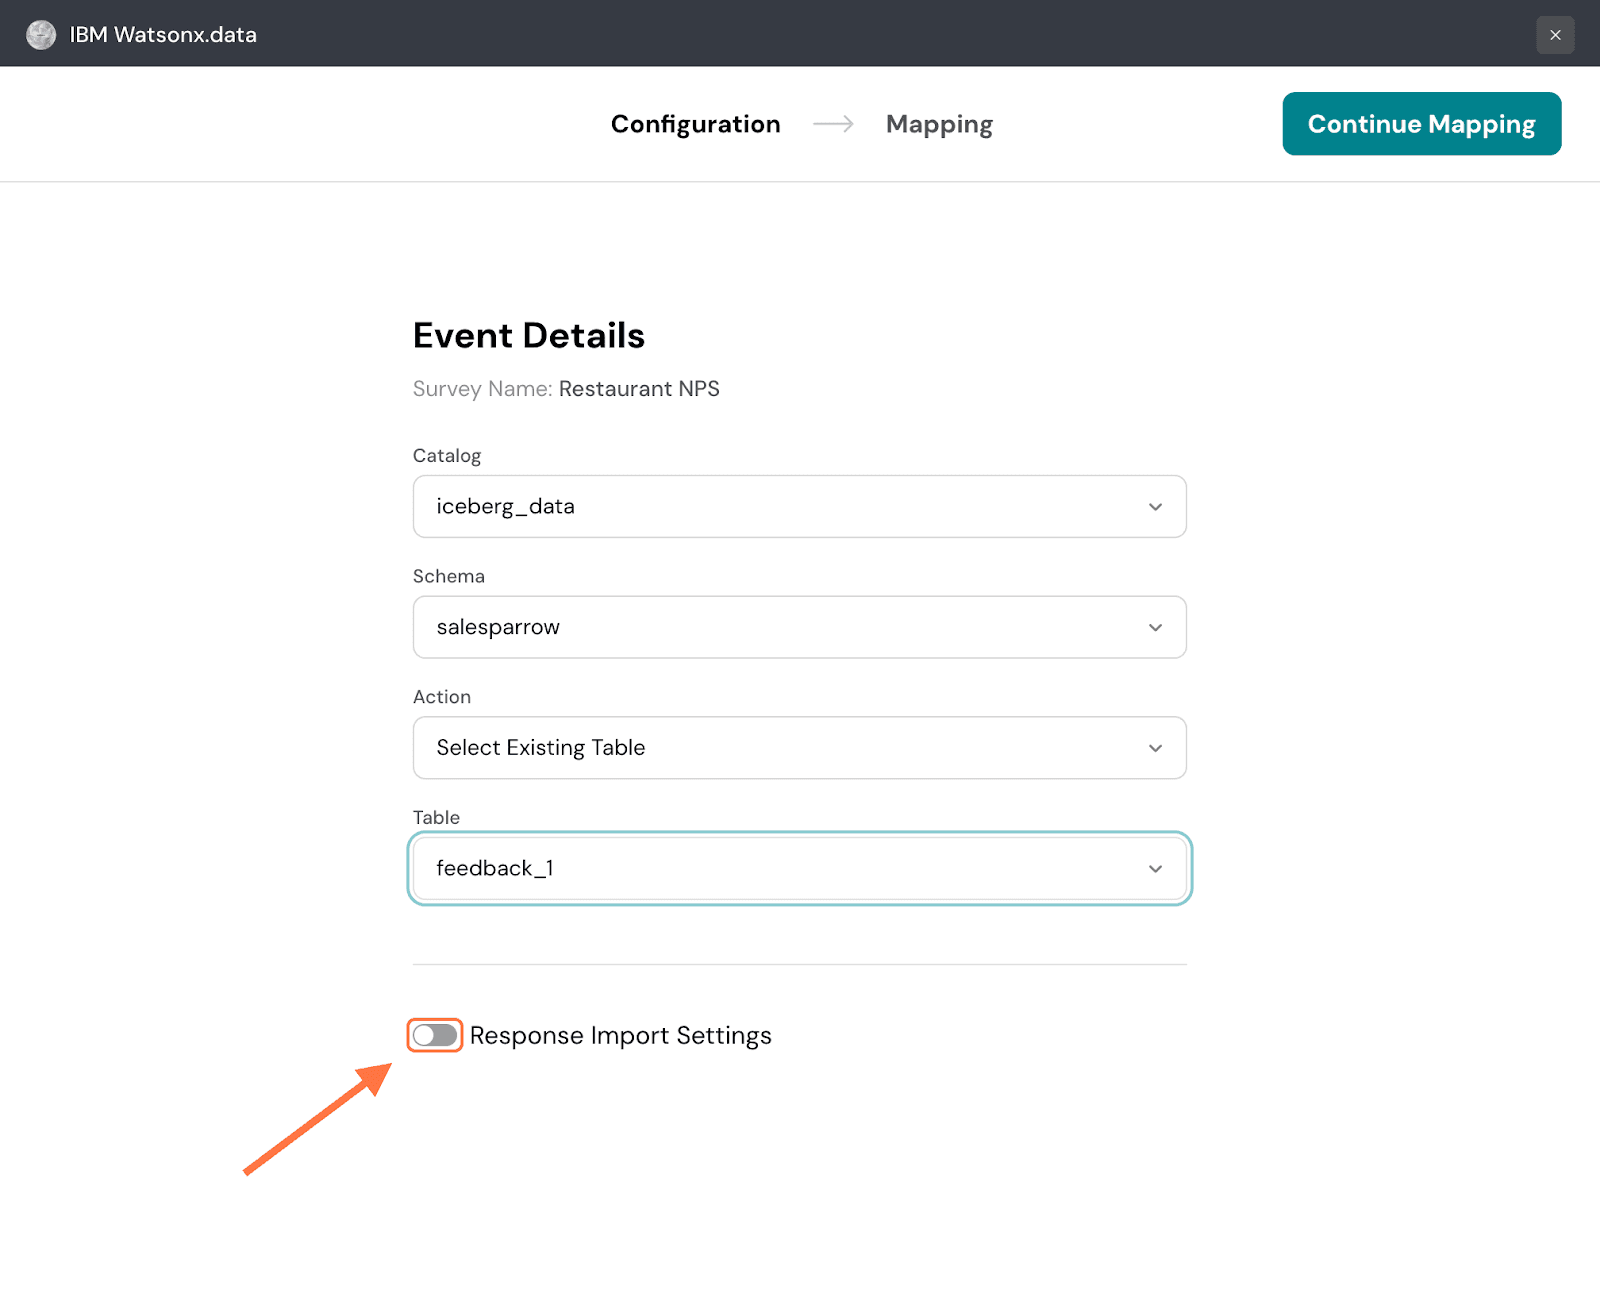
9. When you hover over the Specific Date option, a calendar will appear. Choose a date, then click on Apply.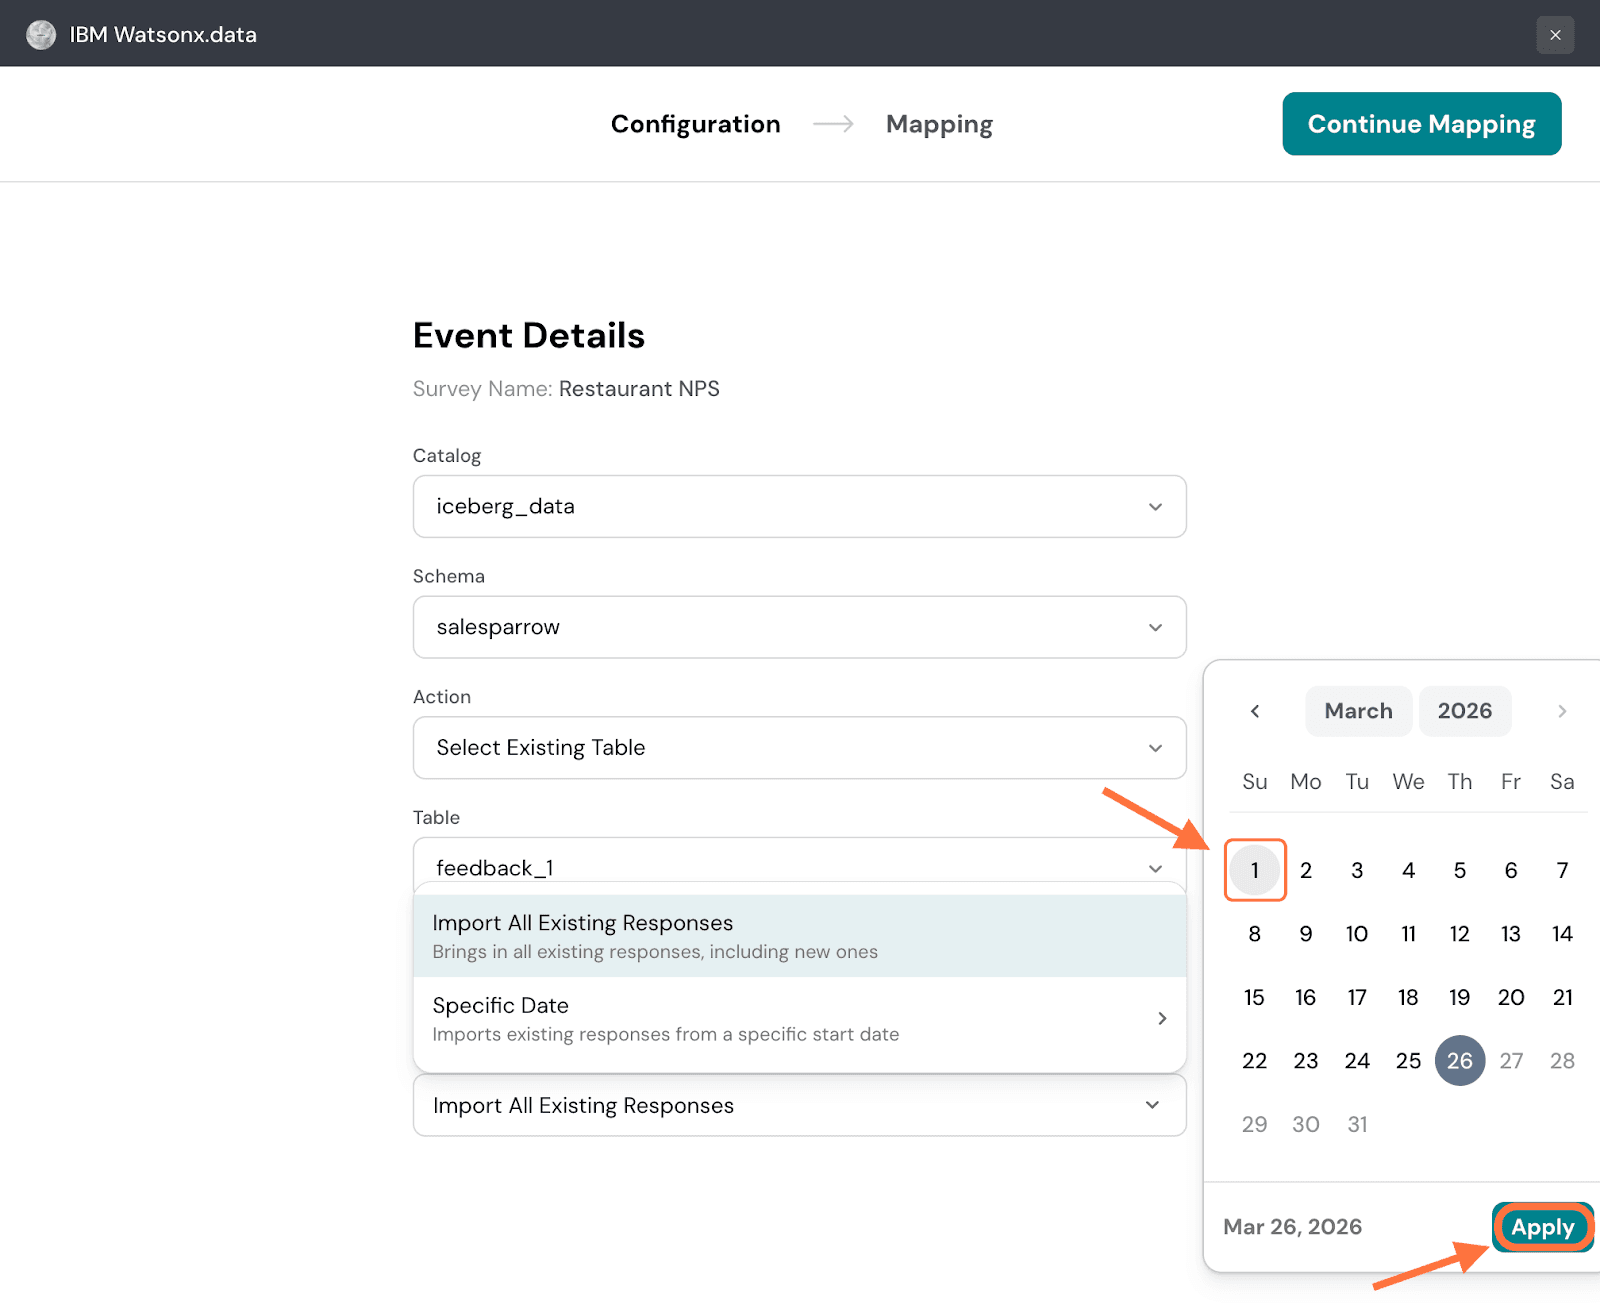
10. Click on Continue Mapping.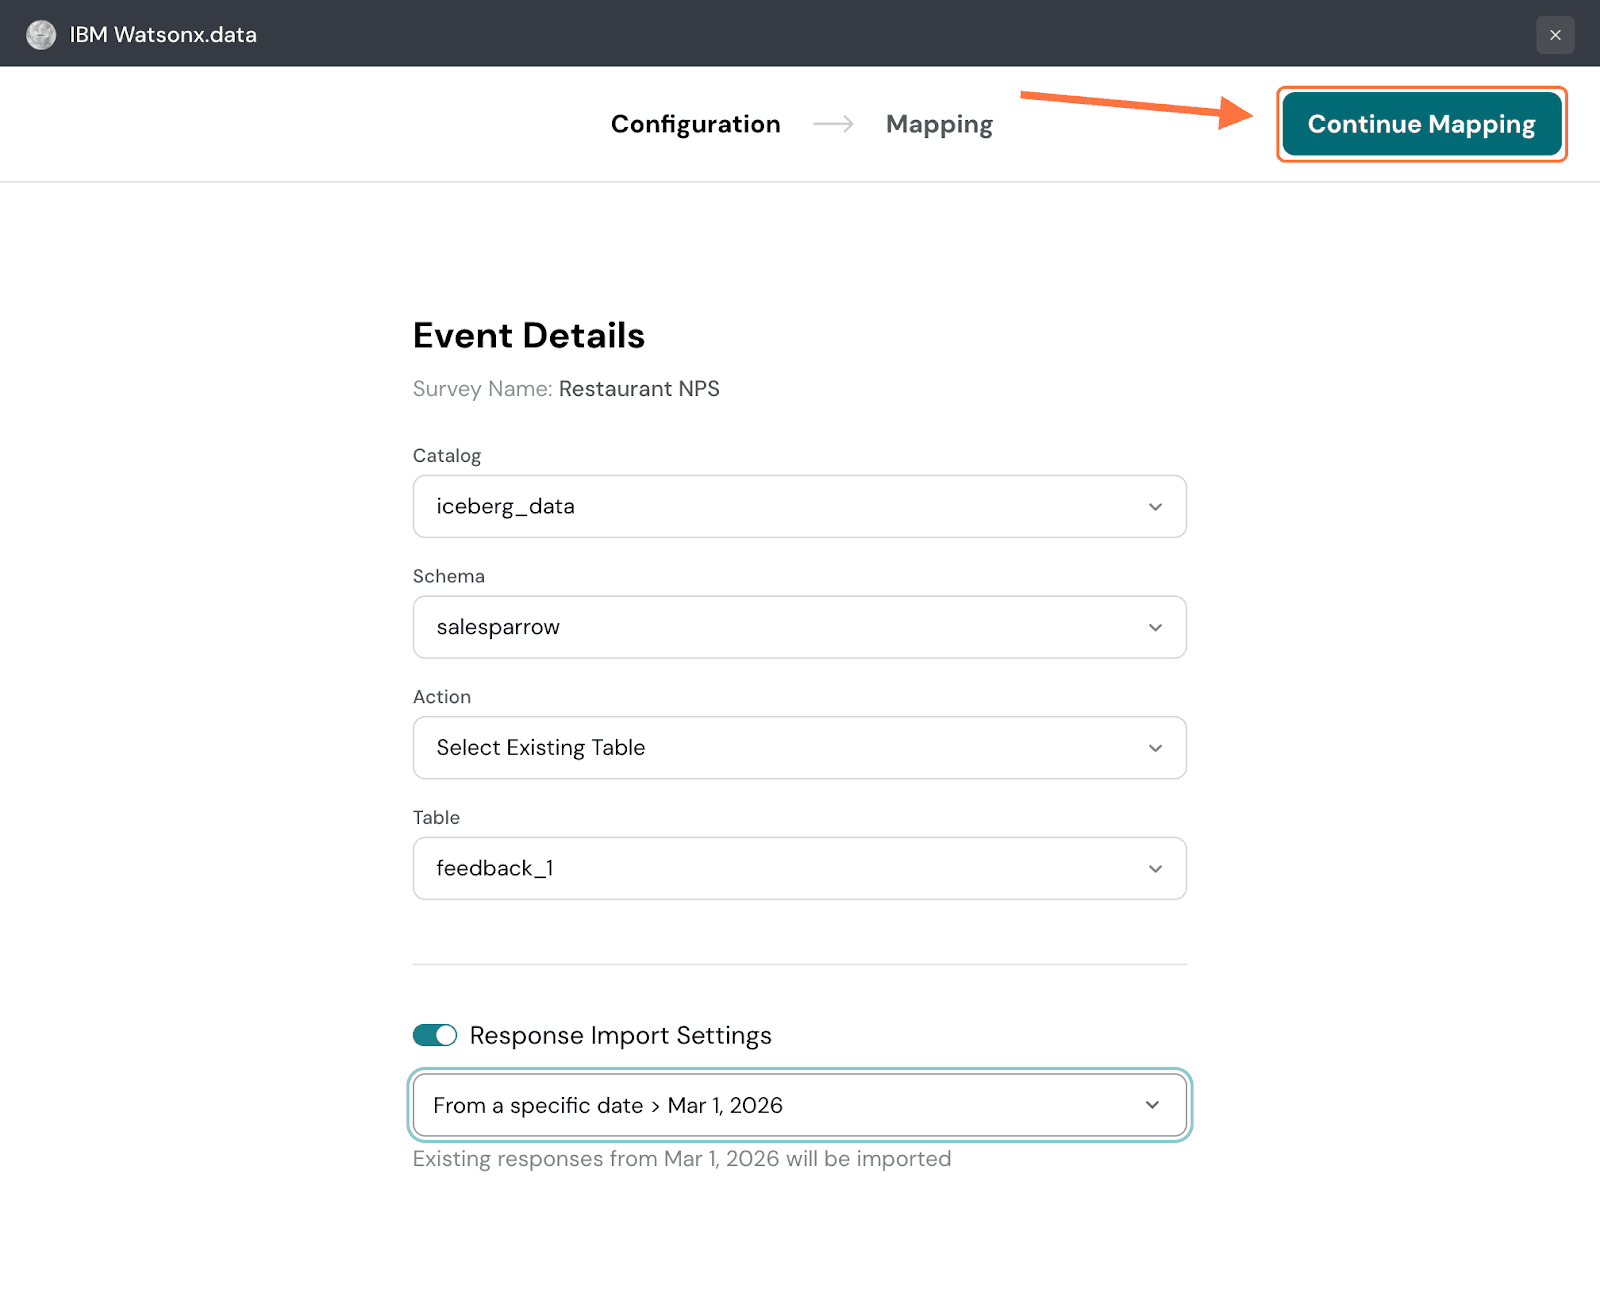
11. Now in the Mapping section, you need to configure which response properties are going to IBM watsonx. First you can set conditions to decide which type of response gets synced to IBM watsonx. Click on Set Conditions.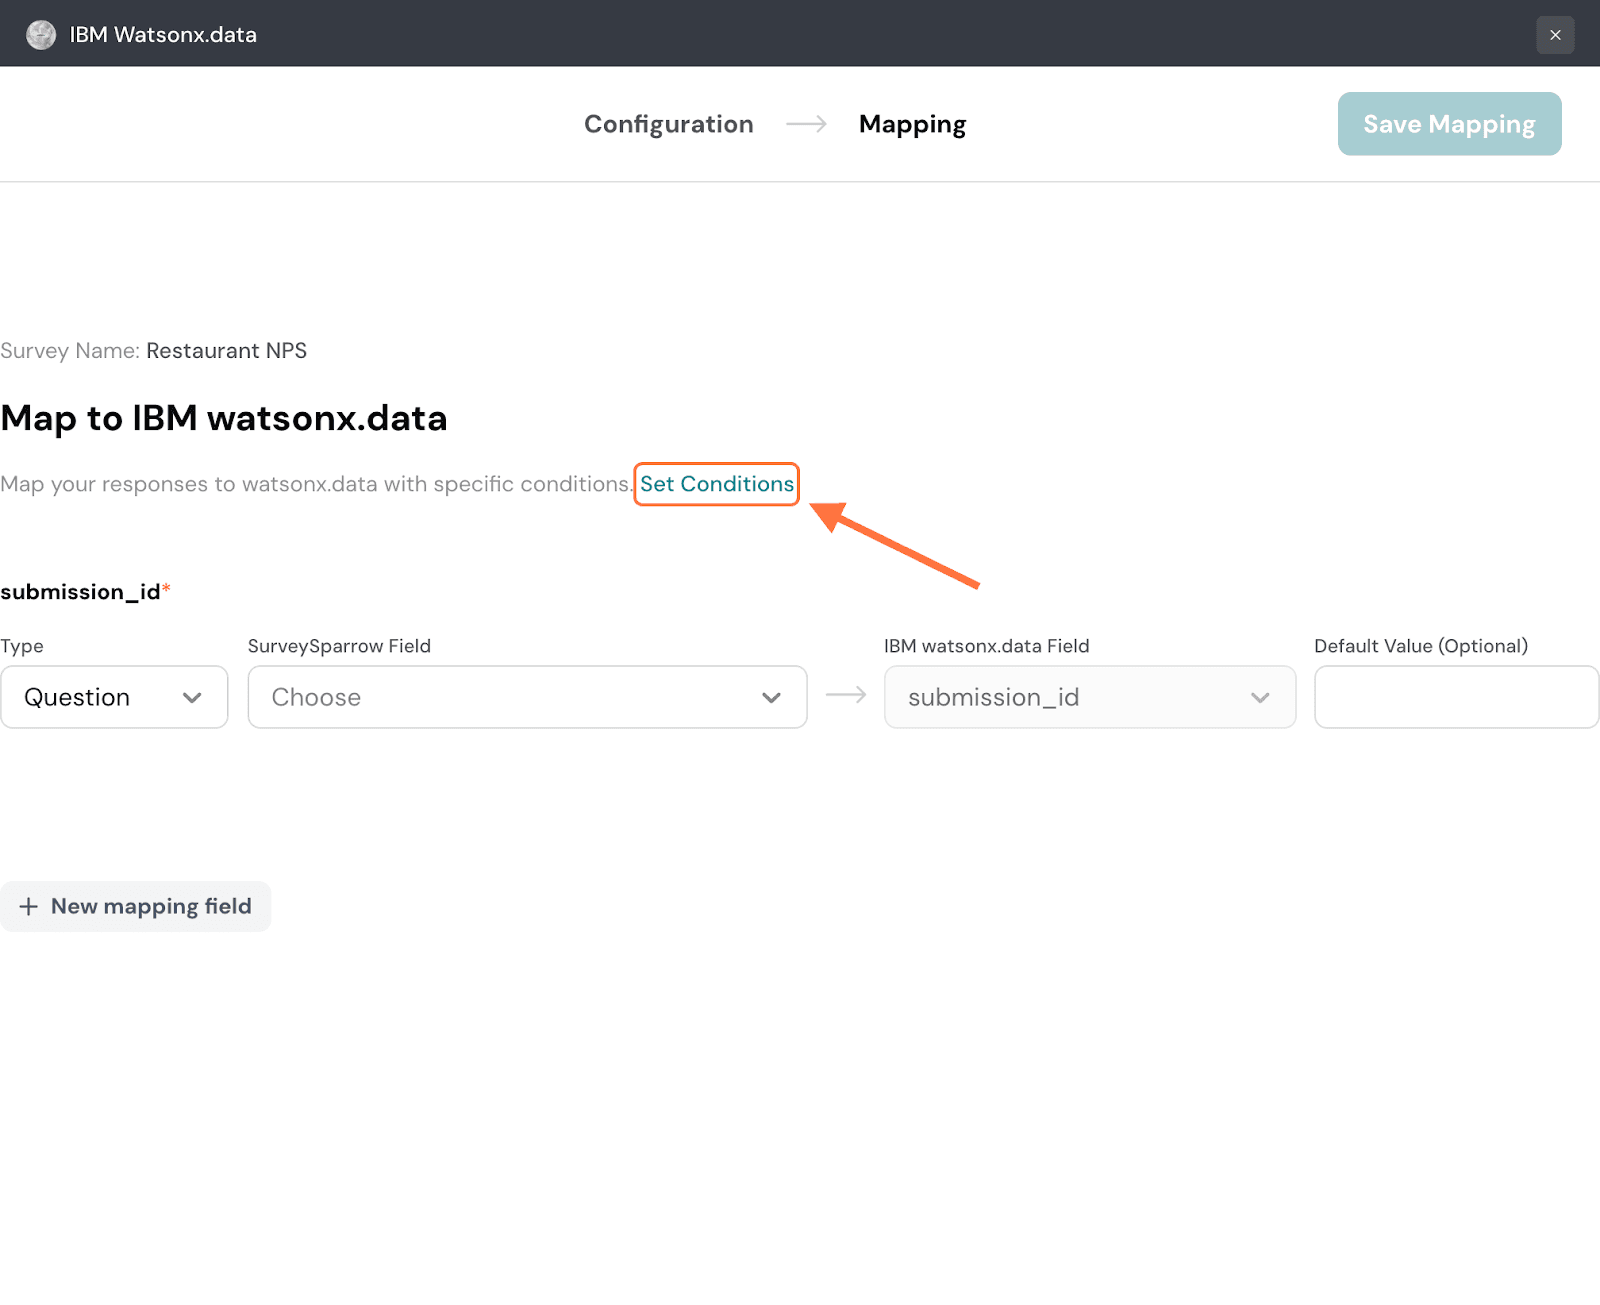
12. In the condition setting modal, you can set a conditional logic for the conditions: either any or all. The default setting is any, but if you’d like to change the logic, click on the drop-down next to it.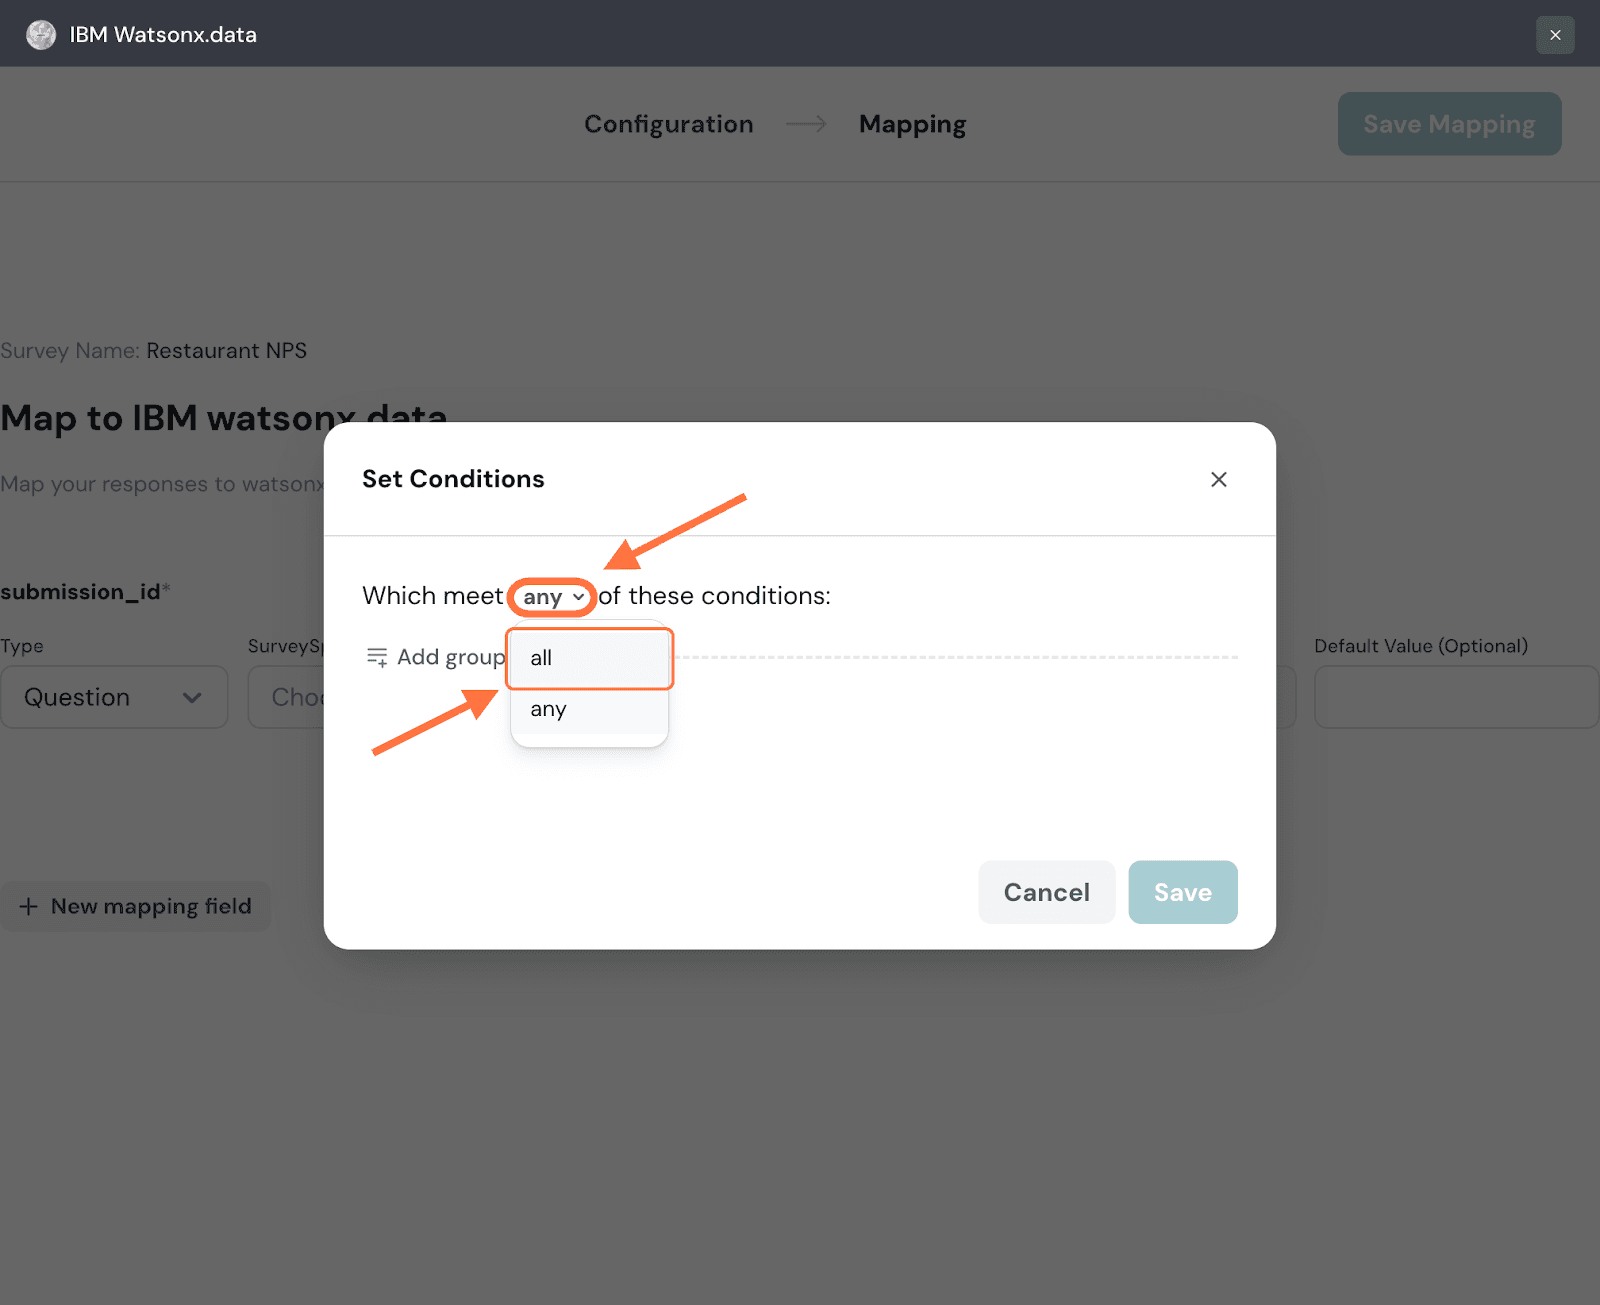
13. To add conditions, click on Add Group.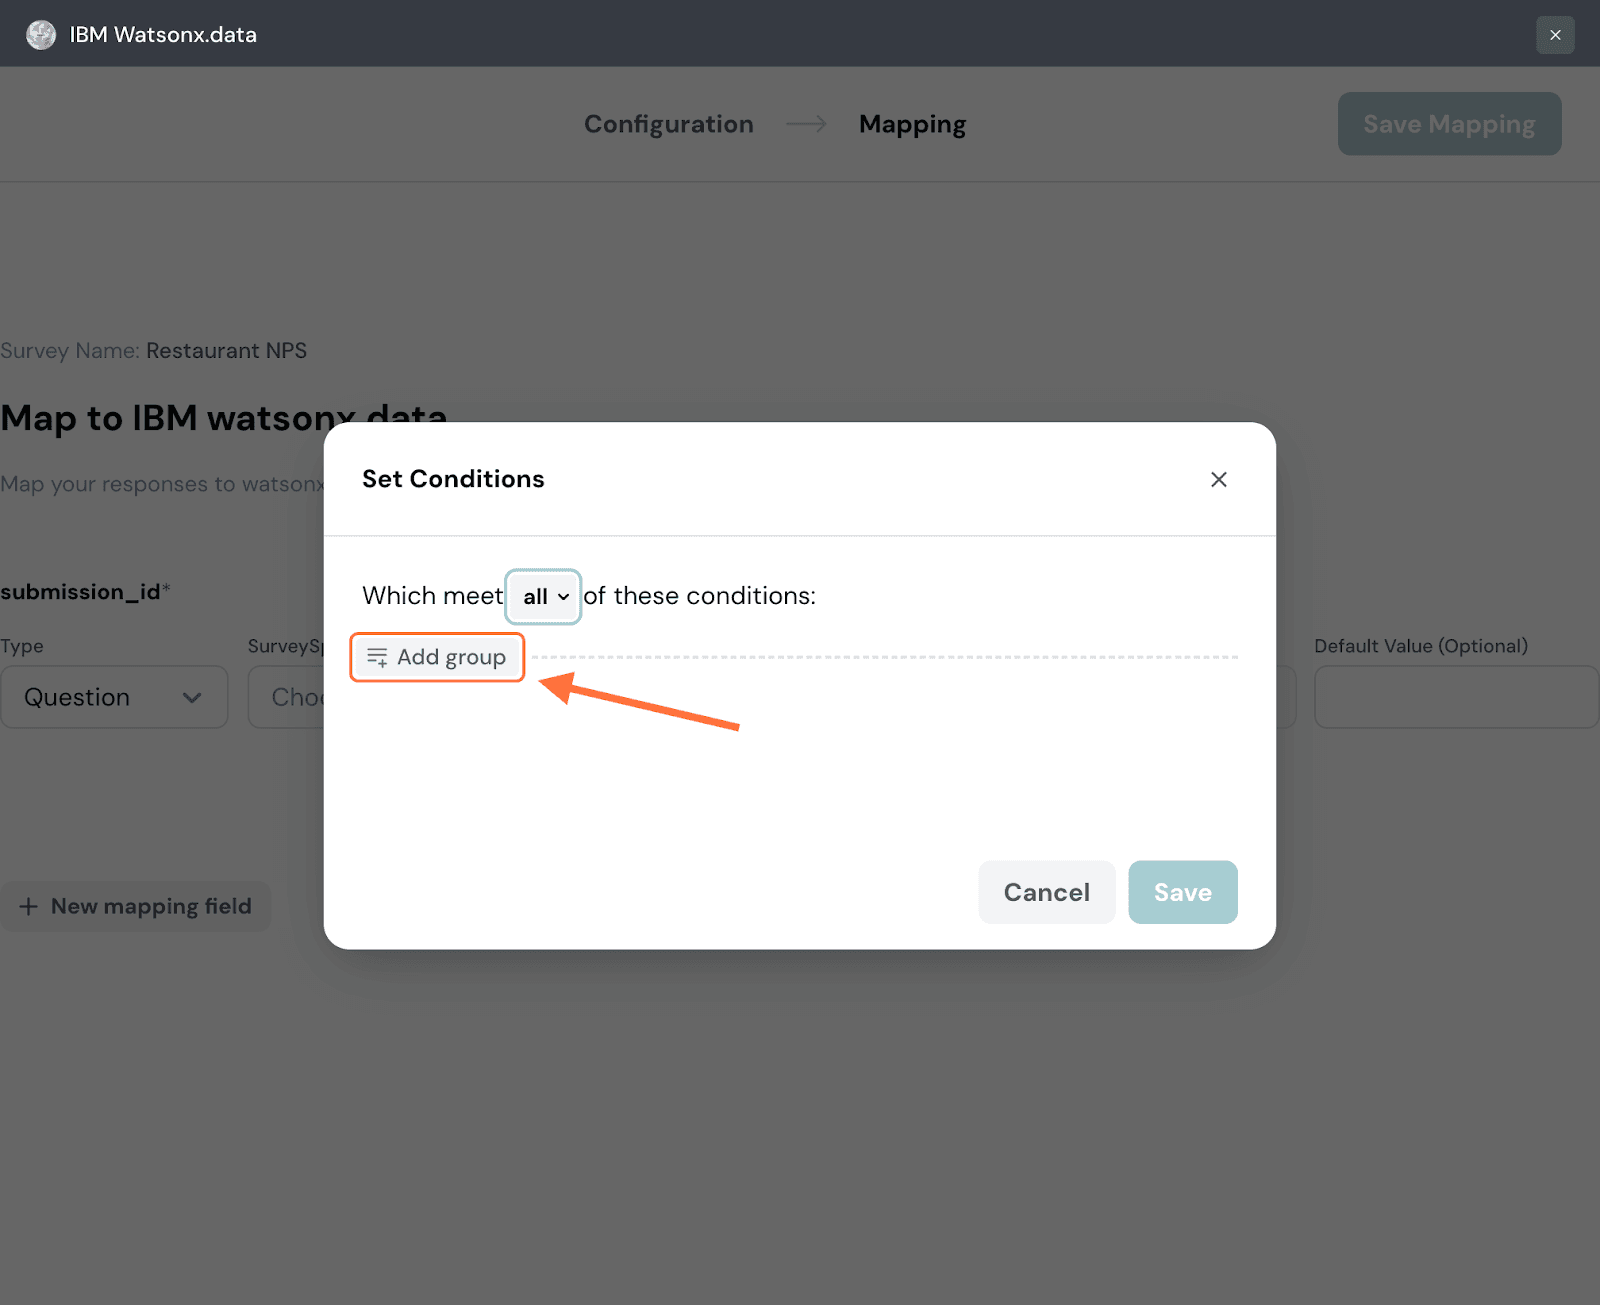
14. Choose a category of data from the drop-down menu to which the condition must apply. For this instance, let’s go with a question.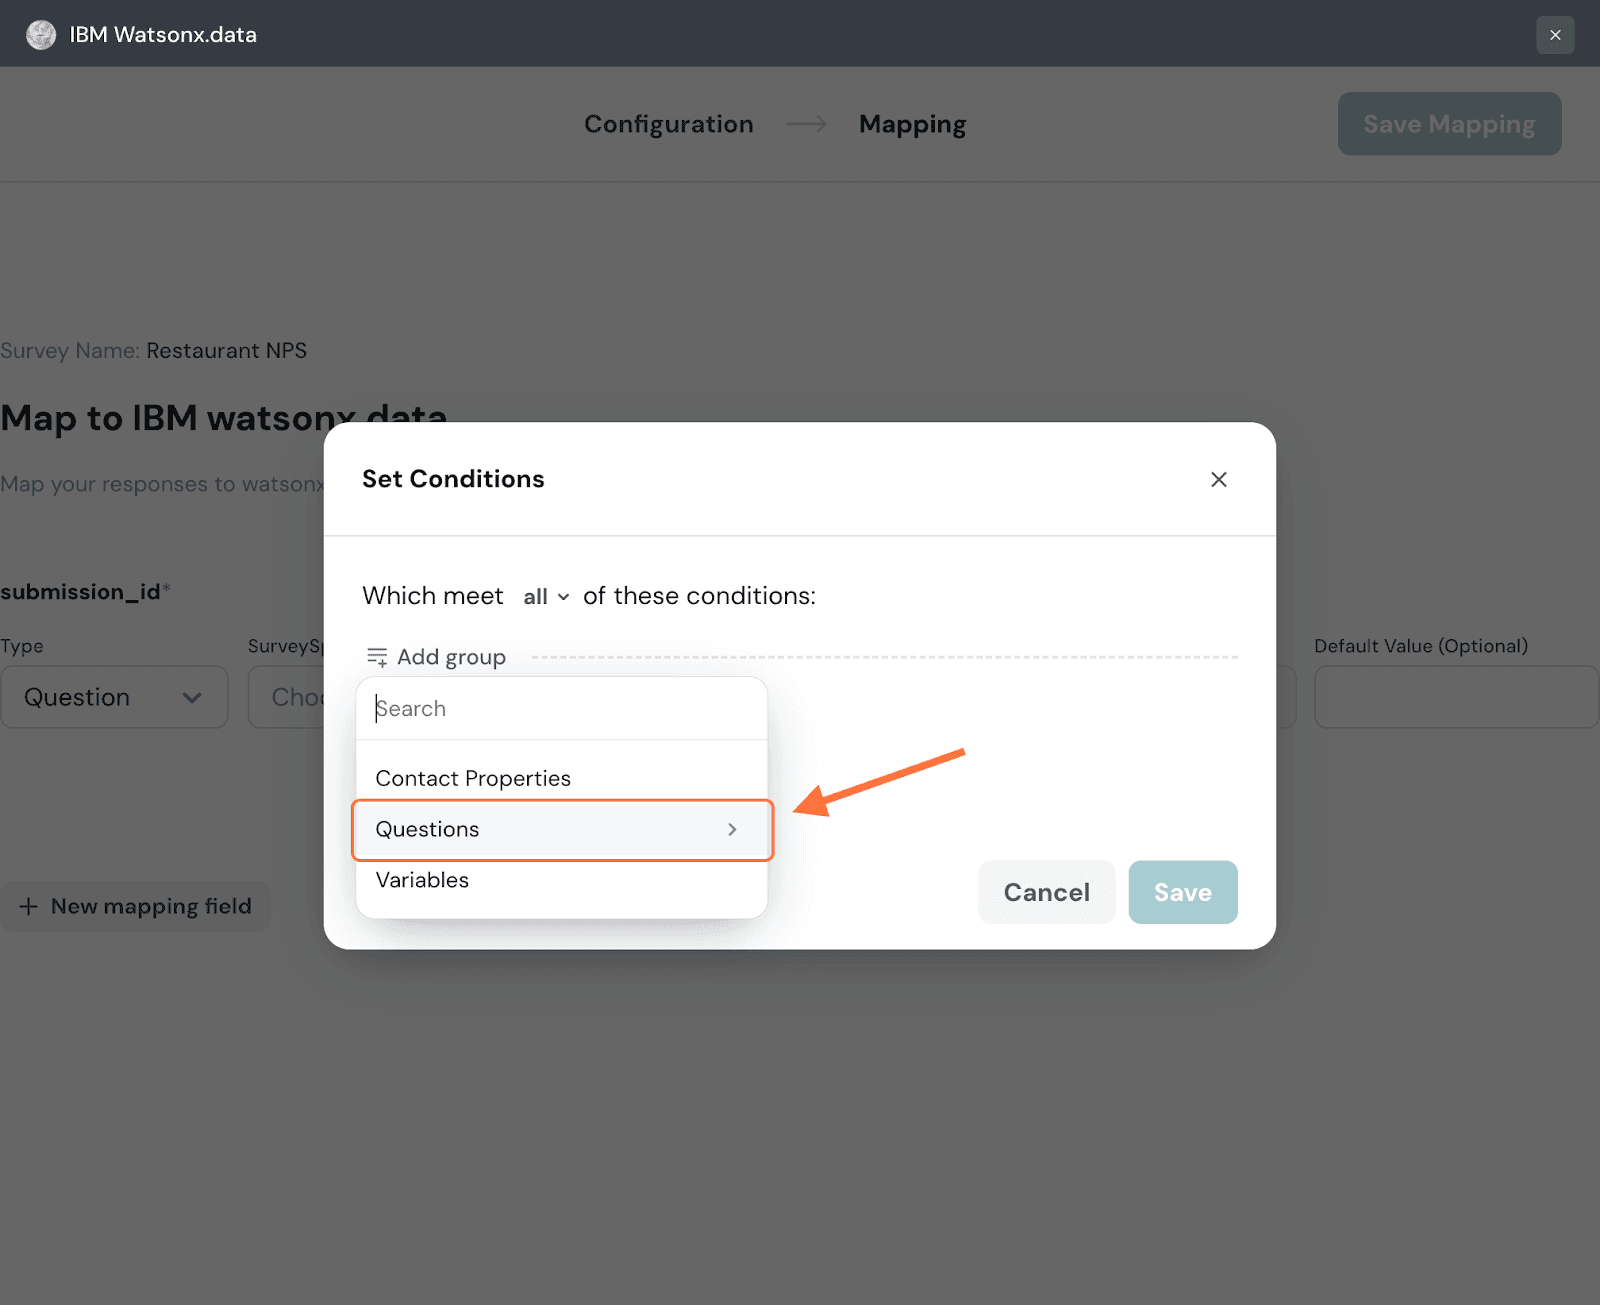
15. Choose a particular item from that category, in this instance a question.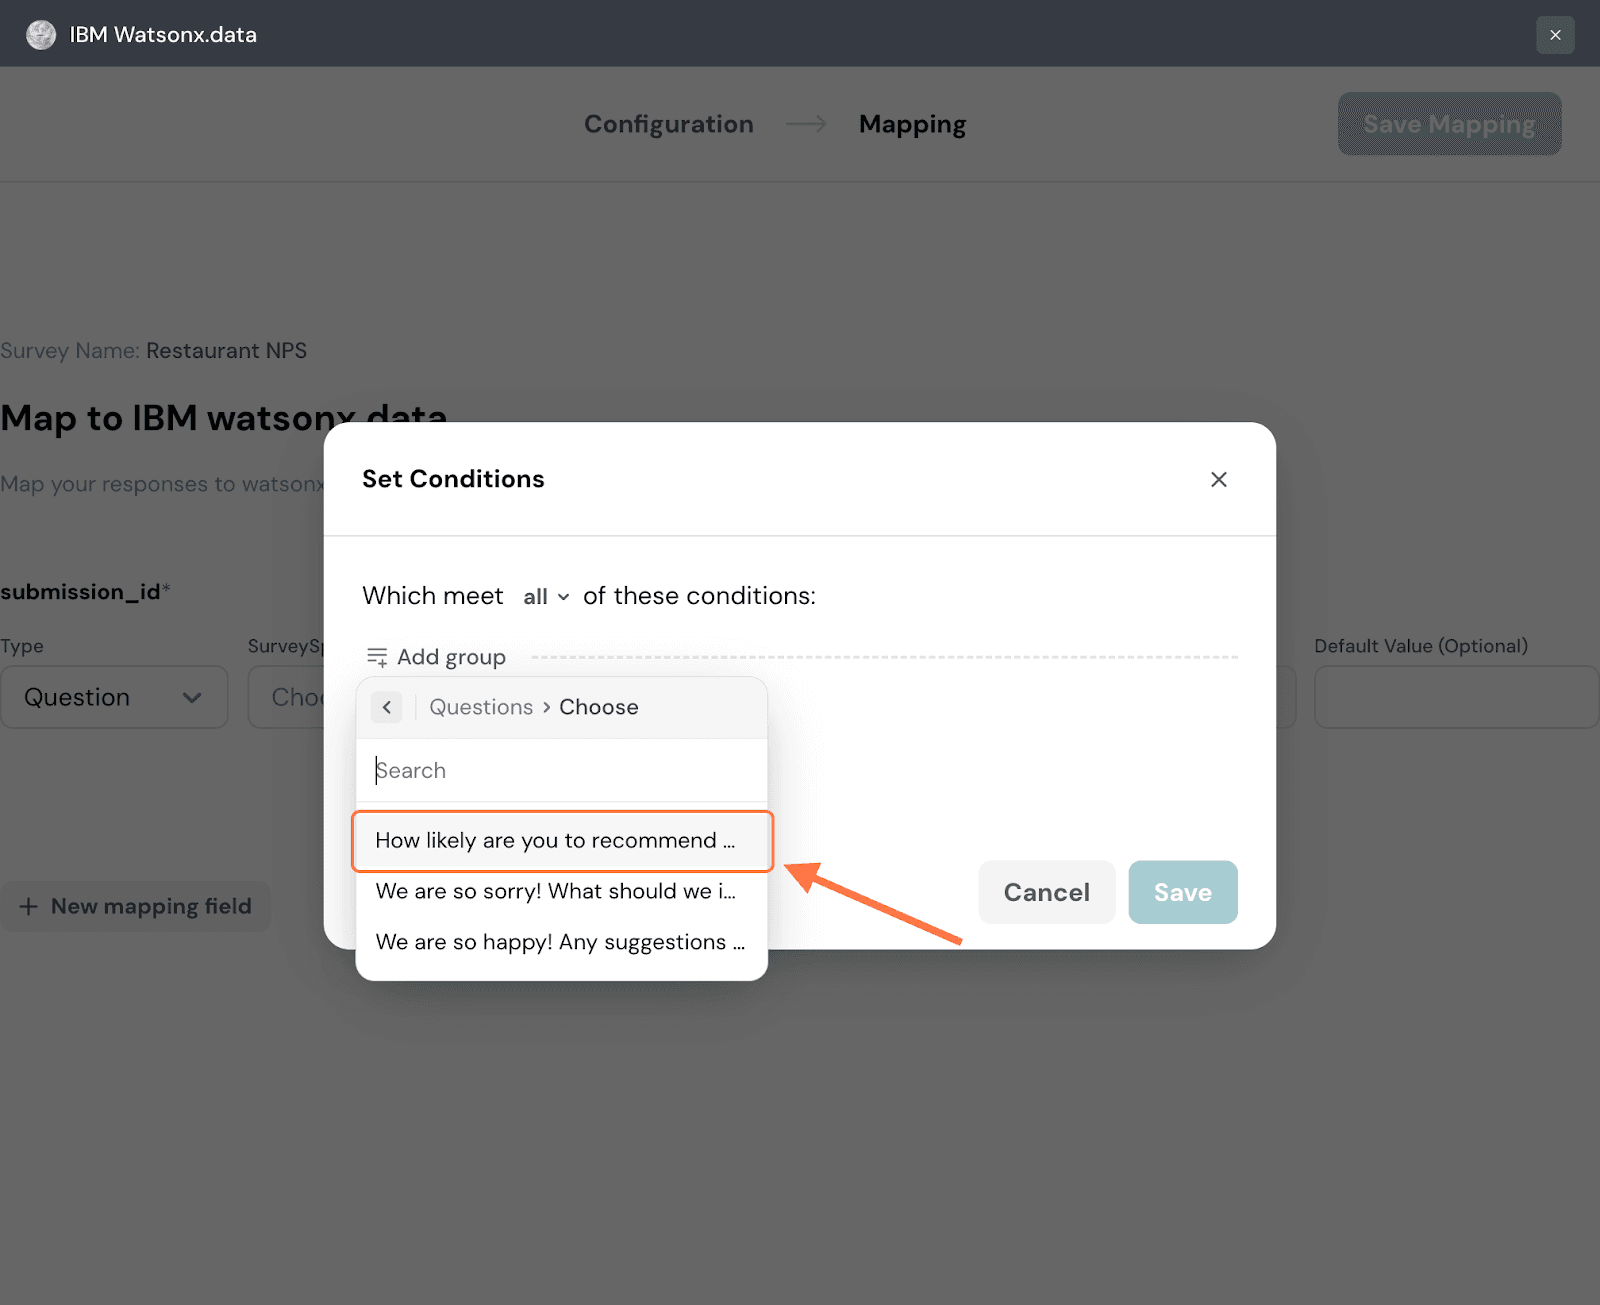
16. Click on Choose Condition to start defining the condition.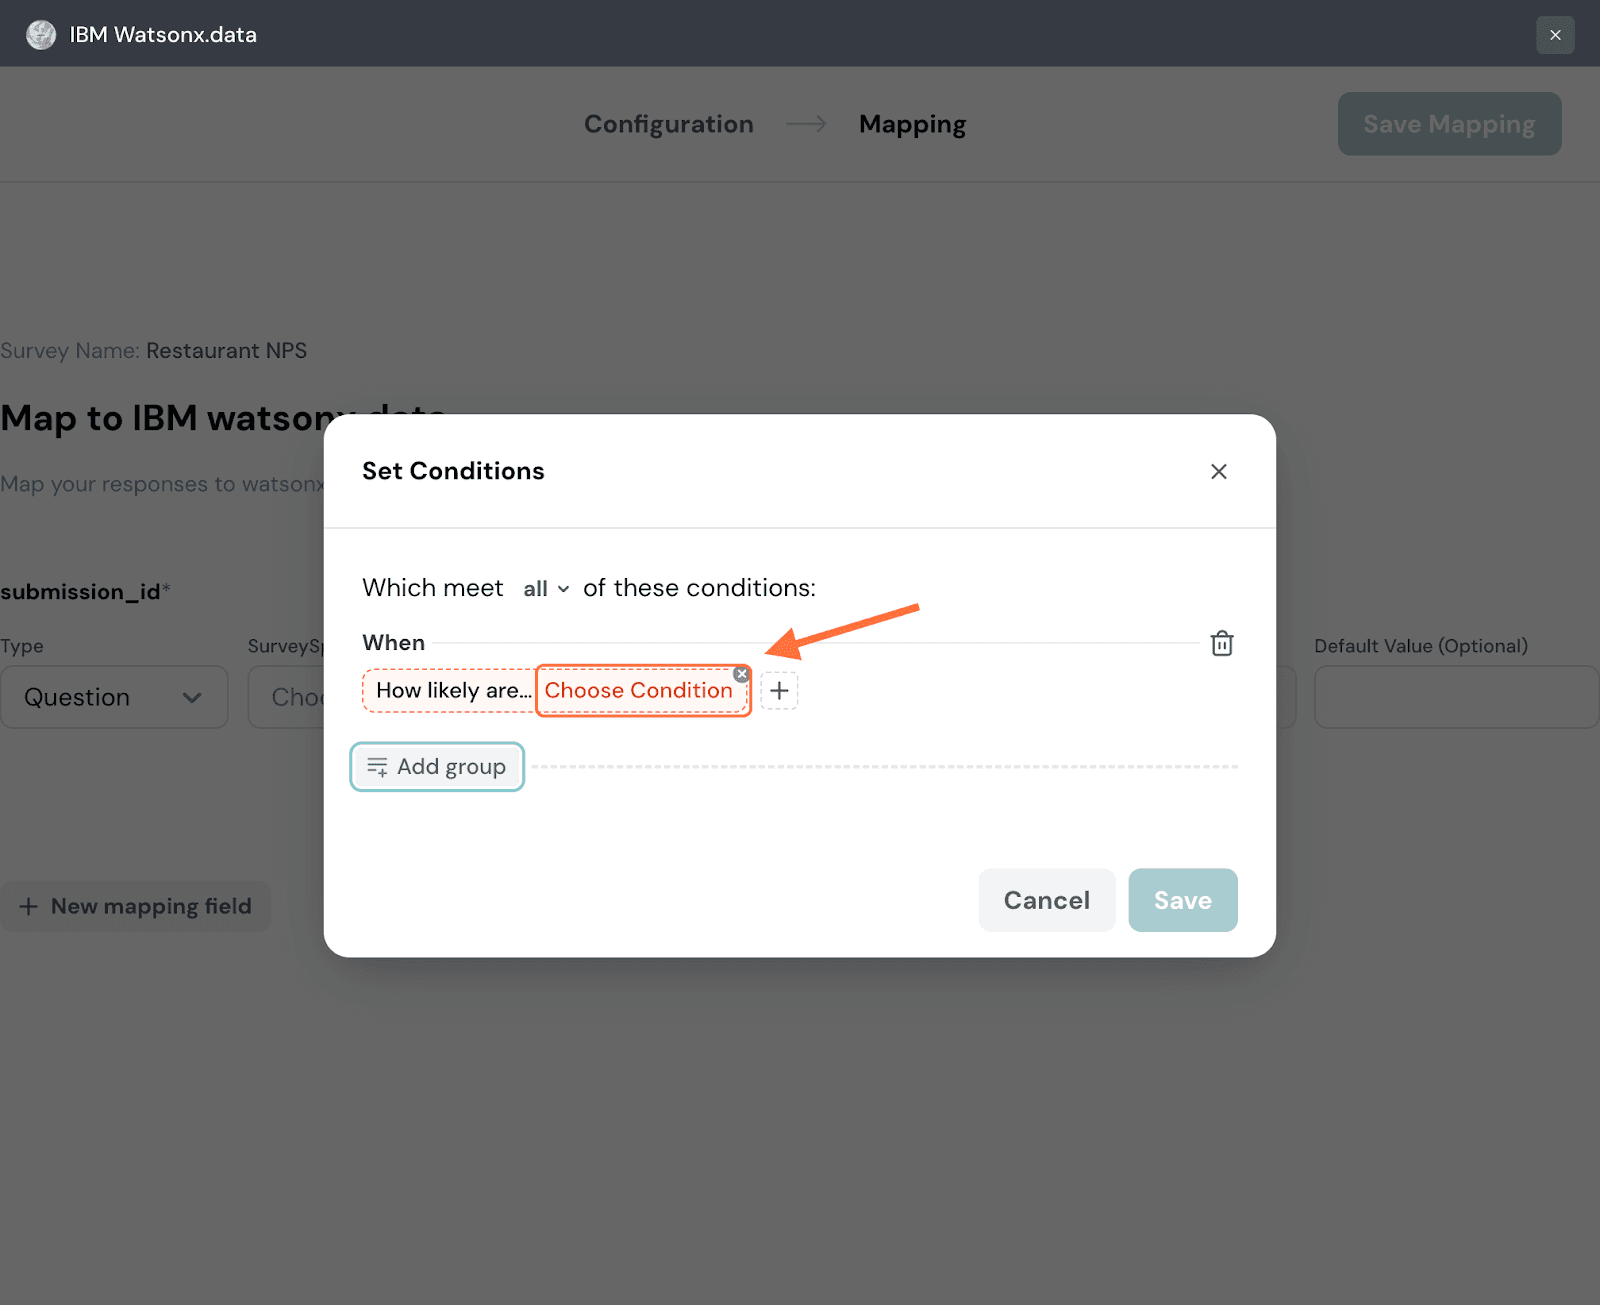
17. A list of comparison operators appears, choose one.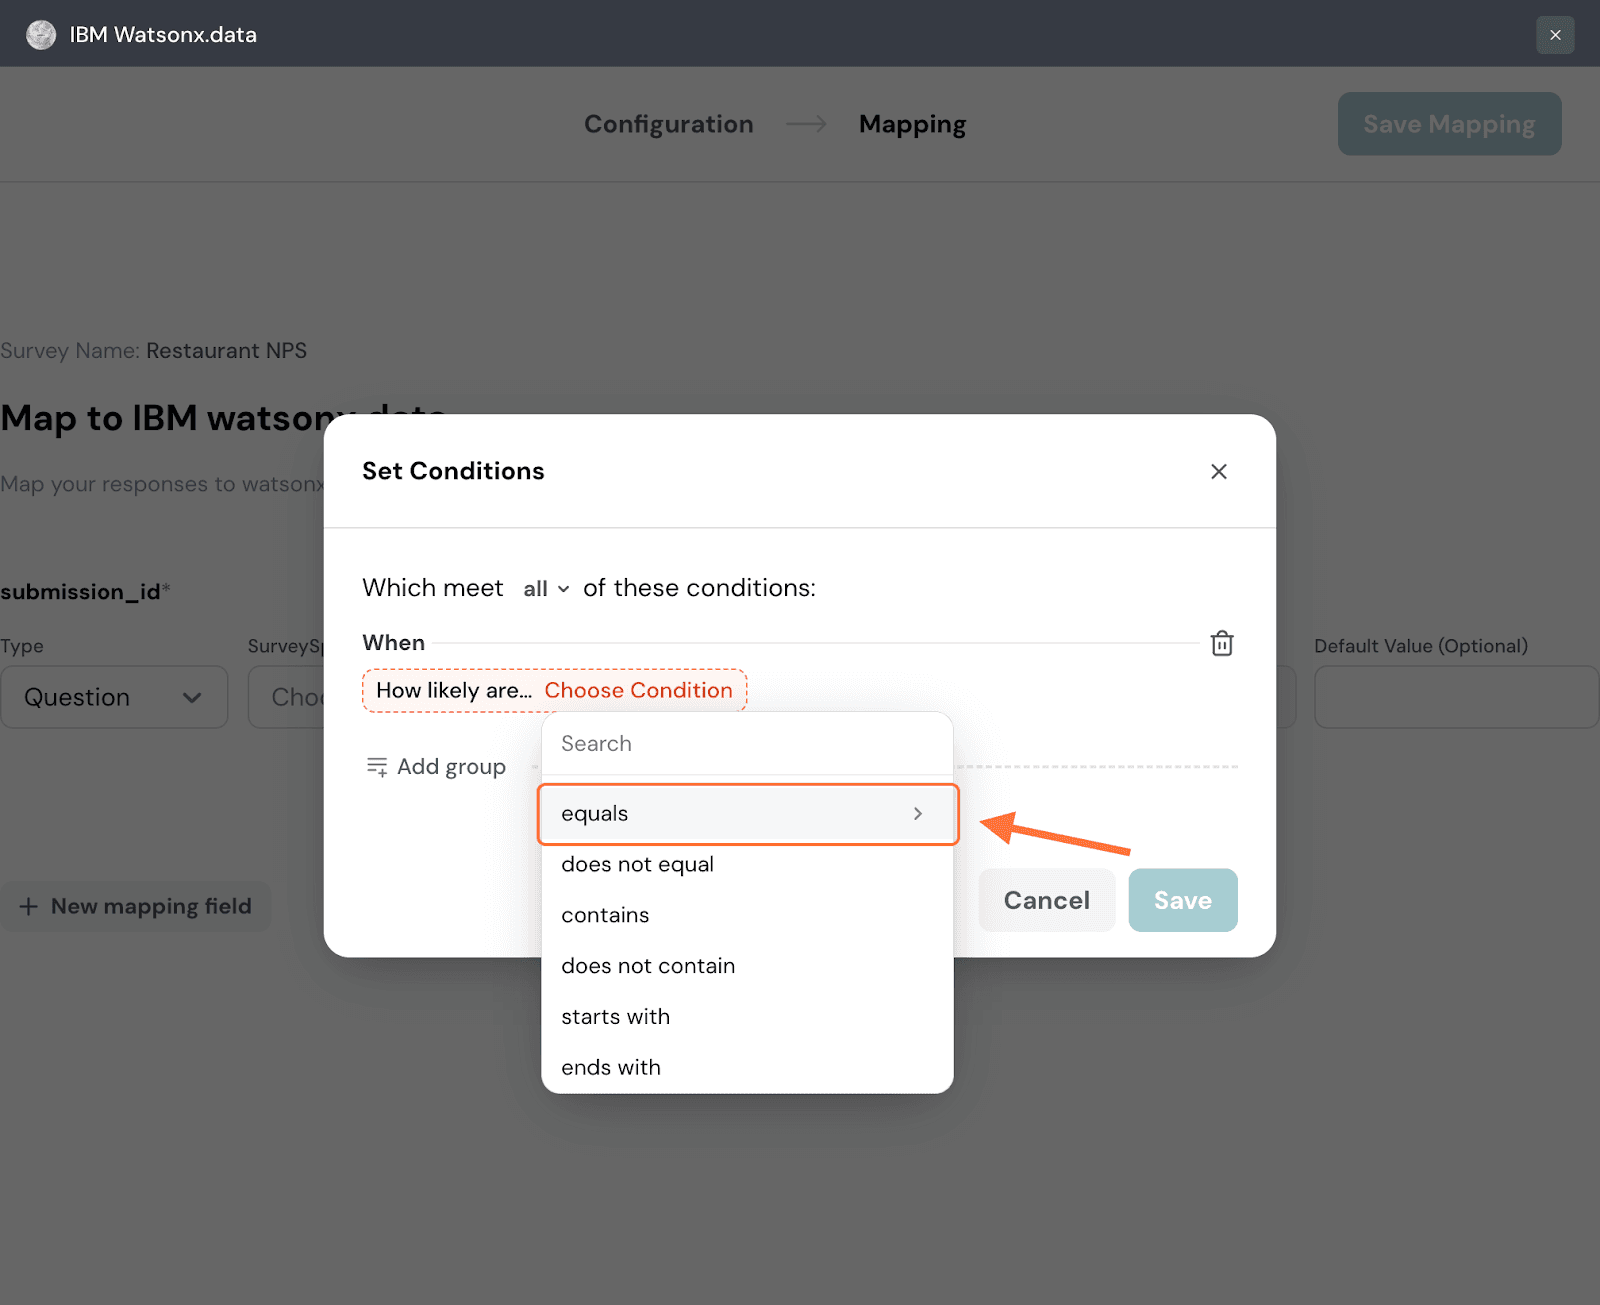
18. Input a value for the data to be tested against and then click Apply.
19. You can turn a condition into a group of conditions by hovering near it and then clicking on the plus icon that appears to the right. Repeat the same steps as above to create another condition.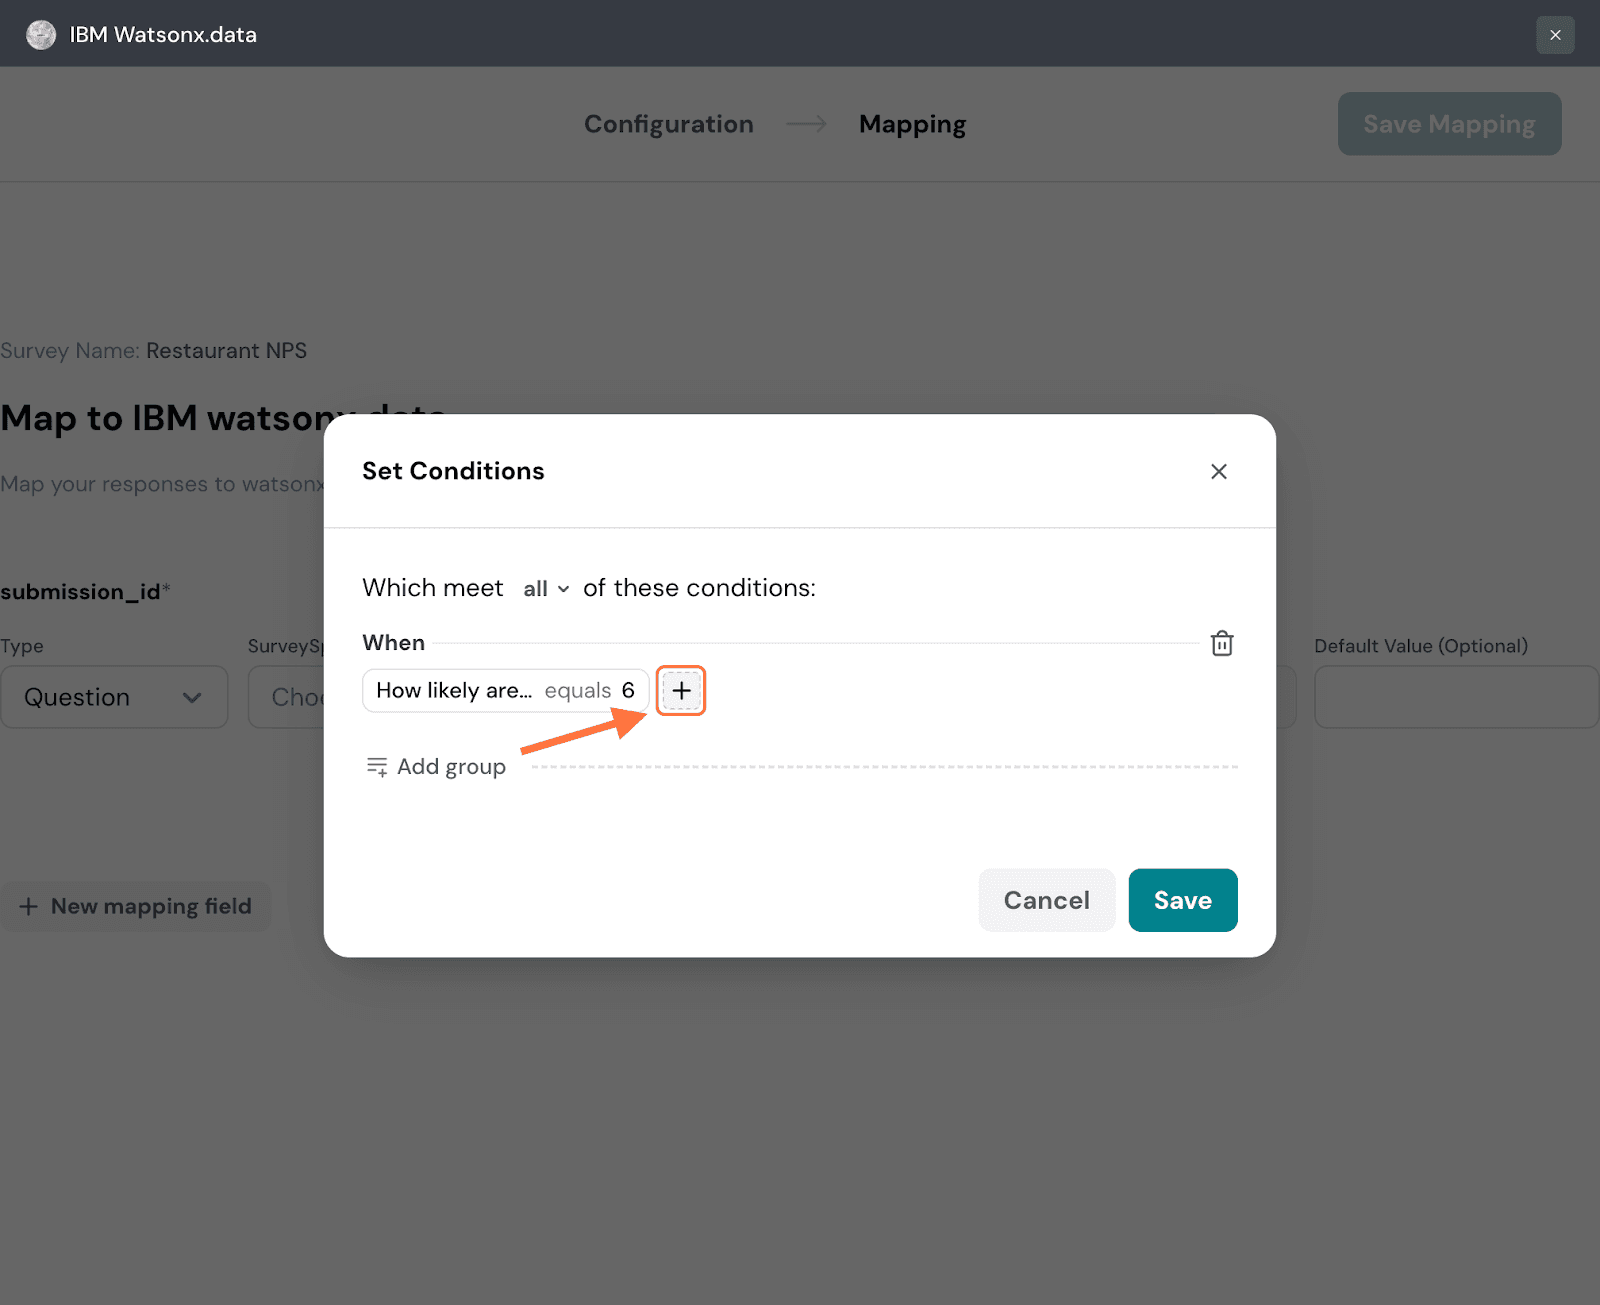
20. Within a group of conditions you can set conditional logic: and/or. The default is and, but if you’d like to change it, click on the drop-down.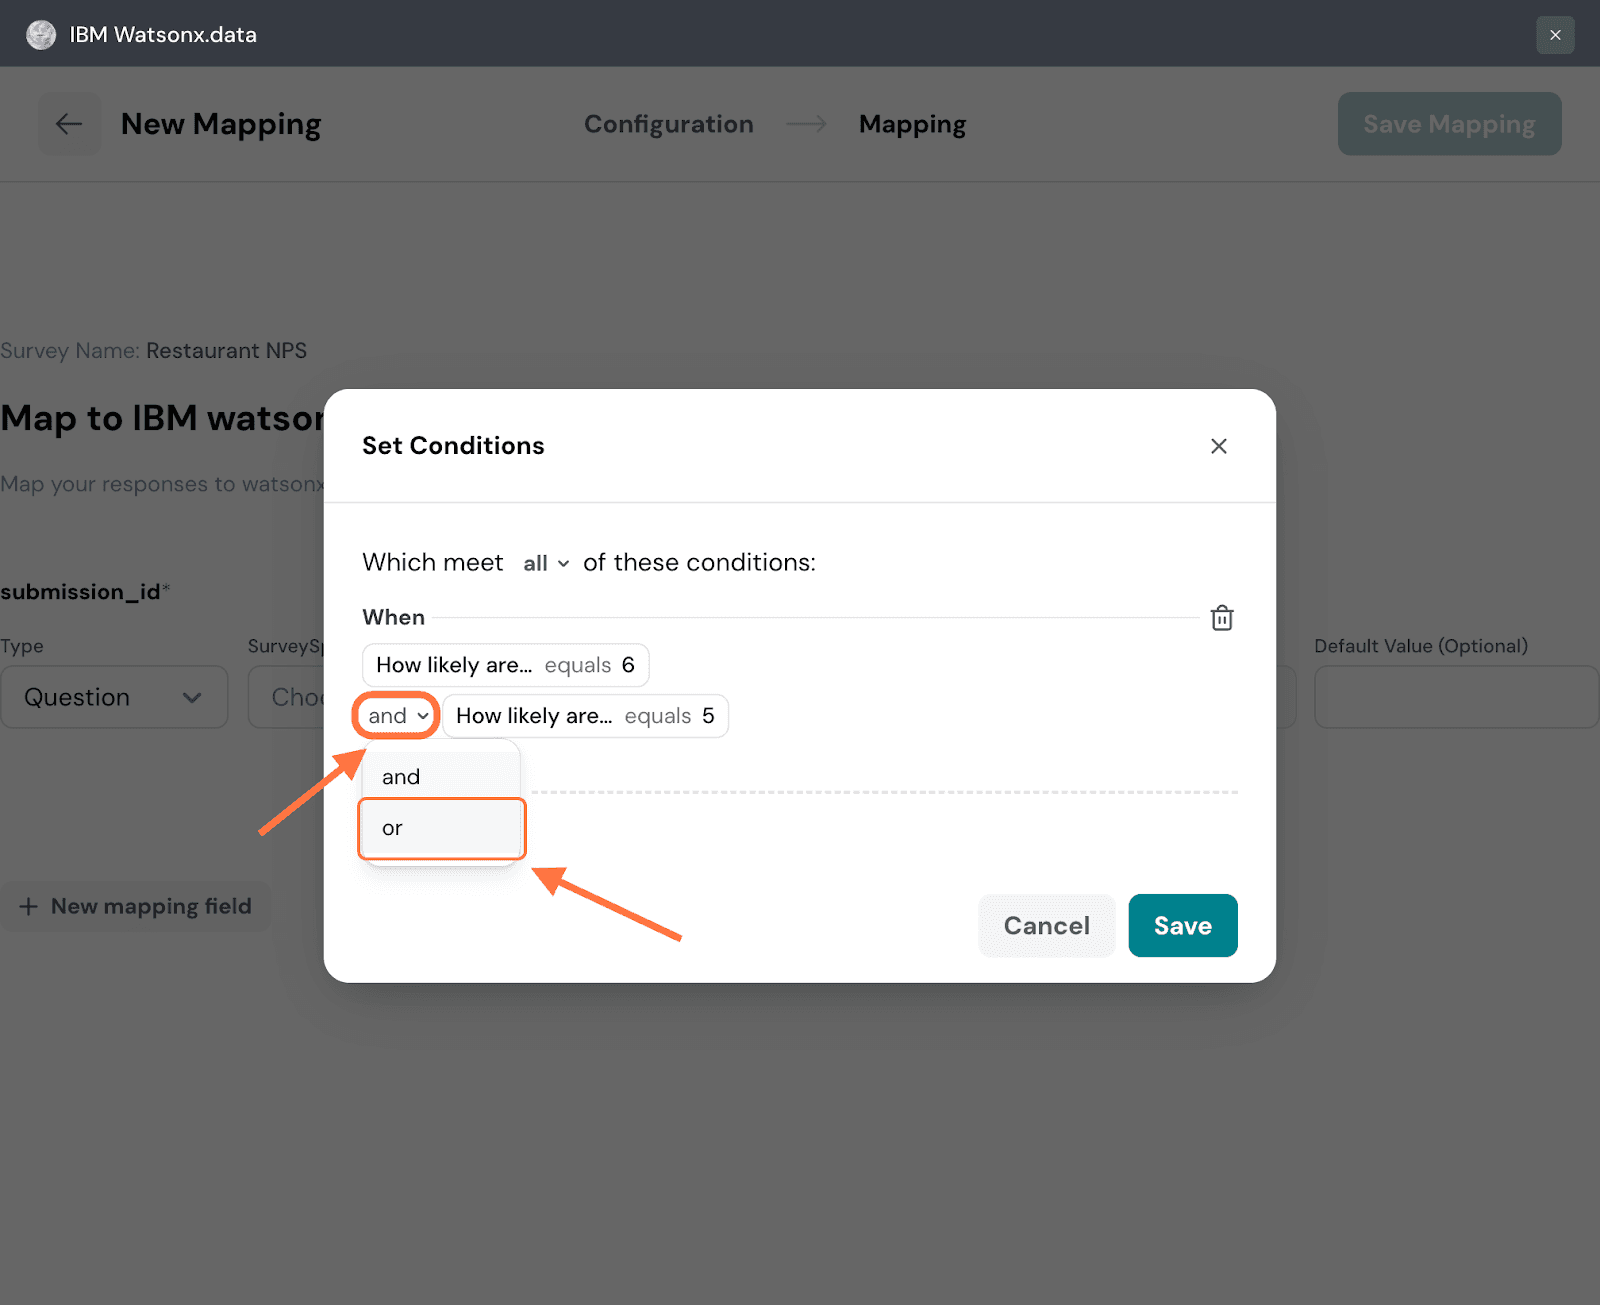
21. Click on Add Group to add more conditions/condition groups. When you’re done, click Save.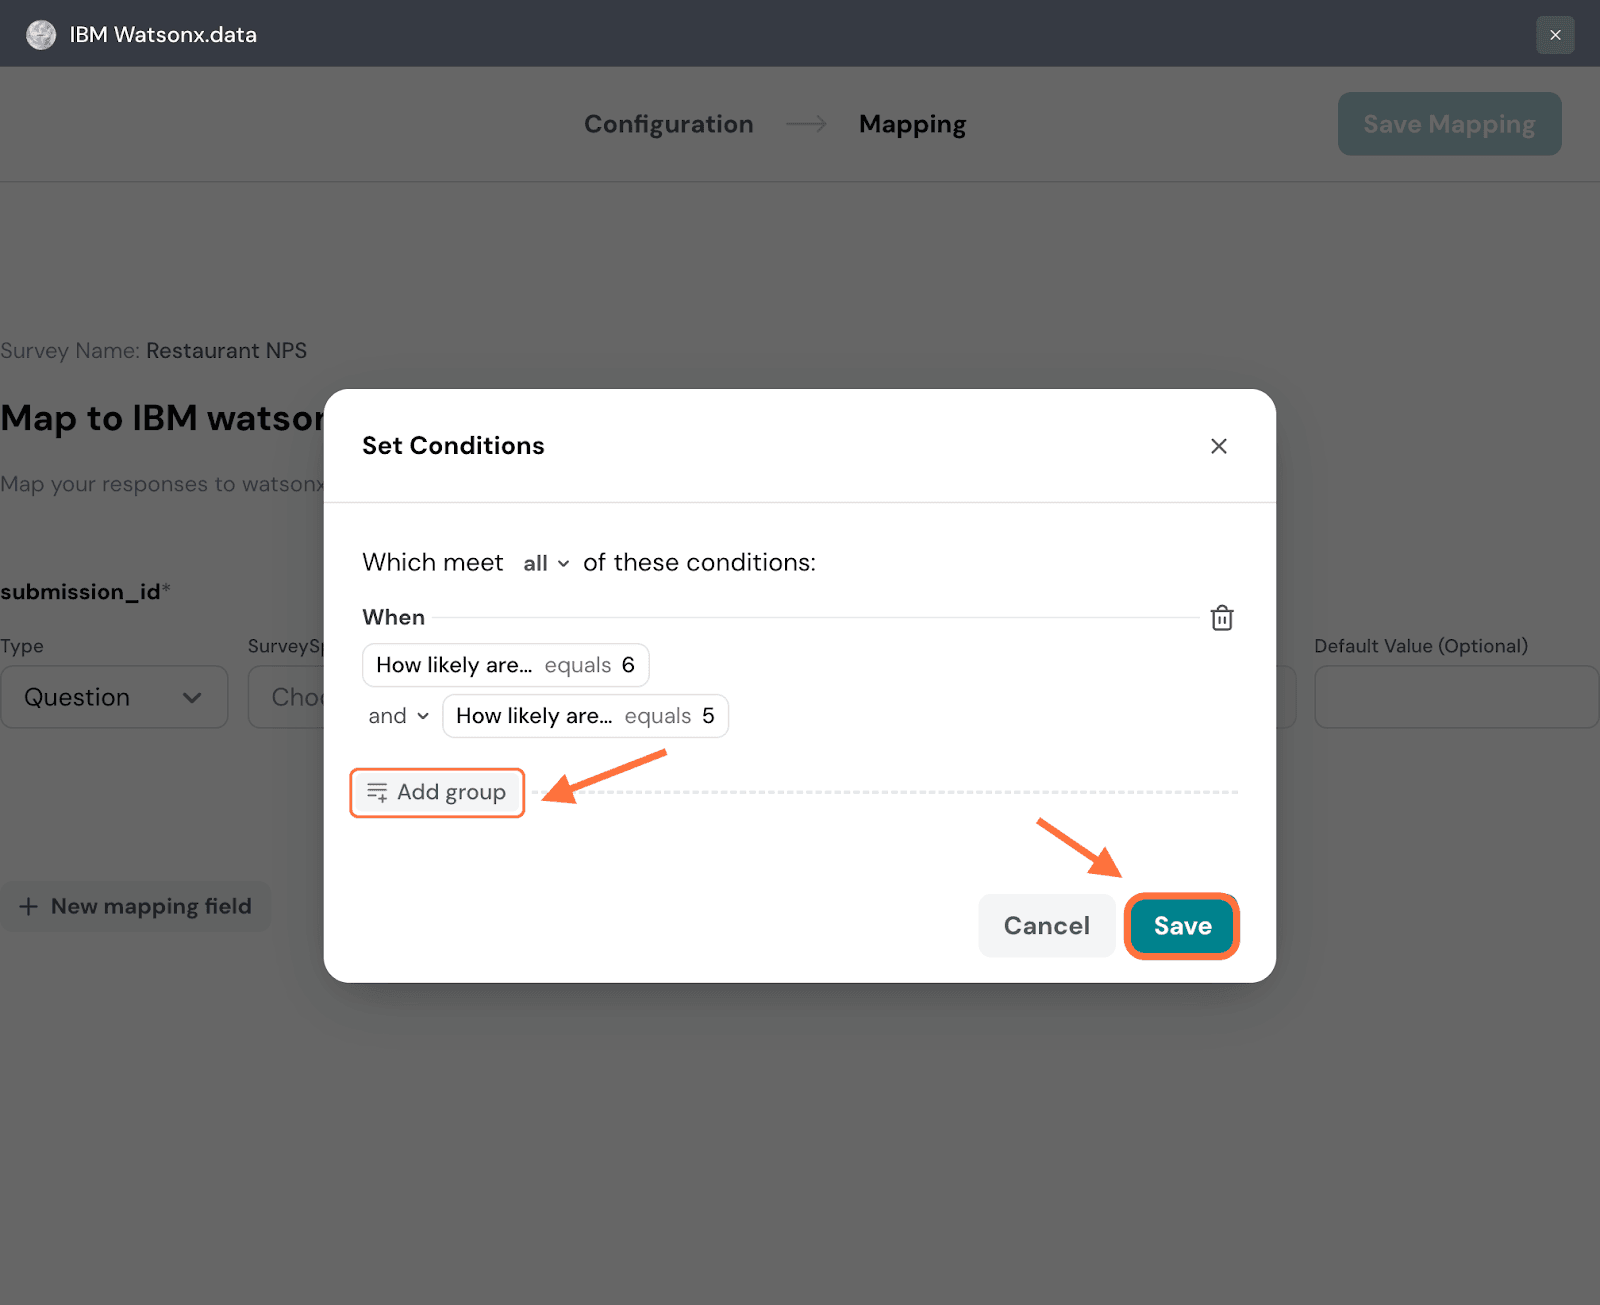
22. The first step of creating a mapping is to first map a response property to the IBM watsonx.data field in IBM watsonx. This is mandatory. The default property type is a question, but you can change it by clicking on the drop-down and choosing from the options.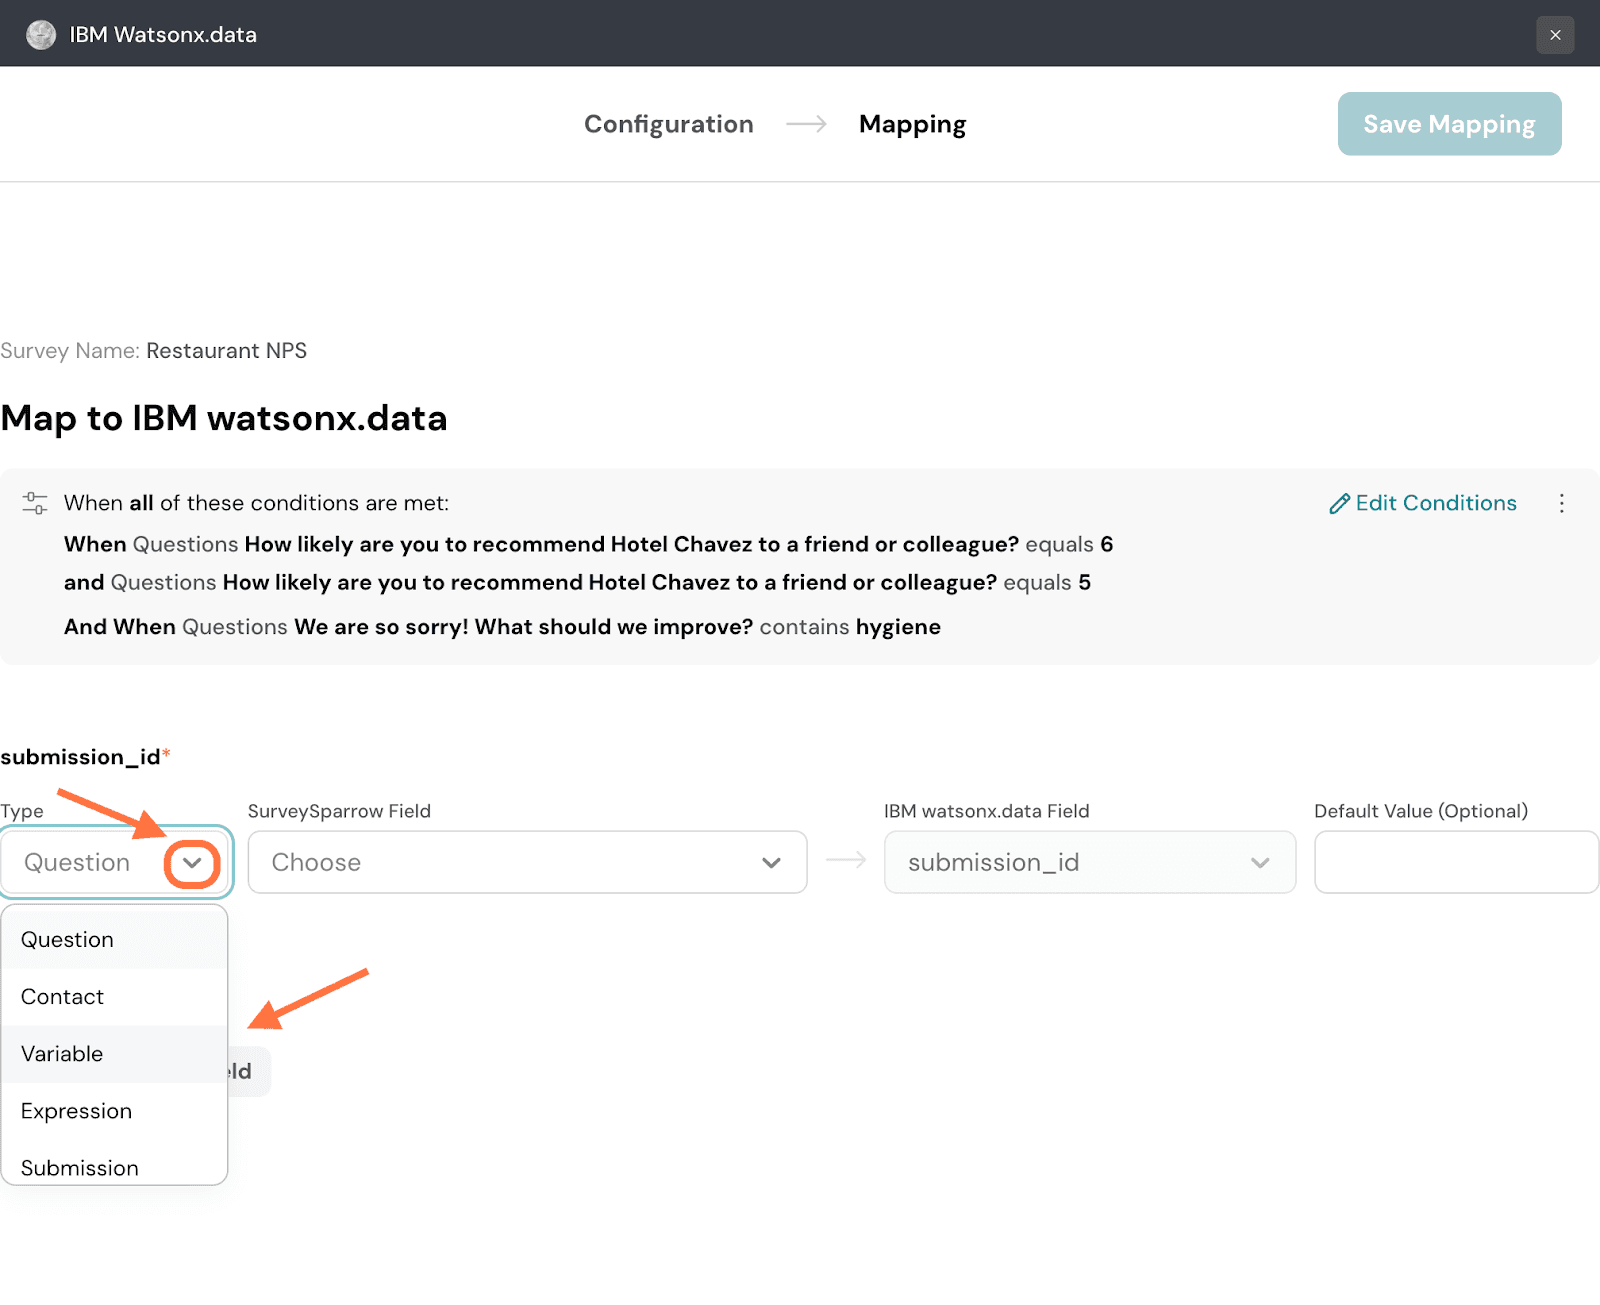
23. Next, you must choose a particular item of that property type that you’ve already created for the survey. Click on the drop-down menu under SurveySparrow Field and choose from the options.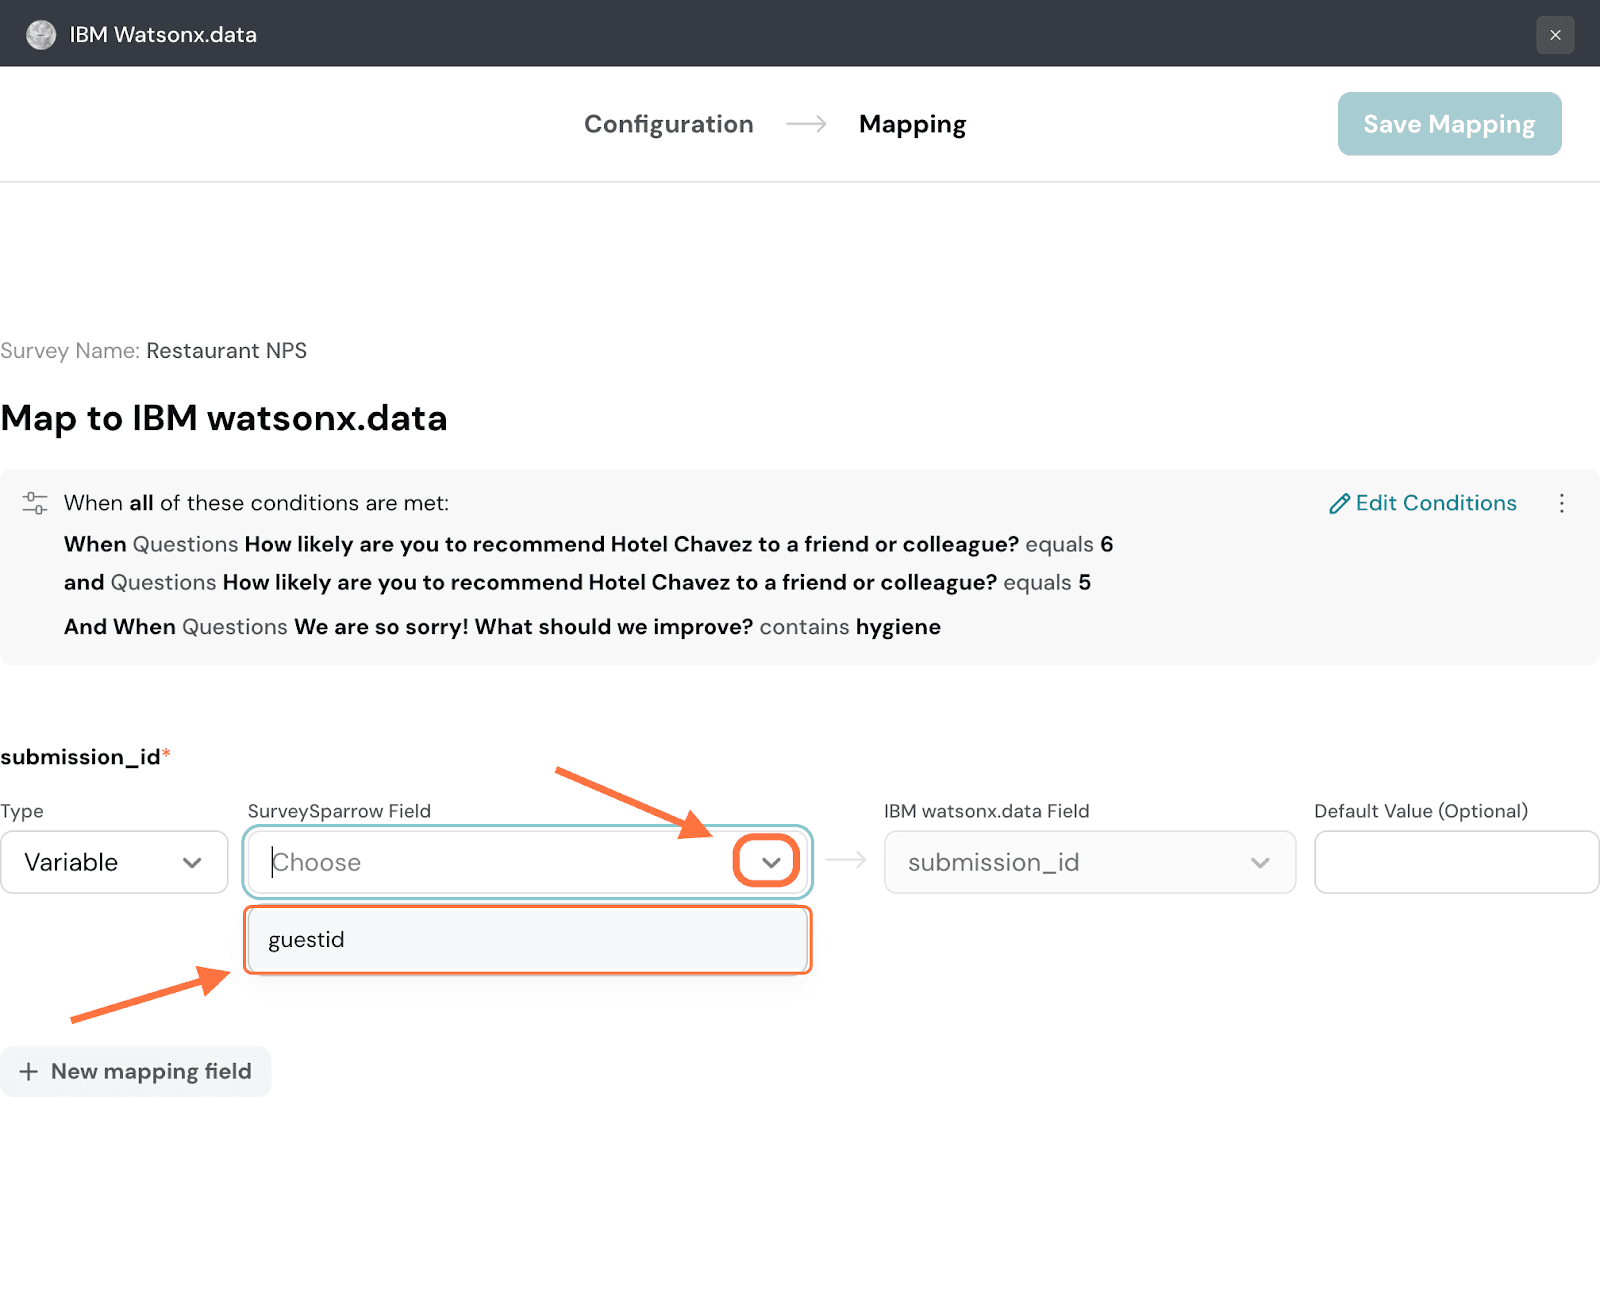
24. If a particular response has no data for the chosen property, the IBM watsonx field will remain empty. But you can choose to fill in a default value that will be filled in as a substitute for such situations.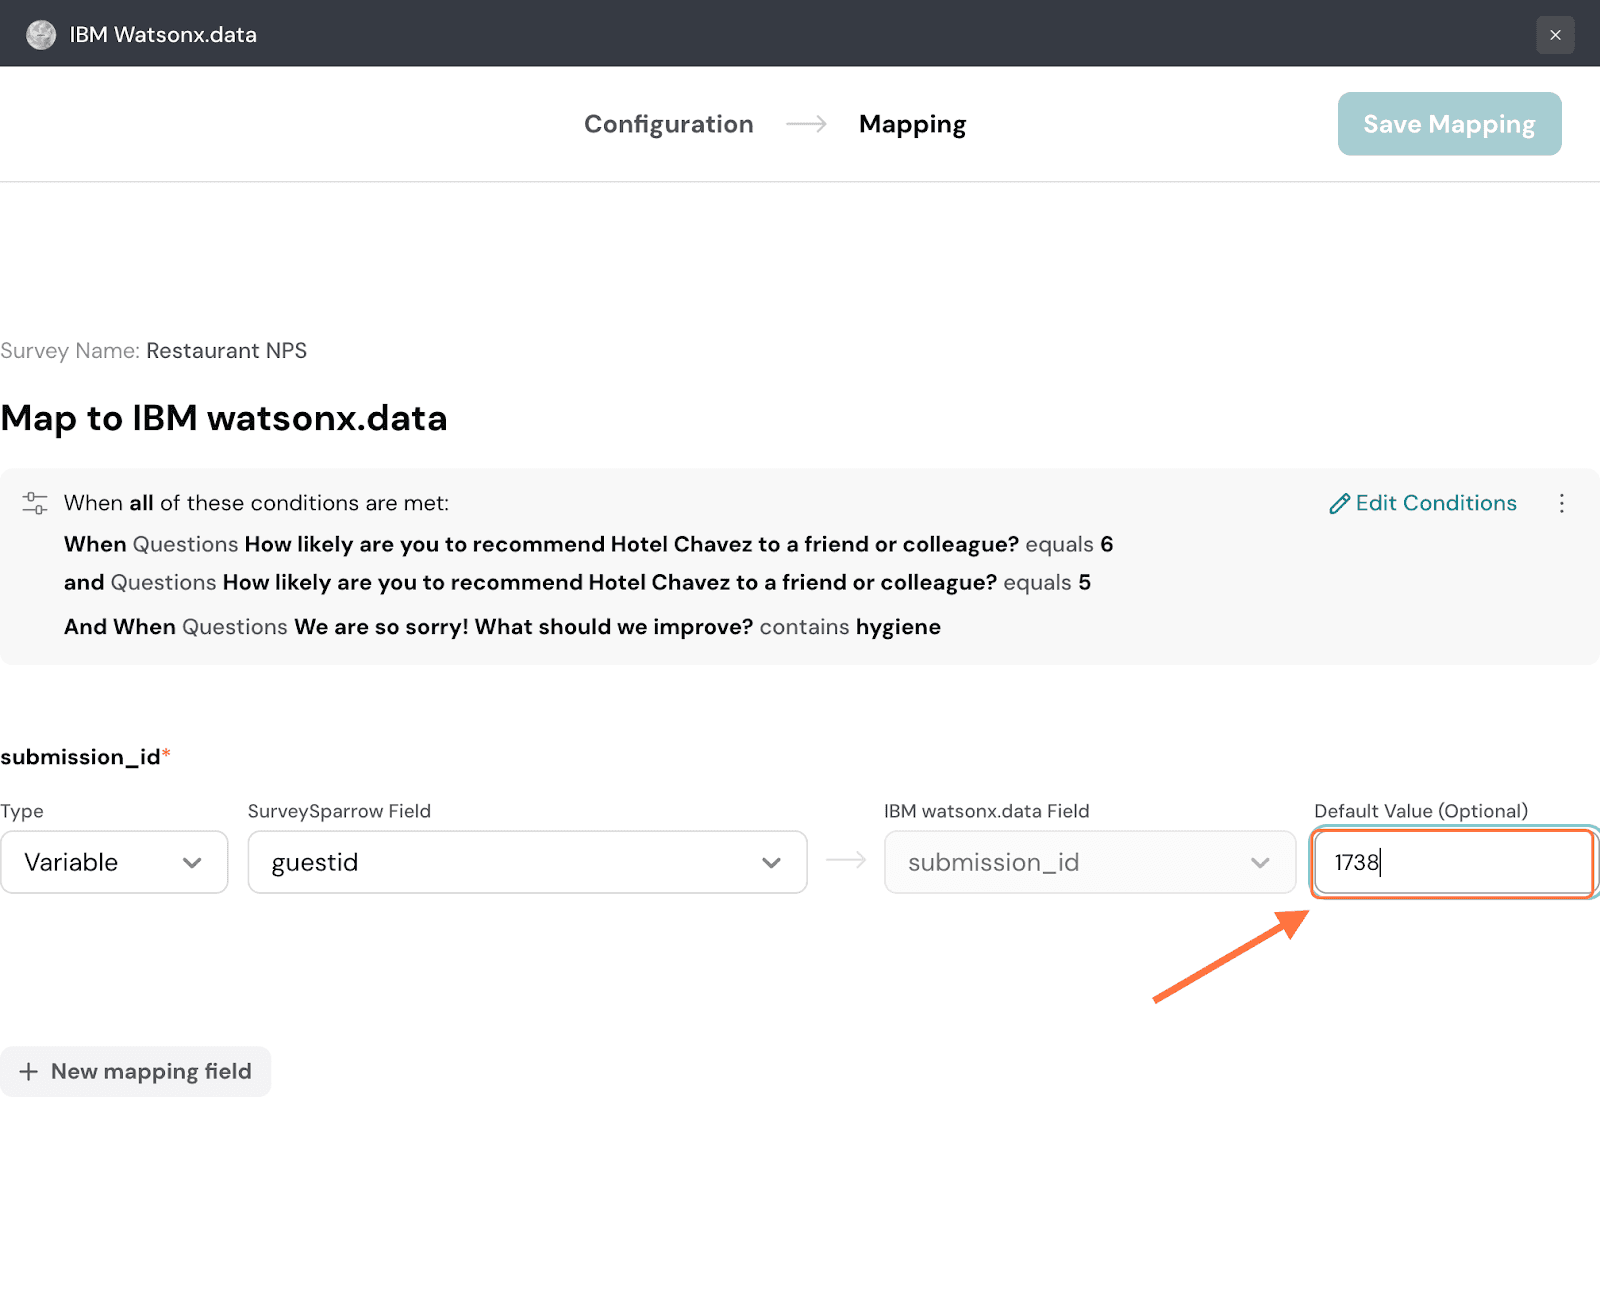
25. To add more mapping fields, click on New mapping field.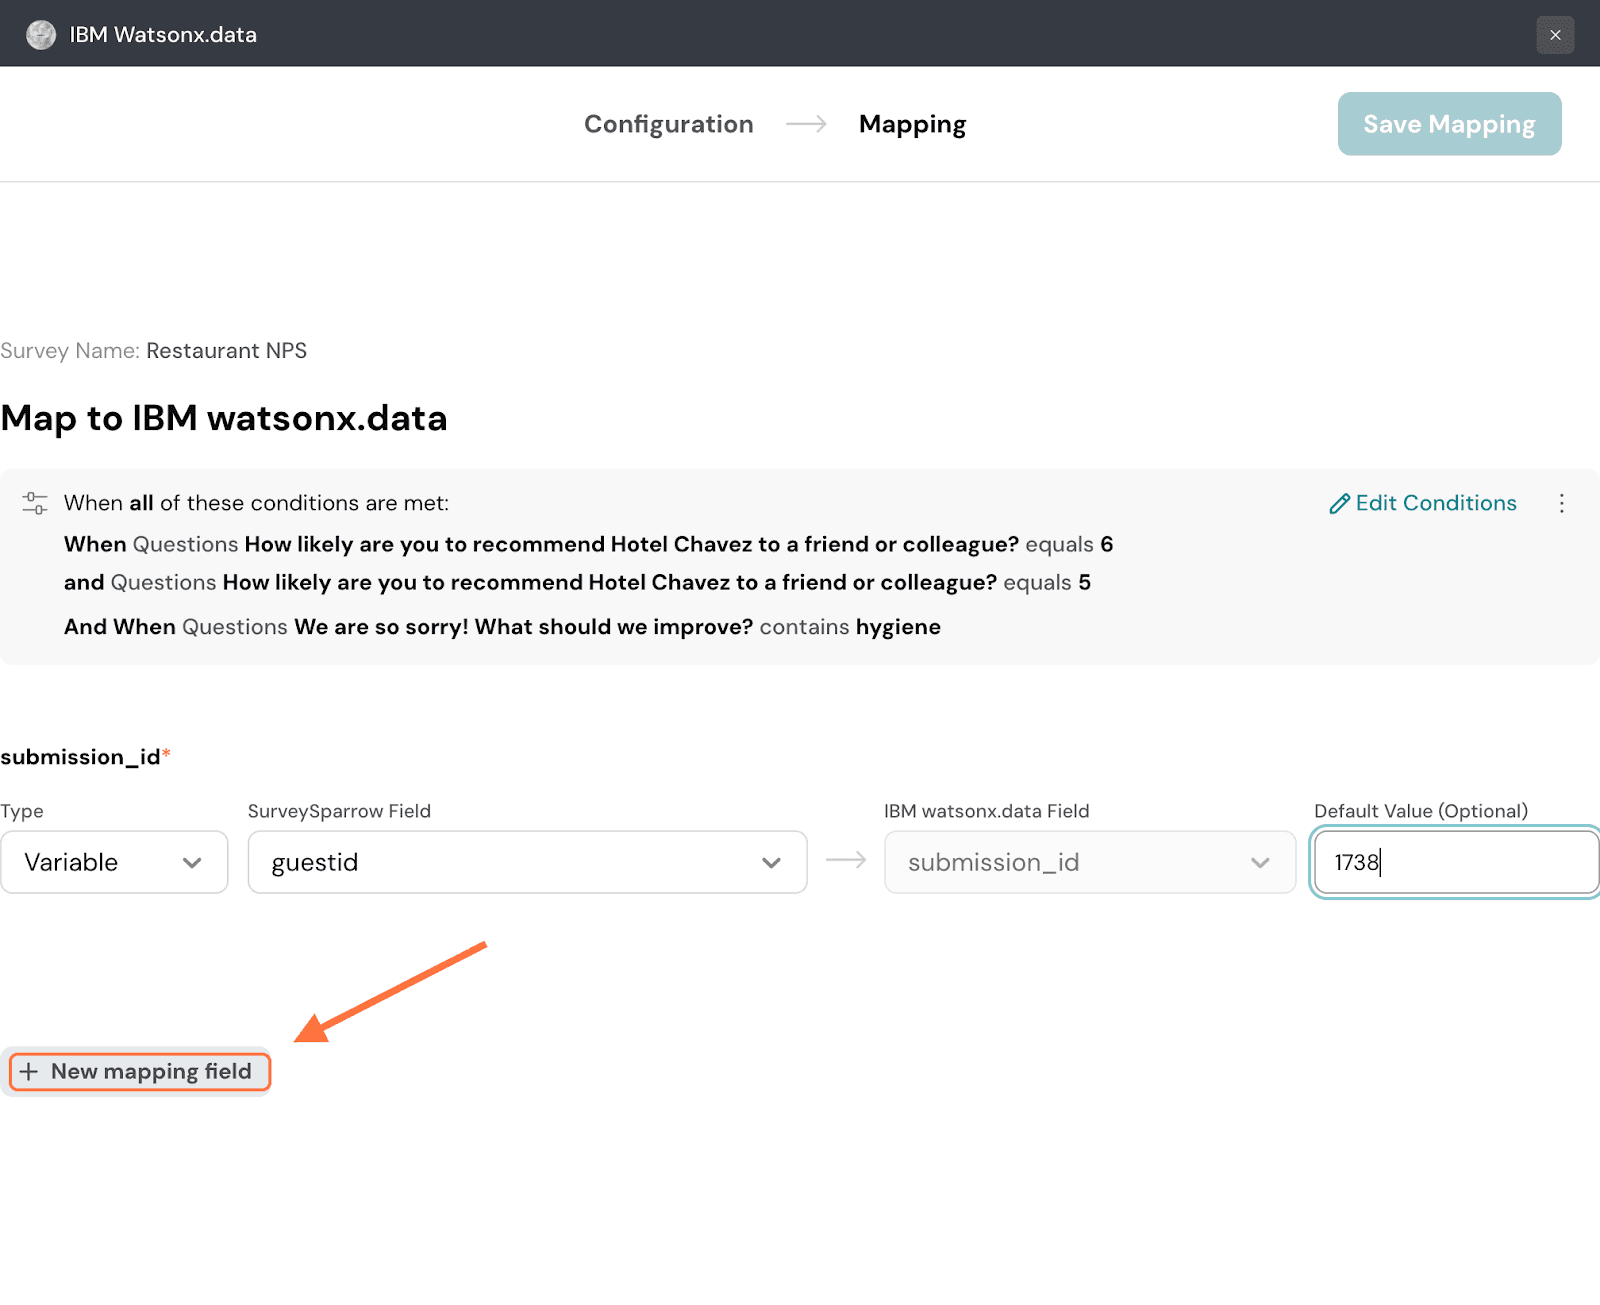
26. When you’re done, click on Save Mapping.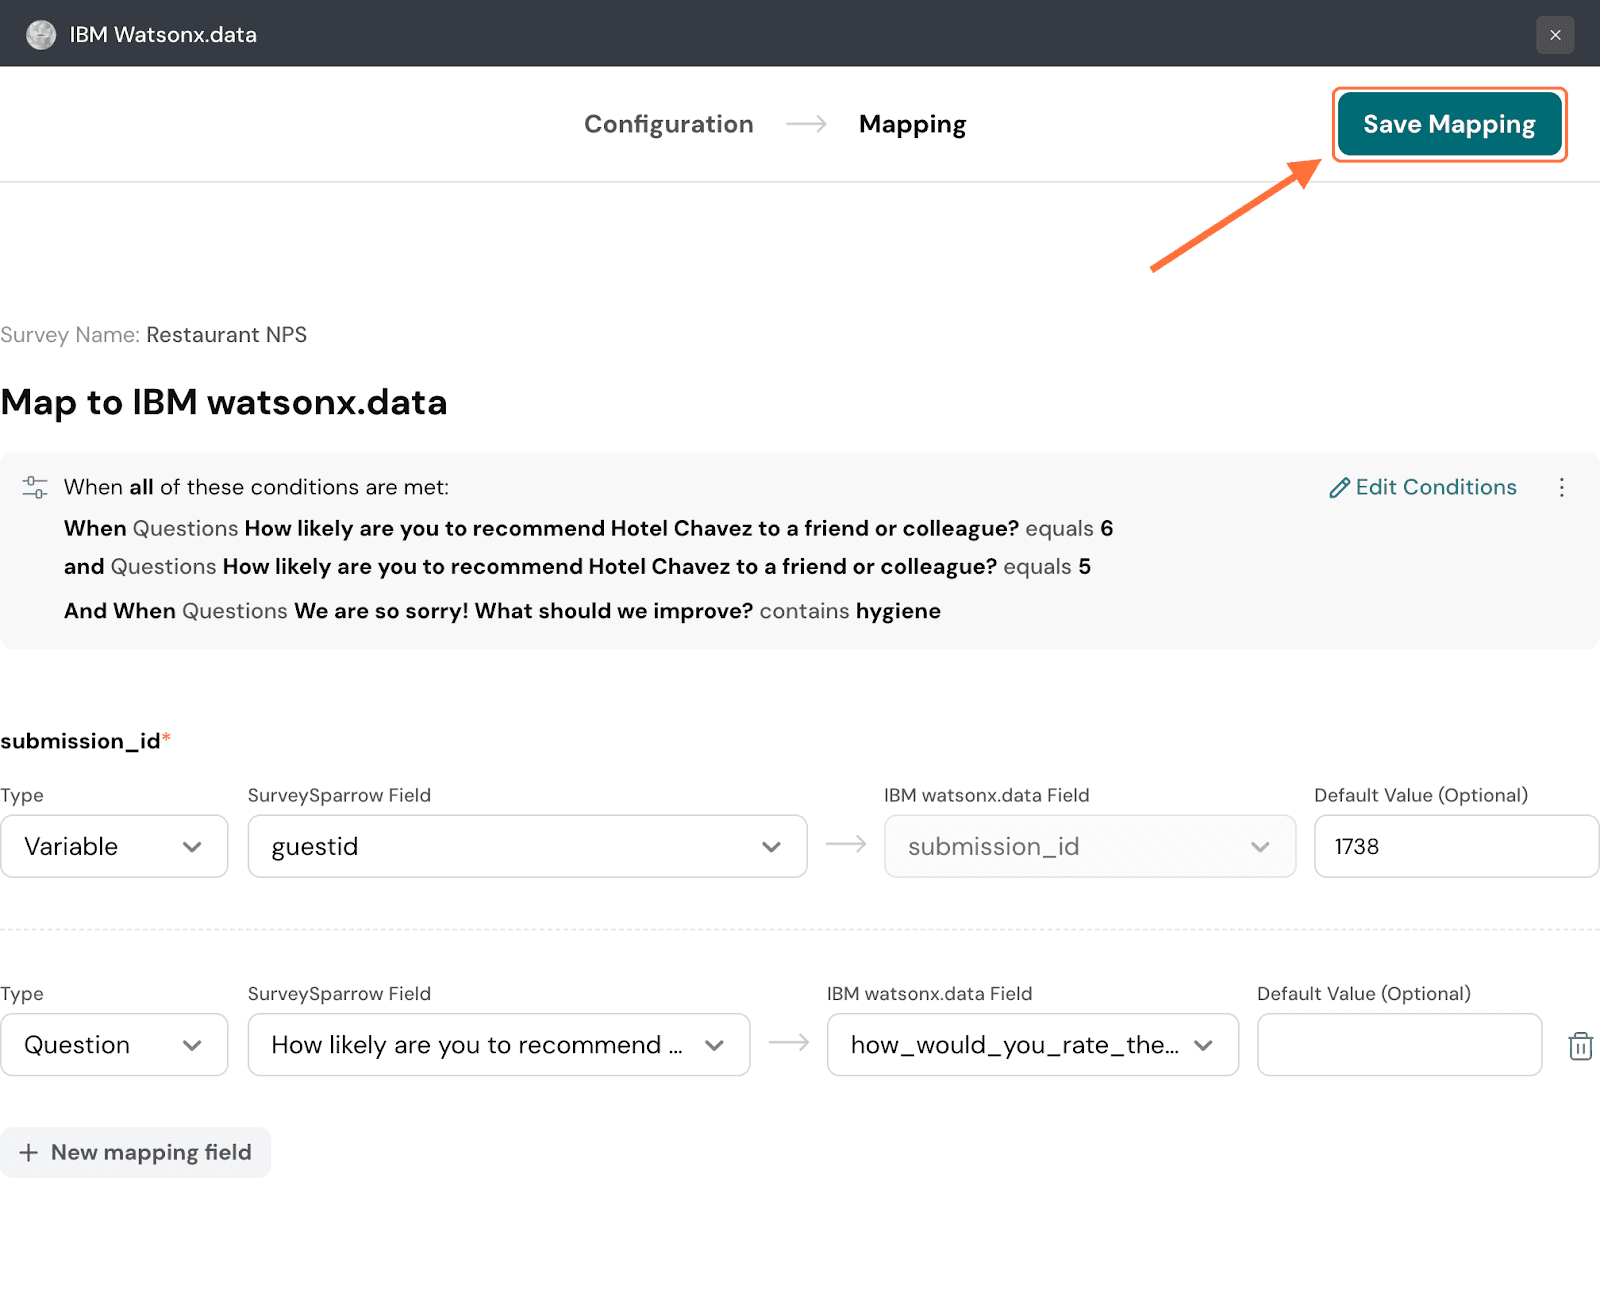
27. Create a name for the mapping, then click on Save Mapping.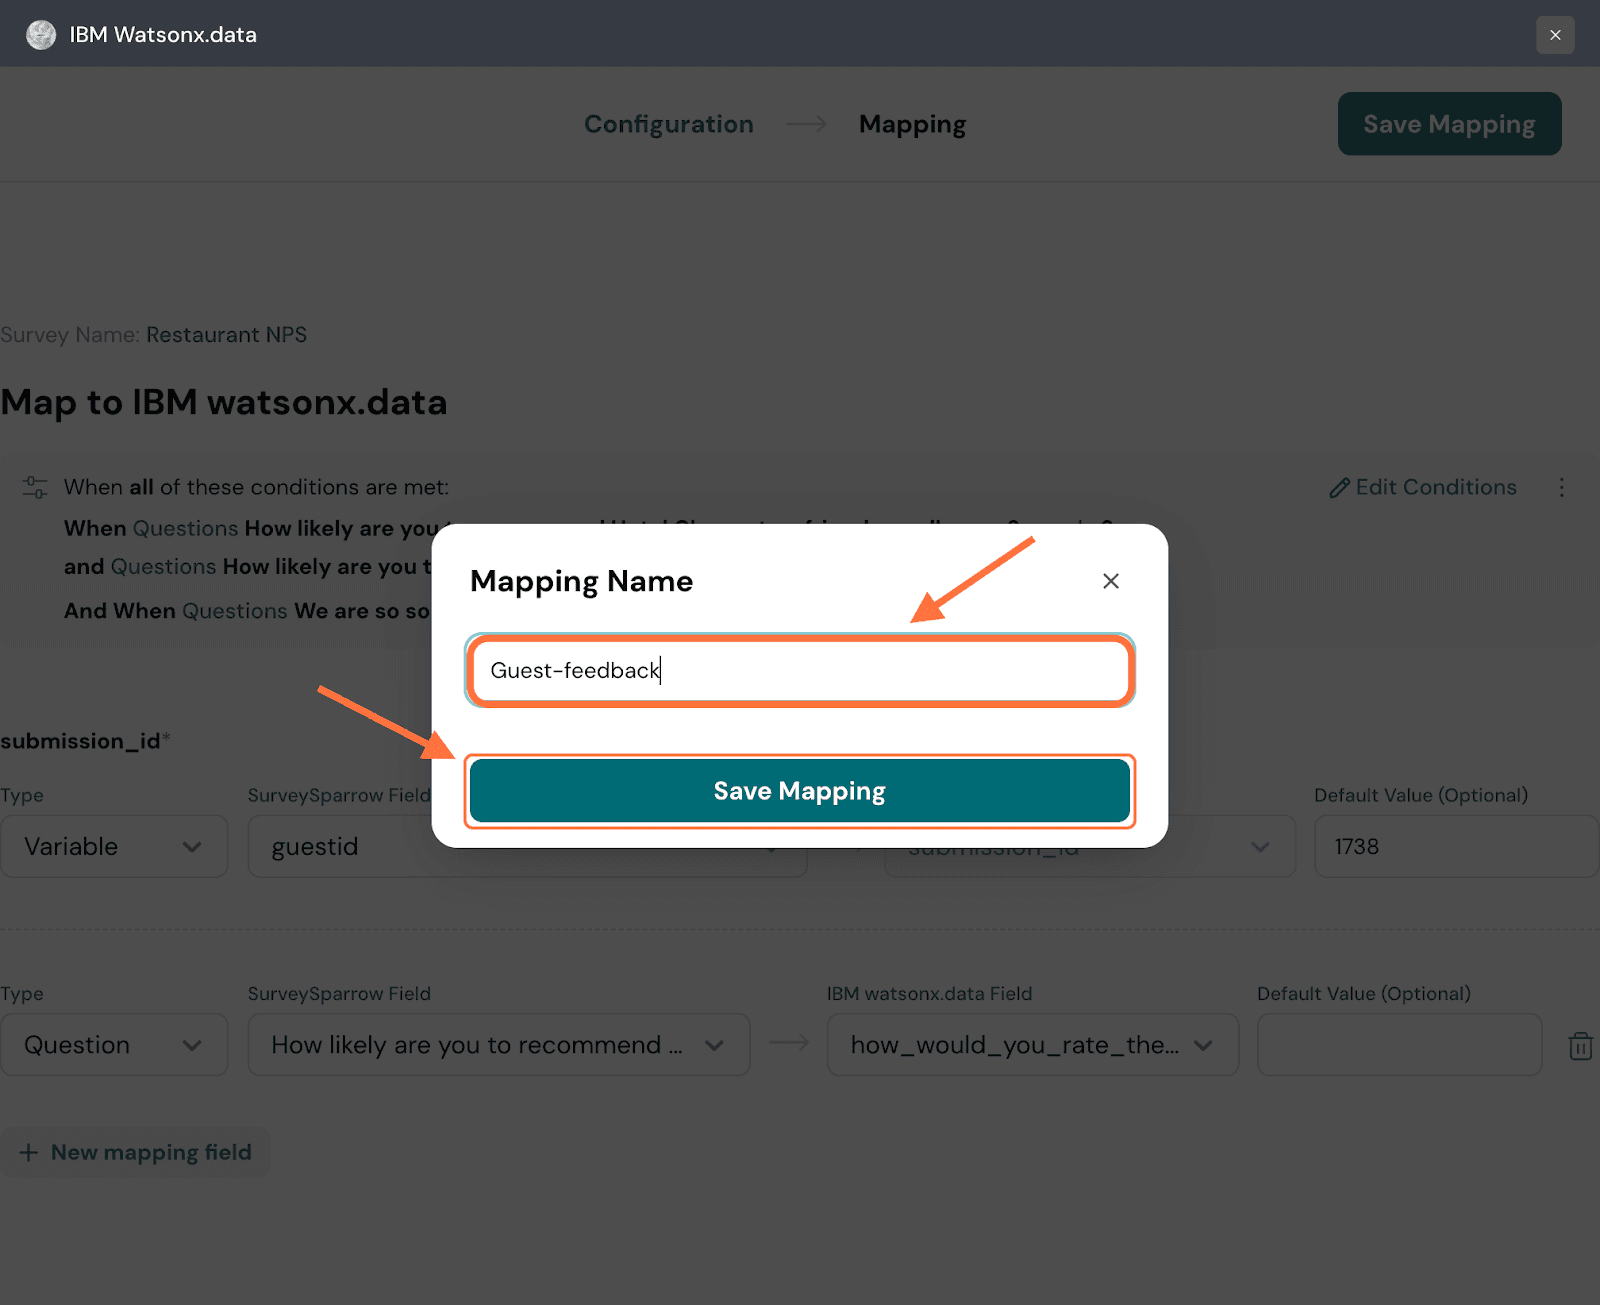
28. After the mapping is saved, you’ll be taken to a screen where you can access all saved mappings. To review the mapping configuration, click on the mapping.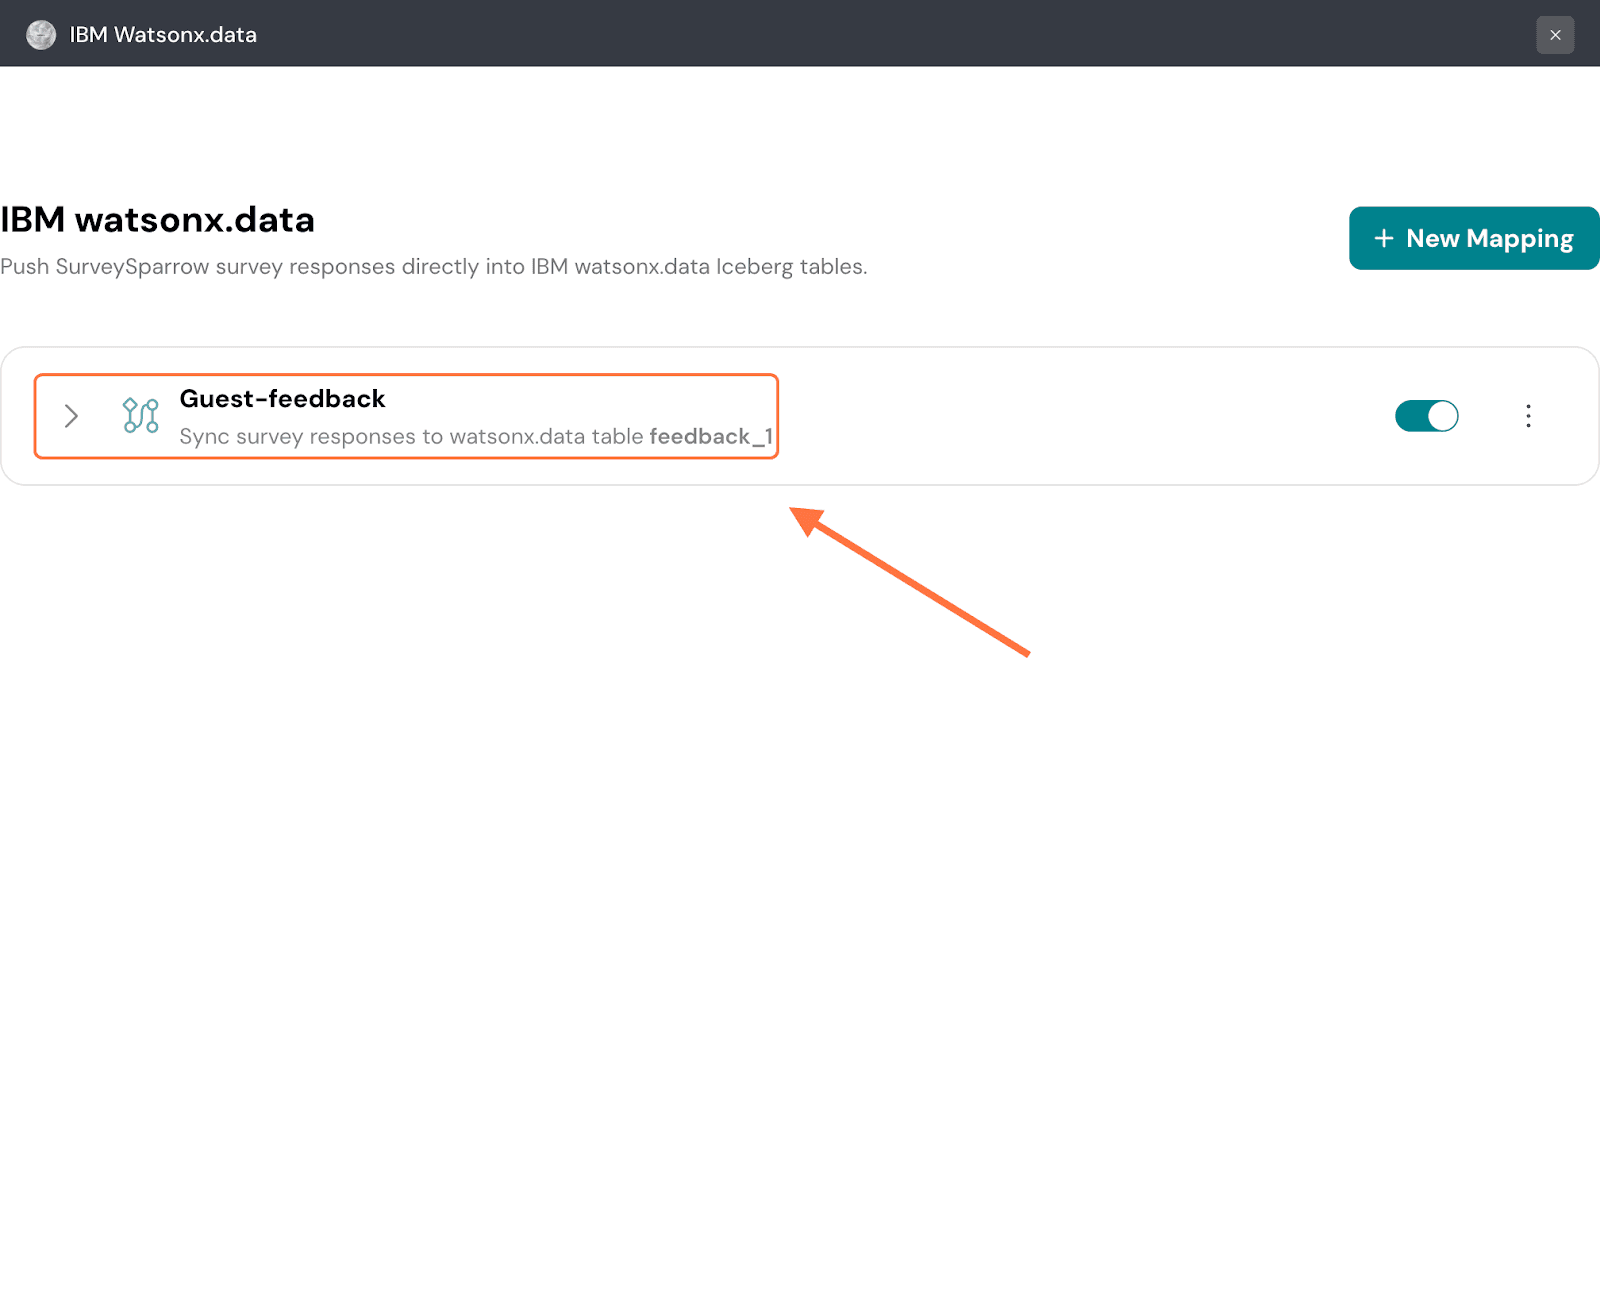
29. The mapping tab expands to show you its settings. If you’d like to modify it, click on the ‘Edit….’ button.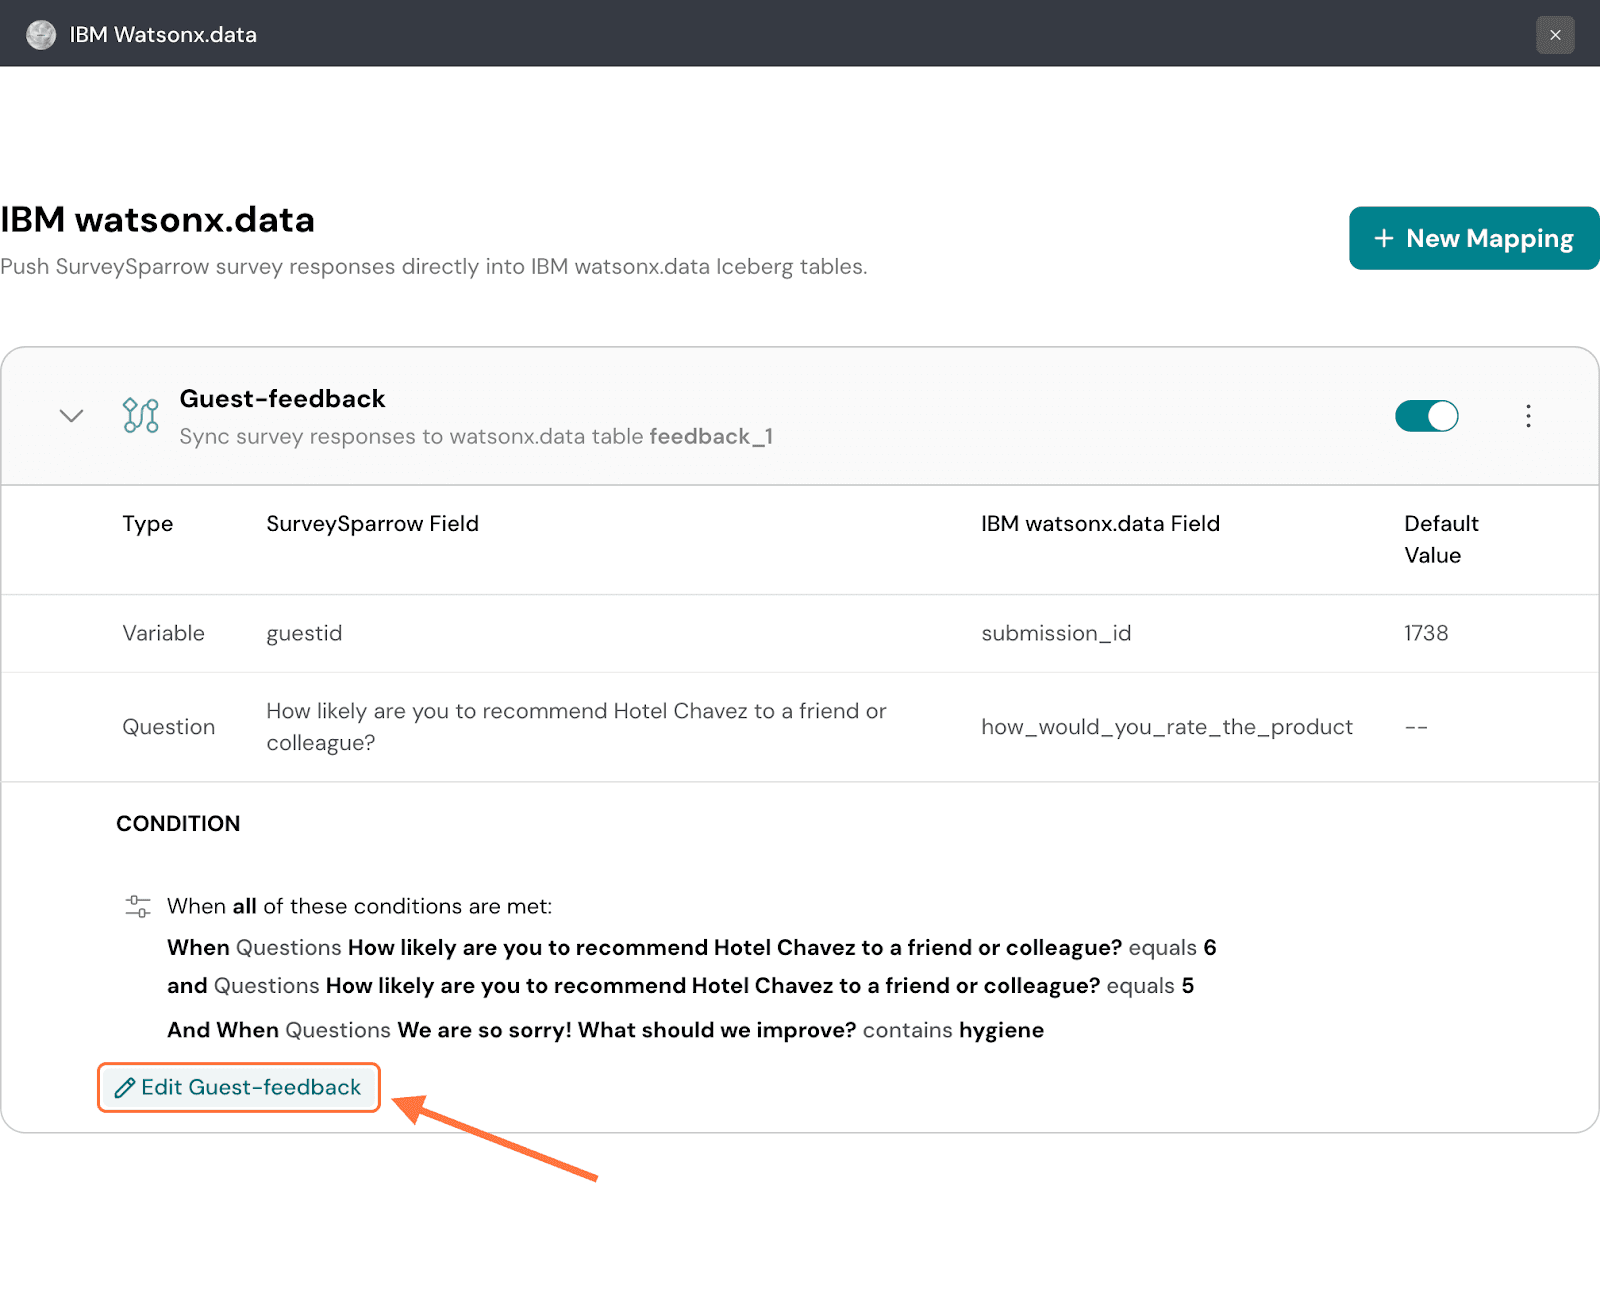
30. To pause the mapping, click on the green toggle button.
Note: Any responses that come in while the mapping is paused will not be synced to Azure Synapse later.
31. To delete the mapping, click on the vertical three-dot icon, then click on Delete.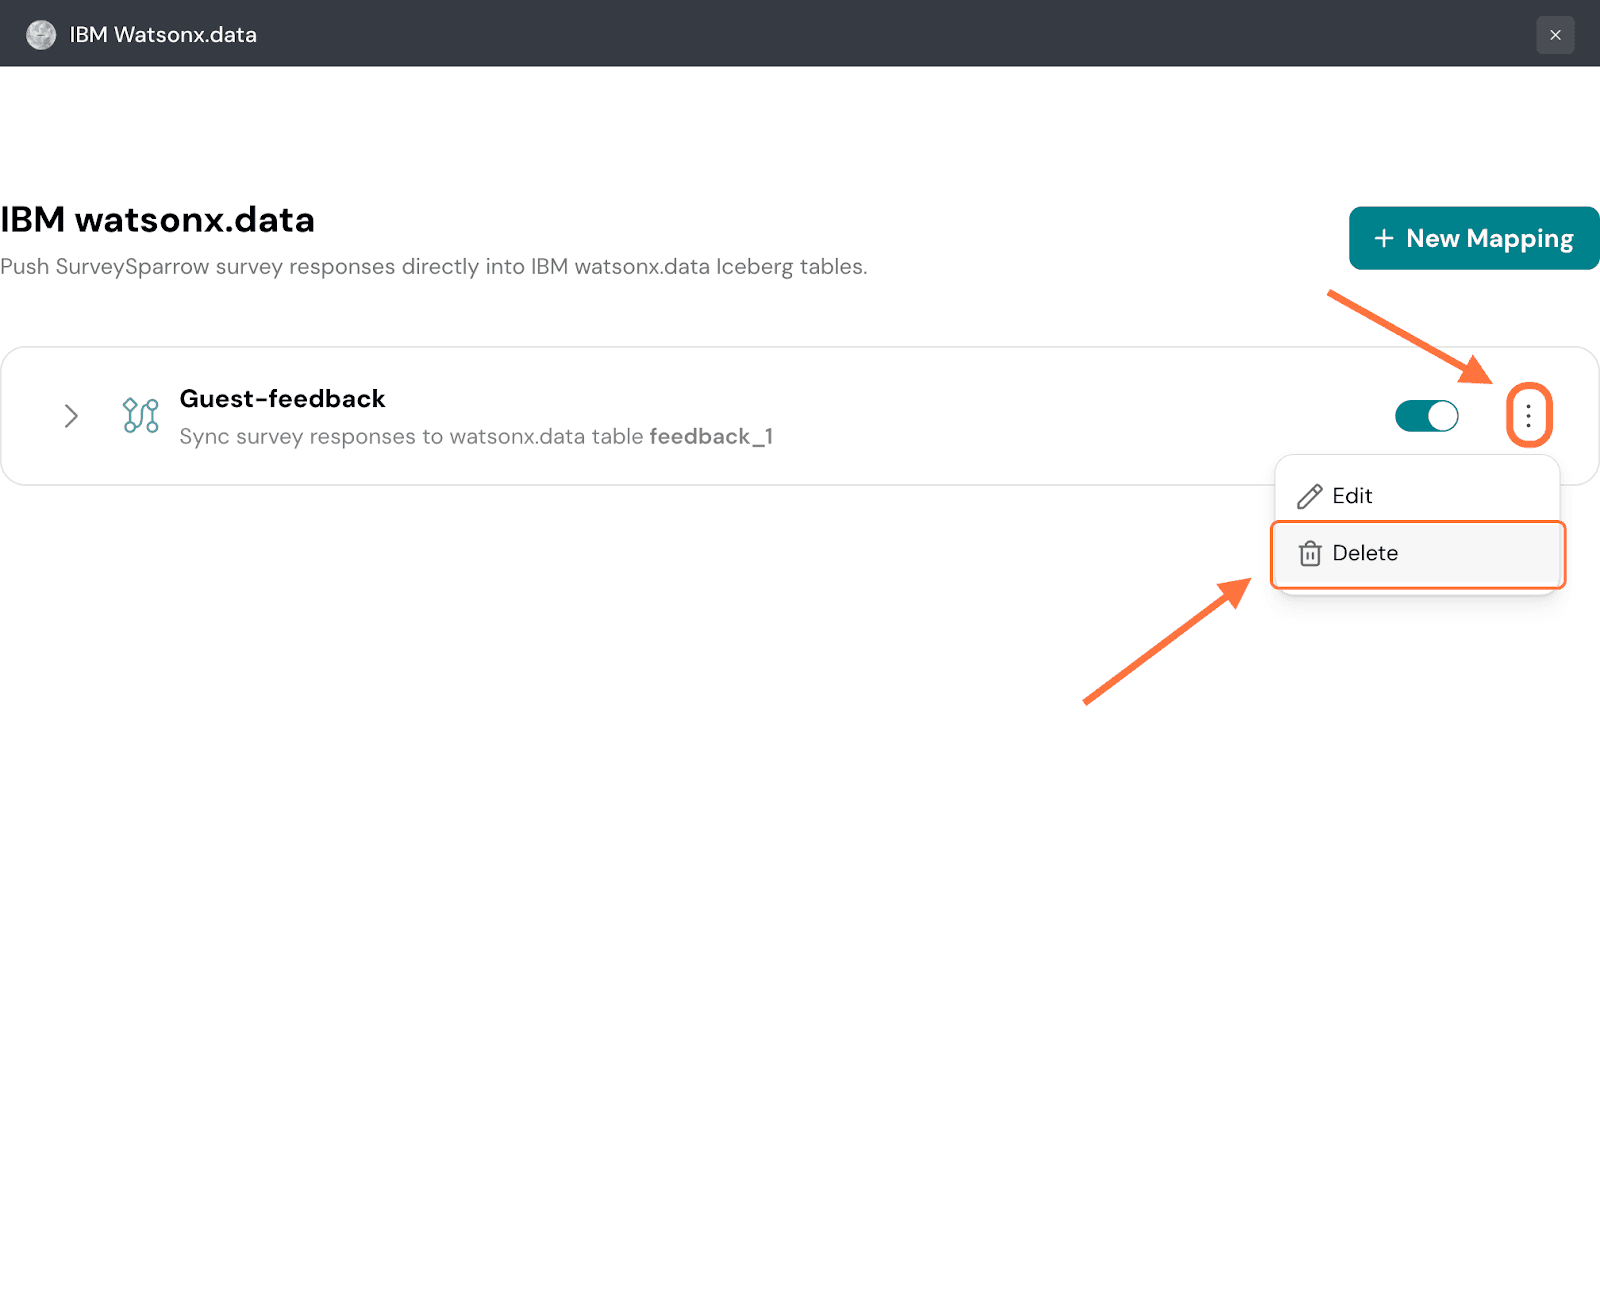
32. Click on Confirm to proceed.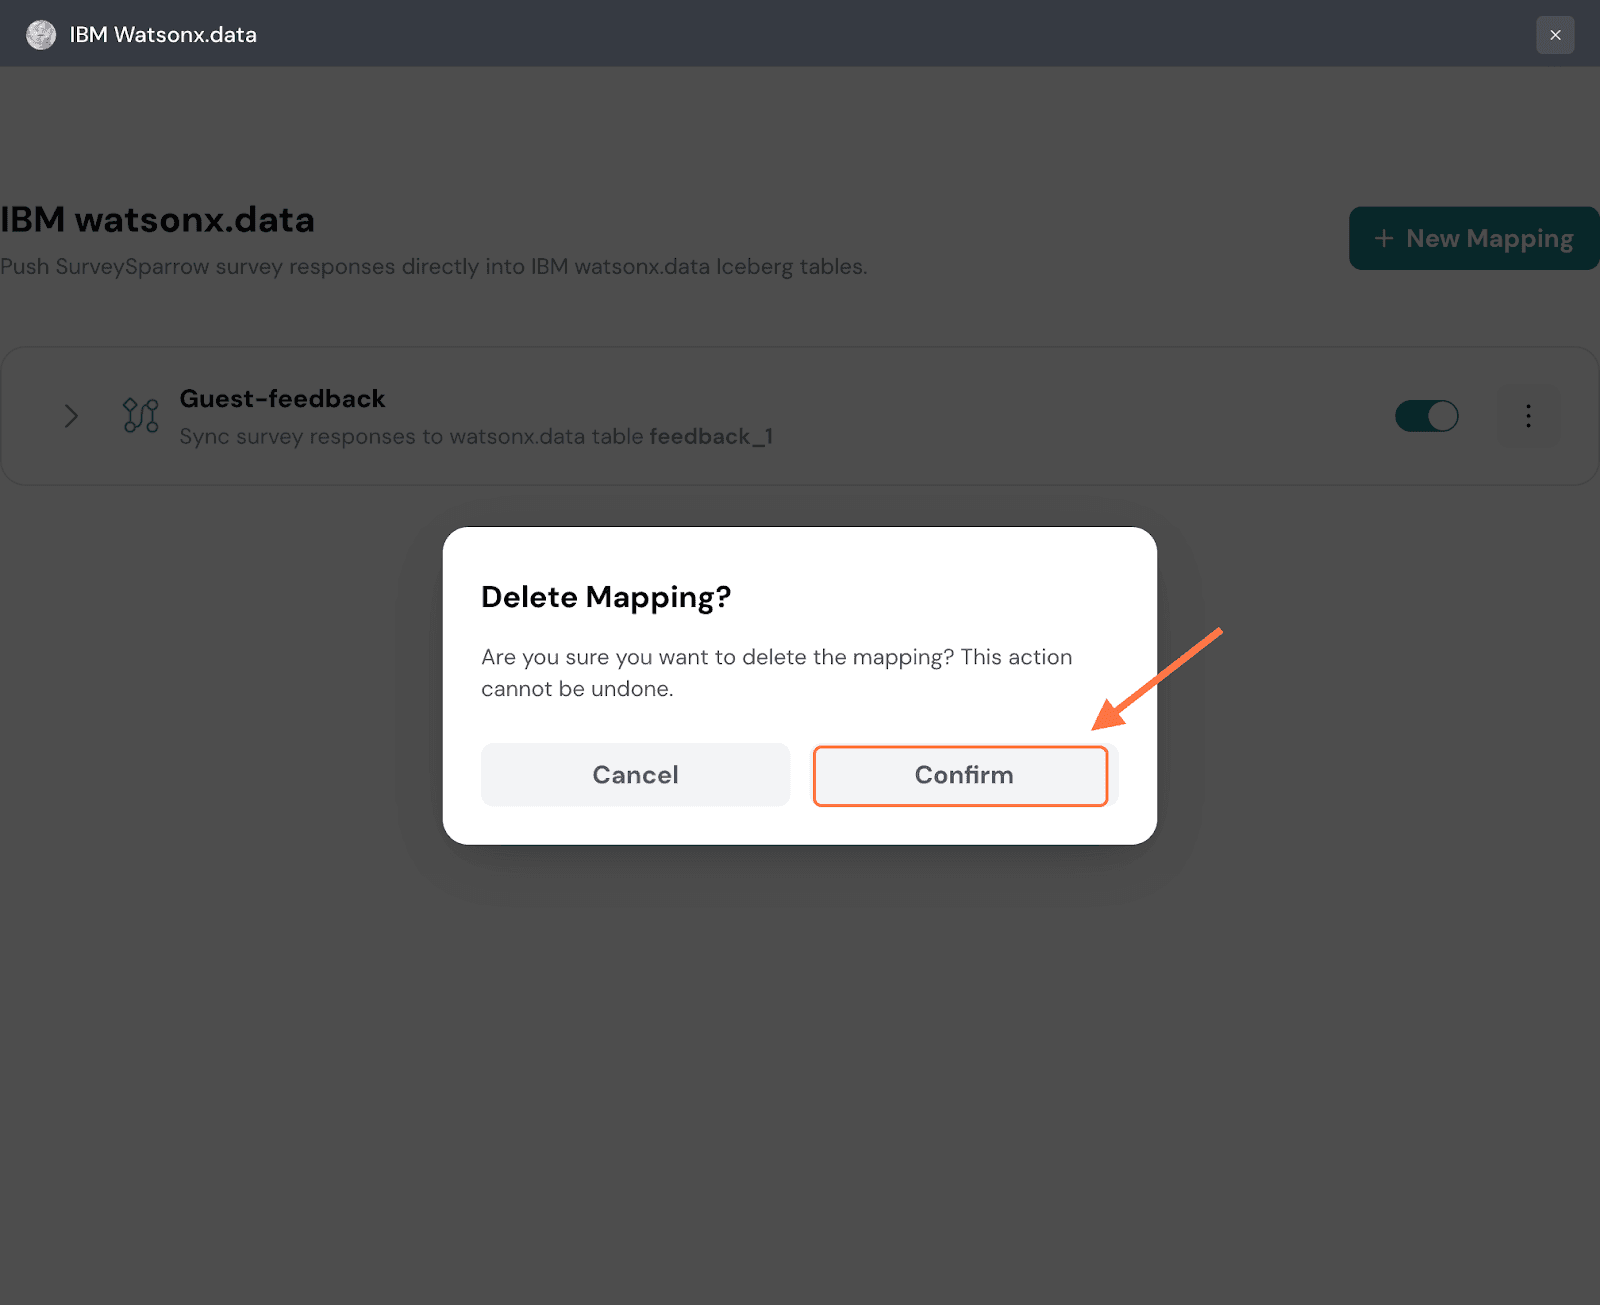
33. Click on New Mapping to add another mapping.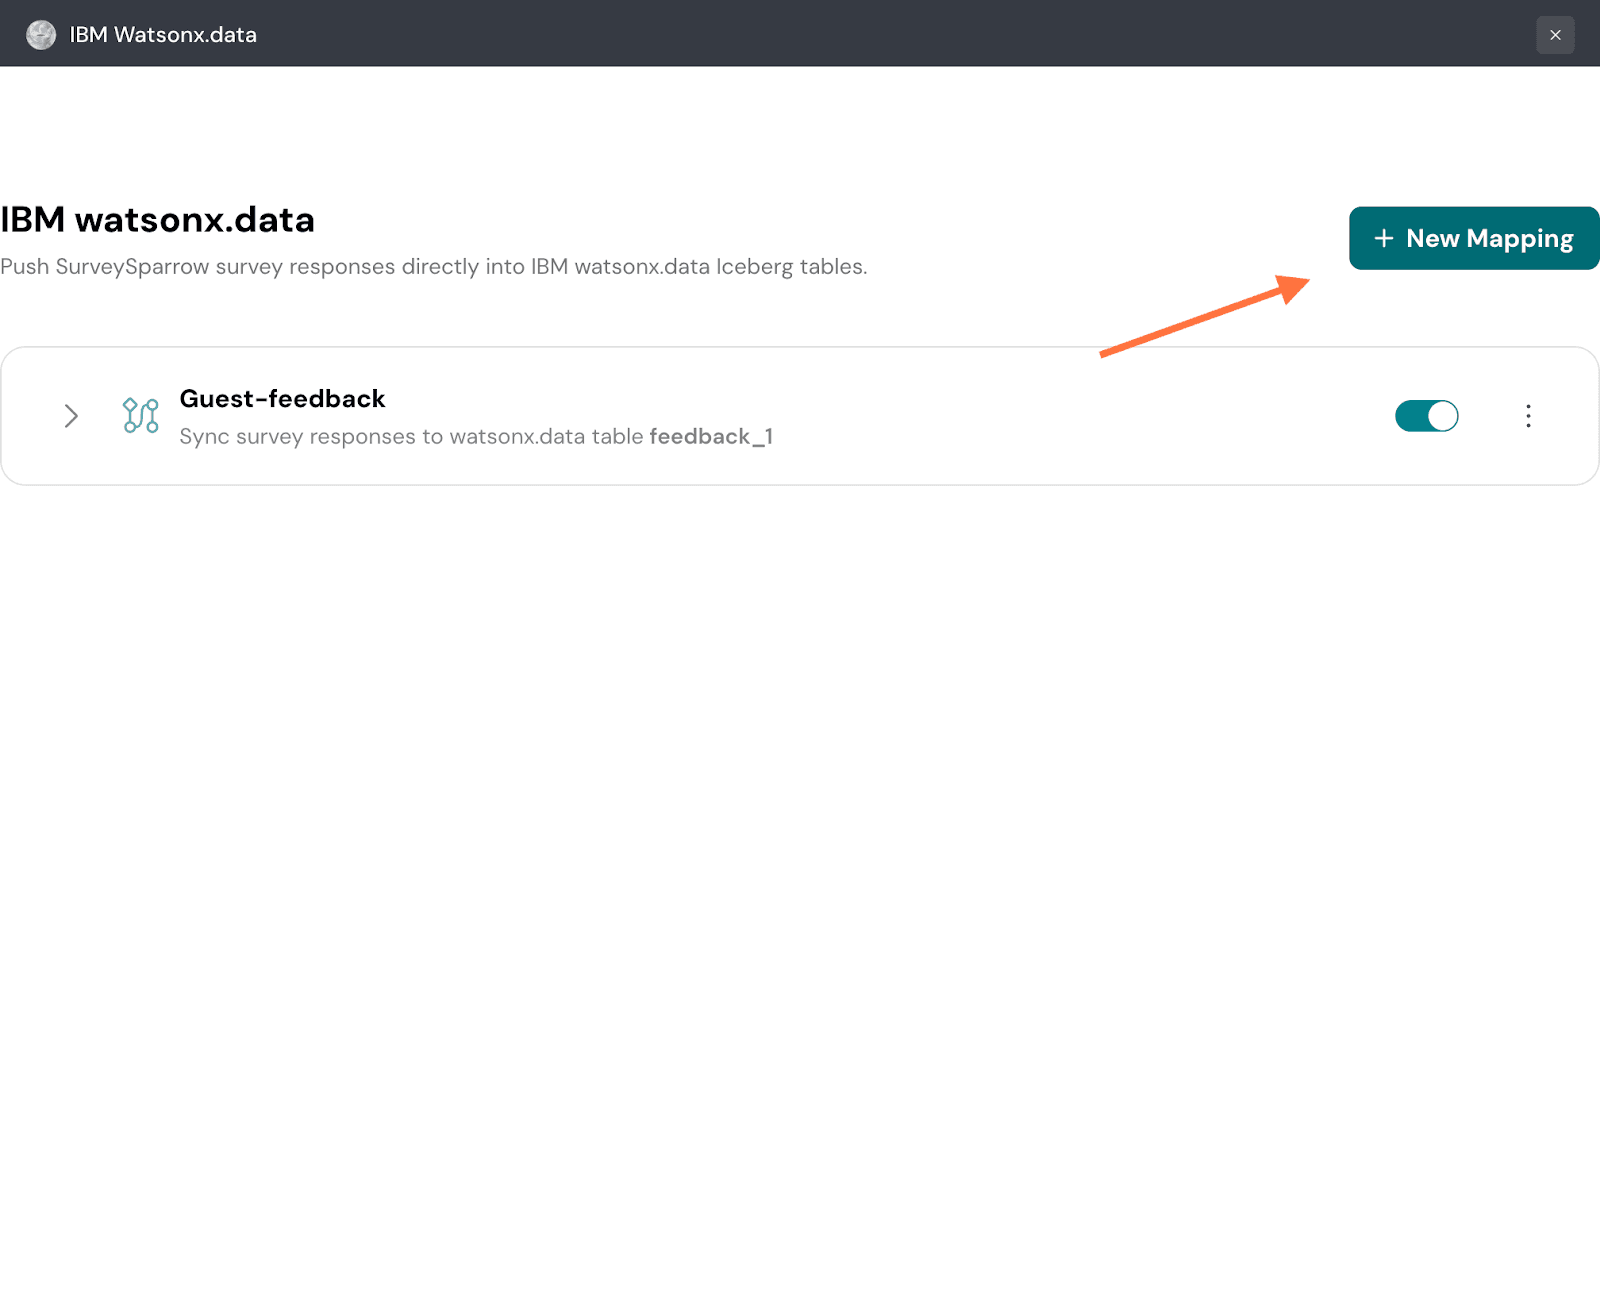
34. Now let’s explore the other set of steps to create a new table for mappings. Once you’re selected Create New Table as your action, enter a table name and click on Continue Mapping.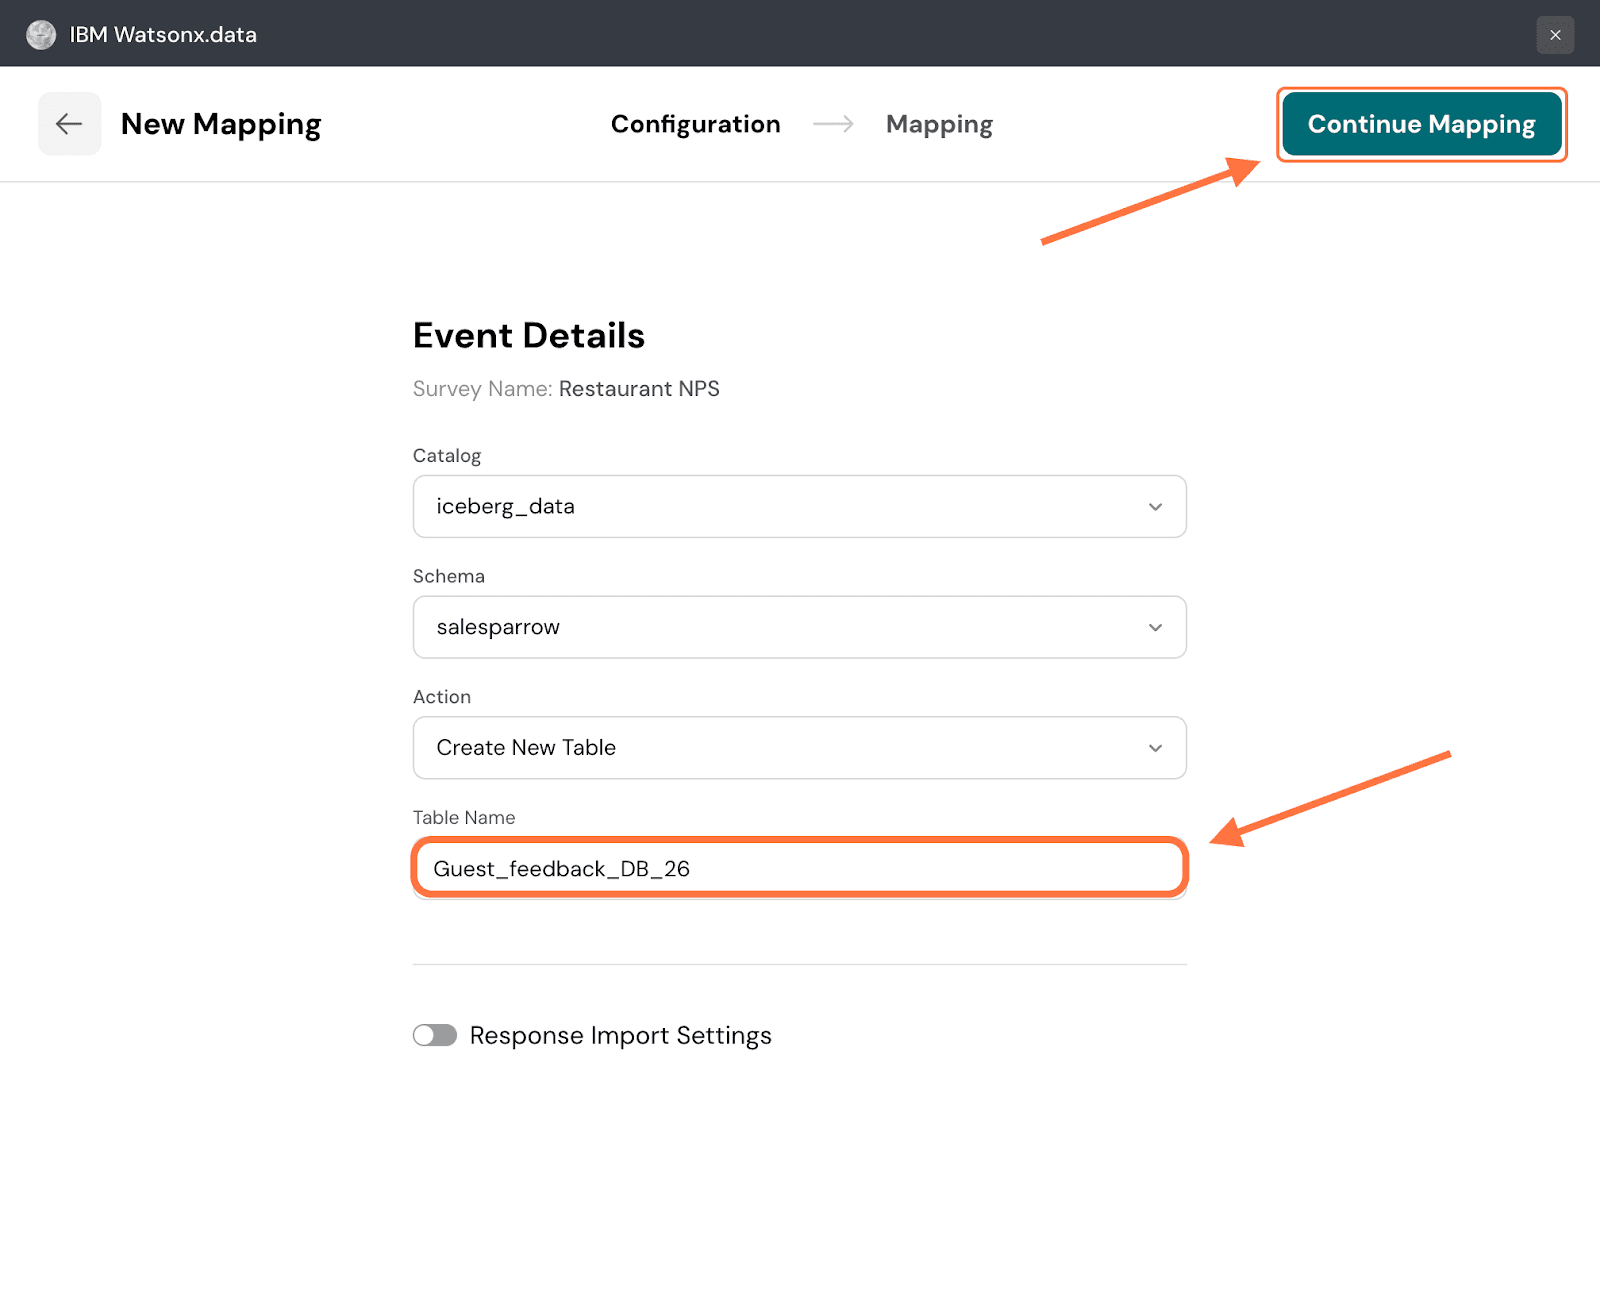
Note: The table name must start with a letter and cannot have spaces or special characters (except underscores).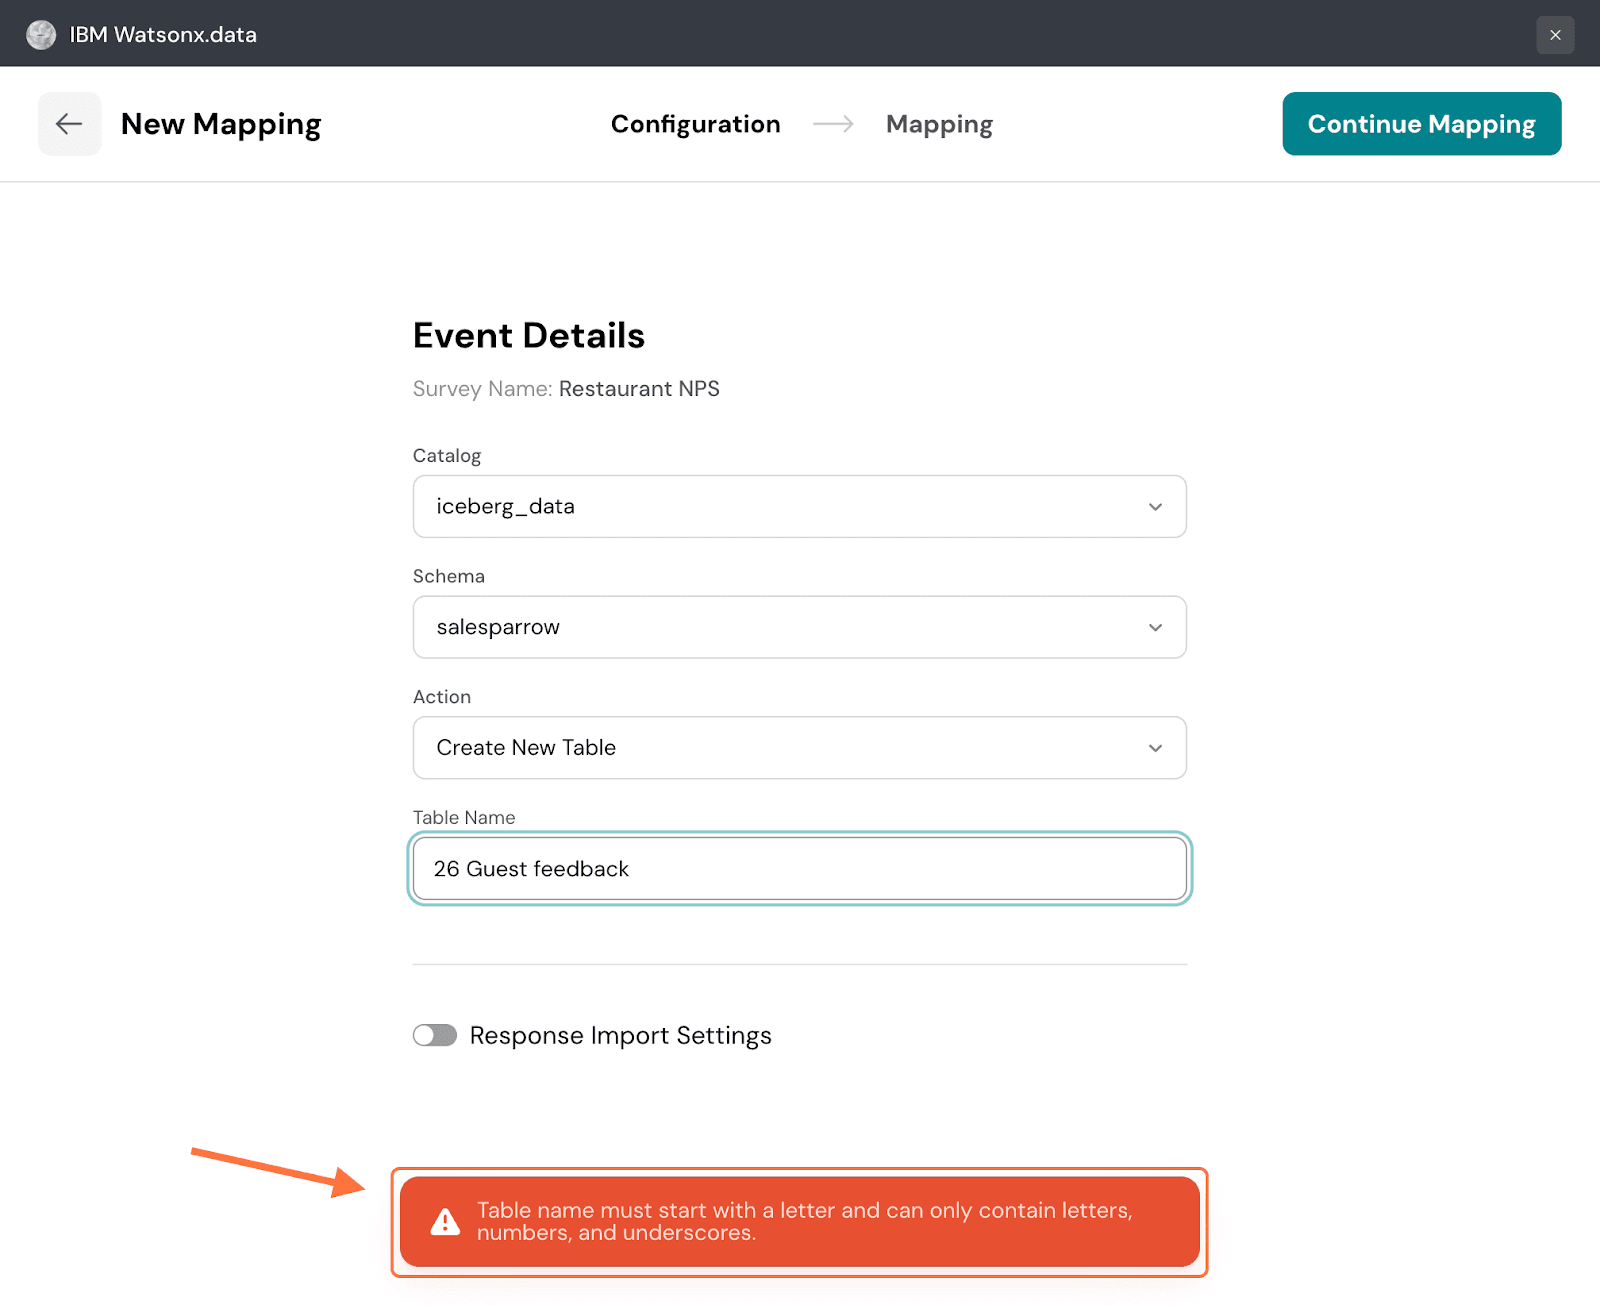
35. In the mapping section, the default option is to send all the response data. You can see all the response properties and their quantities. But if you want to be selective, click the button next to Send selected data.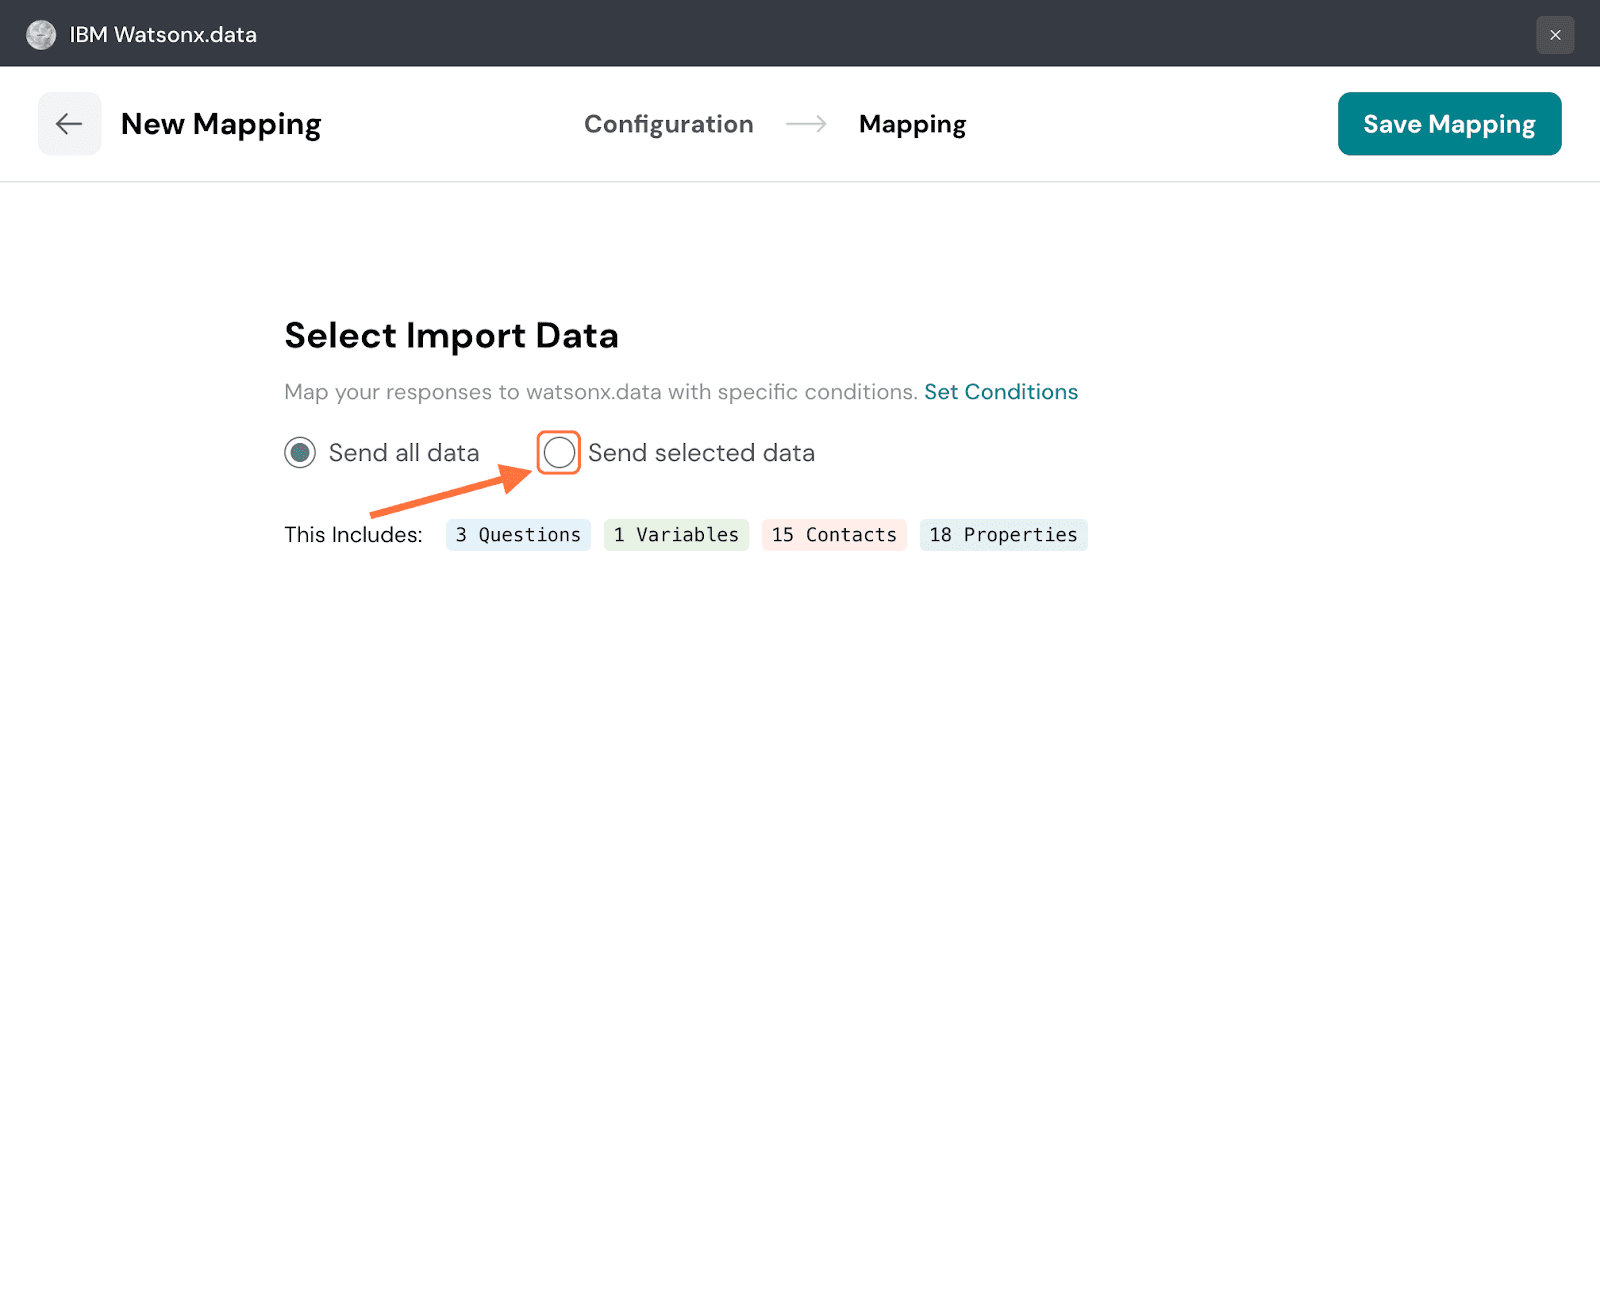
36. You will be shown a series of tabs for each response property. Each tab will have a list of items for that particular property. Click on the checkboxes of the items you want to import to IBM watsonx. Navigate through the respective tabs and select the ones you want. You can also use the search box to find items.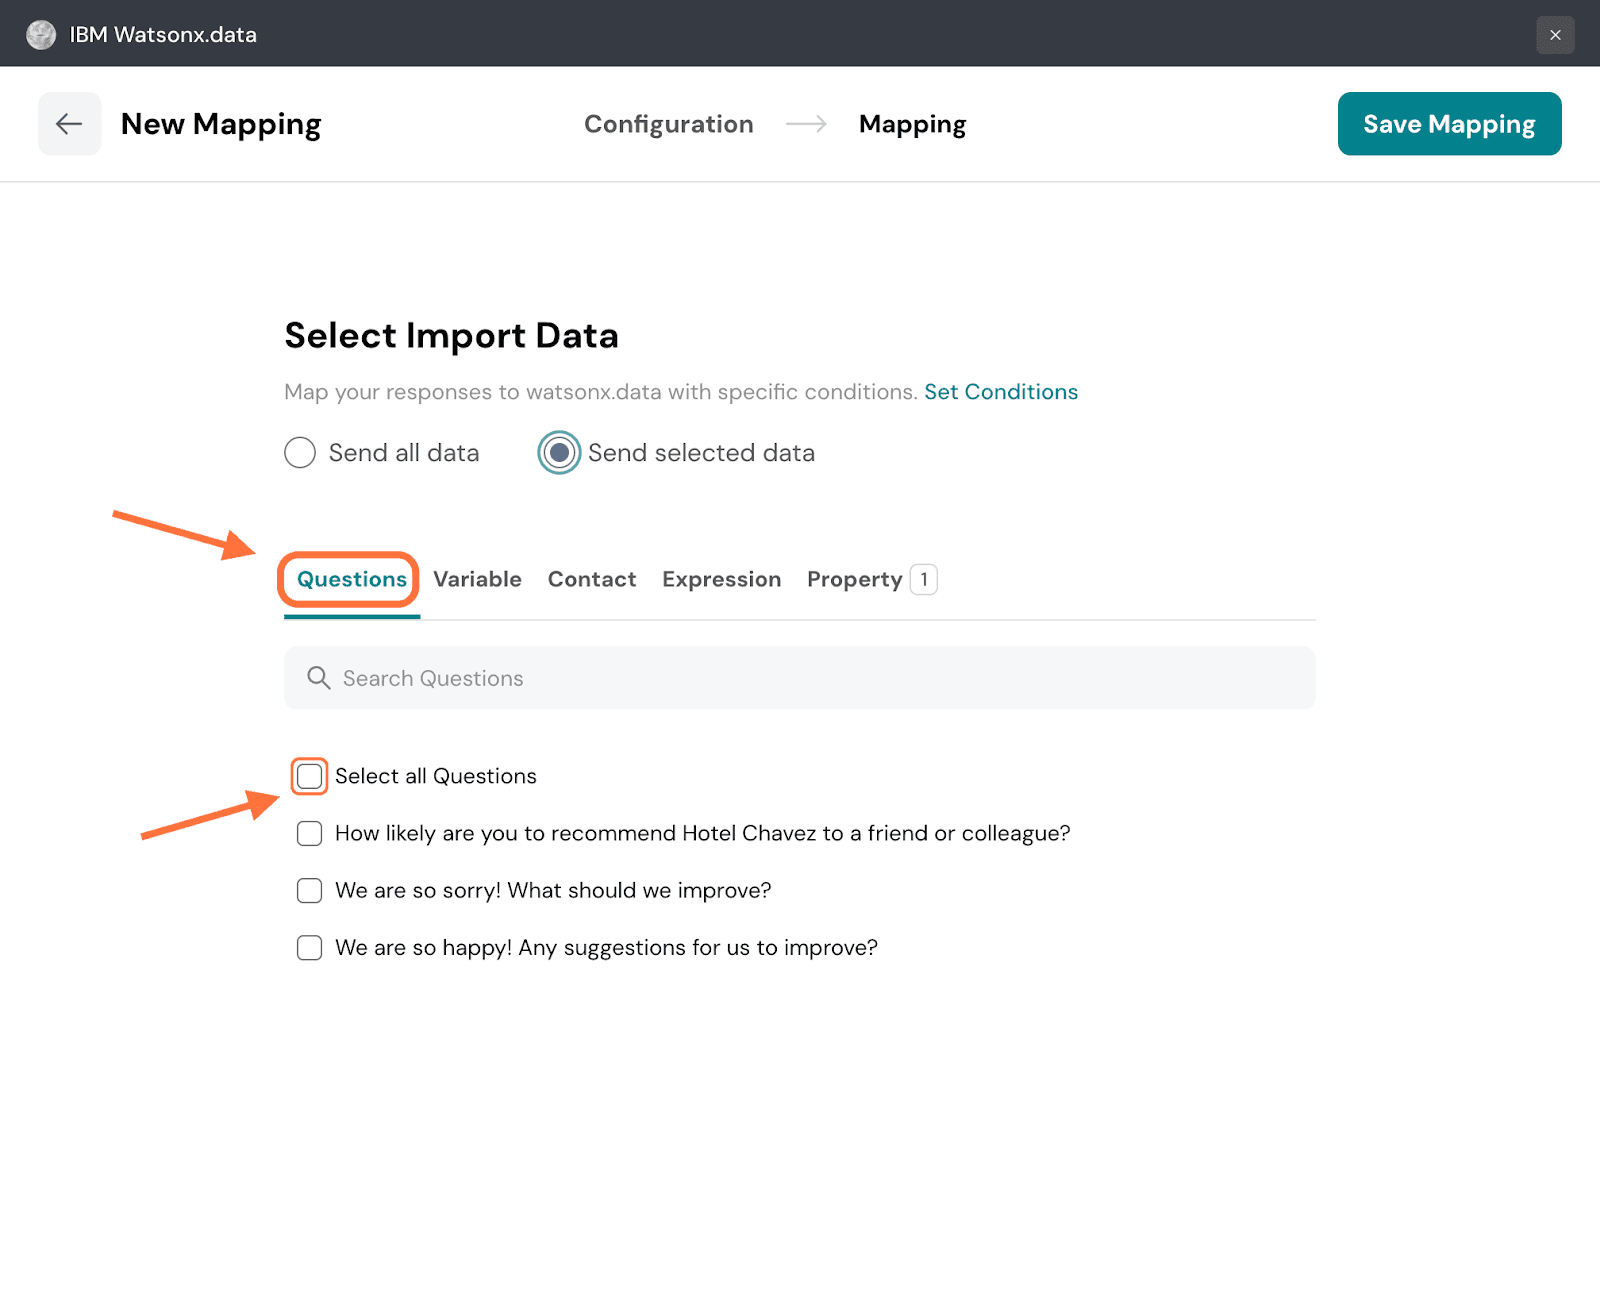
37. When you’re done, click on Save Mapping.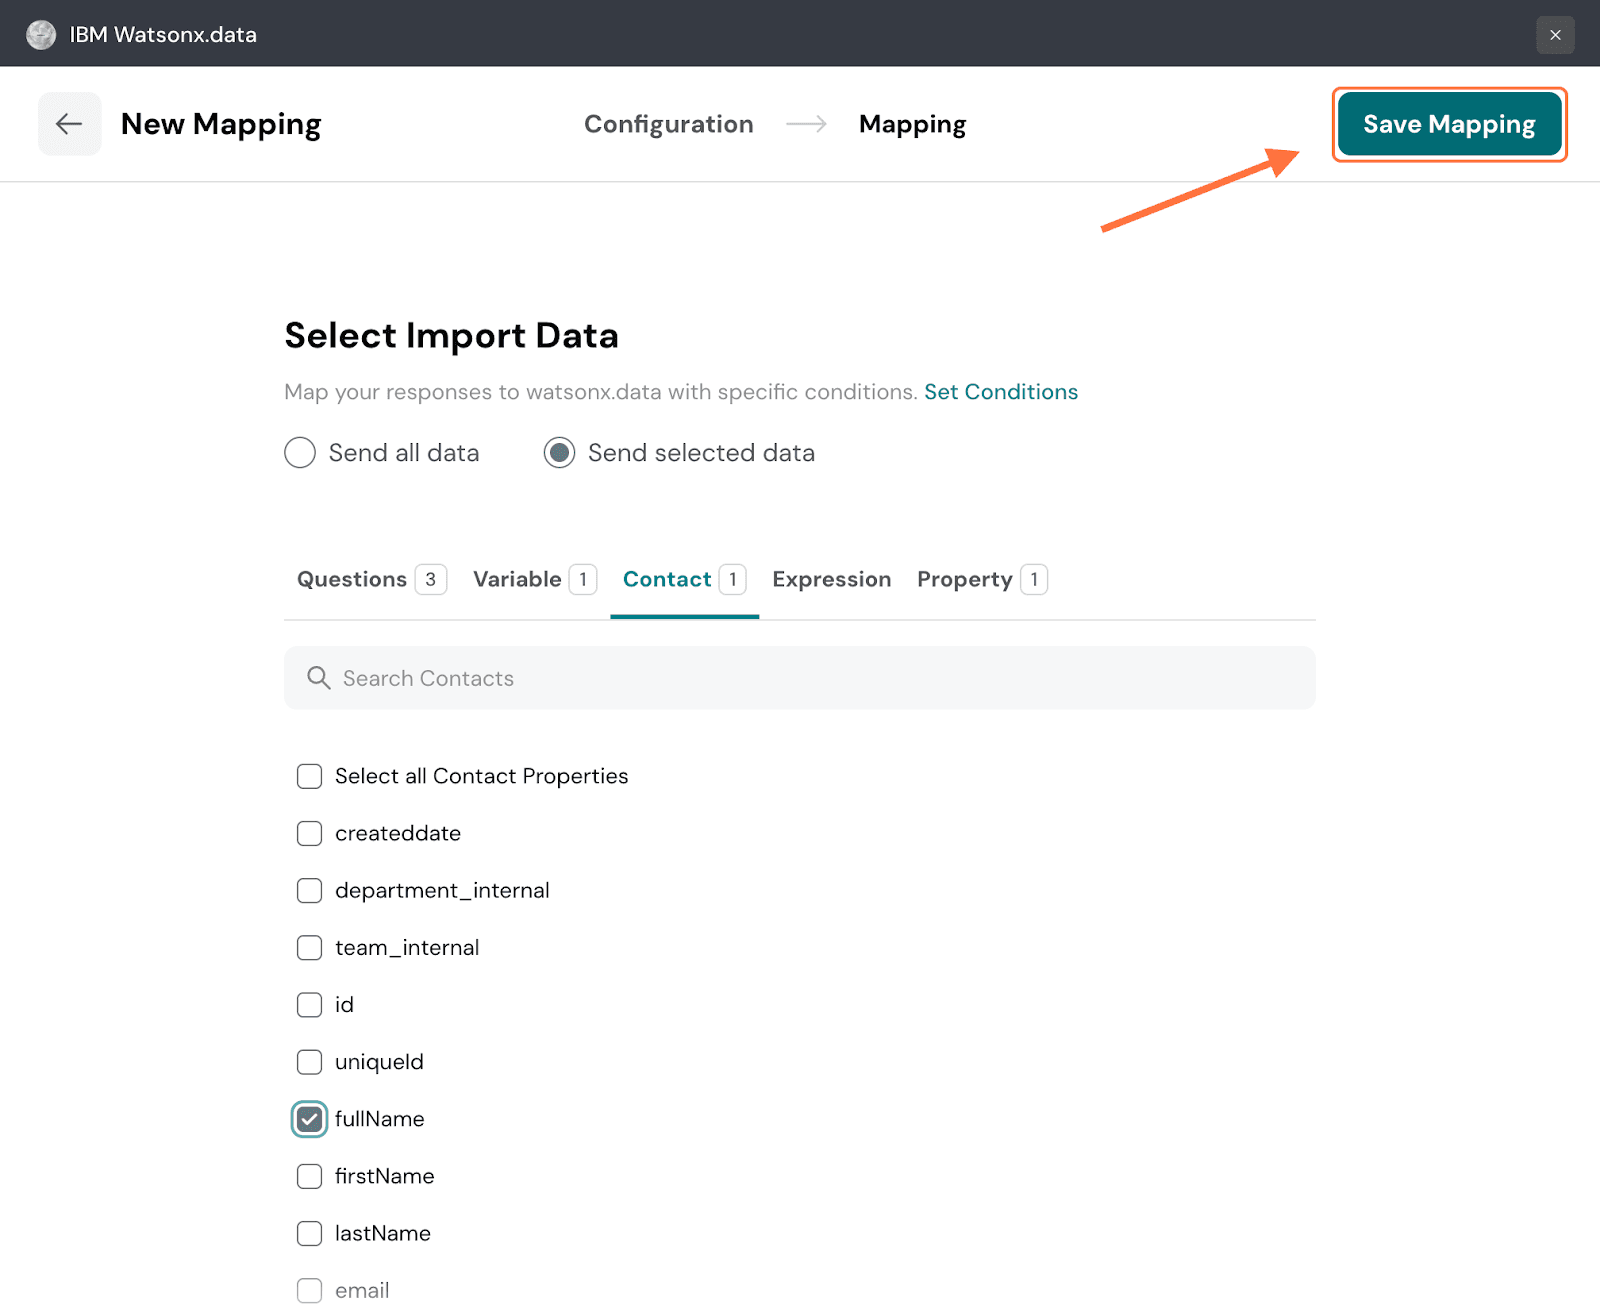
38. Create a name for the mapping and click on Save Mapping.
The SurveySparrow integration with IBM watsonx automatically delivers your customer feedback directly into your AI and data platform, creating a seamless and reliable pipeline for experience data. By replacing manual exports with automated, standardized data flow, you ensure your AI models are continuously trained on fresh, accurate customer insights — without ongoing engineering effort. This powerful connection gives you a single point of entry for all survey responses, unlocking faster and smarter AI-driven decisions.
Feel free to reach out to our community, if you have any questions!
Powered By SparrowDesk