
Integrating Segment with SurveySparrow
Segment is a Customer Data Platform (CDP) that enables you to collect, clean and control customer data. By integrating Segment with SurveySparrow, you can:
- Push survey data to Segment
- Trigger surveys based on events inside Segment
- Add contacts in SurveySparrow based on Segment events
Some example use-cases where this would be valuable include:
- Combining CX data with product usage data in Segment
- Triggering NPS surveys when in-product event occurs (eg: a user completes 10 orders on an e-commerce app)
- Updating new customer contacts in SurveySparrow whenever they are created in the CRM, so they are automatically queued up for onboarding surveys.
In this article, we’ll show you how to set up the Segment integration through the following processes:
- Creating a custom app in SurveySparrow
- Adding SurveySparrow as Segment Source
- Connecting SurveySparrow to Segment
- Configuring the survey source
- Creating survey triggers in the SurveySparrow Destination
- Setting up contact mapping inside the SurveySparrow Destination
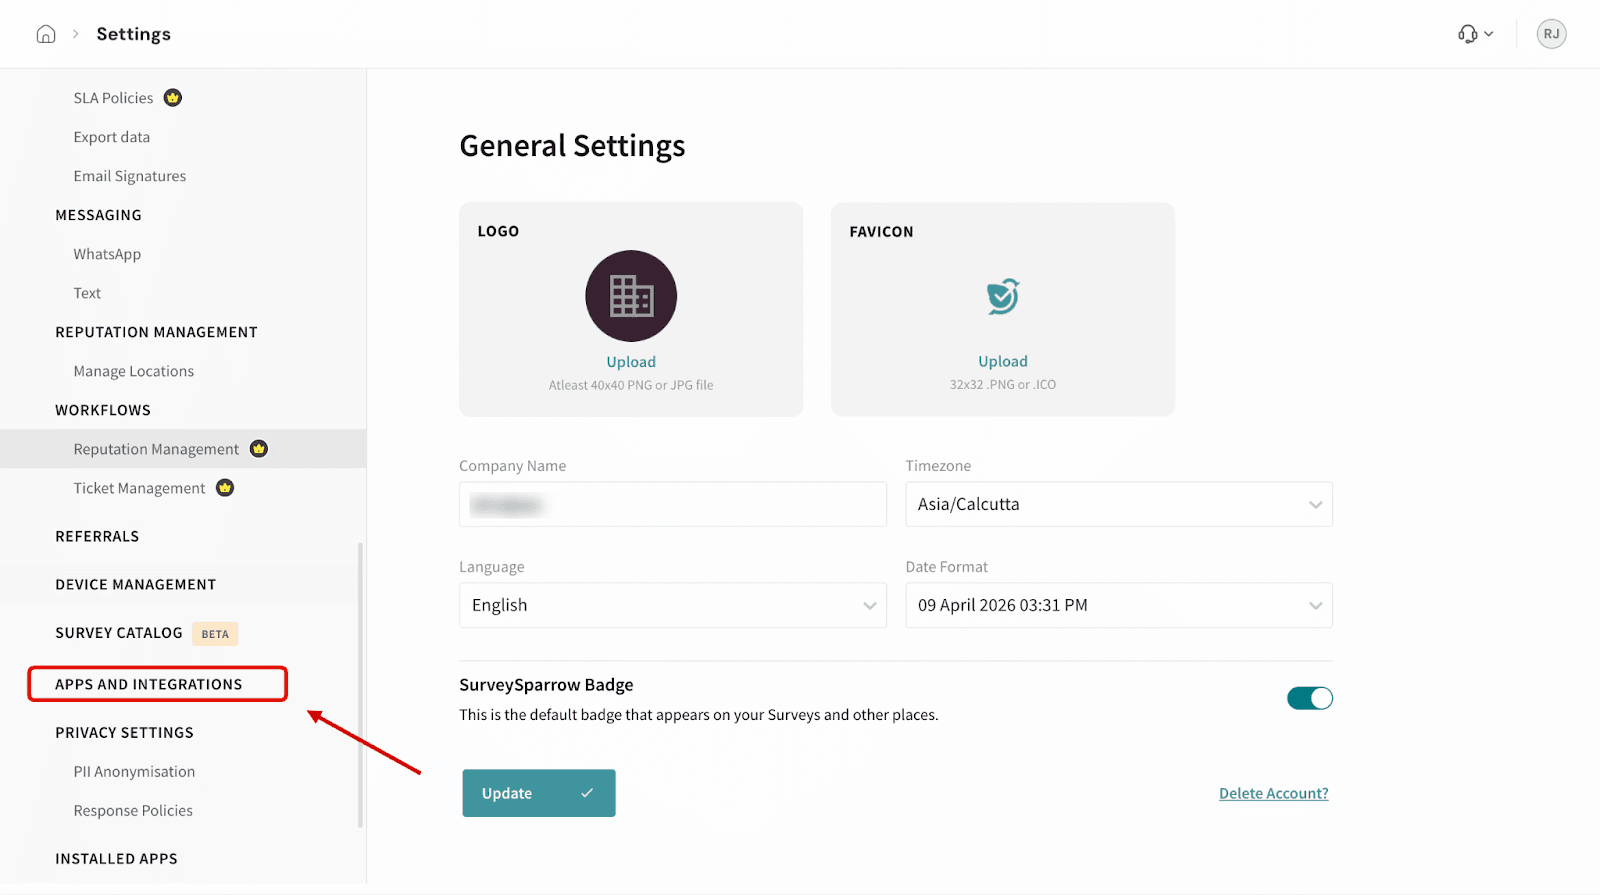
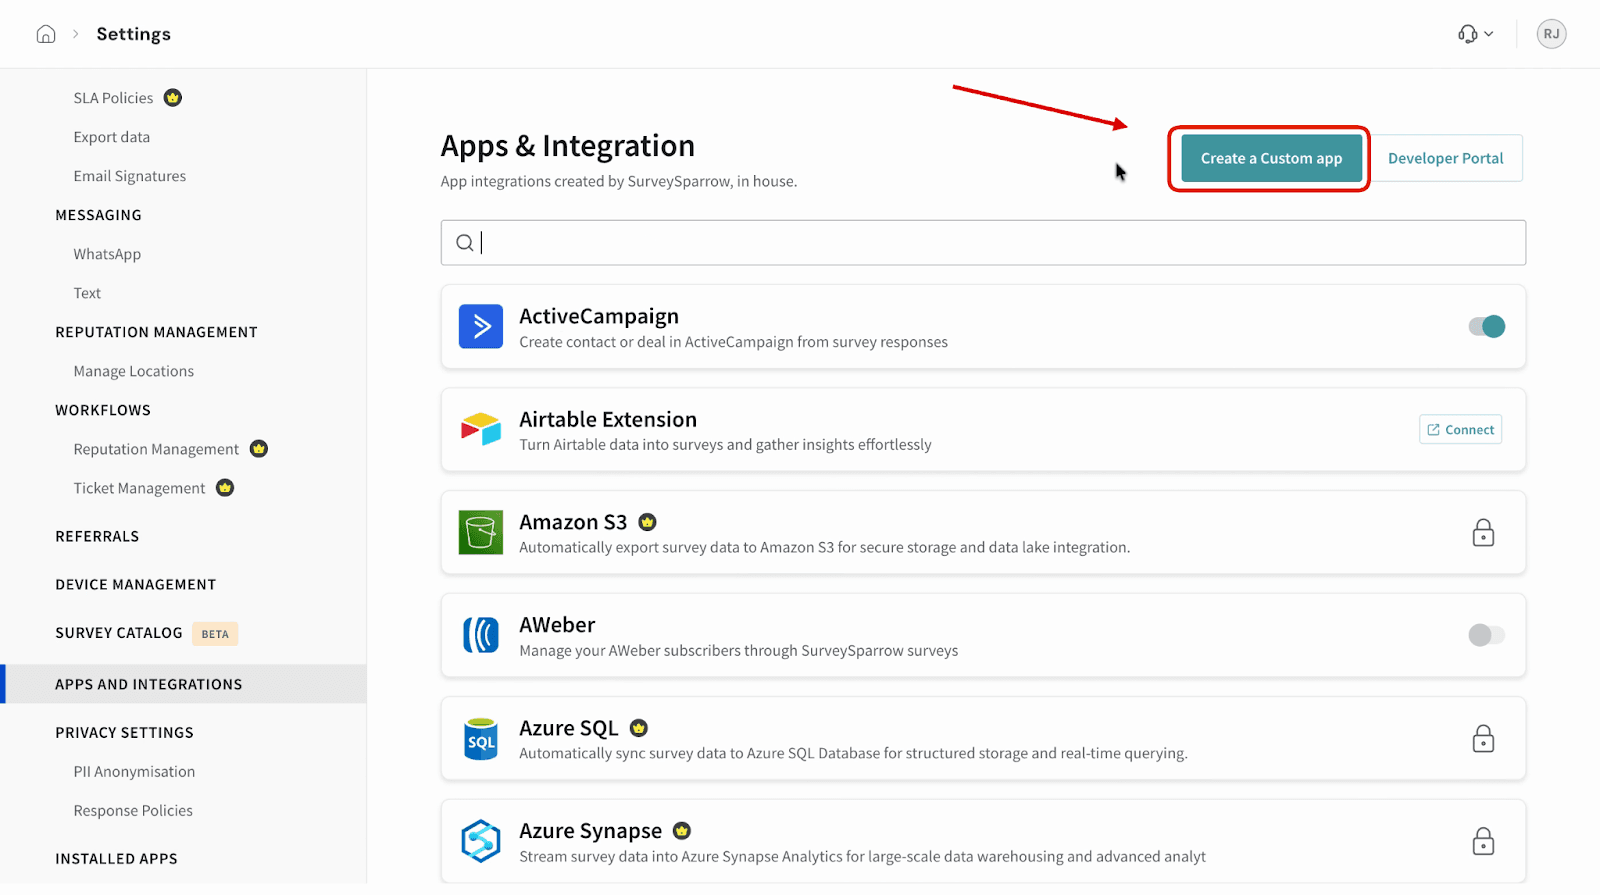
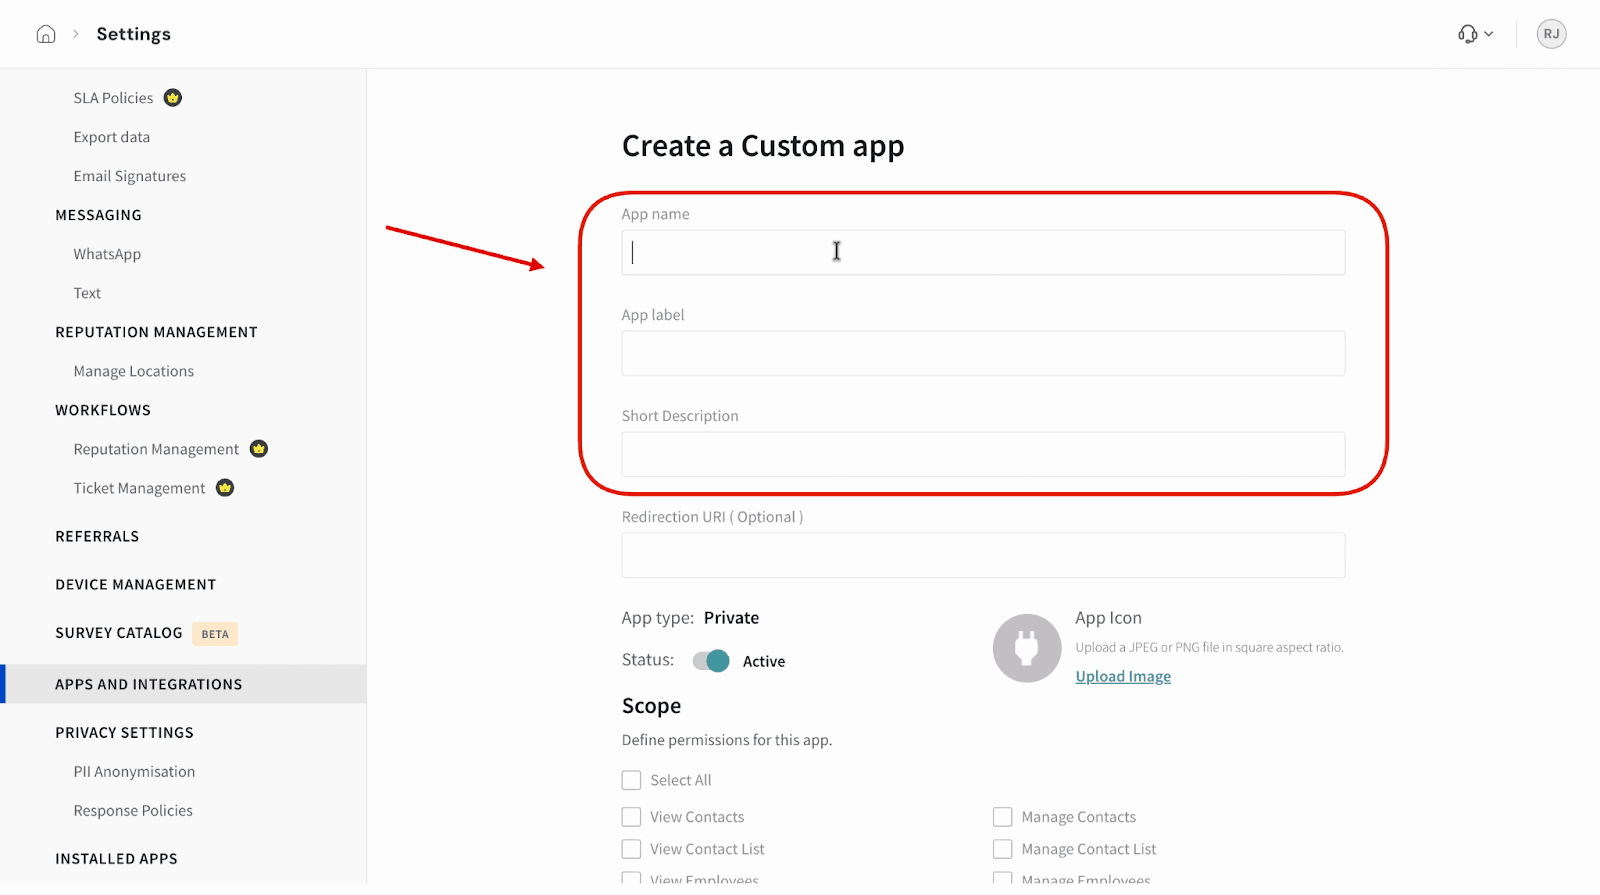
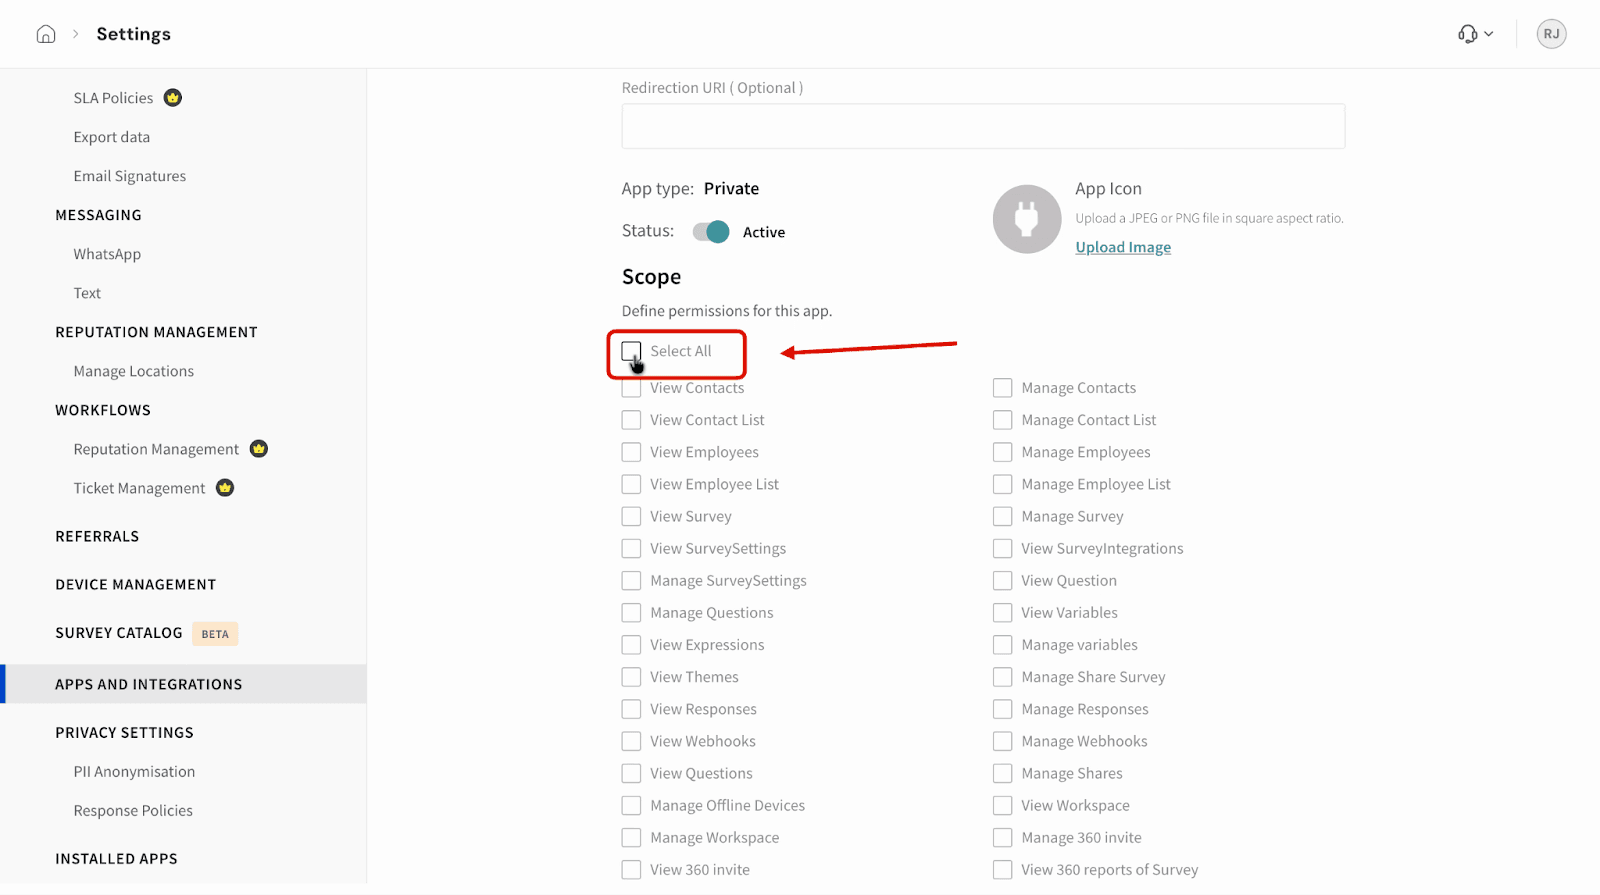
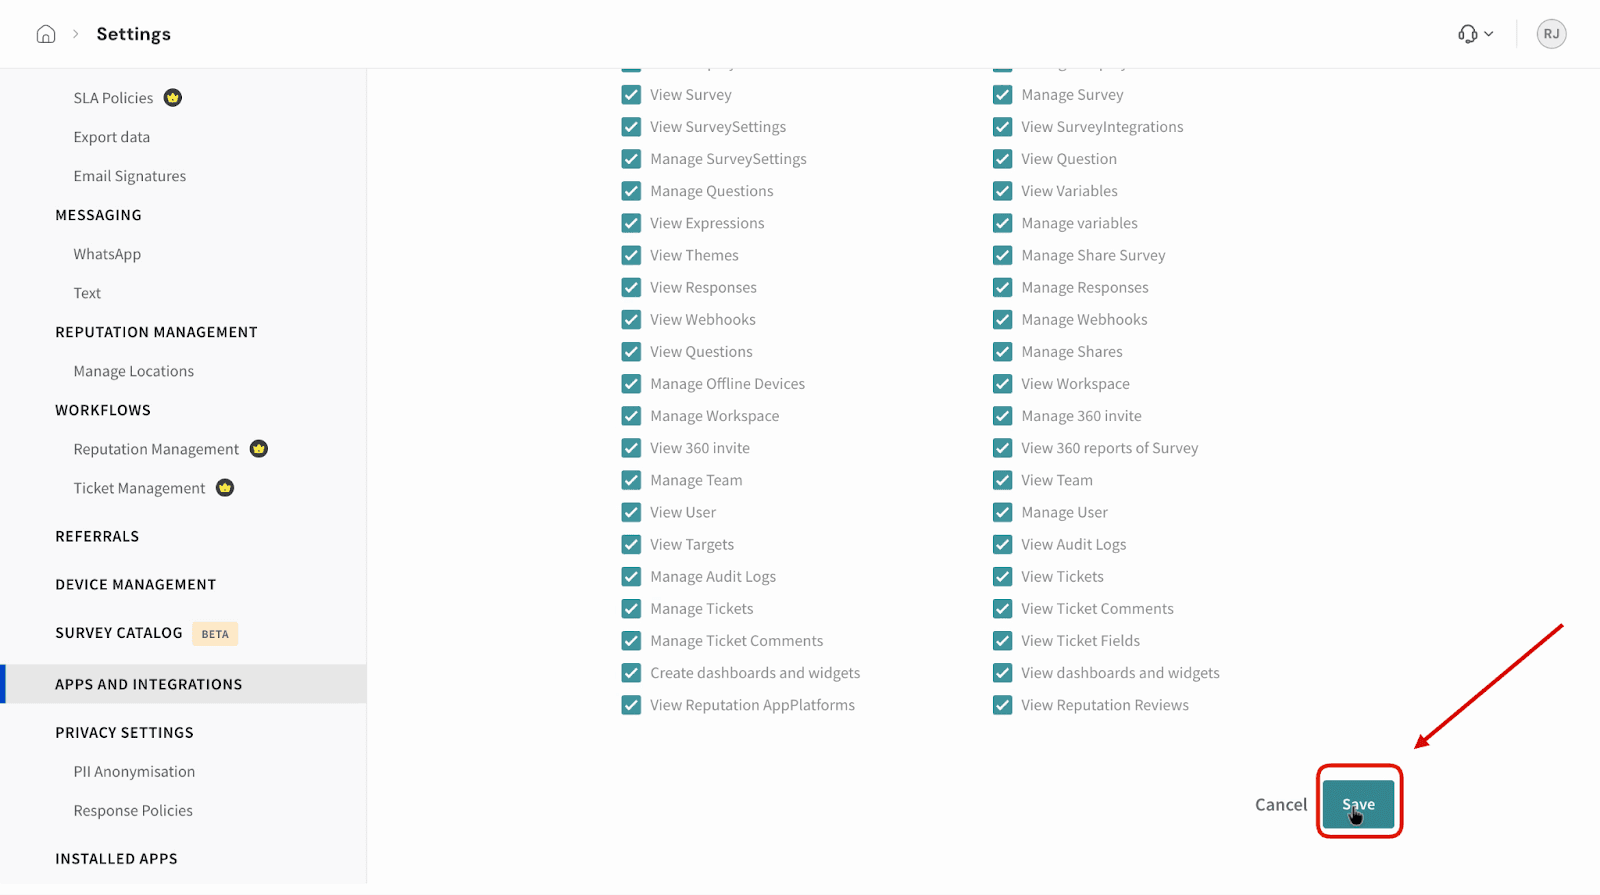
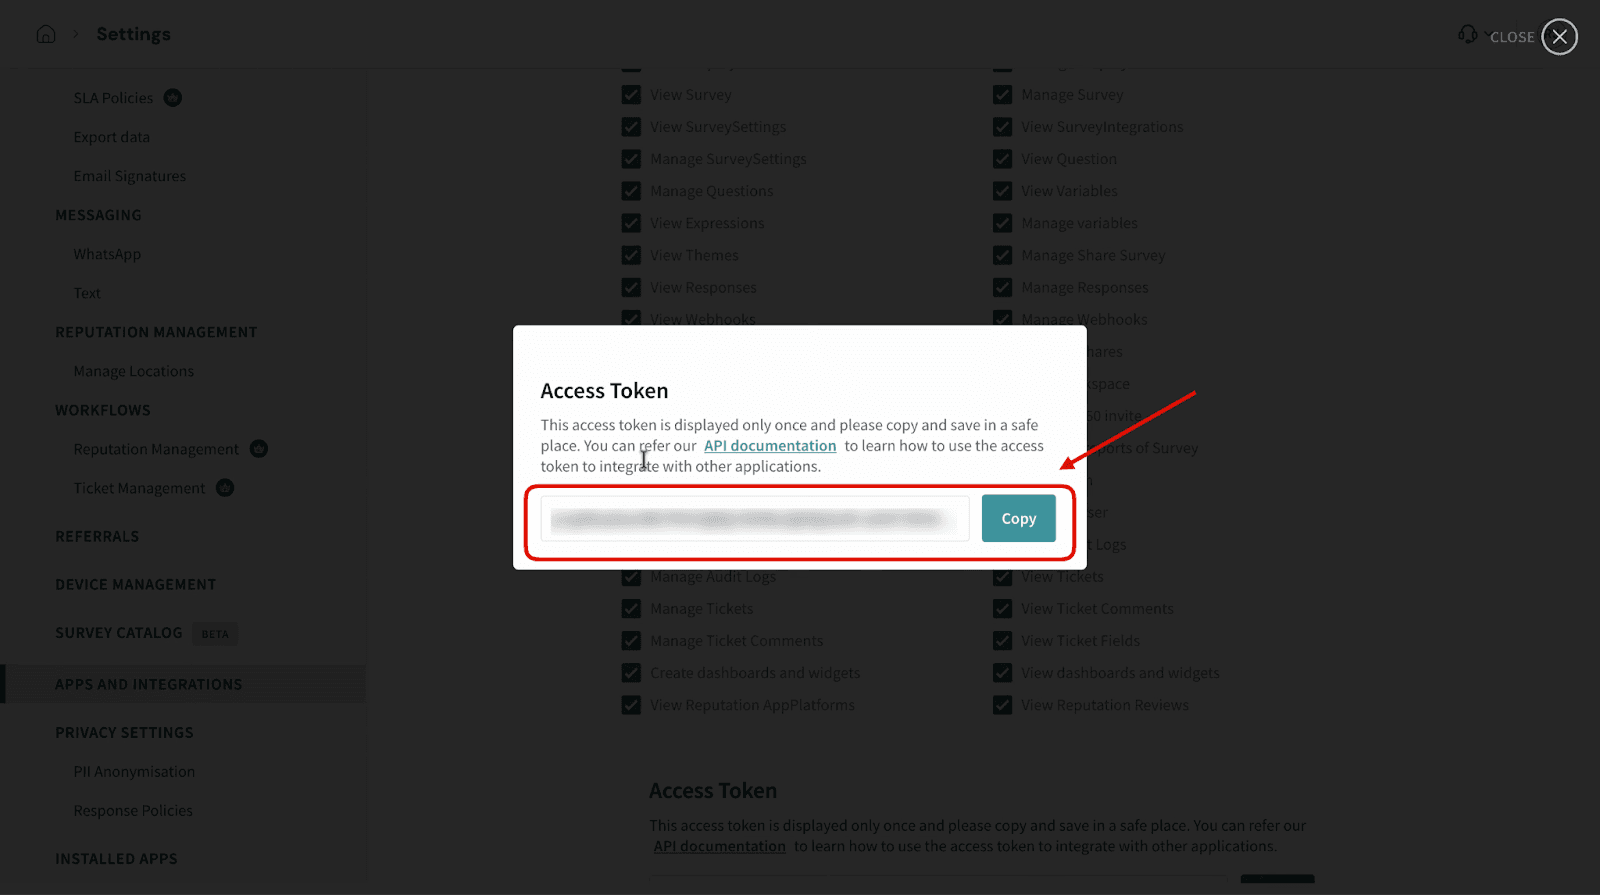
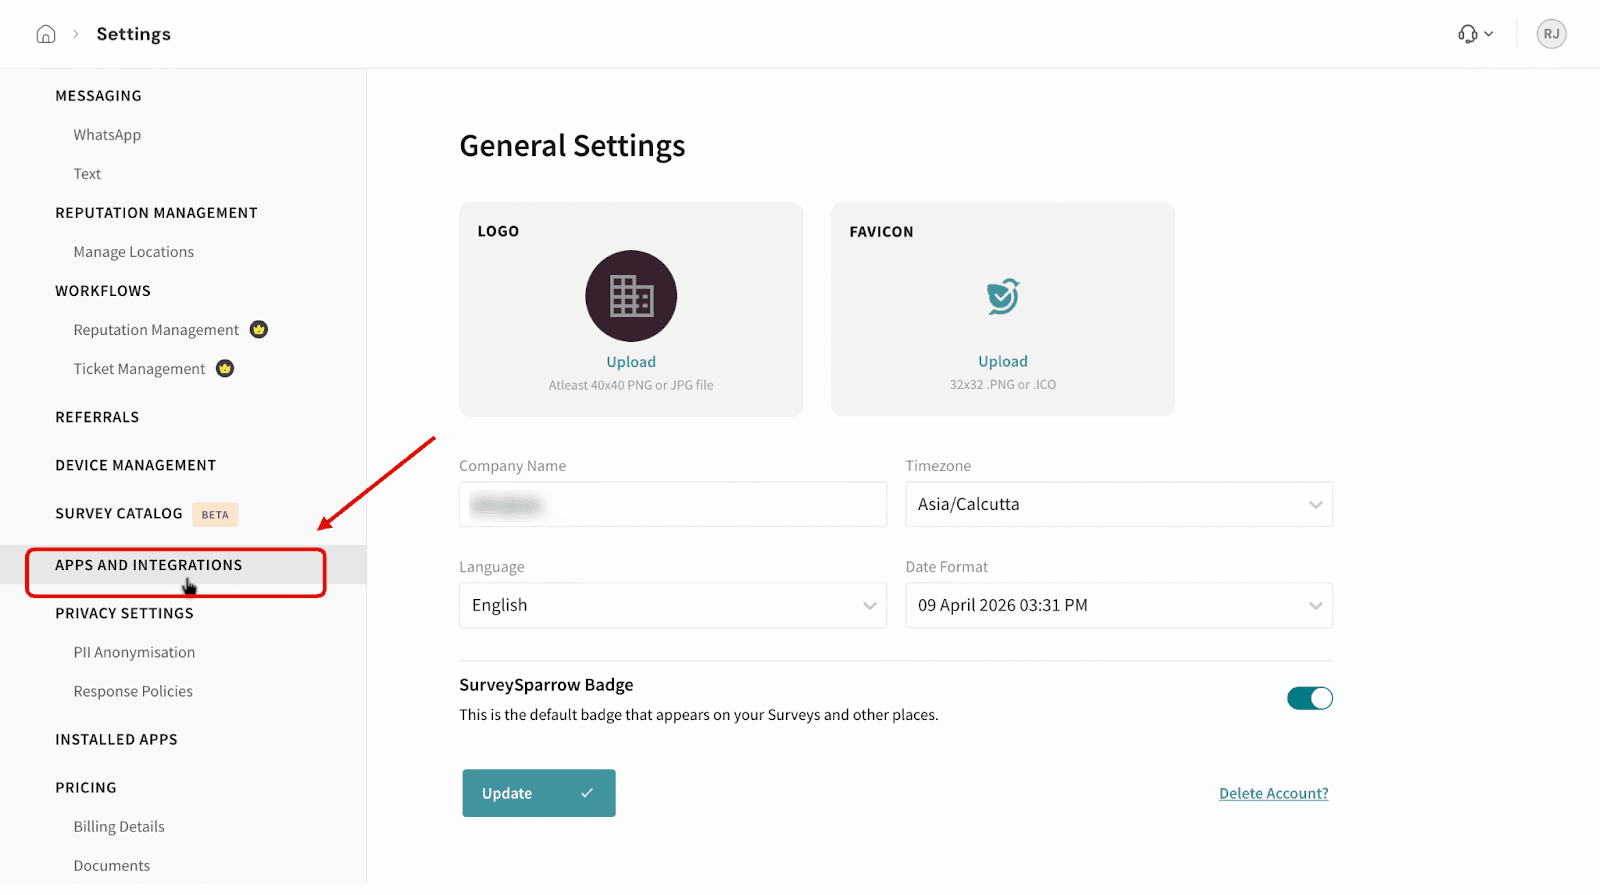
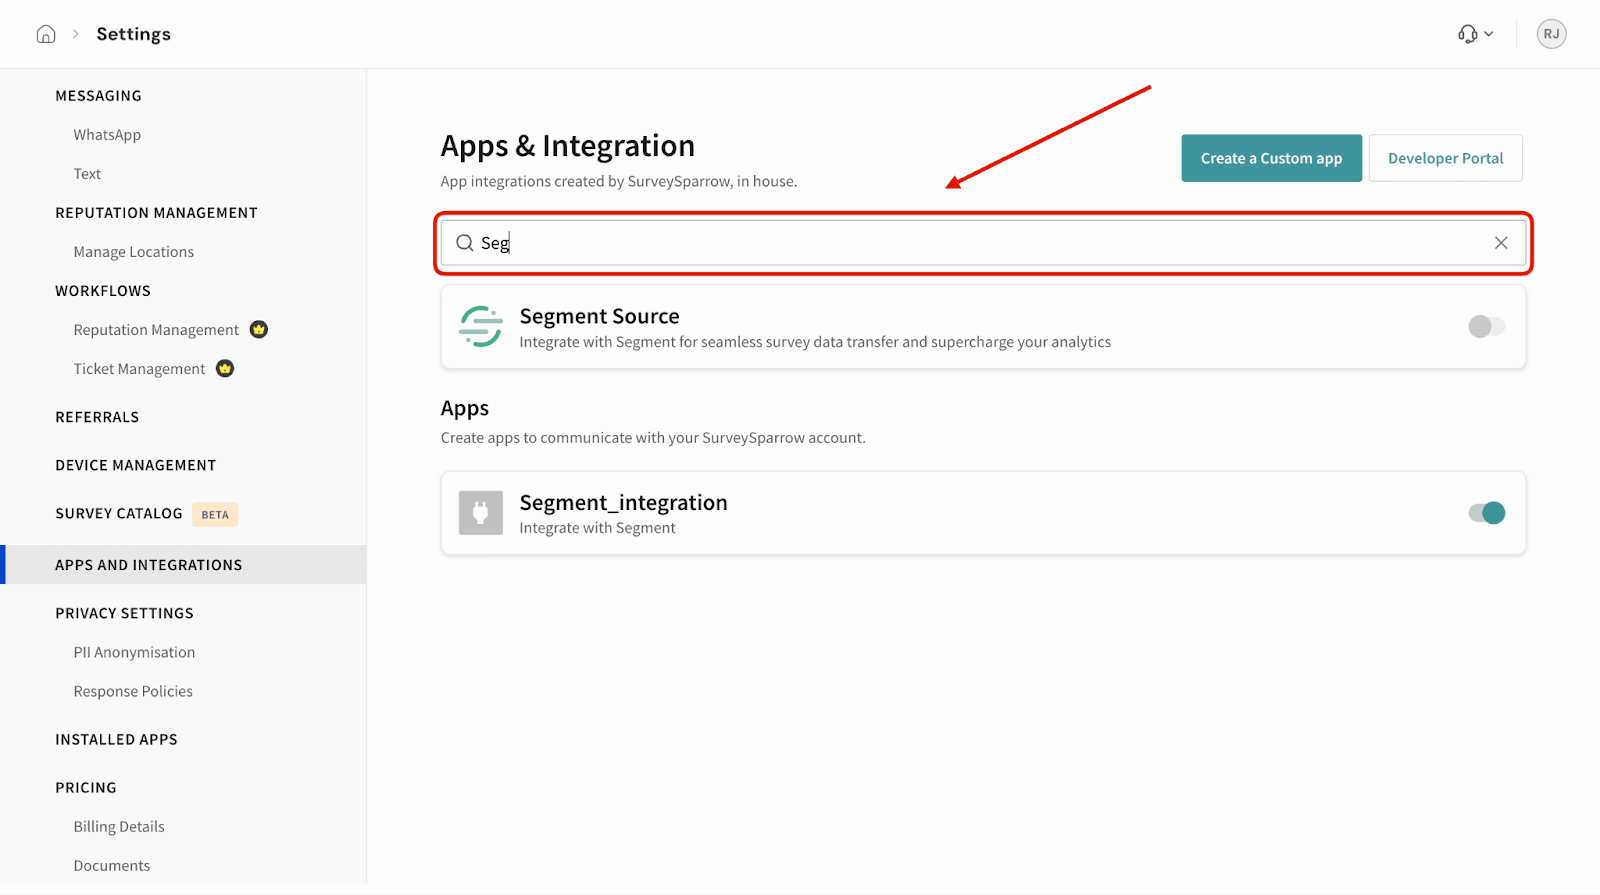
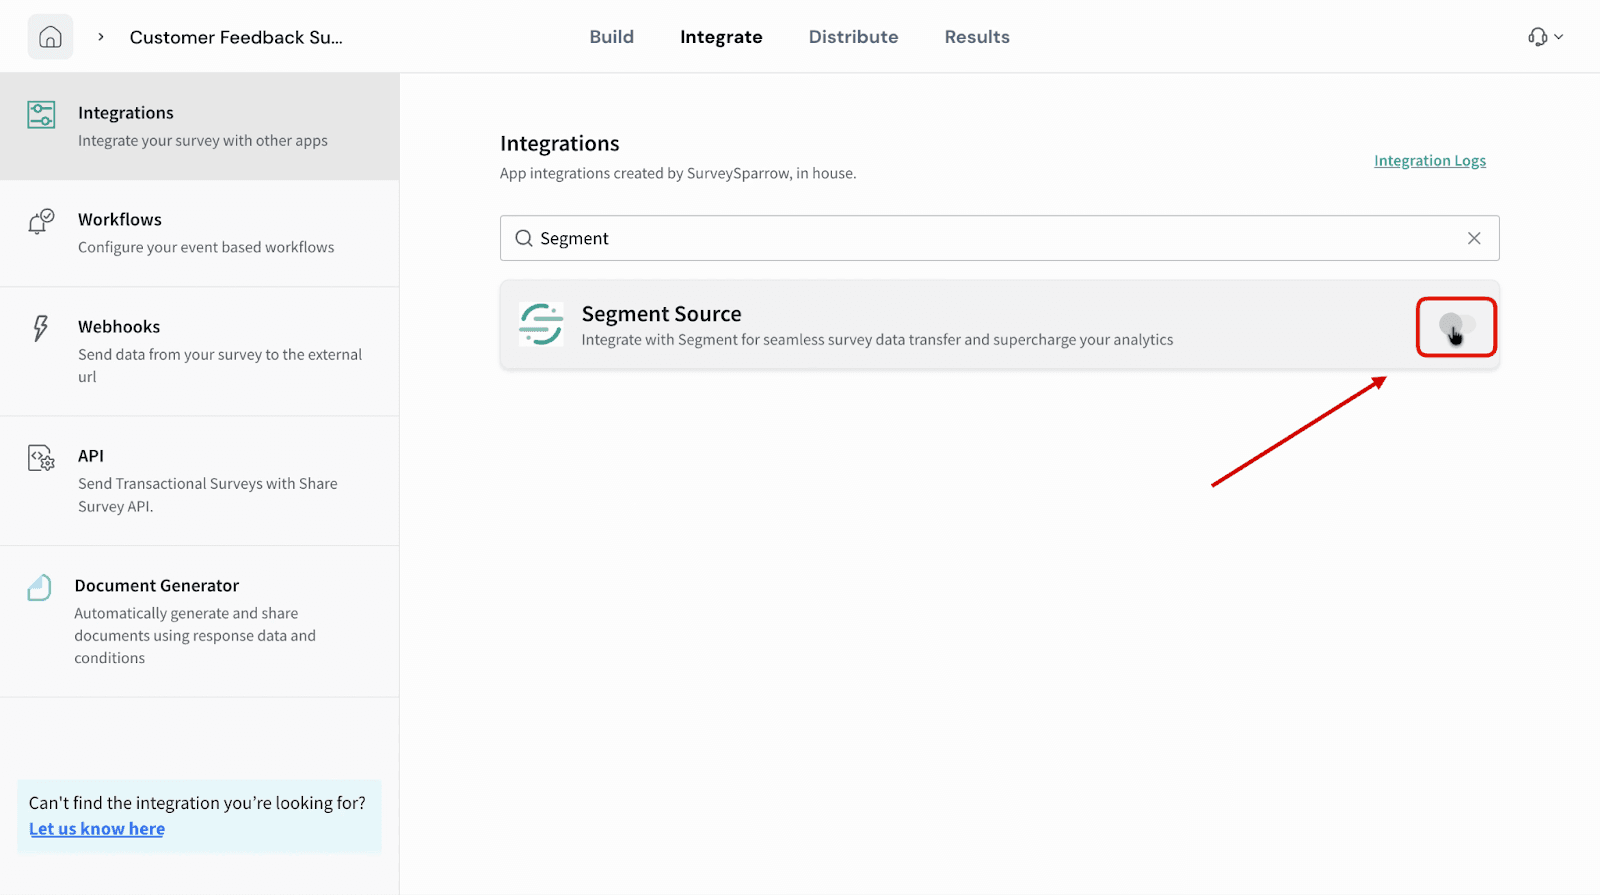
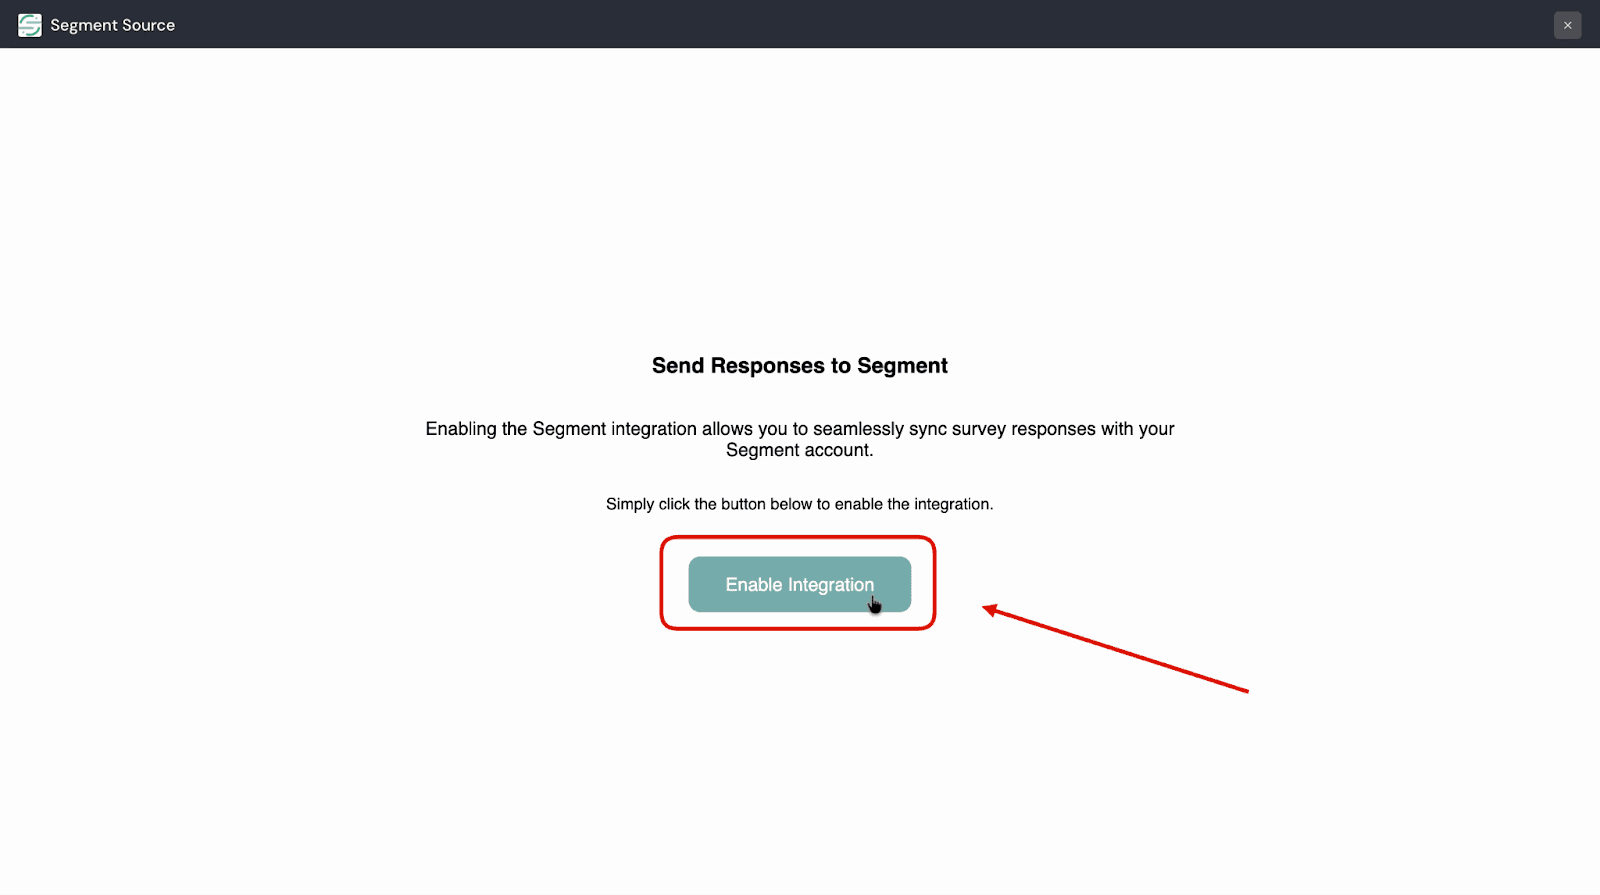
Creating a custom app in SurveySparrow
1. Open your SurveySparrow account and click the settings icon.

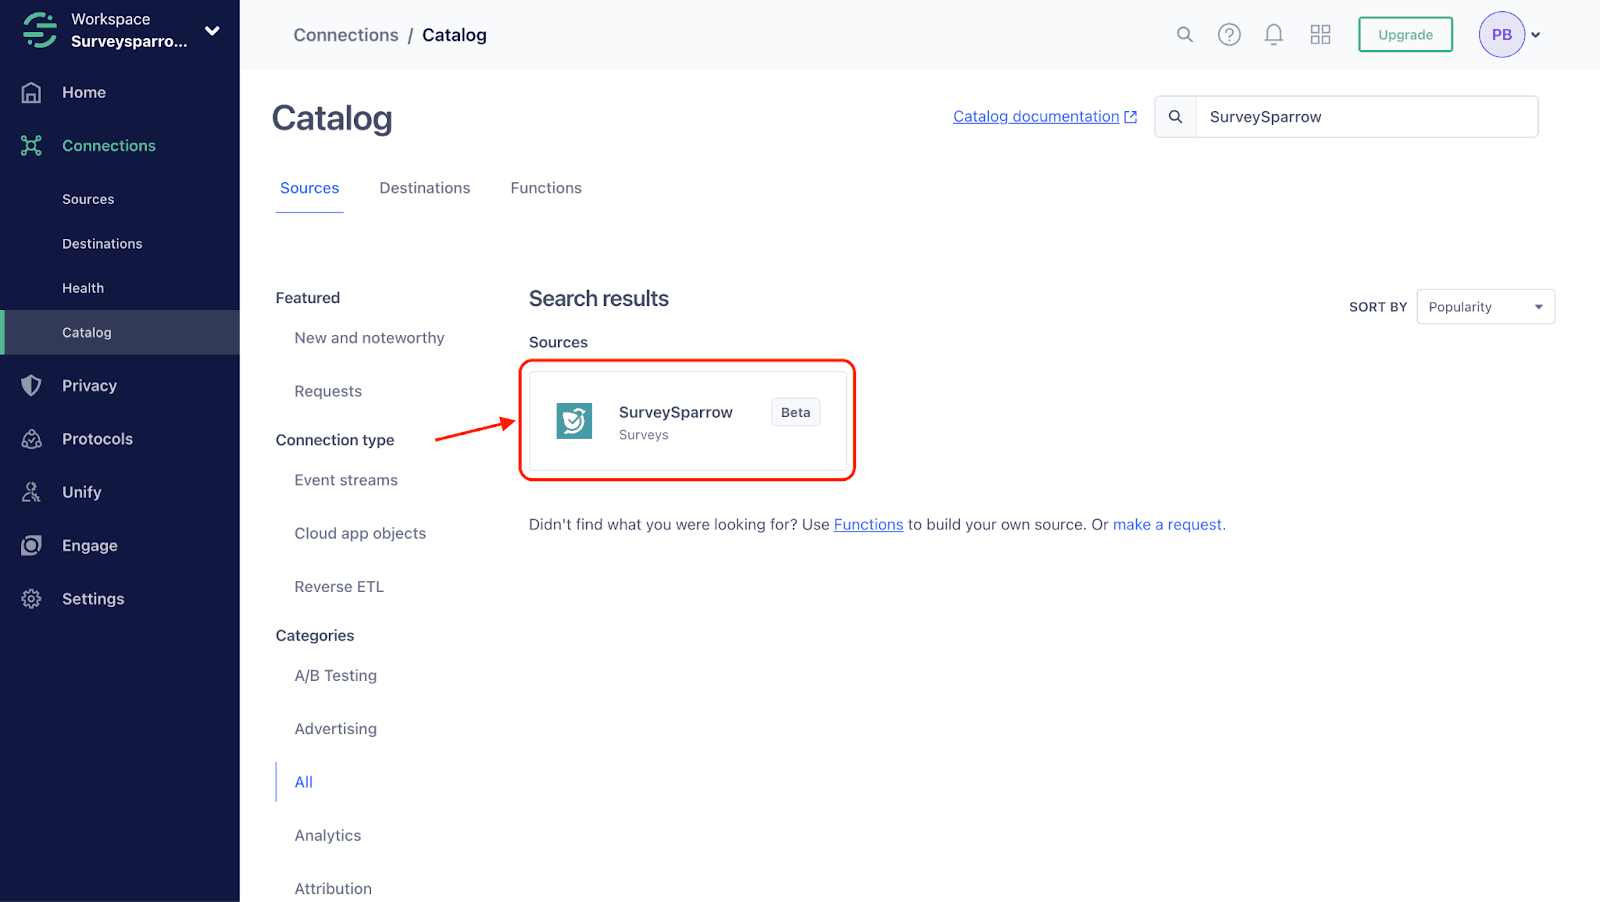
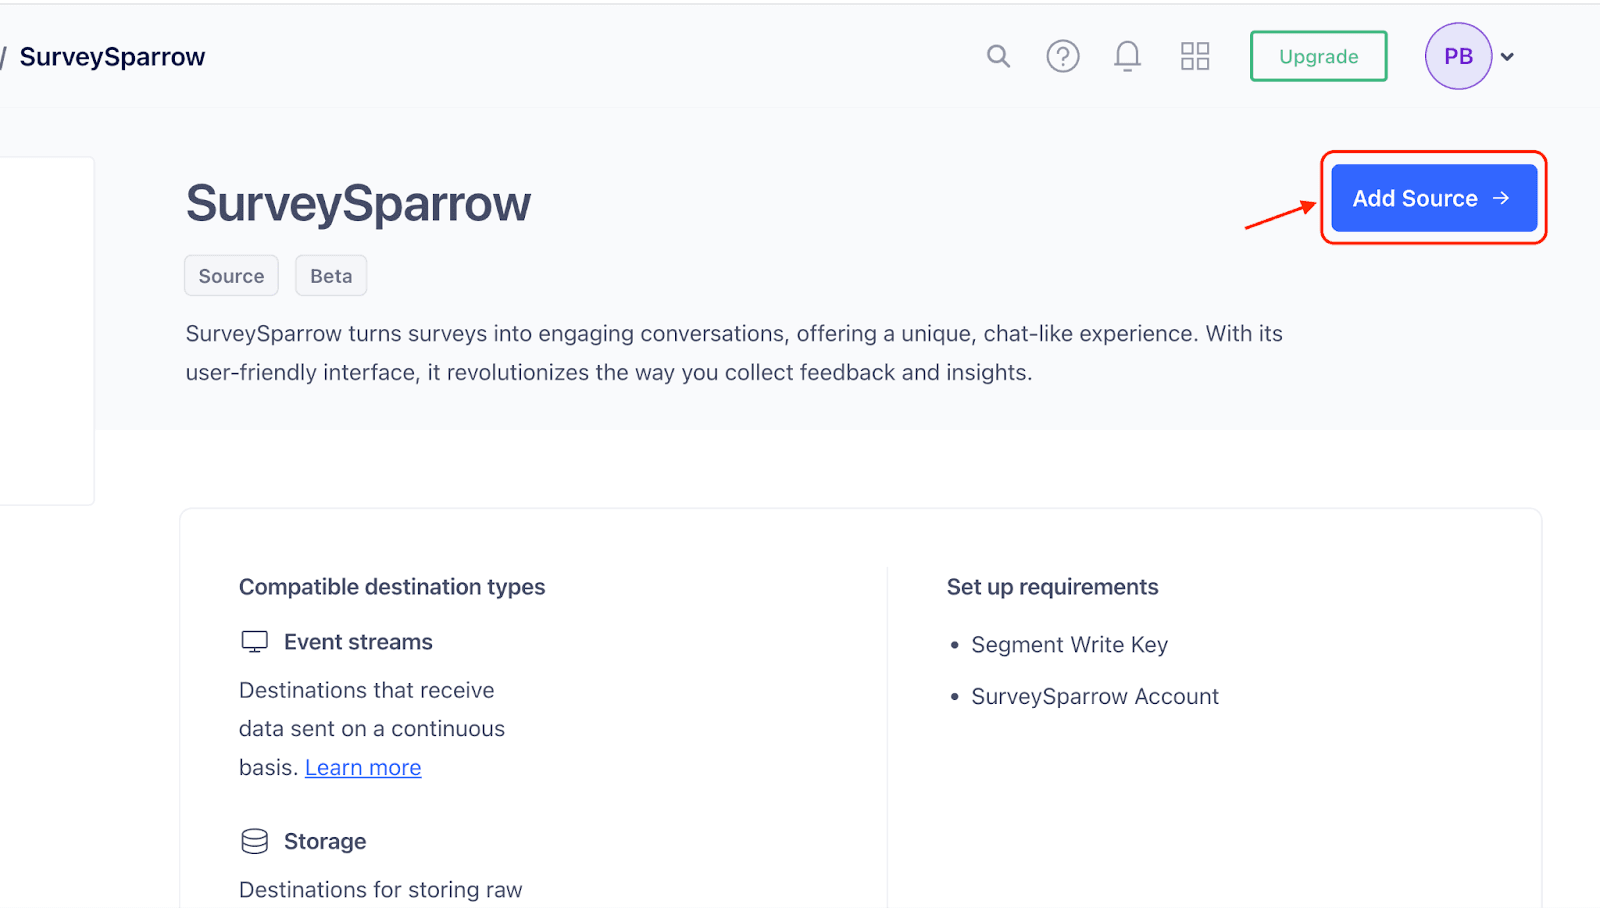
Adding SurveySparrow as Segment Source
1. Log in to your Segment account and navigate to the Catalog section.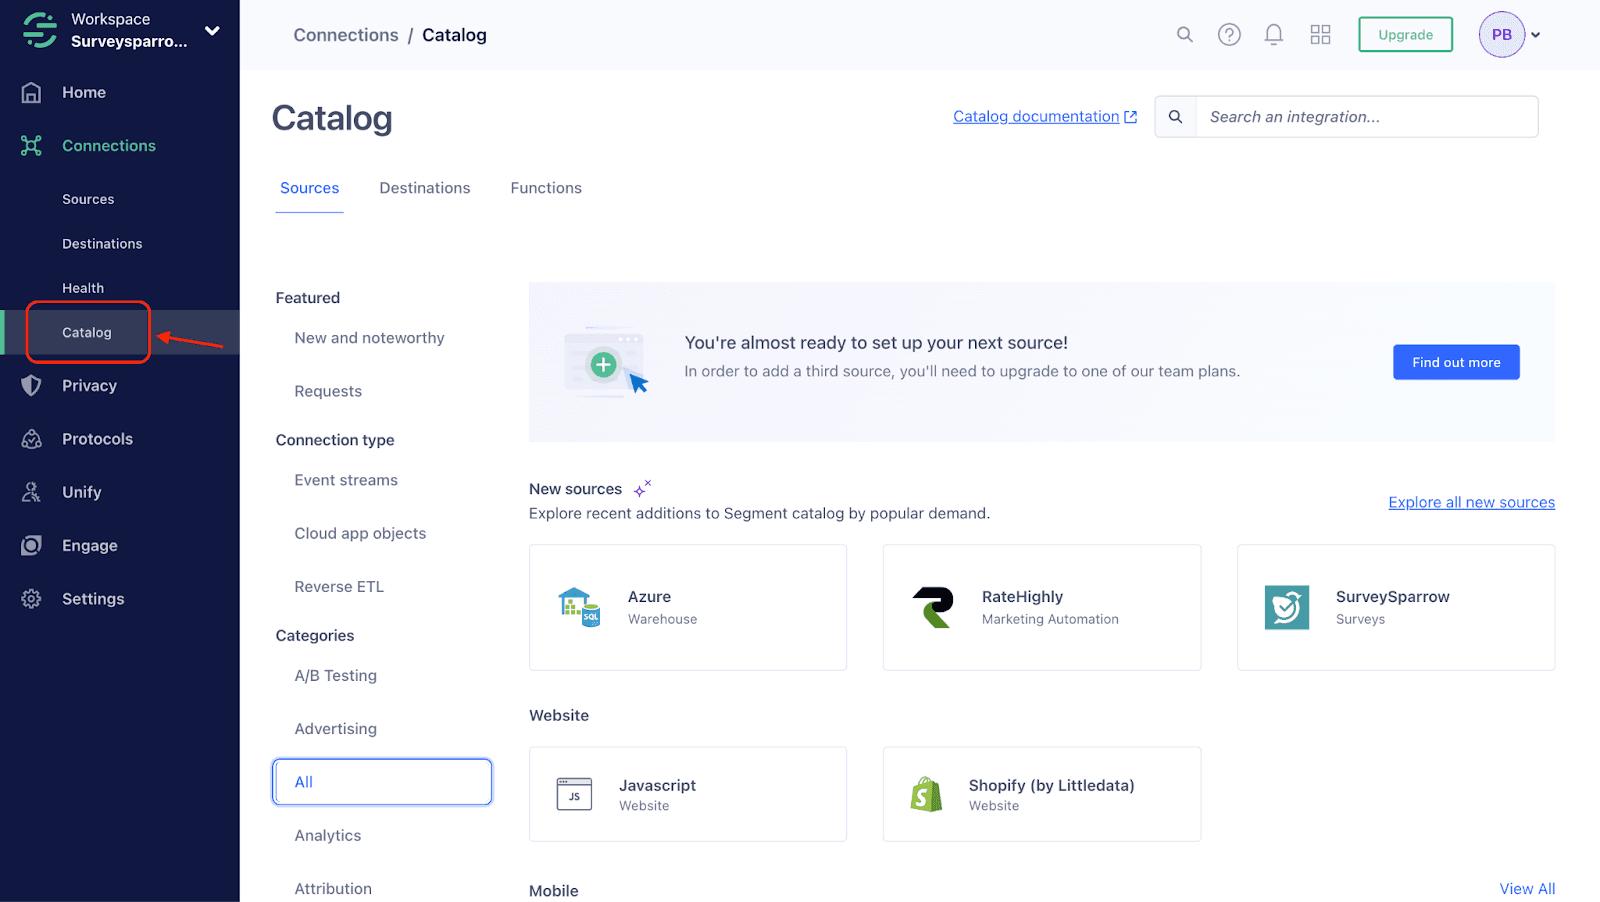


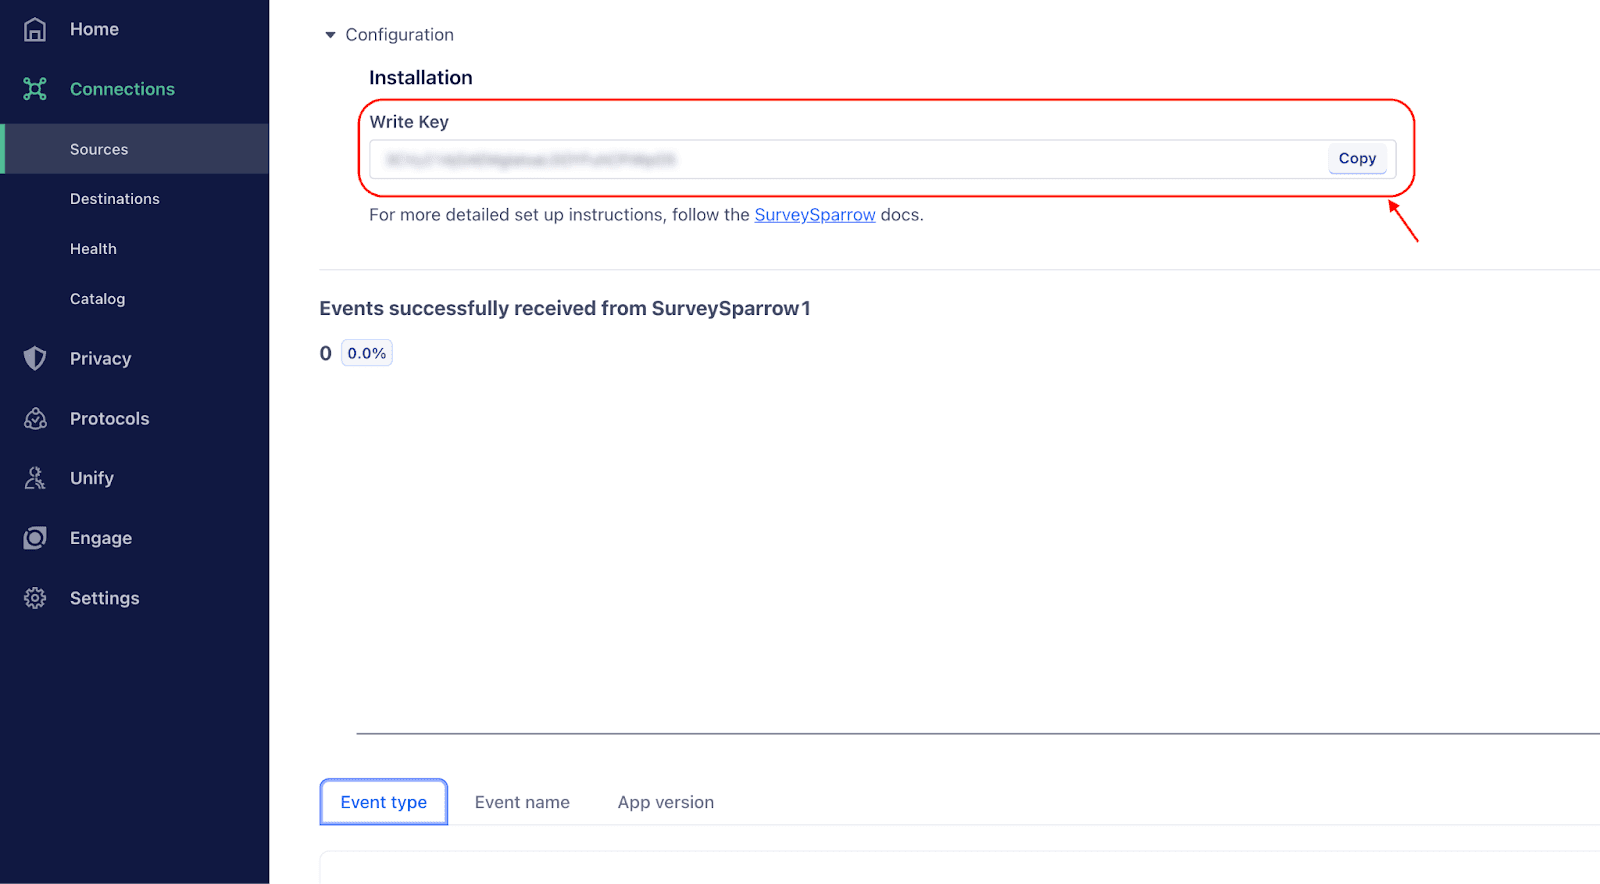
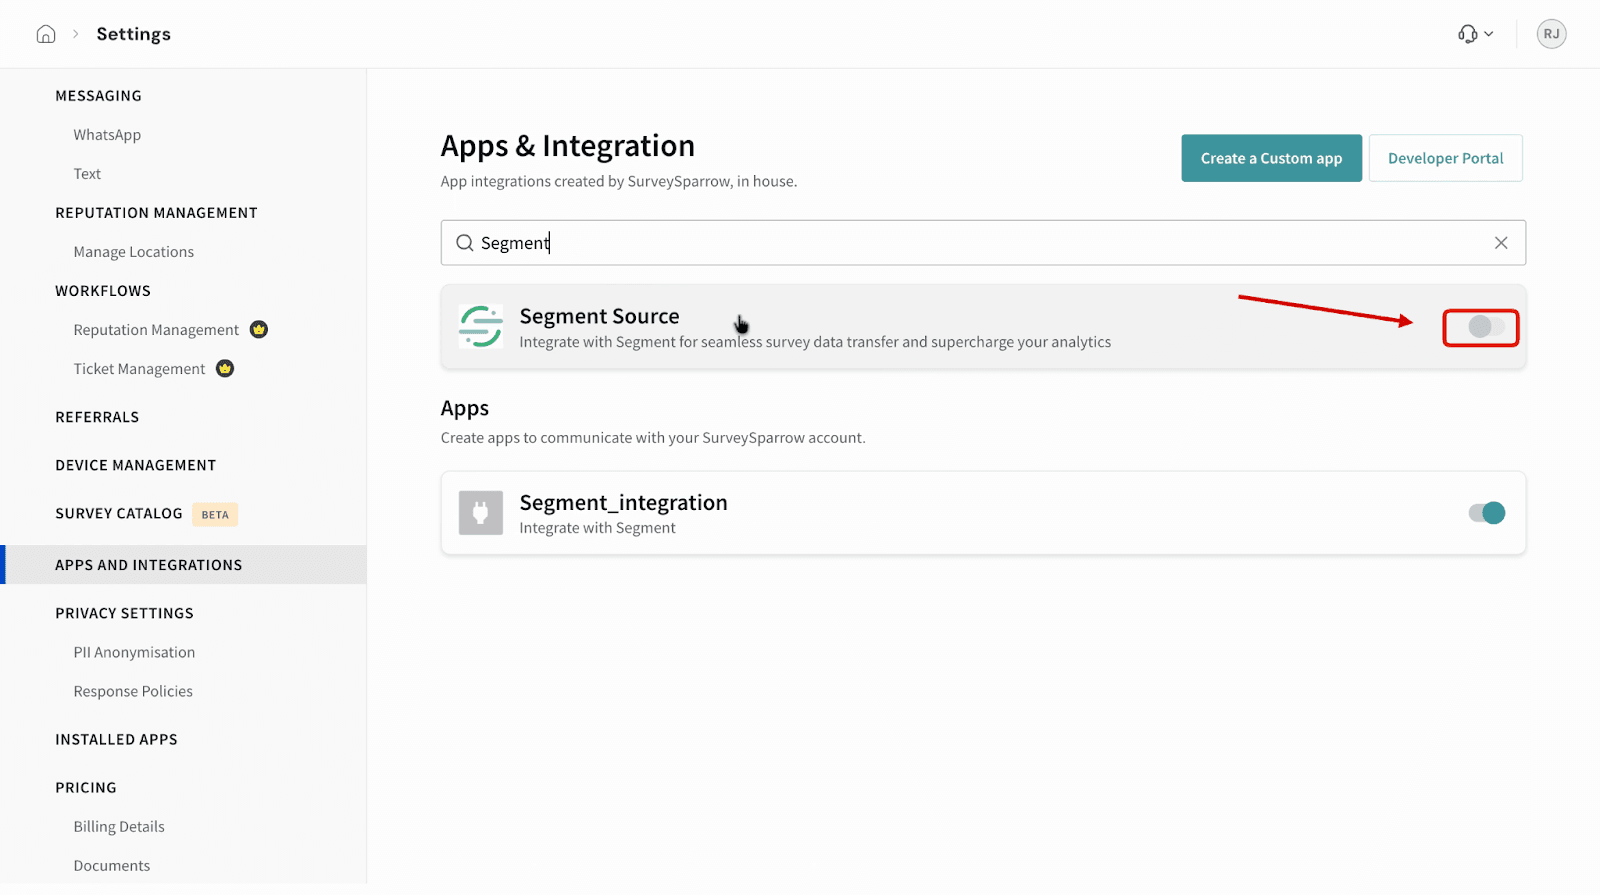
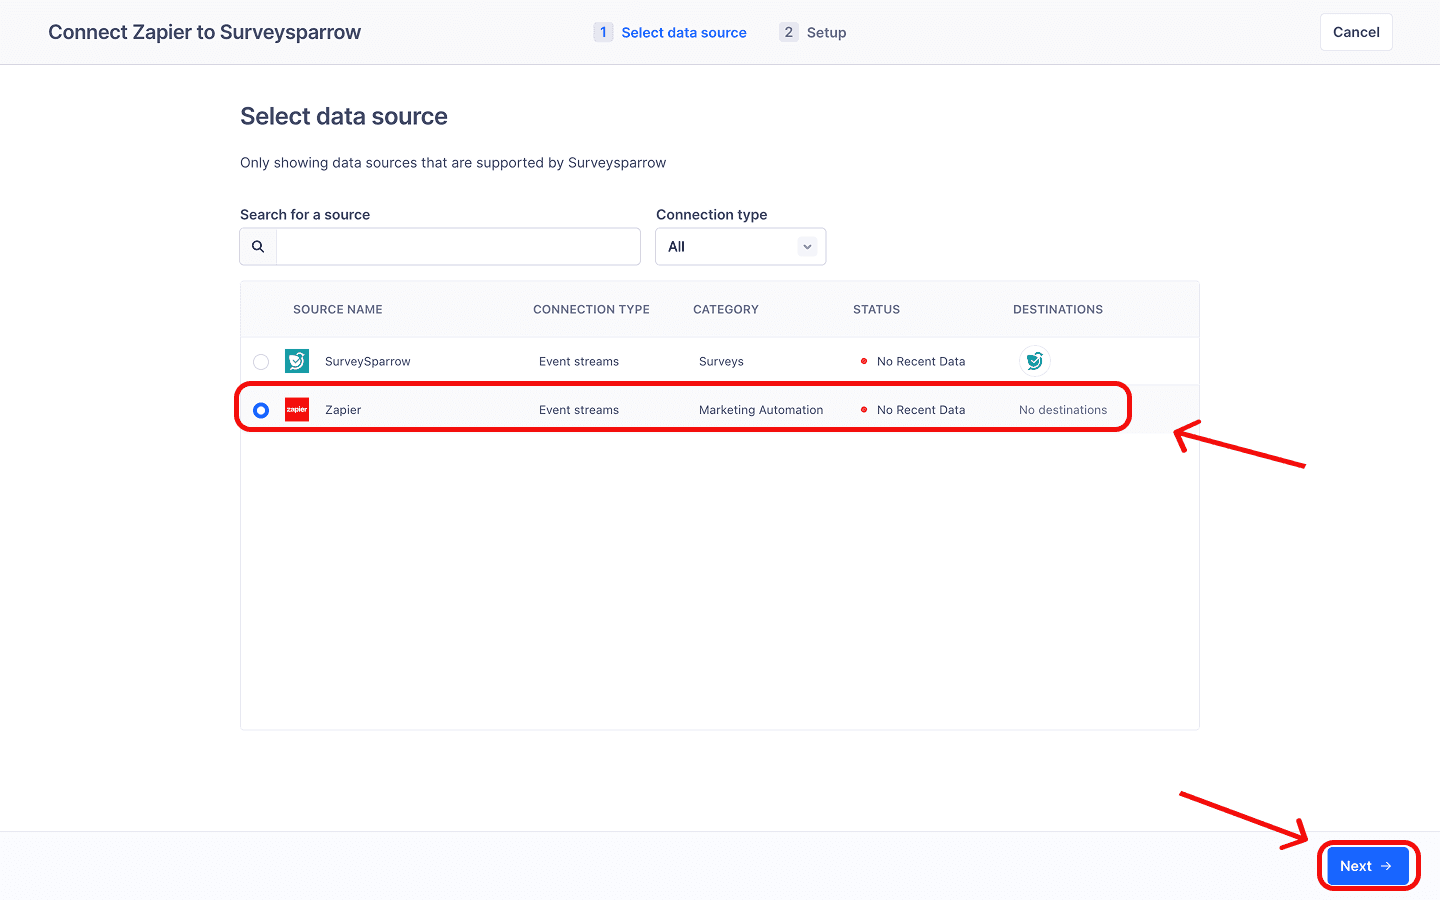
Connecting SurveySparrow to Segment
1. Open your SurveySparrow account and click the settings icon.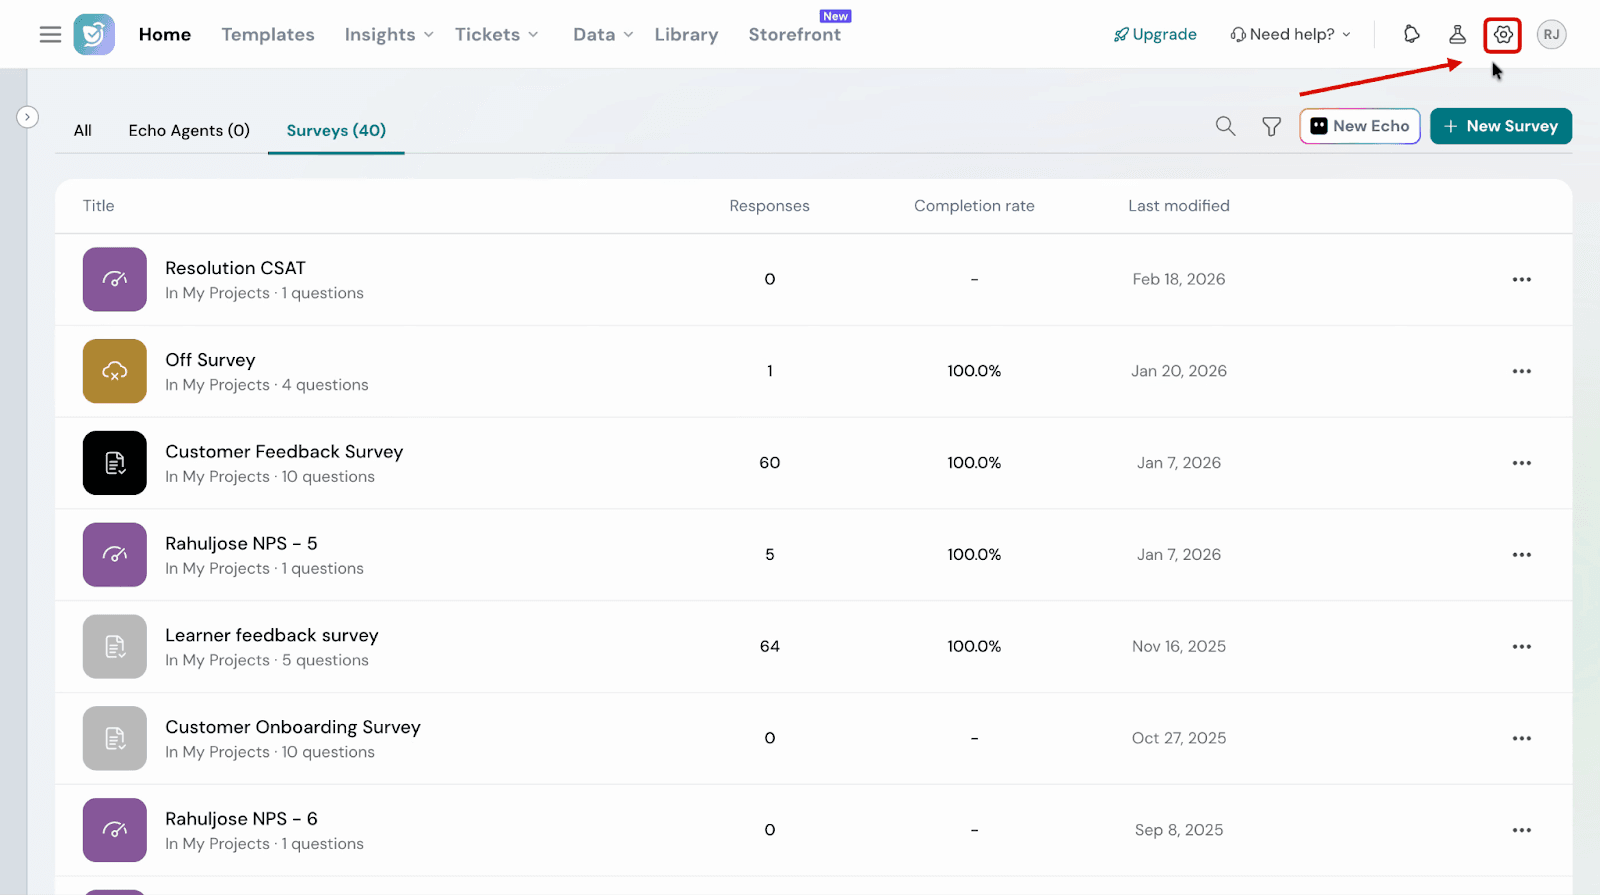
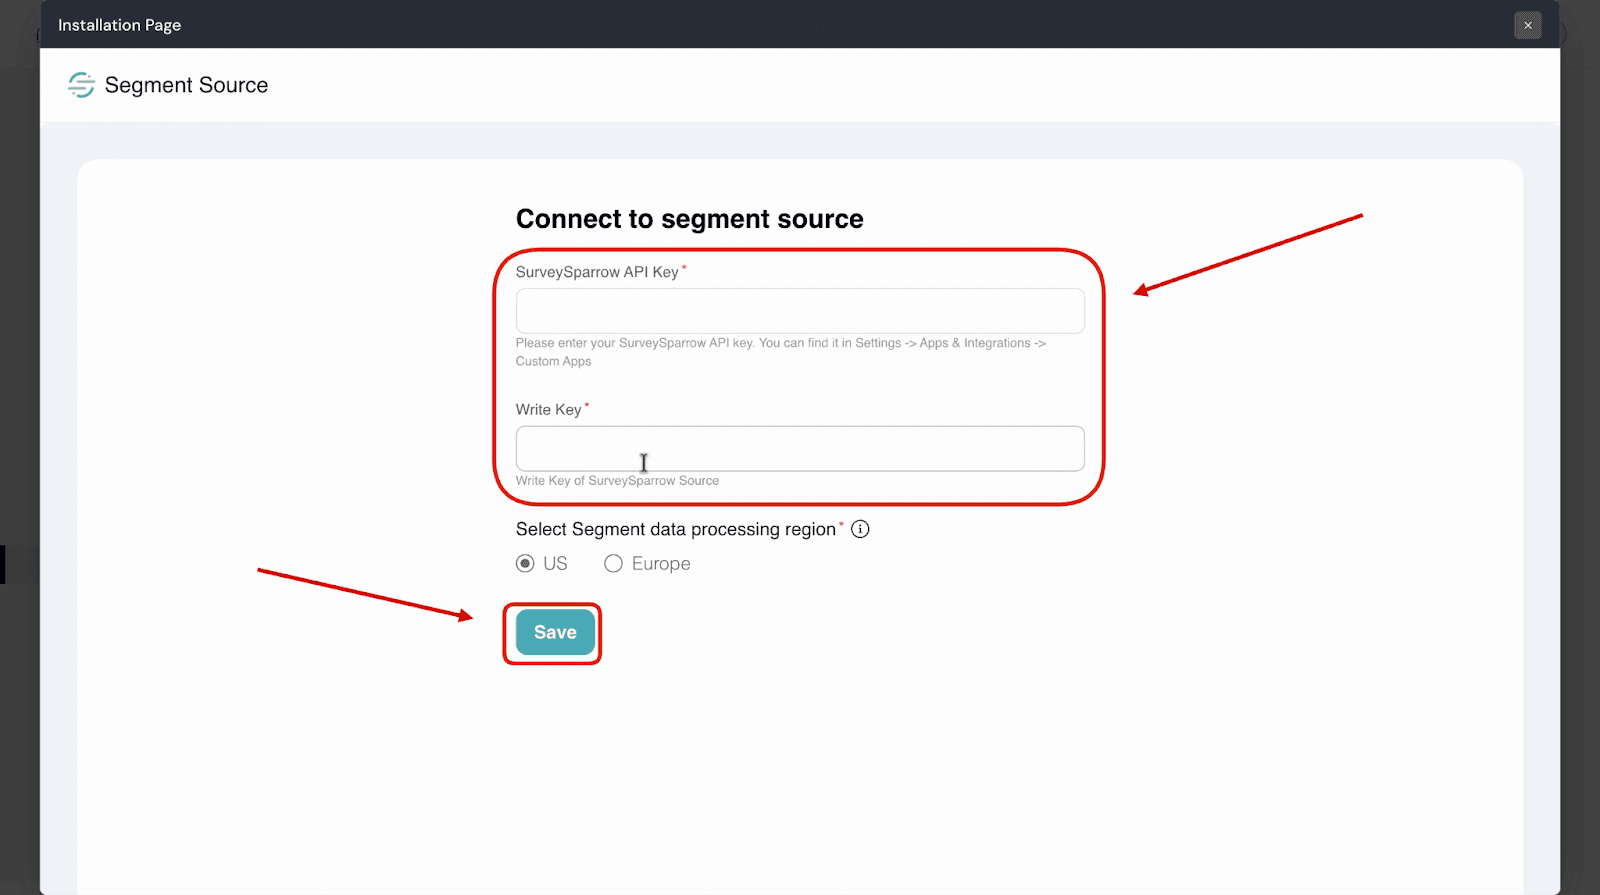
Configuring the survey source
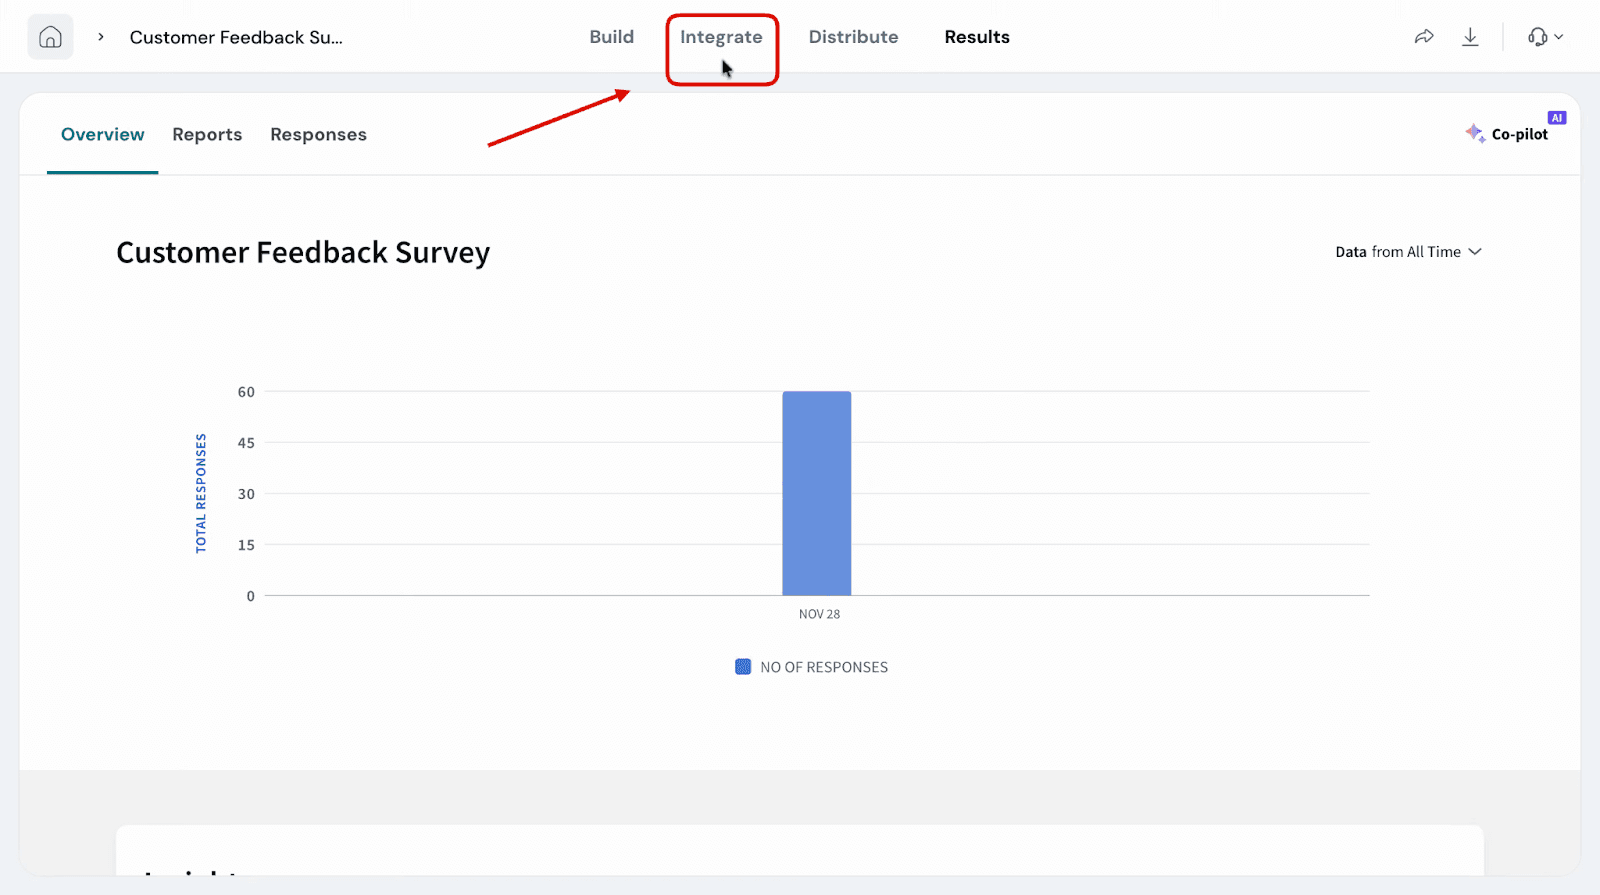
1. Open your SurveySparrow account and navigate to the survey you want to connect. Click the Integrate tab at the top of the screen.
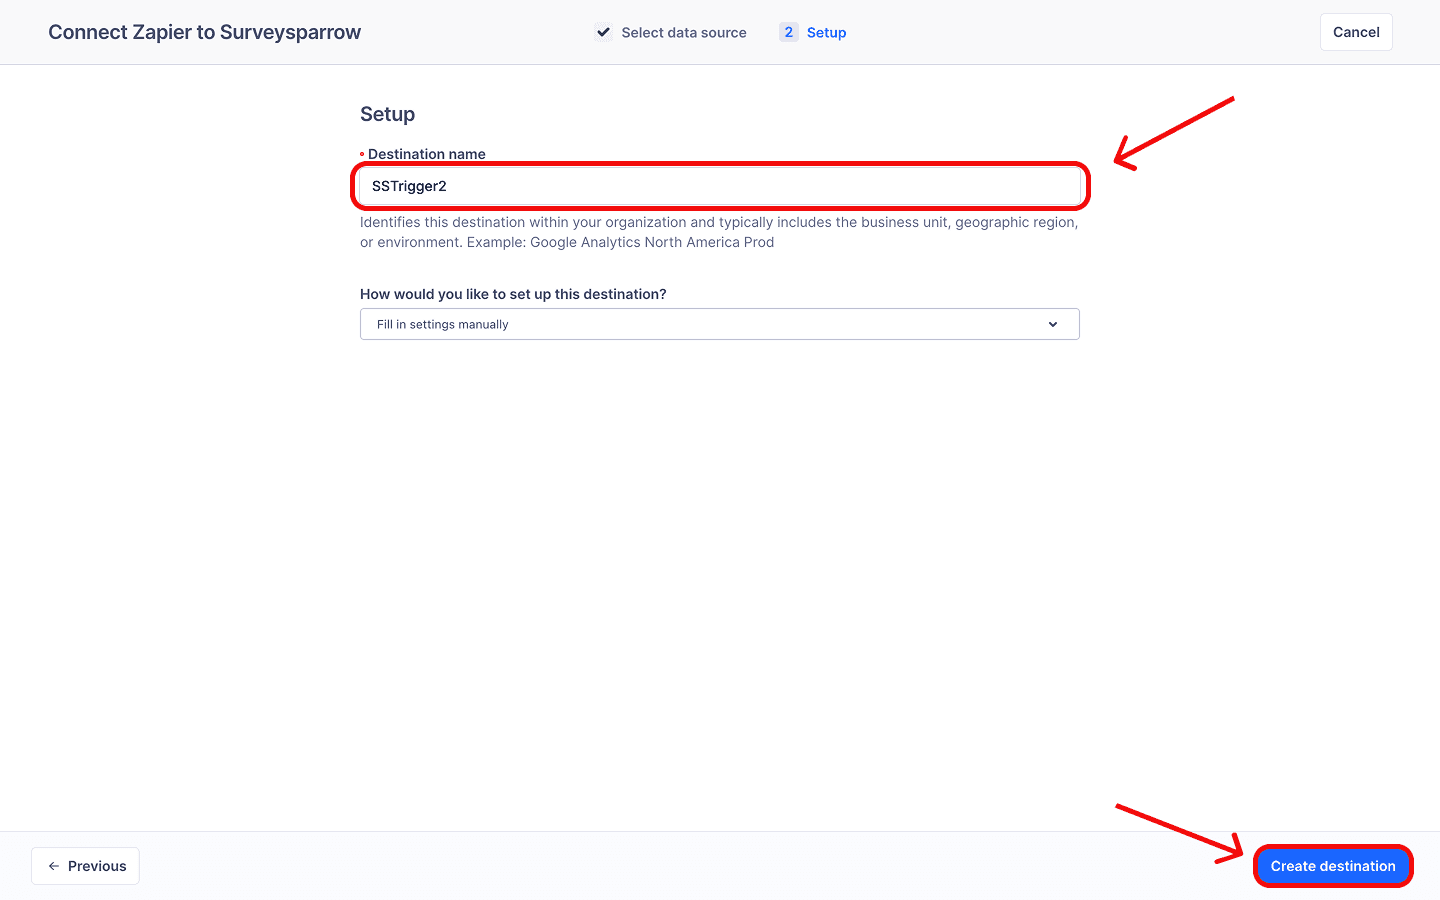
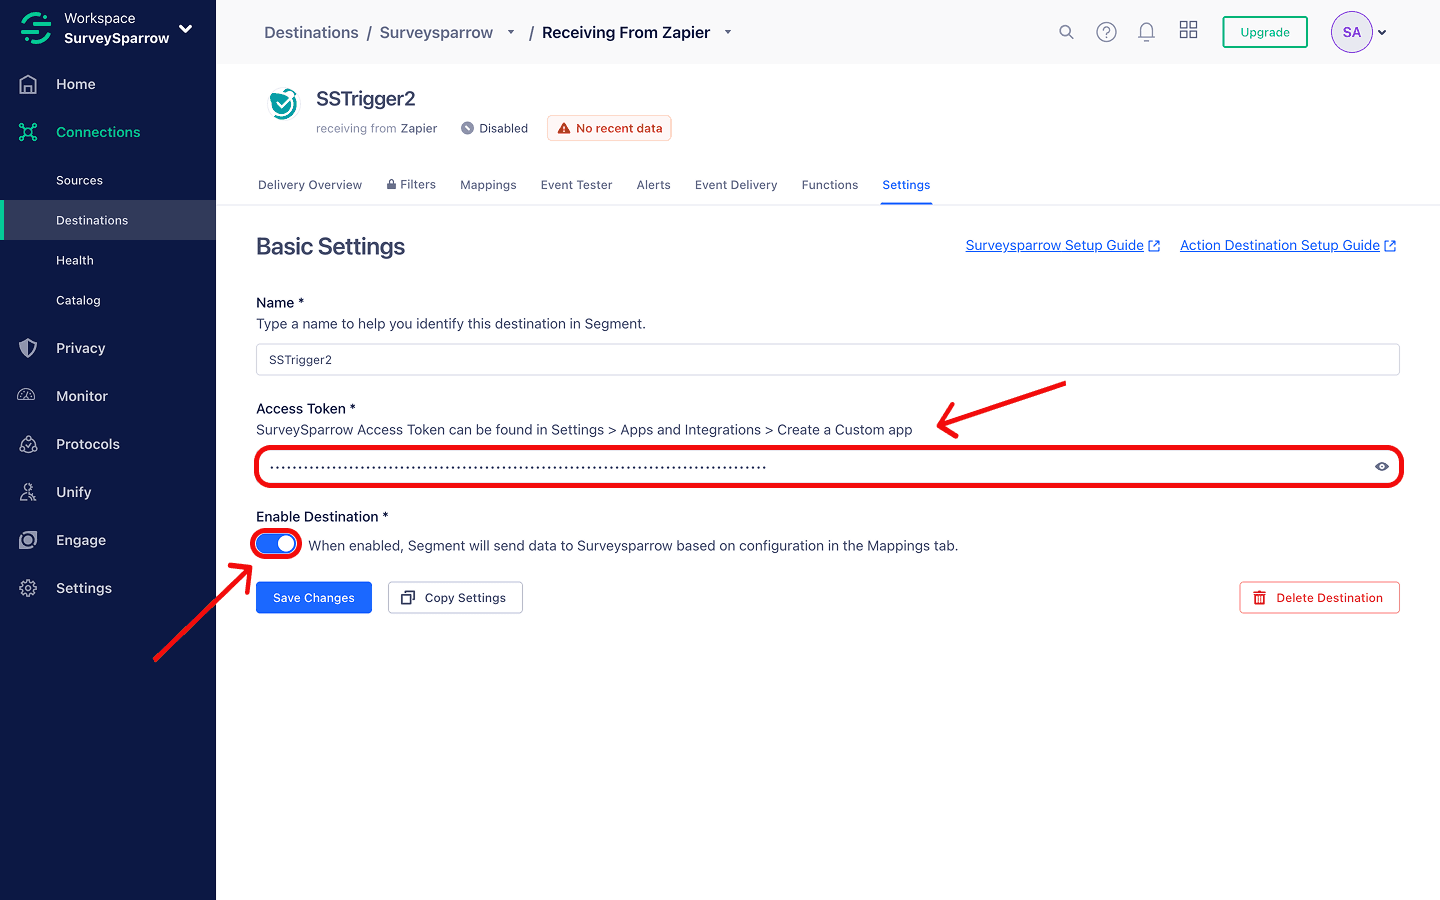
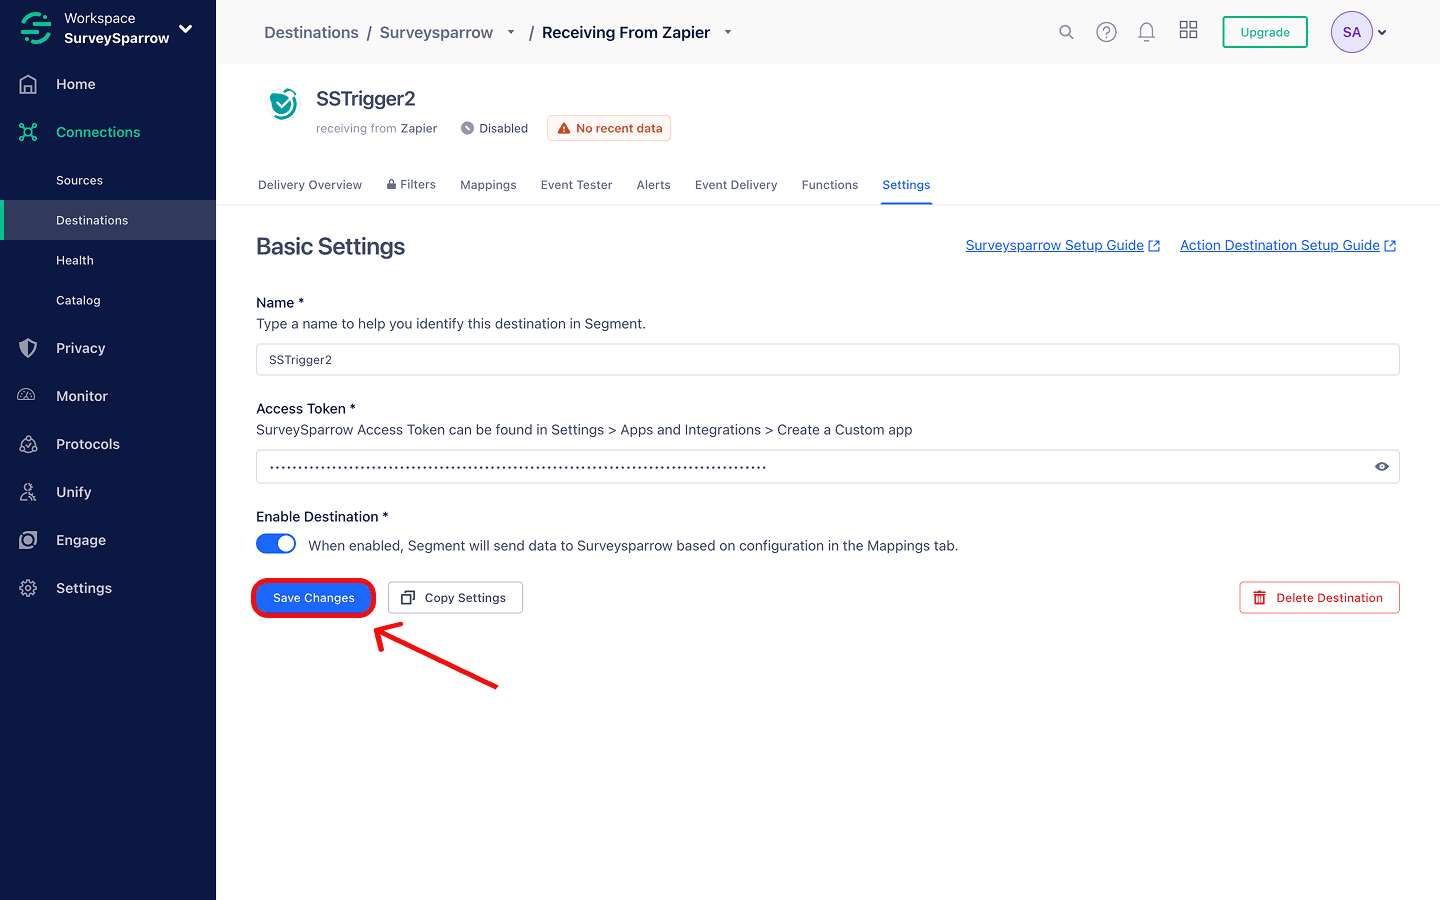
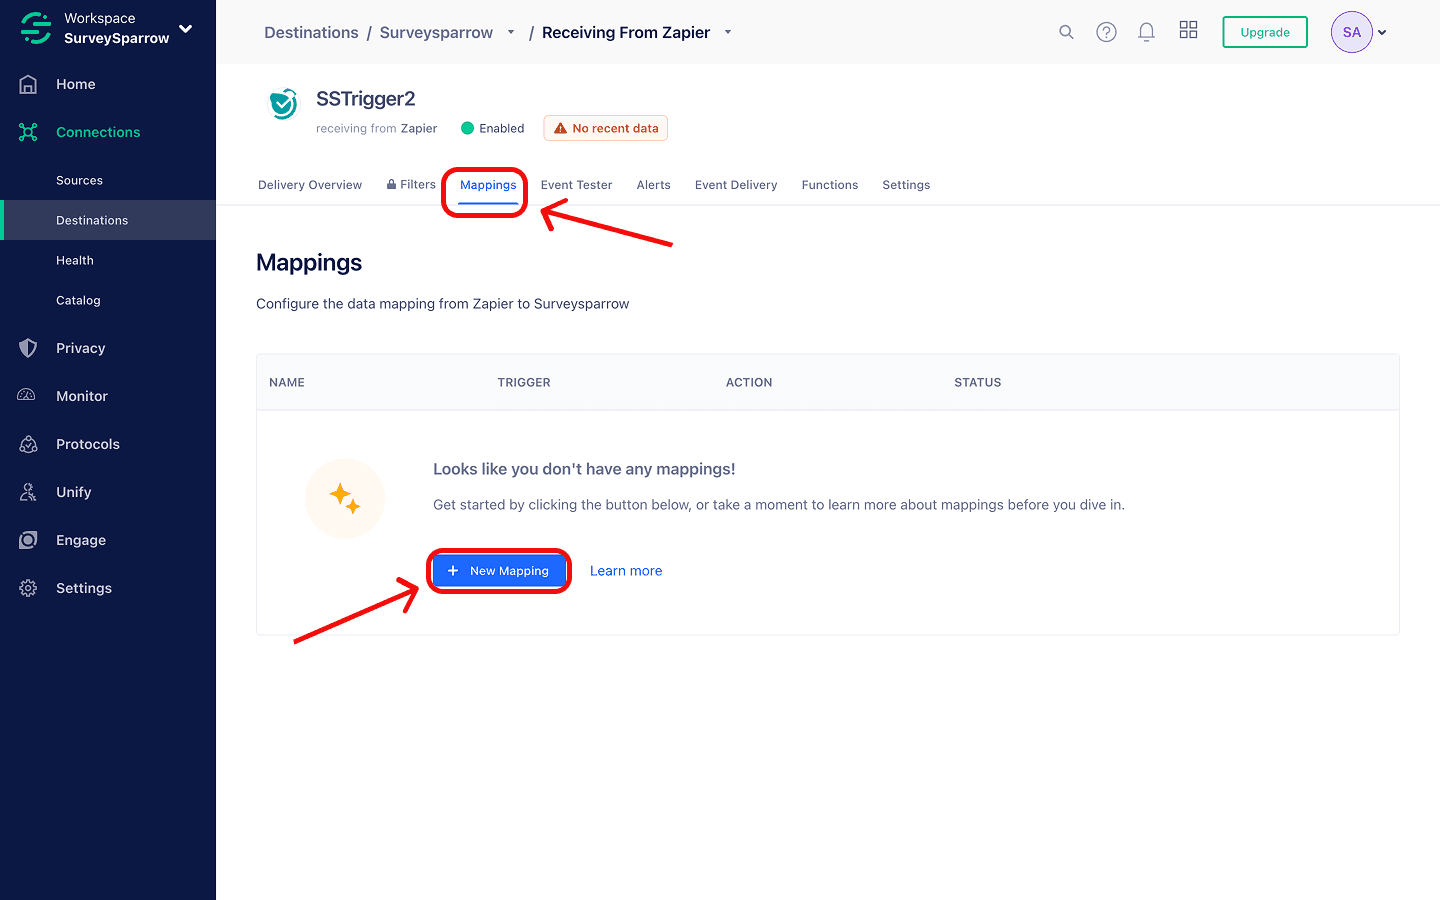
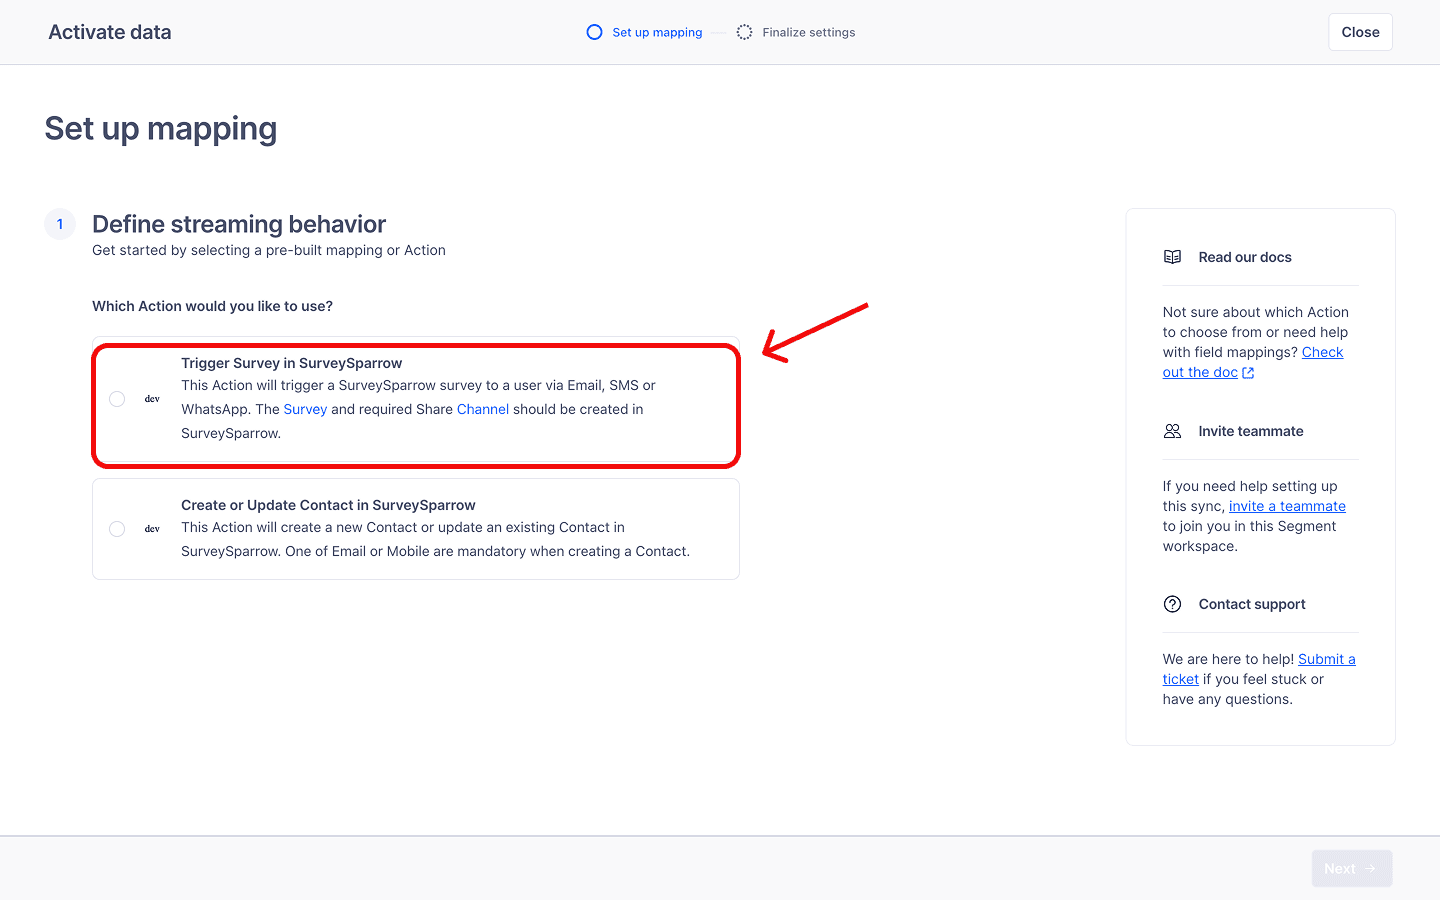
Creating survey triggers inside the SurveySparrow Destination
In order to trigger surveys, you will have to add SurveySparrow as a Segment Destination. Follow these steps to do so.
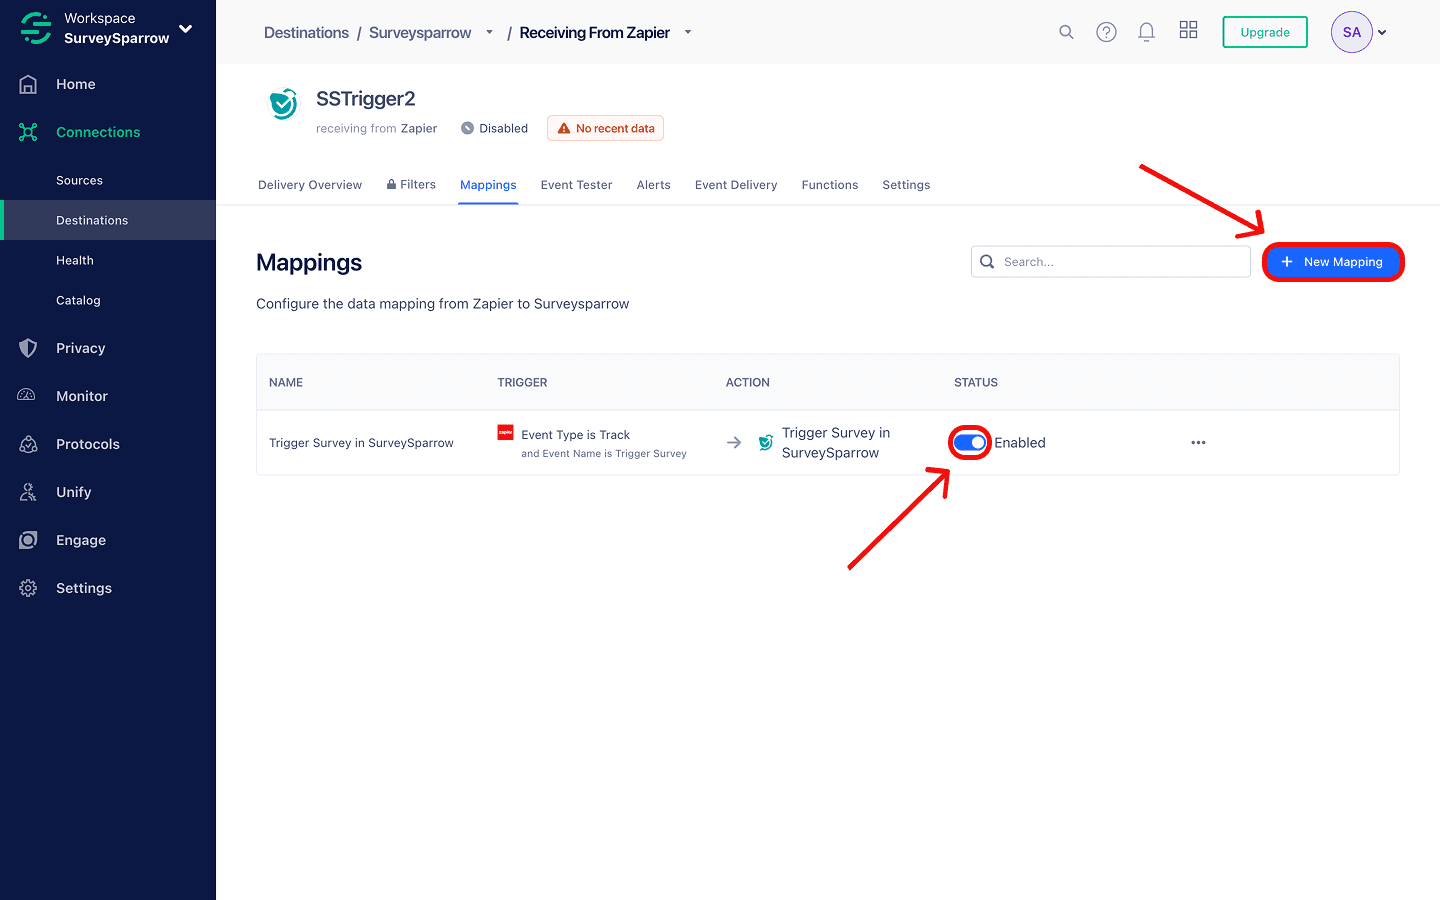
1. Head to the SurveySparrow destination page and click on Add destination.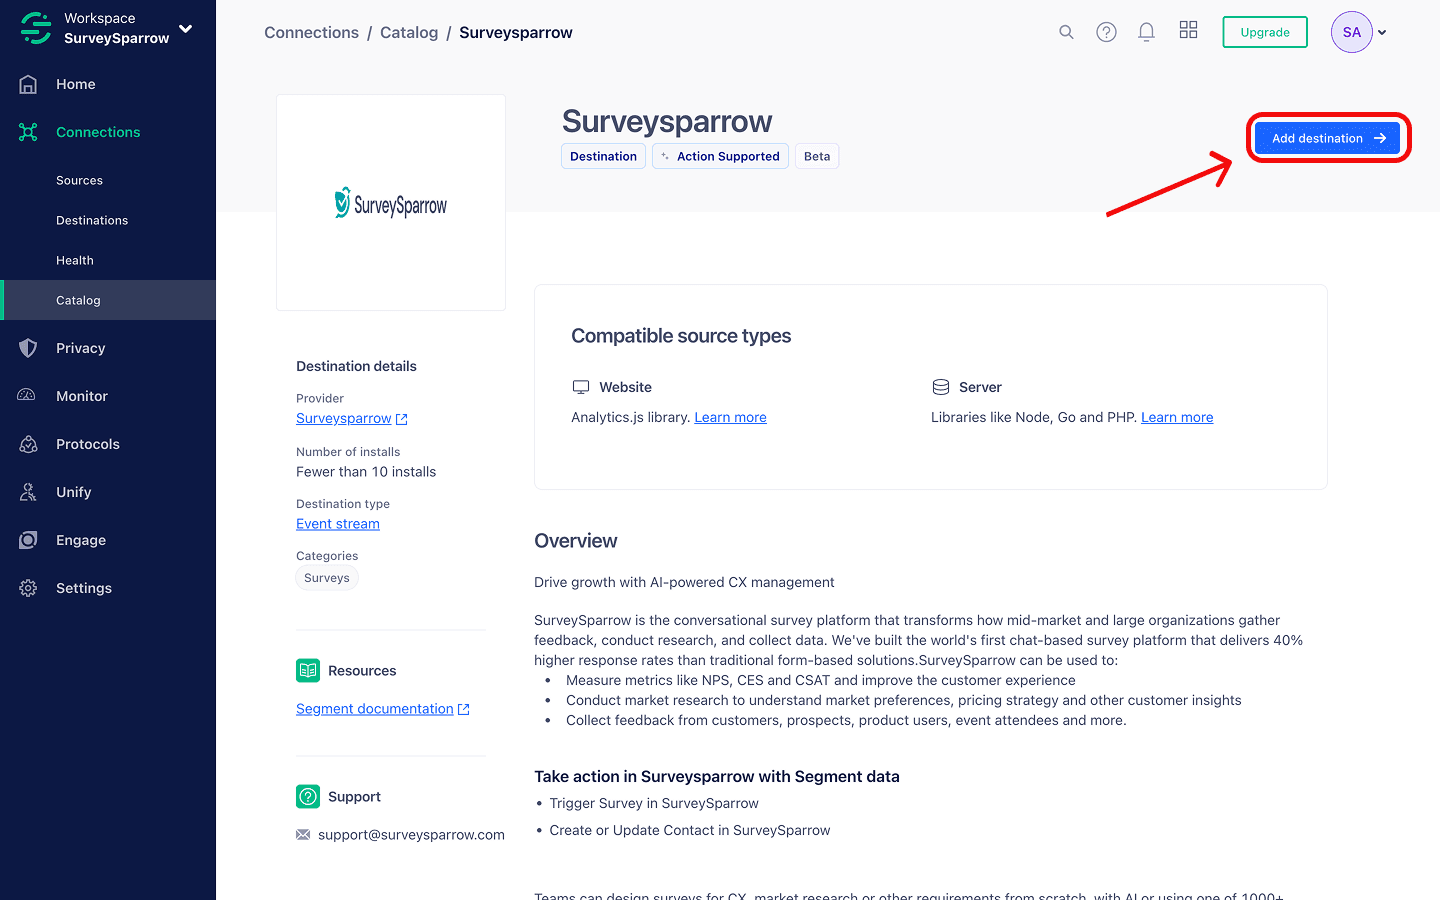
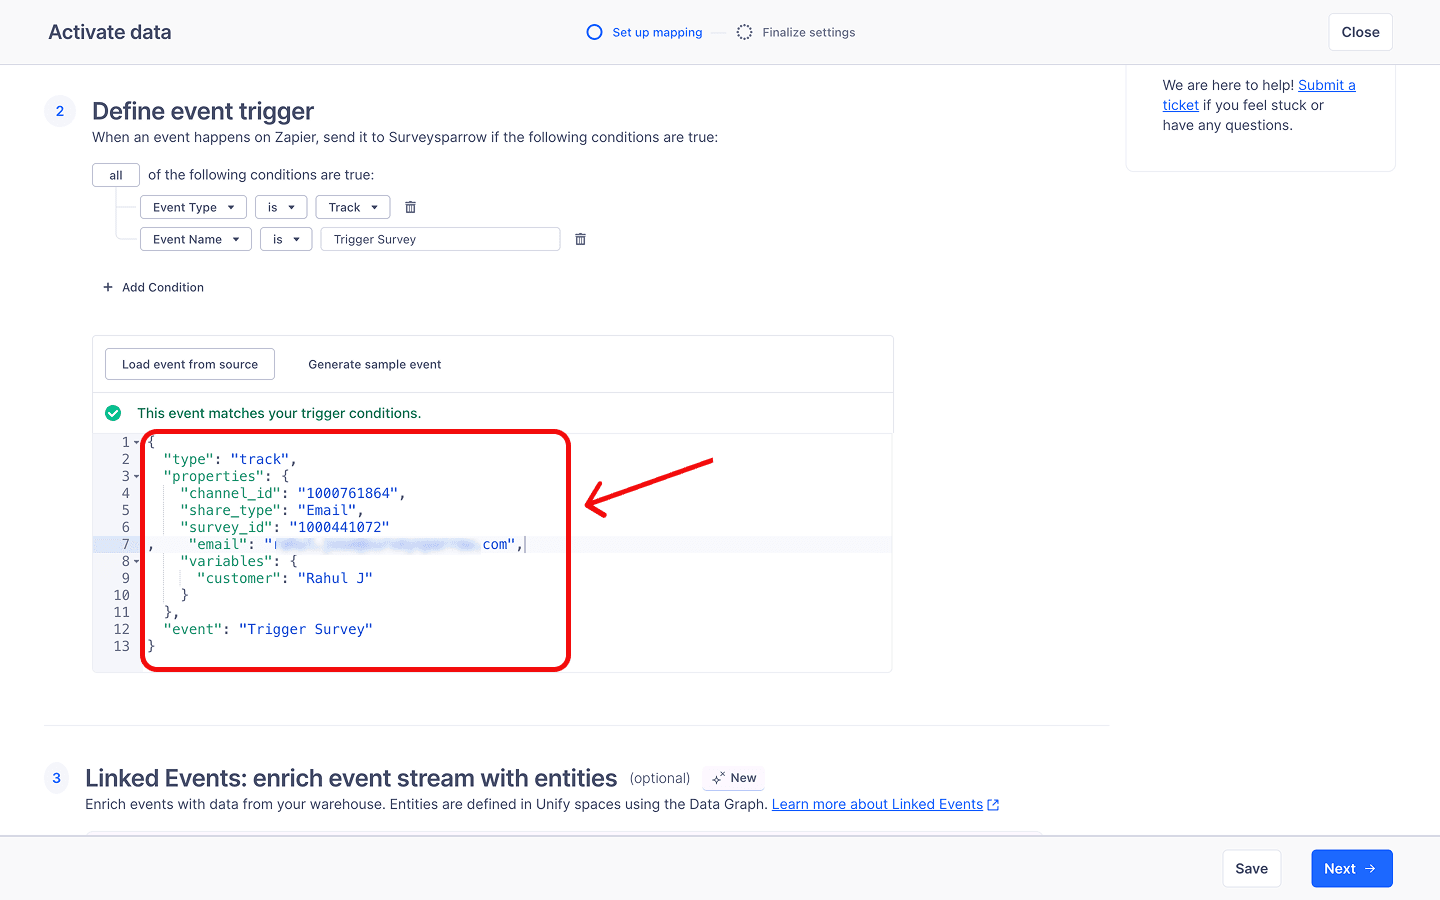
{
  "type": "track",
  "properties": {
    "channel_id": "1234",
    "email": "abc@def",
    "variables": {
      "variable name": "xyz"
    }
  },
  "event": "Trigger Survey"
}
Note: To find the survey and channel ID, head to the Distribute section inside your survey and create a new email share or edit an existing email share. The channel ID will appear in the URL after /channels/. The survey ID appears after /survey/.
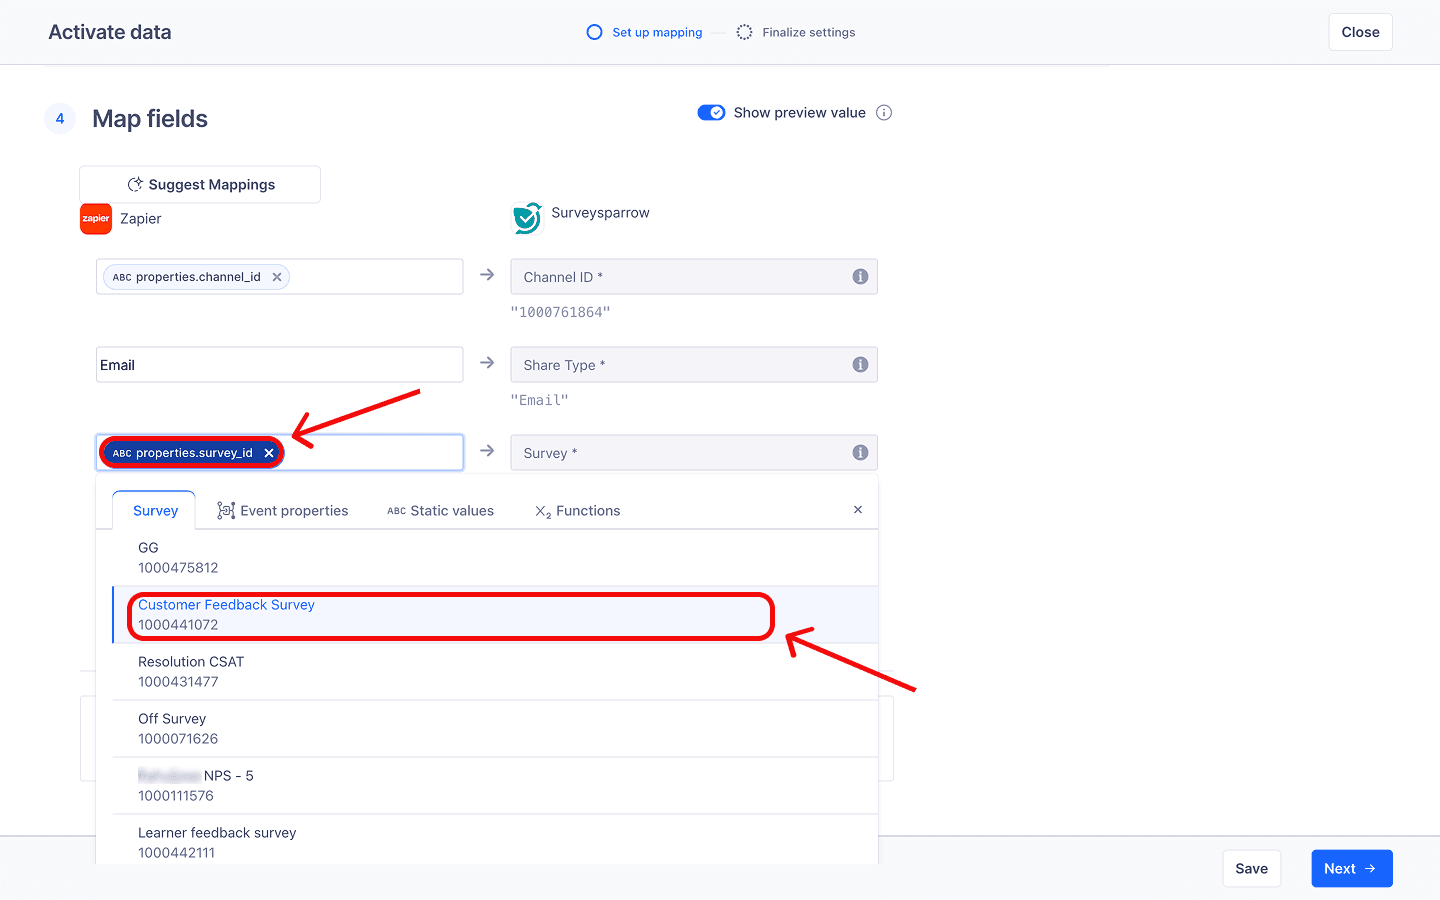
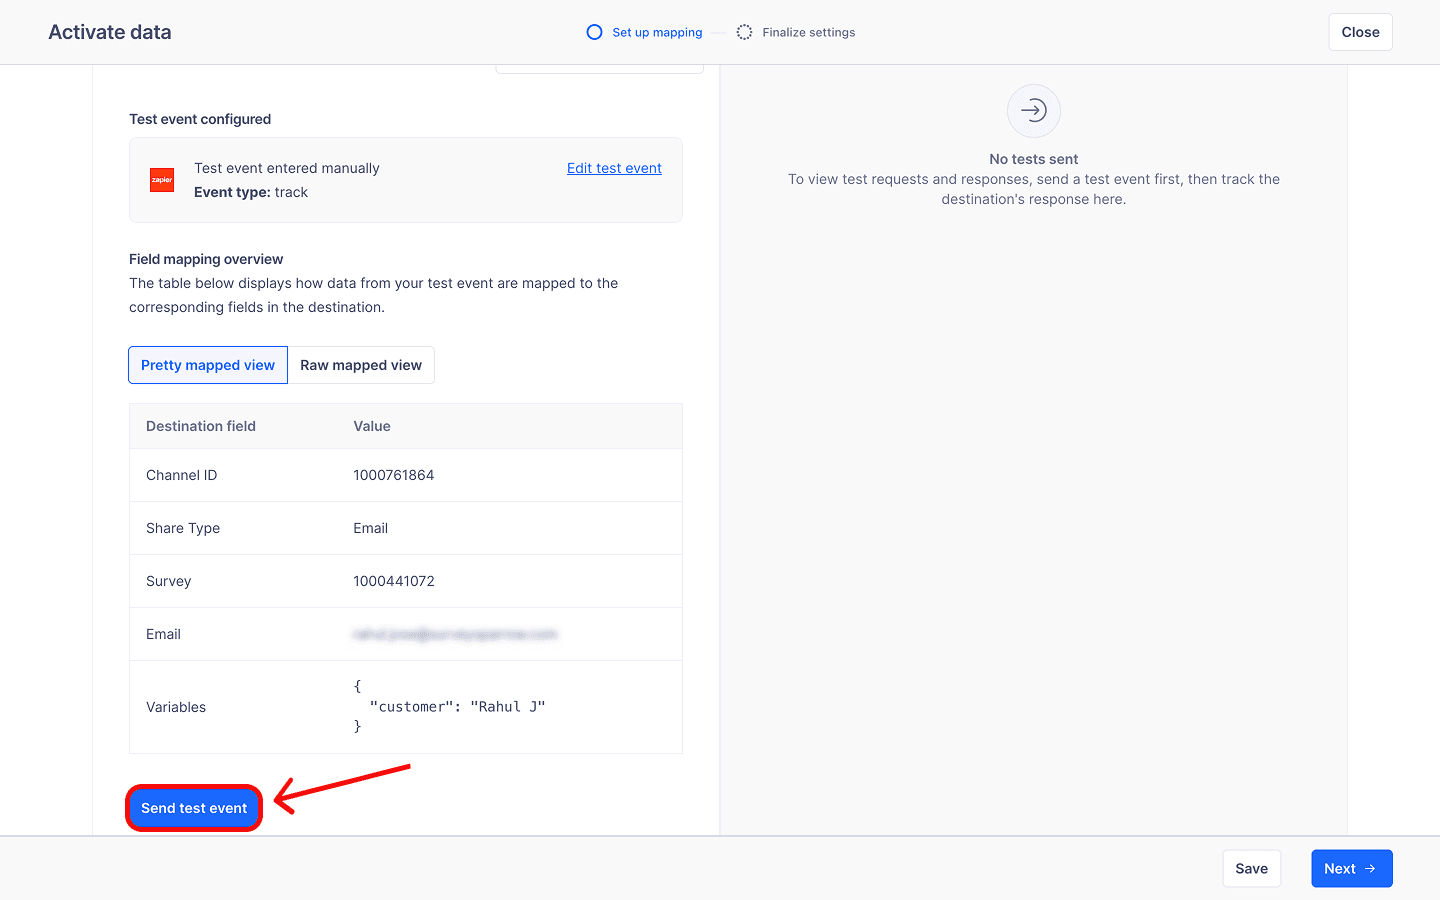
9. Scroll to the 4th section, where you will have to map fields. The payload will automatically create most of the field mappings. When a mapping is complete, you’ll see the value from the payload beneath the SurveySparrow destination field. But sometimes a field mapping might not be automatically completed. You’ll have to click on the source field and choose the correct parameter. For example, here we’ll have to manually map the fields for the Share type and the survey.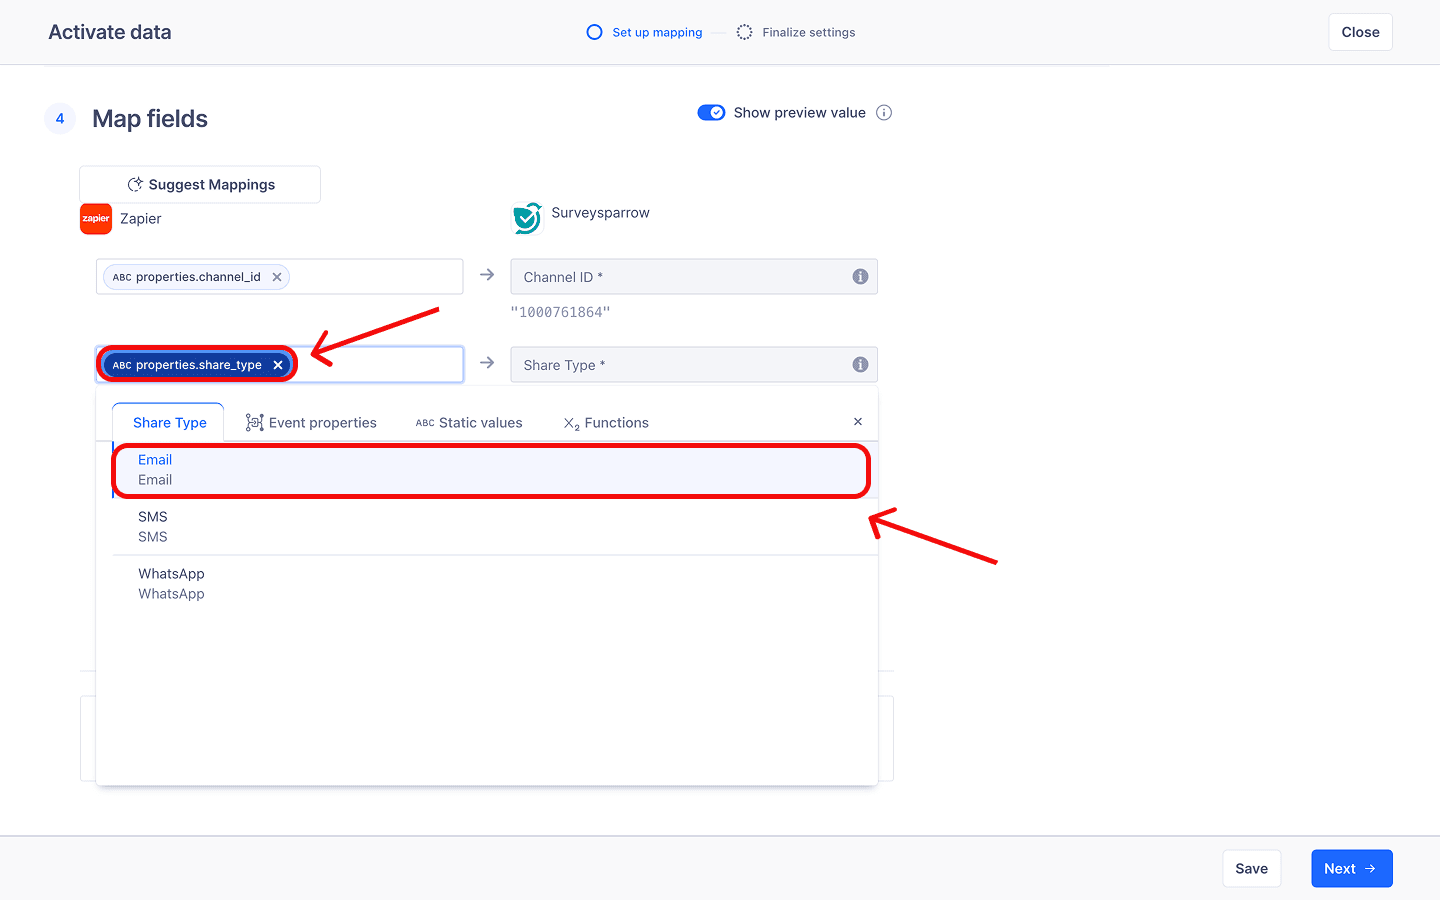

Setting up contact mapping inside the SurveySparrow Destination
1. Inside the SurveySparrow destination, open a new mapping, then click on Create or Update contact in SurveySparrow.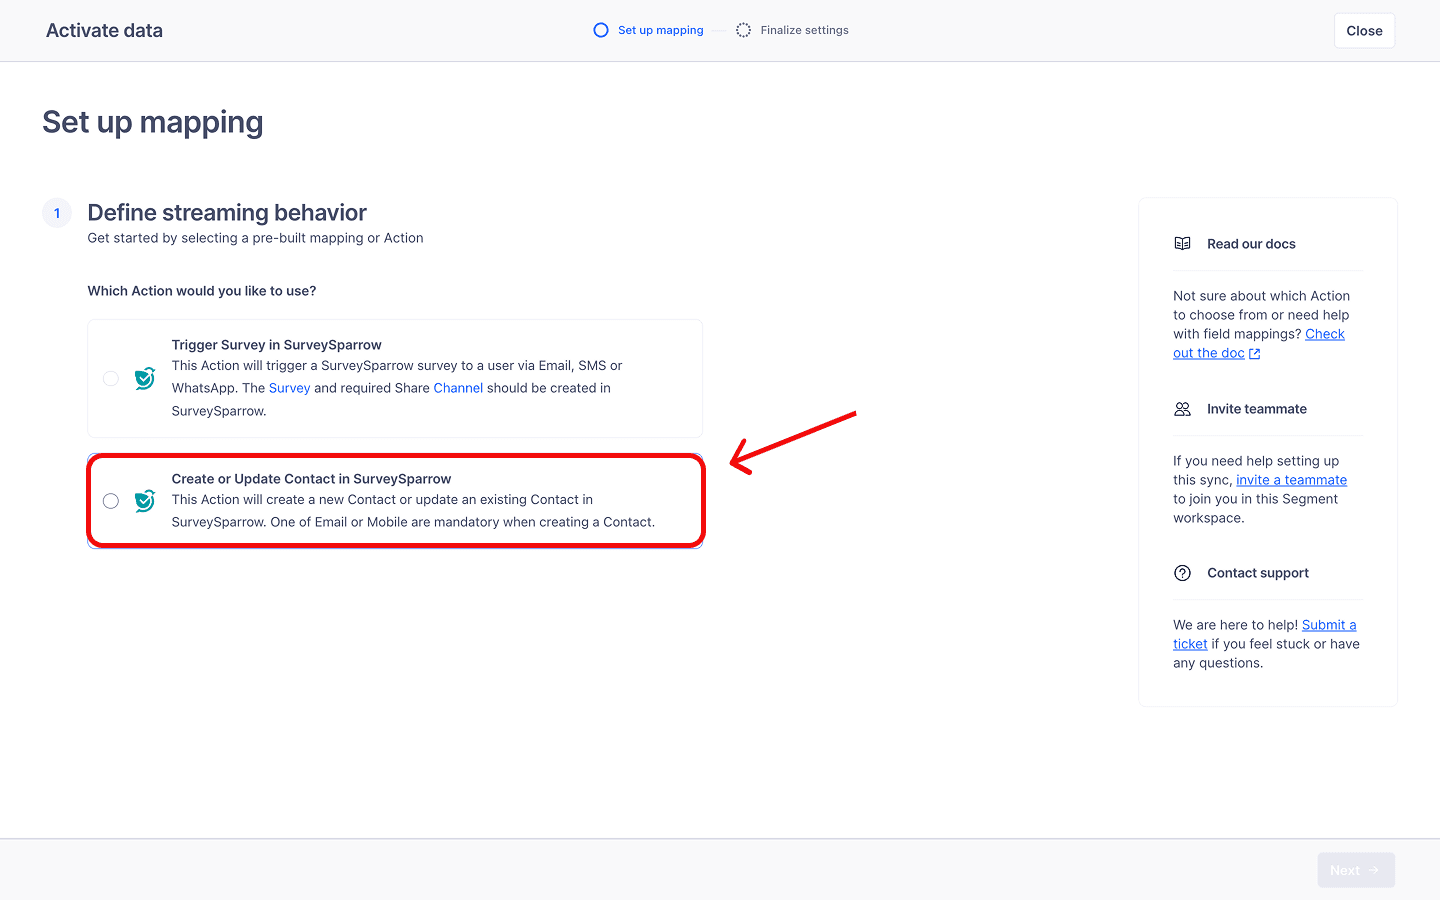
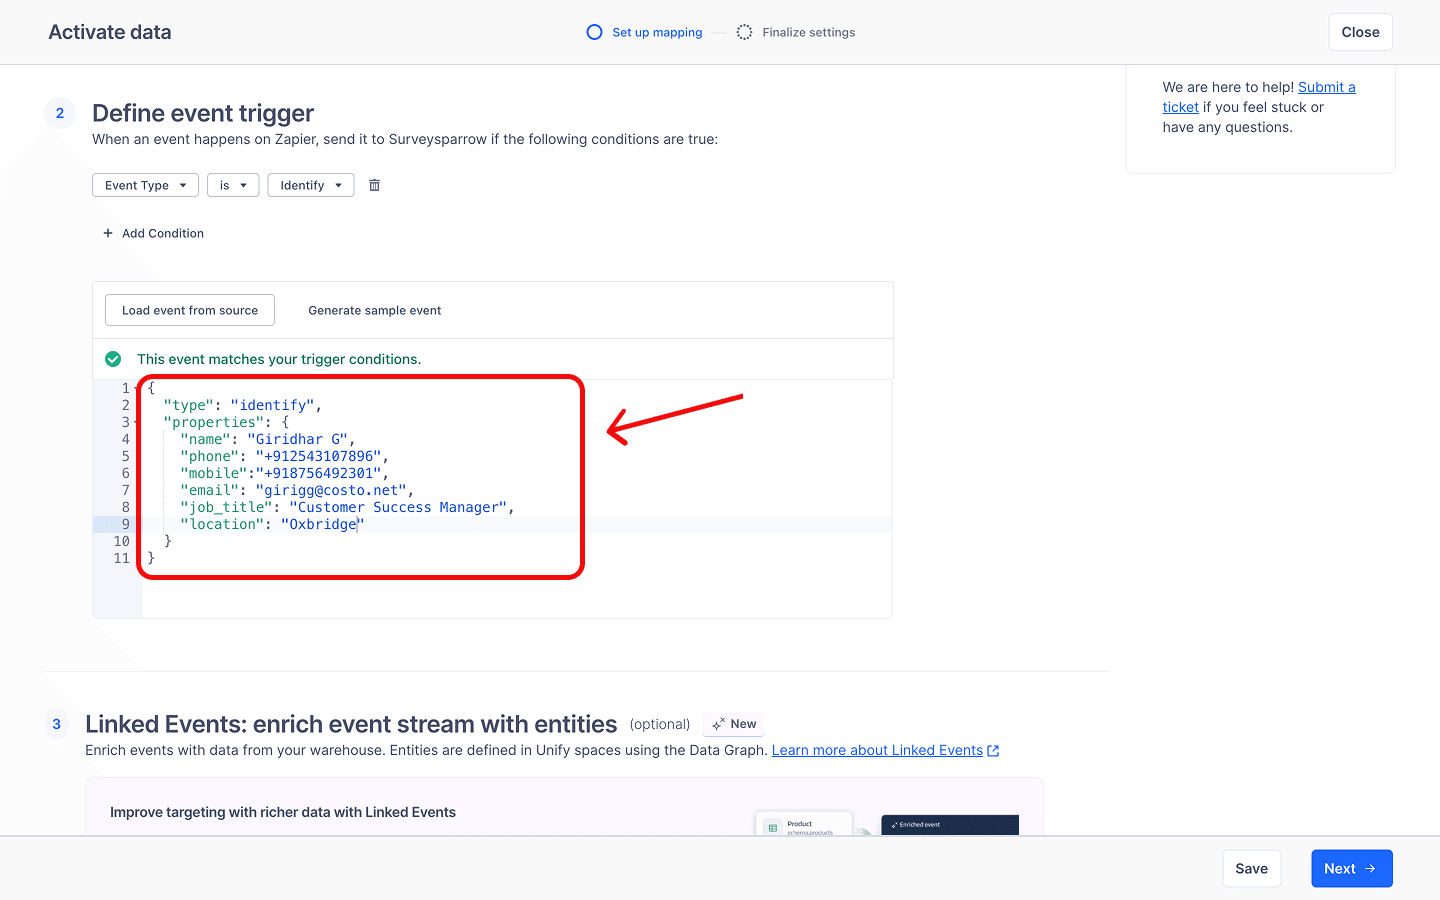
{
  "type": "identify",
  "properties": {
    "name": "abc",
    "phone": "+12456782899",
    "mobile": "+57484920394",
    "email": "[email protected]",
    "job_title": "Manager",
    "location": "Sydney"
  }
3. Scroll to the 4th section, where you will have to map fields. The payload will automatically create most of the field mappings. When a mapping is complete, you’ll see the value from the payload beneath the SurveySparrow destination field. But sometimes a field mapping might not be automatically completed. You’ll have to click on the source field and choose the correct parameter.


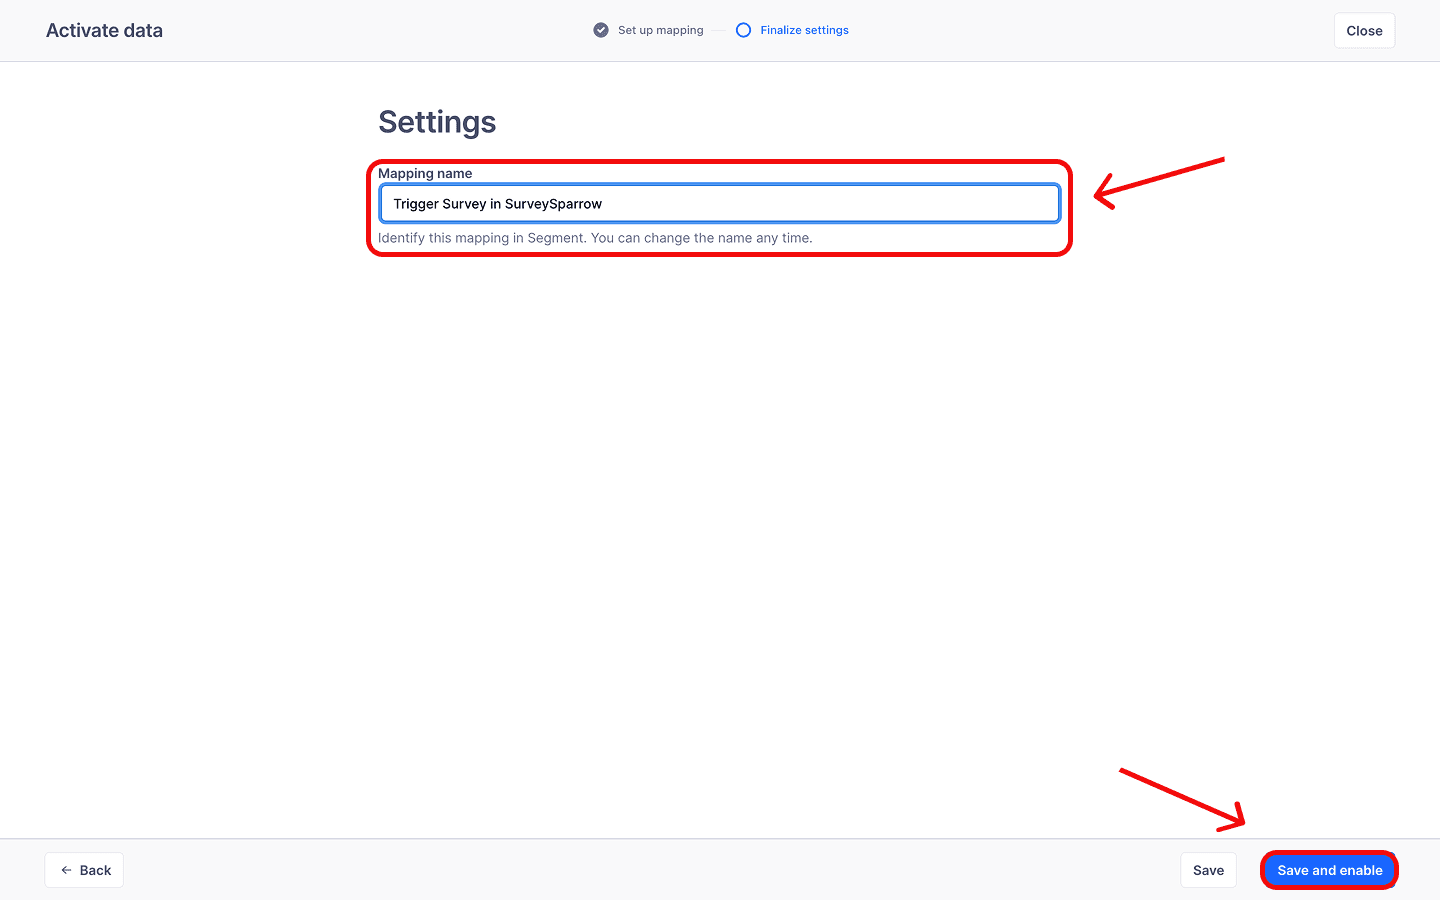
6. Finally, provide a name to the mapping and click on Save and enable.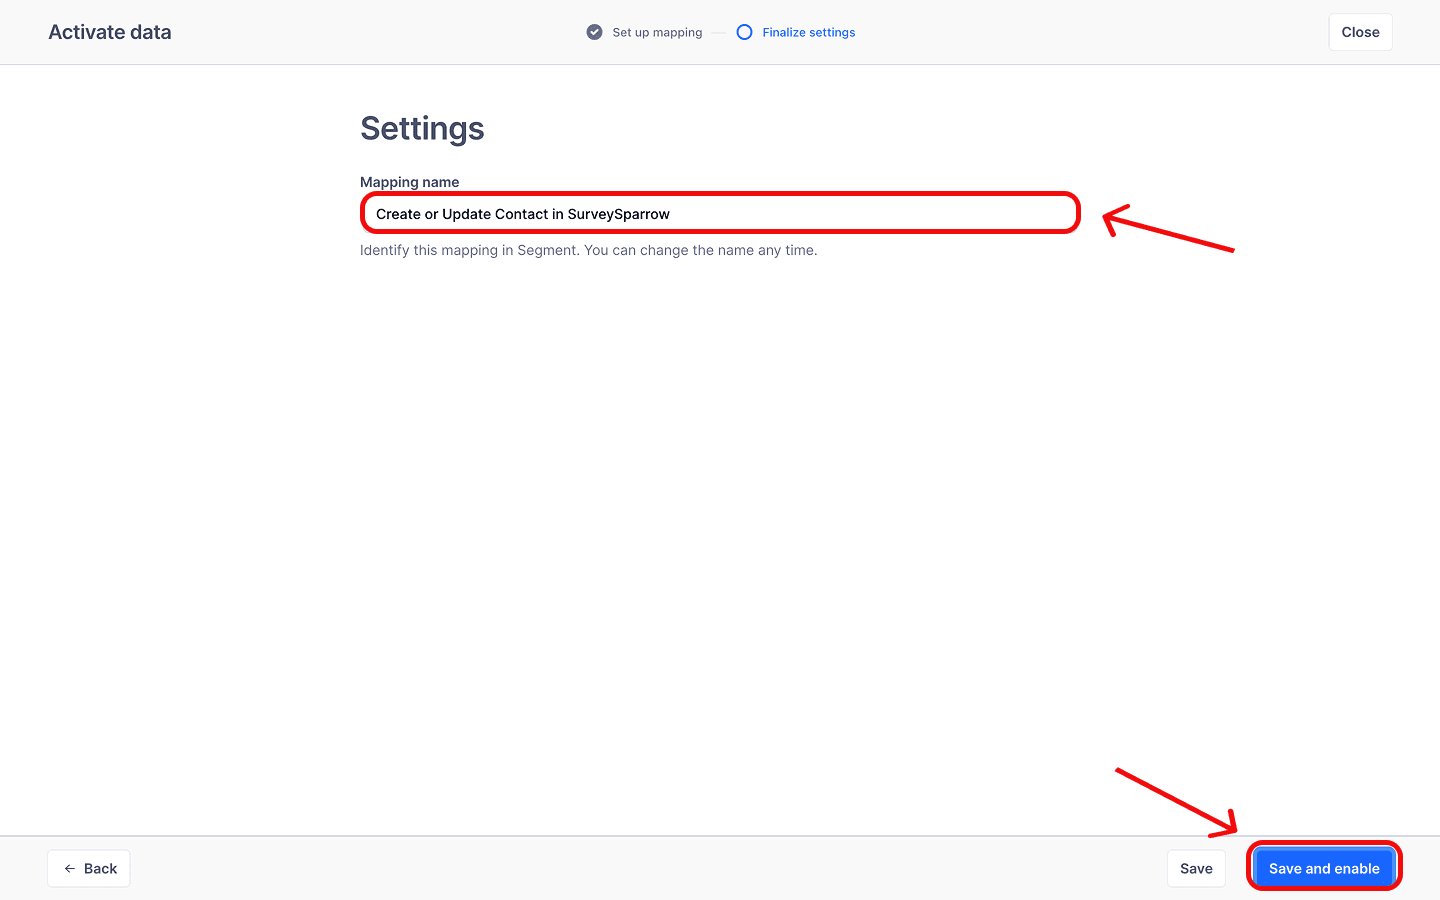
The SurveySparrow-Segment integration bridges the gap between what your customers say and what they do — automating survey triggers, syncing contacts, and unifying feedback with behavioral data, all in one pipeline. The setup is straightforward, and the impact is immediate. Head over to your SurveySparrow account and make your first Segment connection today.
Feel free to reach out to our community, if you have any questions!